3RRL
Administrator  Huge Kama
Posts: 2,027 
|
Post by 3RRL on Feb 1, 2008 0:21:43 GMT -5
Some of you may have seen my post on the other boards about the 7' Howse Boxblade I have. This is what it used to look like. 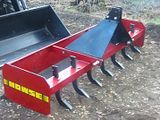 I recently made some upgrades to it.... you know, to make it a little better. I added support plates for the lift pins to make it "captured". Then I added 5/8' steel pates on the sides and to the back of the ripper shanks for support to keep from mangling them so bad. 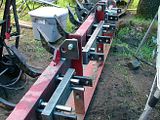   |
|
3RRL
Administrator
Huge Kama
Posts: 2,027
|
Post by 3RRL on Feb 1, 2008 0:25:06 GMT -5
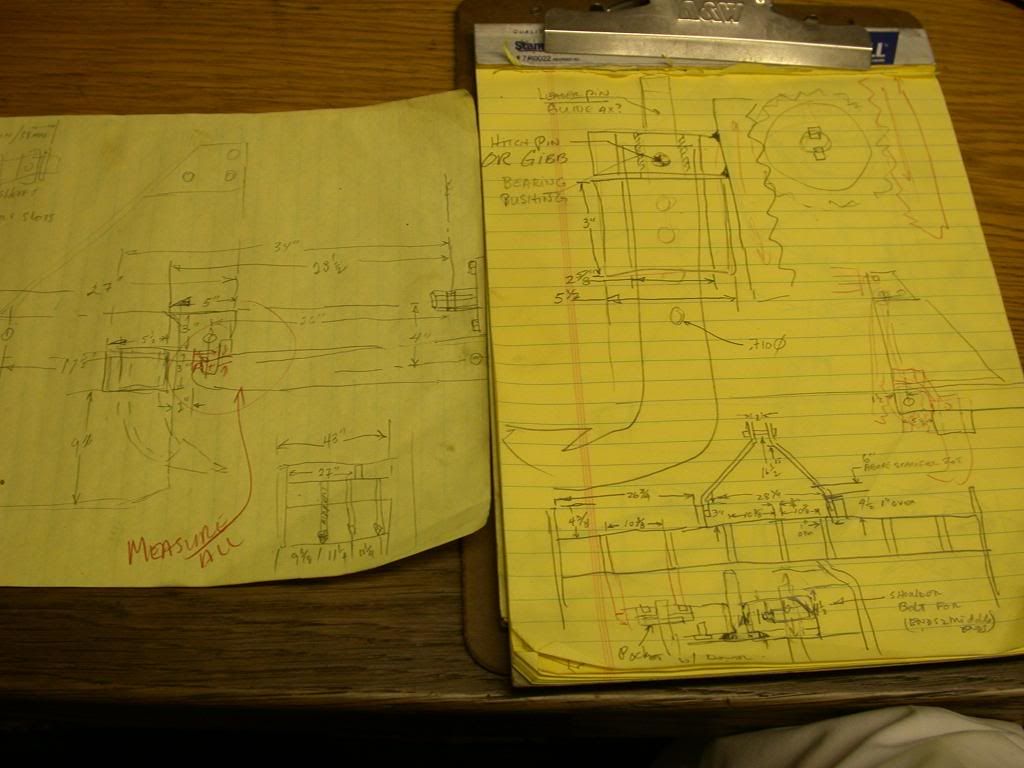
Then I got a little more creative and wanted to make the scarifiers hydraulic activated. My challenge was to use the existing boxblade and make this modification occur within it's current shape and size. I didn't want to dis-member the boxblade completely so this is what I came up with. 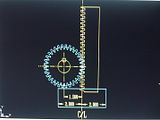 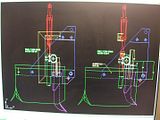 |
|
3RRL
Administrator
Huge Kama
Posts: 2,027
|
Post by 3RRL on Feb 1, 2008 0:28:43 GMT -5
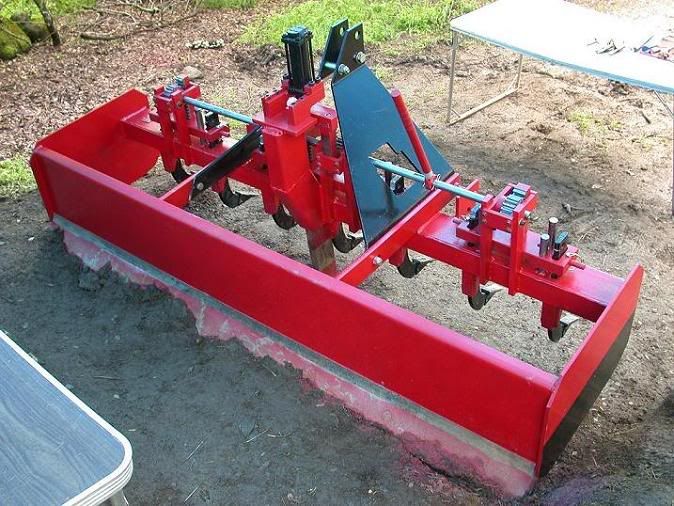
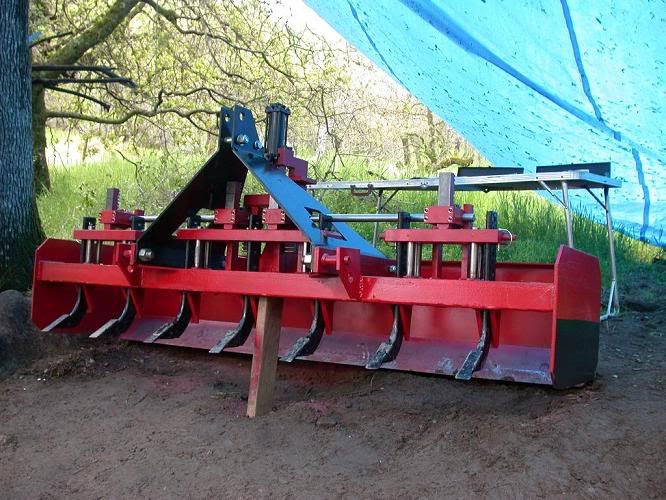
I decided to use a gear system using rack and pinion to activate the system. I used a hydraulic cylinder for the power drive unit plugged into my rear remotes with QD's. Now I can cruise along and cut, grade, smooth and rip all controlled from the tractor cockpit. Wow, what a difference from having to get off the tractor and adjust the draft or scarifiers manually. They can now be set at any depth from max (4" deep) with infinite adjustment. Here's what it looks like now. 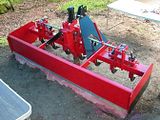 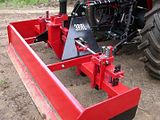 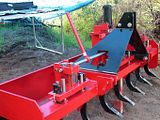 The re-enforcements, gear system and hydraulics added about 350 lbs. to the 7 foot boxblade making the unit weigh in at nearly 1000 lbs. now. That was a good feature in itself. I will post some photos of construction details, gearing, welding, re-enforcements etc. in the following posts. |
|
3RRL
Administrator
Huge Kama
Posts: 2,027
|
Post by 3RRL on Feb 1, 2008 0:31:31 GMT -5
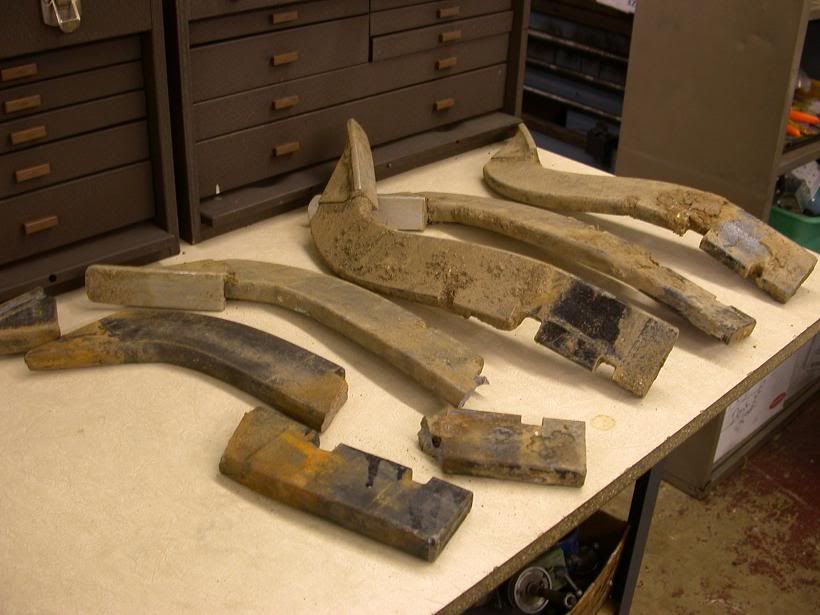
I'll start by showing a photo of the problems I had. I have a lot of grading and ripping to do and also to cut gutters (both sides) on my road, which is almost ½ mile long. I kept bending and breaking scarifiers. My 55hp Kama didn't even slow down for some of them. This is what they looked like. 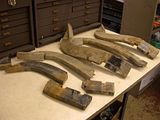 |
|
3RRL
Administrator
Huge Kama
Posts: 2,027
|
Post by 3RRL on Feb 1, 2008 0:38:50 GMT -5
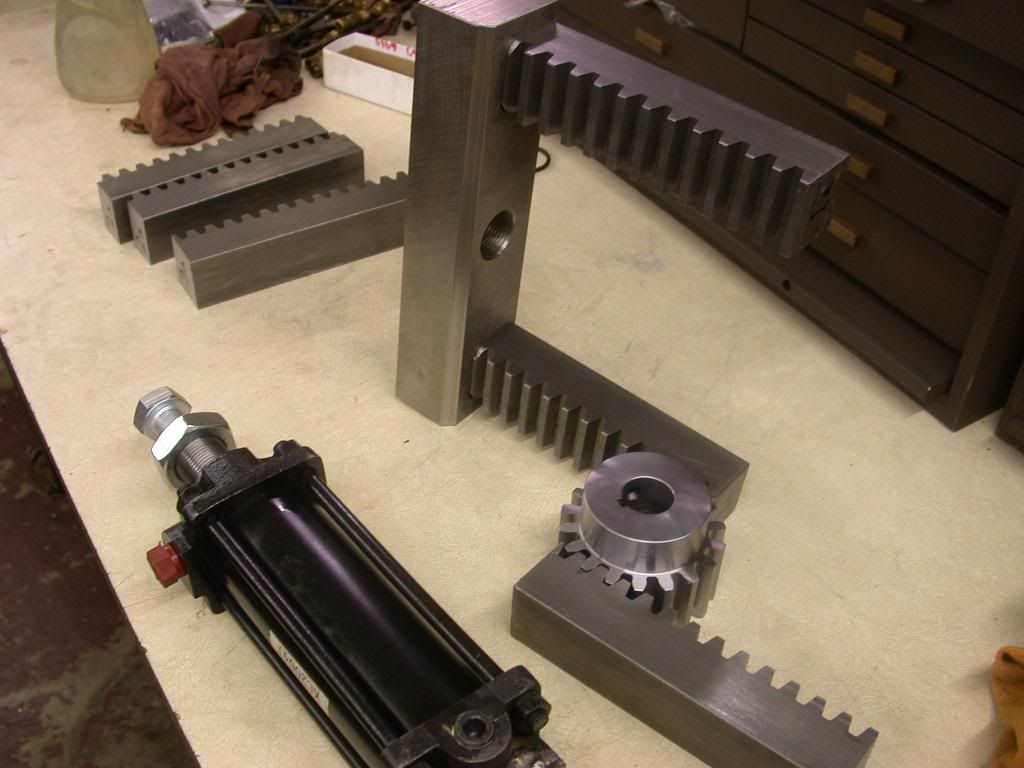
I bought some new ones from Agri-Supply. They were different in that they did not have that notch cut out (making a natural weak point) but rather have holes in them. That meant I'd have to change the way they were held in. So I did. This next picture if of the solid plates that carry the ripper shanks. I machined them at home and brought them up to fit. The other photo is of all the junk I had in the garage for the project. 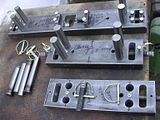 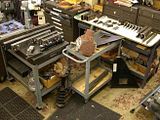   |
|
3RRL
Administrator
Huge Kama
Posts: 2,027
|
Post by 3RRL on Feb 1, 2008 0:40:00 GMT -5
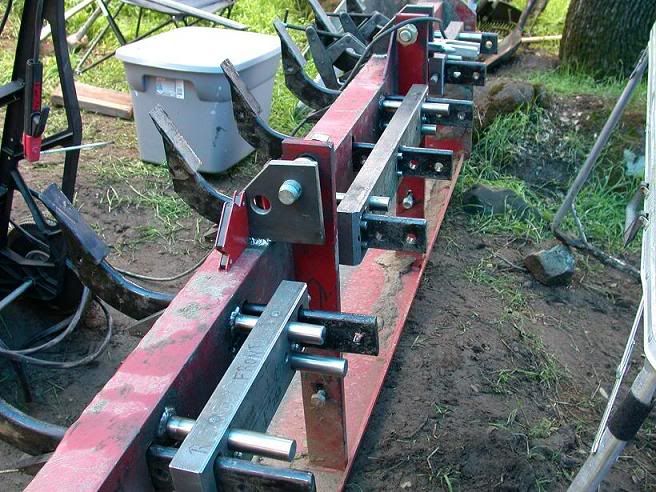
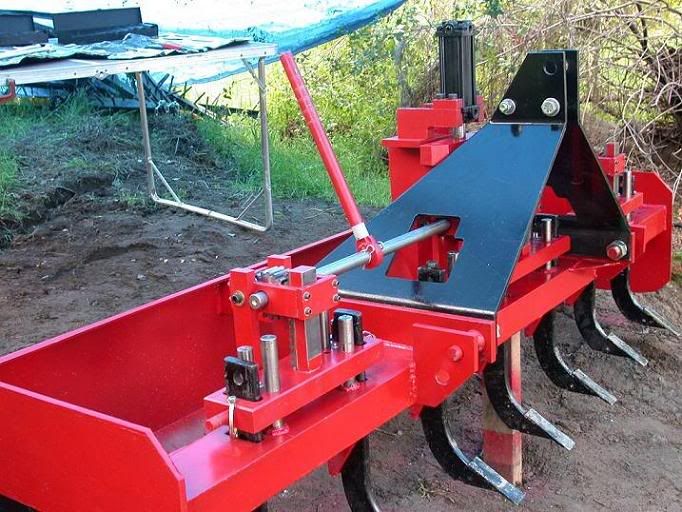
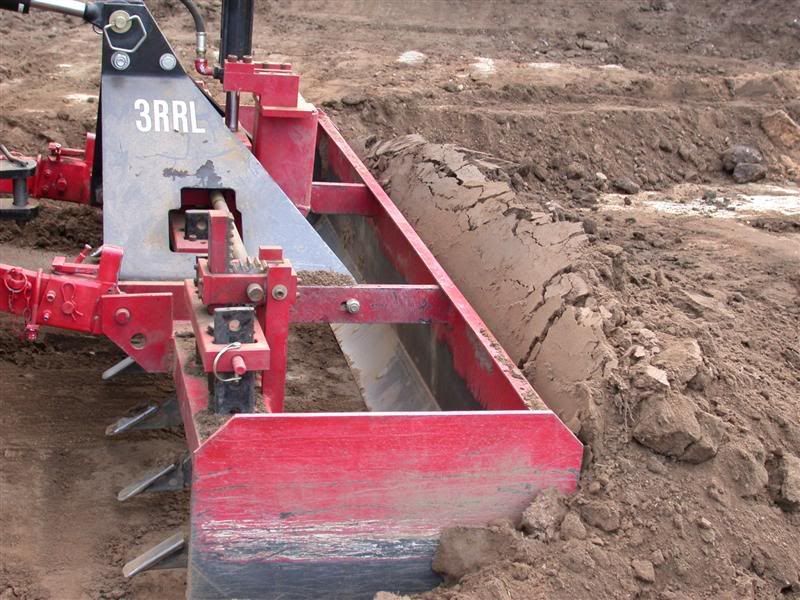
Here's a picture of the front of the modified boxblade. You can see the "very new" way the scarifiers are attached. See the rack and pinion system and hydraulic cylinder to drive everything. Finally notice the handle (which unscrews) to move the system in case the hydraulics fail. |
|
3RRL
Administrator
Huge Kama
Posts: 2,027
|
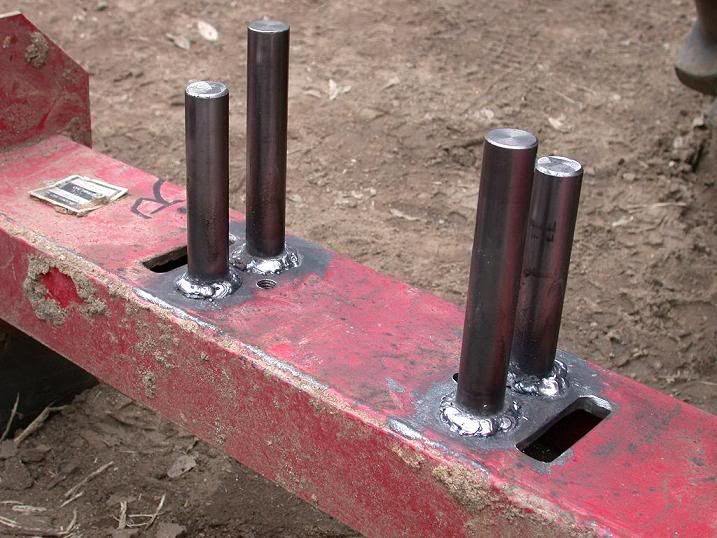
Post by 3RRL on Feb 1, 2008 0:45:53 GMT -5
I took some of that stuff up to camp where my boxblade was to start the modification. I had to weld guide pins onto the boxblade that will locate the steel bars that carry the ripper shanks. This was a real scary job because they need to be right on and square and parallel for the bars to slide up and down.  Fitting the new shank carriers, I had to "work them in" by hand until they slid up and down the guide pins freely. The working conditions were not exactly the greatest.  |
|
3RRL
Administrator
Huge Kama
Posts: 2,027
|
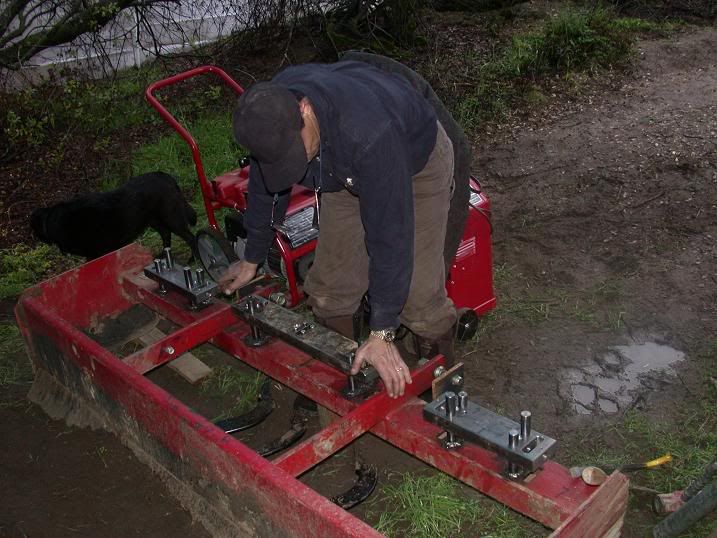
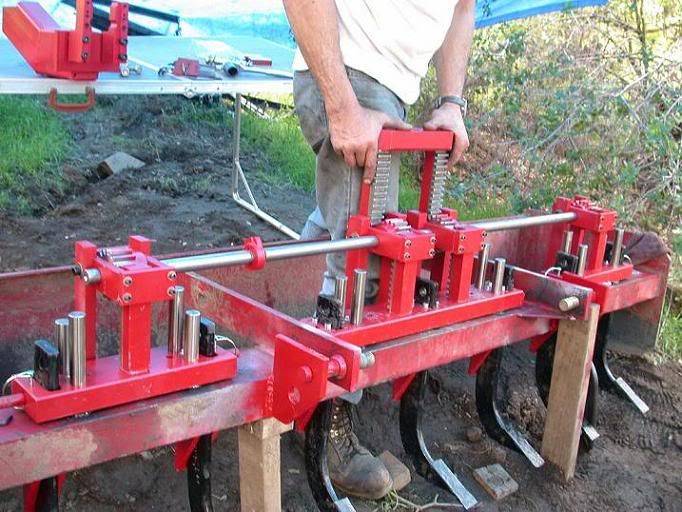
Post by 3RRL on Feb 1, 2008 0:49:26 GMT -5
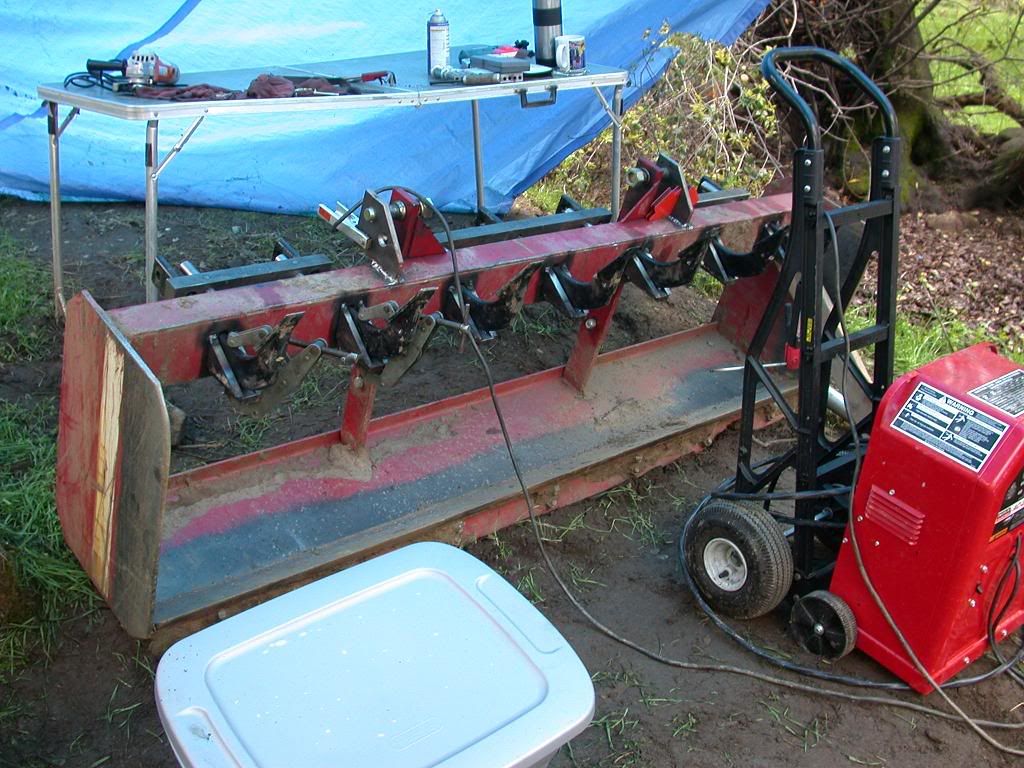
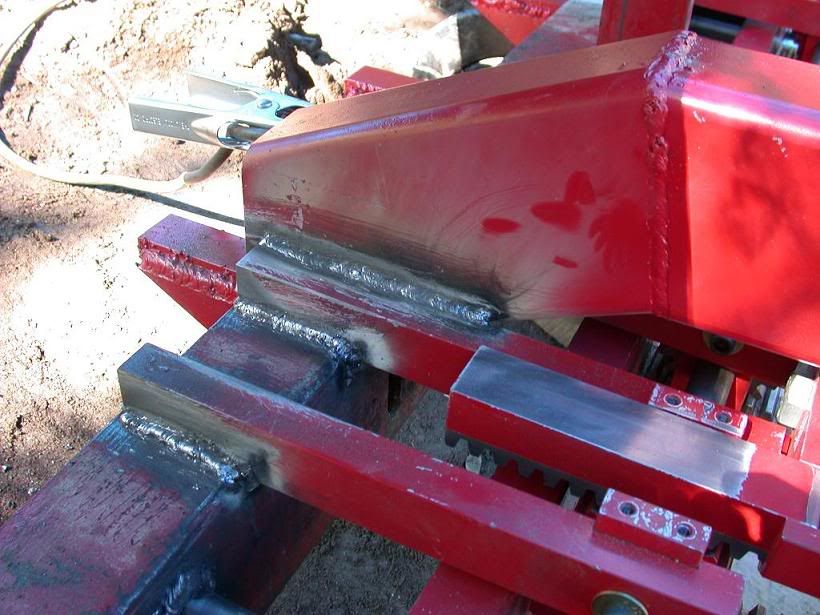
After machining up a bunch of parts in the garage, I bought some gears and a hydraulic cylinder and brought everything to camp to start putting stuff together and welding to the boxblade. That took a long time. I had to test out each assembly by hand to be sure it fit and functioned correctly. This picture shows me trying out the fit between the two racks that will drive the entire mechanism. These 2 racks are attached to a bar that will be mounted to the hydraulic cylinder. You can see all 3 scarifier bars in this picture, and how the drive mechanism works with the shaft running through it.. When I push the drive racks down, the scarifier bars raise up. And when I pull them up, the scarifiers go down. 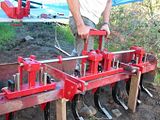 Next I had to mount the hydraulic cylinder onto a sturdy base mount. This picture shows how I welded the the base mount and also the gear assembles to the back of the boxblade. I used 7018 for all welds to get maximum penetration and strength. 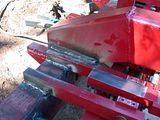 |
|
3RRL
Administrator
Huge Kama
Posts: 2,027
|
Post by 3RRL on Feb 1, 2008 0:57:56 GMT -5
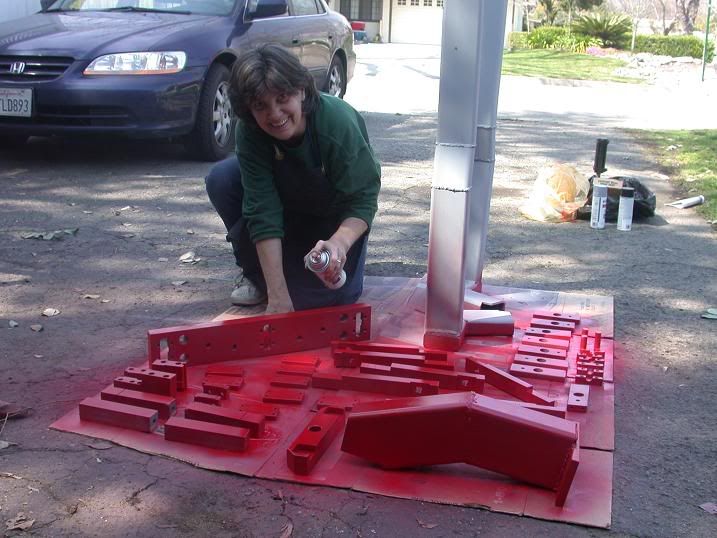
These are front and rear pictures of the center scarifier bar all put together. Also the 3pt brackets are now mounted as is the hydraulic cylinder assembly. See that handle I made to move them manually just left of the 3pt bracket? It's keyed onto the shaft like all the gears are. 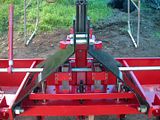 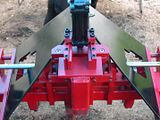 Here is Loretta, as usual doing all the painting work at home for me. She is so cool. Also Wes helping clean off the overspray at camp. 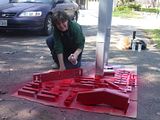  |
|
3RRL
Administrator
Huge Kama
Posts: 2,027
|
Post by 3RRL on Feb 1, 2008 1:00:37 GMT -5
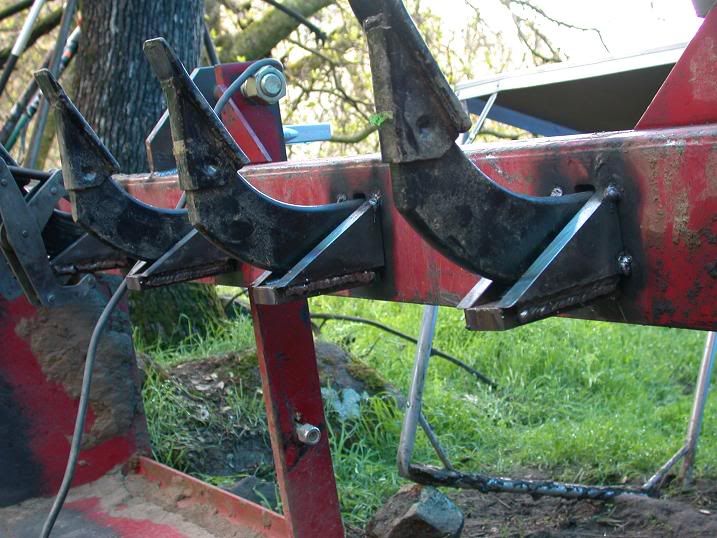
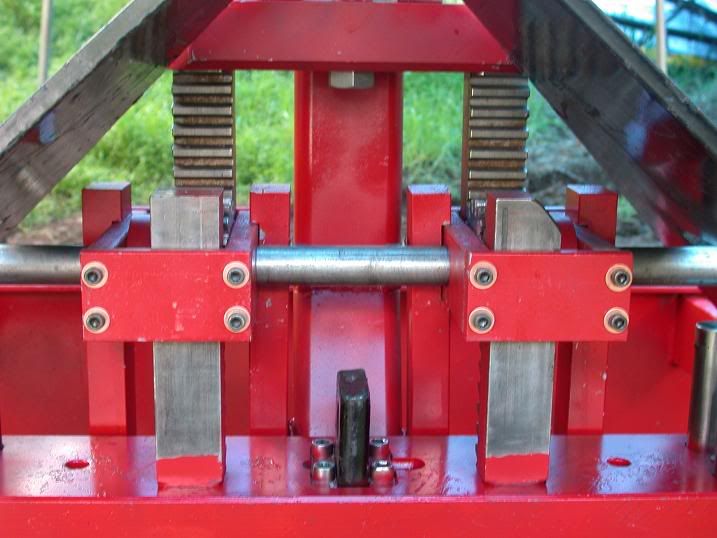
This picture shows the one of the end assemblies that raise and lower the scarifier bar via the gear drive. The end riser bars holds 2 scarifier shanks. 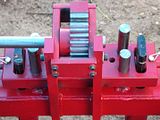 This one shows the center assembly which carries 3 scarifier shanks. This is also where the 2 racks from the hydraulic cylinder do the pushing and pulling to turn the entire shaft.  |
|
3RRL
Administrator
Huge Kama
Posts: 2,027
|
Post by 3RRL on Feb 1, 2008 1:02:52 GMT -5
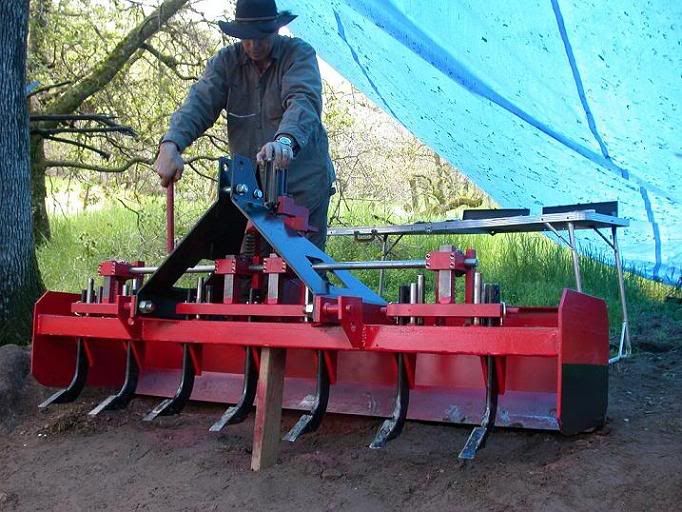
Here I am testing out the manual lever in case the hydraulics fail. First photo shows the rippers down. Second one shows them raise up.  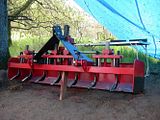 |
|
3RRL
Administrator
Huge Kama
Posts: 2,027
|
Post by 3RRL on Feb 1, 2008 1:09:09 GMT -5
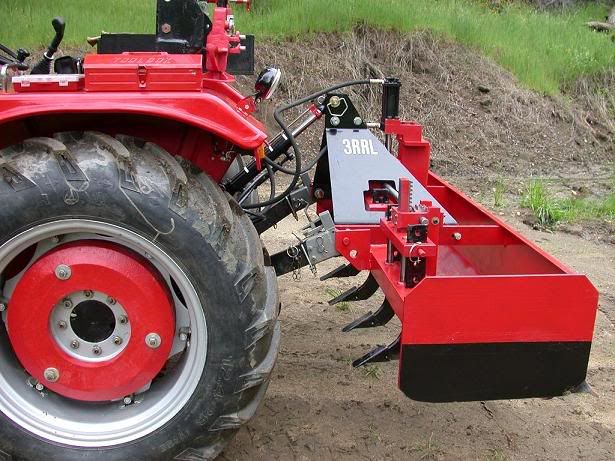
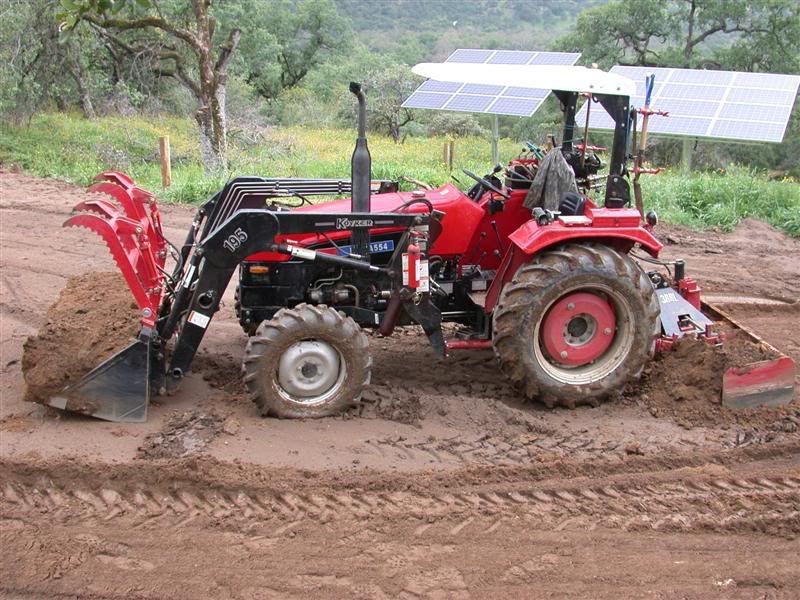
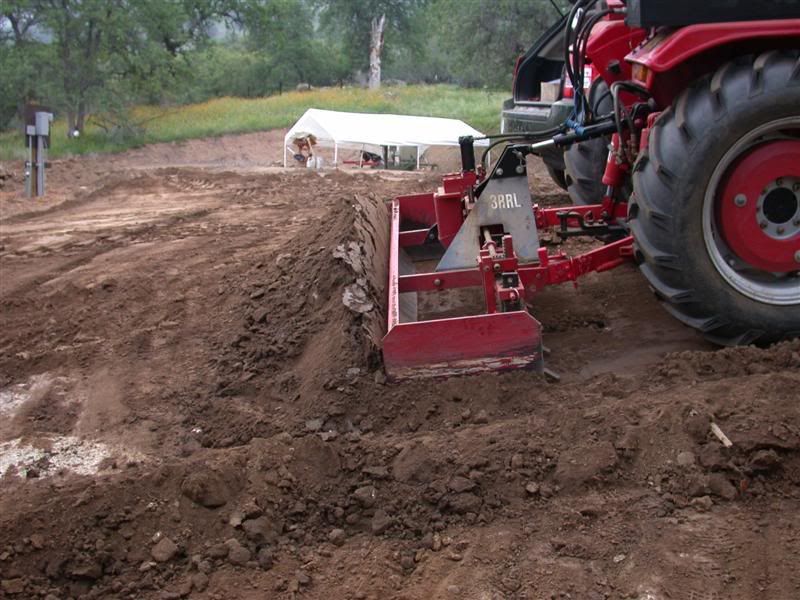
So finally I got the thing together and added the hydraulic hose and put it on the tractor...looks beautiful here, doesn't it? Here's a picture of it on my super deluxe KAMA 554. Notice I got my 3RRL name put on now.  This final picture shows the back of the boxblade where you can see all the welding attachments, including that heavy duty center post that holds the hydraulic cylinder. It also shows the manual handle (now removed for work) and even the re-enforcement for the shanks below. 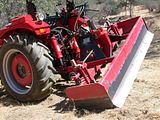 |
|
3RRL
Administrator
Huge Kama
Posts: 2,027
|
Post by 3RRL on Feb 1, 2008 1:14:19 GMT -5
Now, here are the videos of it all working. First is one that shows the functions and the hydraulic top link. 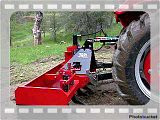 |
|
3RRL
Administrator
Huge Kama
Posts: 2,027
|
Post by 3RRL on Feb 1, 2008 1:18:31 GMT -5
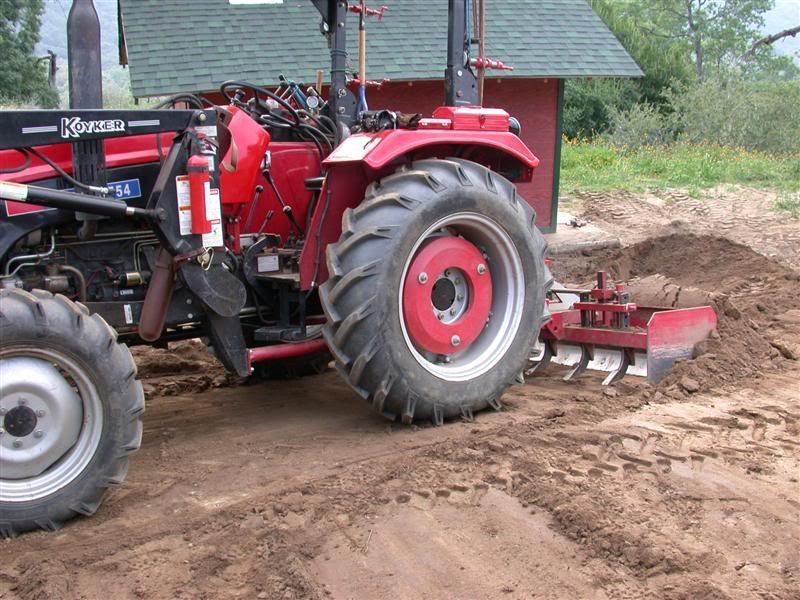
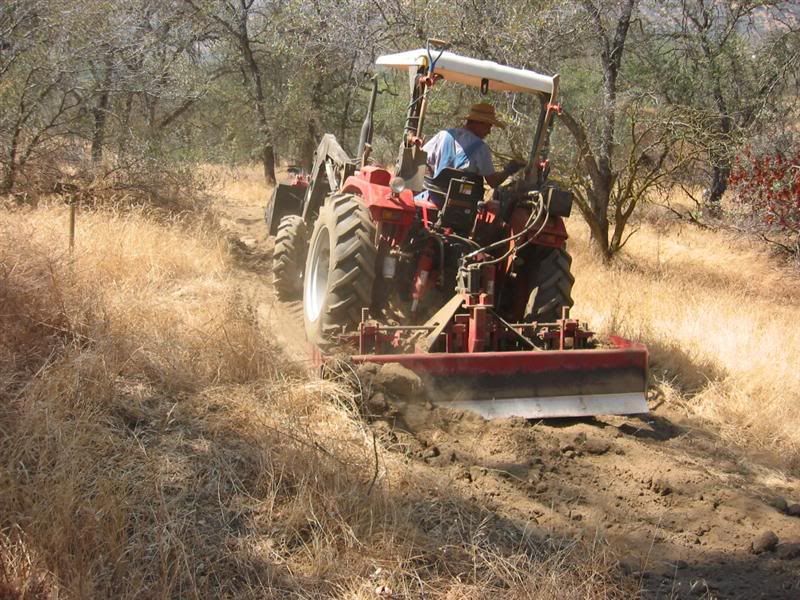
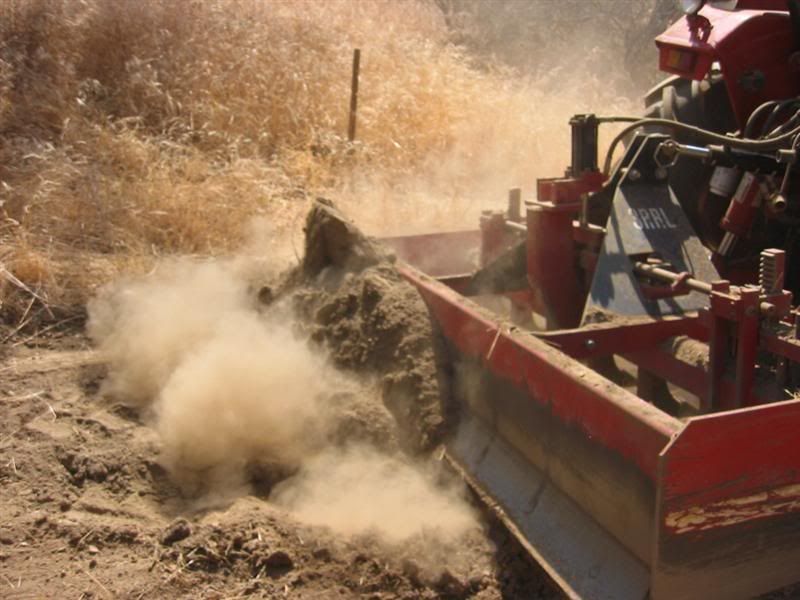
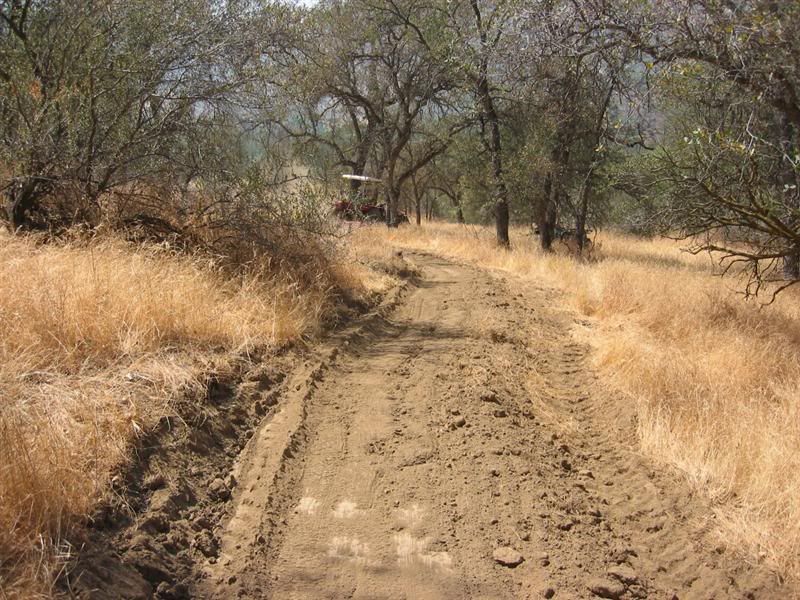
This video is how it works in the dirt. I am trying to cut down a bank. Notice how the shanks are lowered as the boxblade goes into the dirt, and then once they have ripped, they are immediately sucked up so the dirt can be moved. 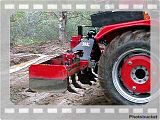 |
|
3RRL
Administrator
Huge Kama
Posts: 2,027
|
Post by 3RRL on Feb 1, 2008 1:25:38 GMT -5
|
|