quikduk
CTW Life Member
   Dog House
Posts: 552
|
Post by quikduk on Feb 8, 2008 17:31:51 GMT -5
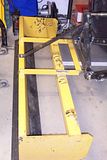
I decided to fix a couple of sections on my property a while back that had eroded due to past rains. Overall, it turned out o.k. I even made a temp. repair to another section so I could get the tractor through to another part of the property although I need to get a culvert and re-do it properly later. I then decided to go over to the "other side" so I could clear some brush for more work on my vinyl fencing project. I decided to take out some grease weed by using the boxblade as a dozer...BIG mistake. I had added twin reversible cutting edges to the existing boxblade to help with the grading. BTW, the steel I had to drill through was hardened. This was probably the stoutest portion of the existing implement.    What I ended up doing was bending the bejeezus out of my 3-point box blade pin mounts. They are out of 3/8" x 2" plate but they are not triangulated, nor "captured". I didn't realize until I had put the 354 away in the garage. I was standing there wondering why the pins were at a 45 degree angle when I noticed the bending stress marks and loss of "paint" (barf colored yellow primer is more like it). |
|
quikduk
CTW Life Member
   Dog House
Posts: 552
|
Post by quikduk on Feb 8, 2008 17:32:21 GMT -5
|
|
quikduk
CTW Life Member
   Dog House
Posts: 552
|
Post by quikduk on Feb 8, 2008 17:32:45 GMT -5
Anyway, what I first had to do was to straighten (big bar/tube clamped to bent section for leverage) the bent sections (no torch at my disposal). I first attempted to reinforce the ears after straightening them out but this didn’t last long. I ended up using a liberal dose of sledge-hammer while standing on the blade..."BANG BANG BANG BANG. After that, I had to cut off all the bent crap. I cut/beat with a 20# sledge hammer on the top brackets until they gave up and then proceeded to attempt to straighten the “beam”. It really should have been made out of 3/8”wall, 4” square tubing but it is skip welded 1/4” x 3” angle iron. I took one bend most of the way out but still have to work on two more, then grind the cut-off areas flush. Here is the design of the newer, better, Mini-Manual-Robo-Blade-II…or whatever that I whipped out to get an idea of what I would be doing and what materials I would need.  |
|
|
|
quikduk
CTW Life Member
   Dog House
Posts: 552
|
Post by quikduk on Feb 8, 2008 17:33:43 GMT -5
|
|
quikduk
CTW Life Member
   Dog House
Posts: 552
|
Post by quikduk on Feb 8, 2008 17:34:09 GMT -5
|
|
quikduk
CTW Life Member
   Dog House
Posts: 552
|
Post by quikduk on Feb 8, 2008 17:34:33 GMT -5
|
|
quikduk
CTW Life Member
   Dog House
Posts: 552
|
Post by quikduk on Feb 8, 2008 17:34:53 GMT -5
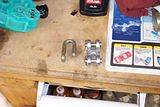
I also managed to break the factory sway chain attachment links so I added some HD mini-shackles…color coordinated of course.   So far it has held up exceptionally well to repeated attempts by me to crumple it. I have also used it to bulldoze heavy wet snow and will use it soon to repair all of the recent rain/snow caused damage on my property. |
|
3RRL
Administrator  Huge Kama
Posts: 2,027 
|
Post by 3RRL on Feb 24, 2008 18:18:35 GMT -5
Wow Ken,
Your rebuild came out great.
It looks a lot beefier than before, that's for sure. The captured lift pins are a nice touch for strength too. Makes you wish you had Pat's EZ Change system for that. When you visited my place, did you notice I managed to bend the brackets on my boxblade anyway?
I worked feverishly on the box blade repairs over the next few weeks.
Somehow I can picture that... ;D
So have you used it since you finished making it sturdy? I don't recall any posts about that? How much does the boxblade weigh now with the 125lbs added weight? Maybe it's just the pictures, but it seems the top link attachment is very high on the box. It's probably the same height as before though.
Rob-
|
|
|
|
Post by grohgreg on Feb 24, 2008 18:47:42 GMT -5
I can see why damage was inflicted, that's got to be the lightest duty BB I've ever seen.
OE critique aside, good upgrades - nice looking end product. But I hope you don't mine one observation. That 60 degree strut behind the toplink bracket might be an Achilles heel. There's going to be huge amounts of stress transferred to the bottom. Your work looks sturdy enough, but consider the force that might be transferred to the (still) light duty backblade. You might want to consider a couple less angular struts (30 degrees comes to mind) between the uprights on the H-frame and the backblade.
//greg//
|
|
quikduk
CTW Life Member
   Dog House
Posts: 552
|
Post by quikduk on Feb 25, 2008 23:44:07 GMT -5
Rob:
I haven't weighed it yet but my estimate is that it is around 600-650 pounds or so. I will take it to the scales one day to see plus to get an accurate tractor weight once the grapple and plumbing is finished...OH and I DO appreciate the help band-sawing and drilling that 1/2" plate. My "little" garage "shop" isn't equipped well (yet) to handle that size stuff.
I have bulldozed with it since the repairs and it seems to hold up well. The top link looks high there when the TPH is raised but this lets me rip deeper and take deeper cuts. It is at the exact 17-1/2" center to center height as before (as I found on some Gannon and Gearmore HD boxblades) measured from the lift arm pin centers to the top link pin center. I will be making another bracket that will lower this point though. It will be a sandwich of 1/2" plate that will be bolted (with a DOM spacer) through the existing upper hole, will have a second bolted hole behind the existing one and will have the new pinned hole about 3-4 inches lower.
Greg:
I thought about adding two more diagonal braces. I did add a 1-1/2" x 1" x .120 rectangular tubing brace to the underside of the rolled top of the rear moldboard. The 2" sq. draw-bar tubing is welded through the moldboard and into that brace so I am hoping it will be strong enough. Besides, if I really bend the heck out of it, maybe that means I need a BIG Gearmore BB like Tim's. ;D
|
|