3RRL
Administrator  Huge Kama
Posts: 2,027 
|
Post by 3RRL on Aug 8, 2010 3:16:34 GMT -5
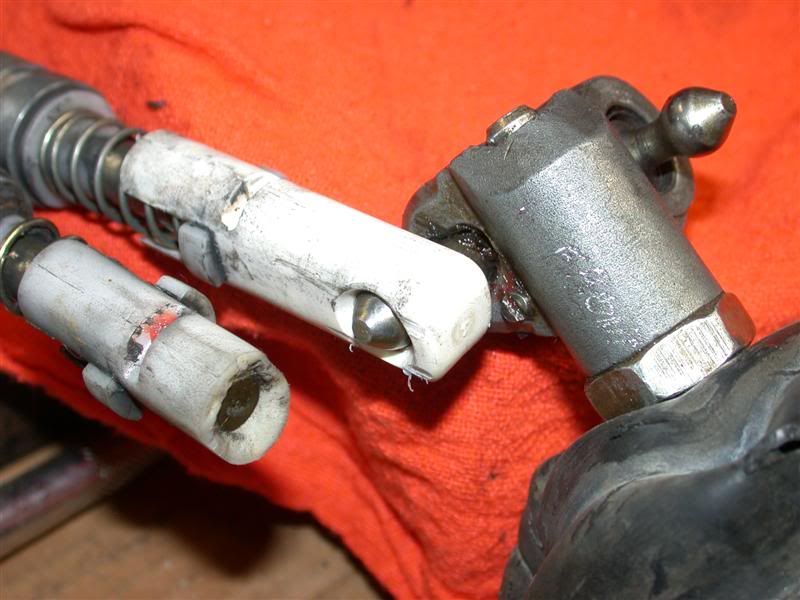
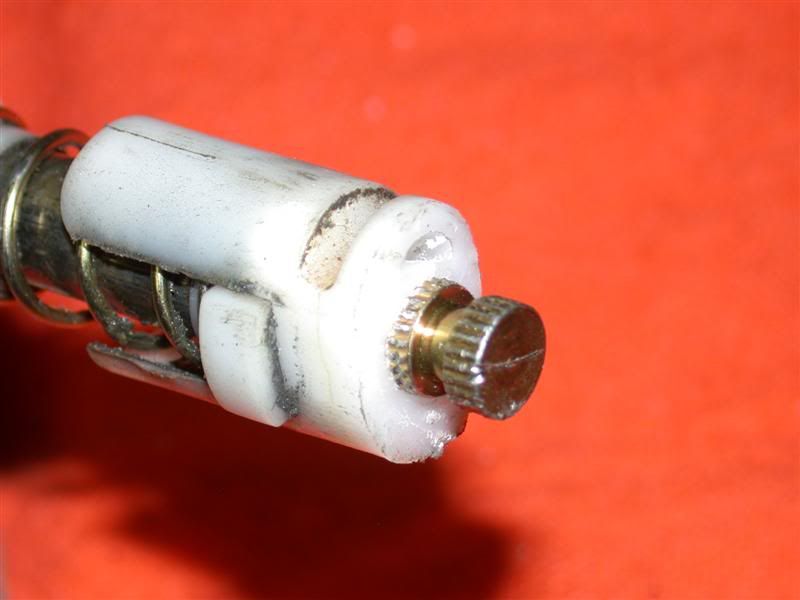
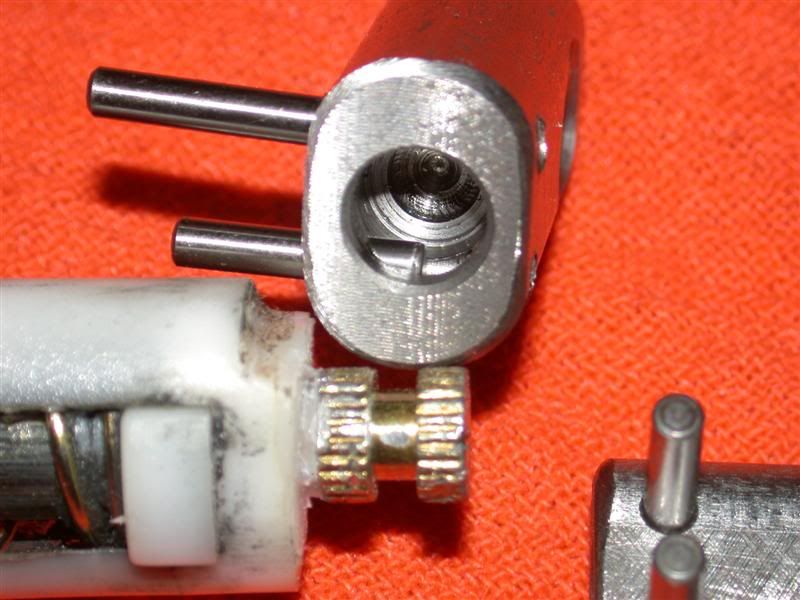
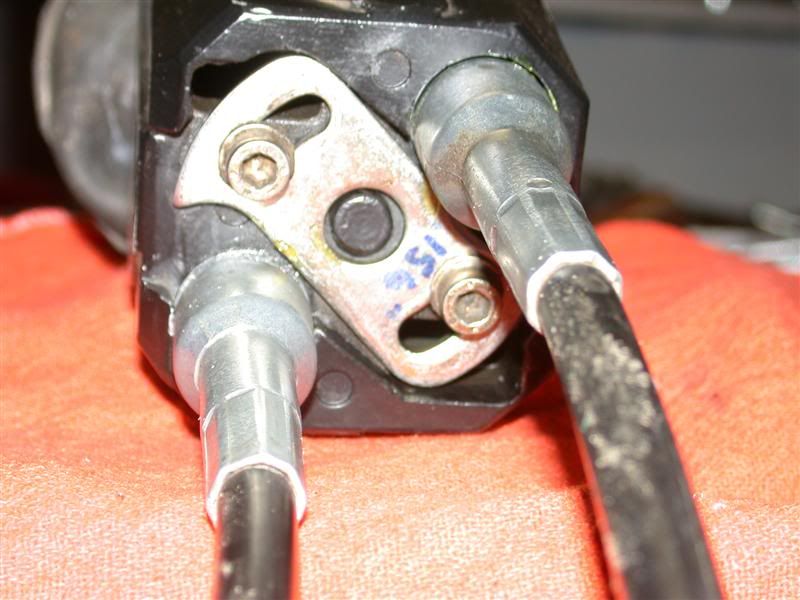
I didn't get anywhere trying to get new control cables for the Cofle Joystick in my other thread. So I decided to go ahead and repair the broken ones. I had a cable break a couple years ago in exactly the same place and I saved it for a repair like this. Below are a couple photos of the plastic molded end that fit onto the joystick toggles. You can see where the plastic broke off...right at the end of the brass cable ferrule. 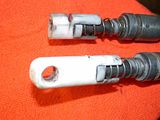 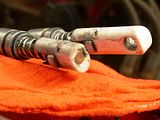 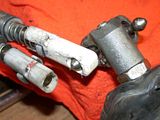 I figured the cable ferrule was over-molded and I was right. I used a cut-off wheel and some grinding hand pieces to expose it. When I did, I saw the brass ferrule had a recess on it which is what held the pastic onto it. 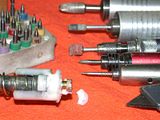 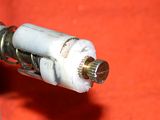 |
|
3RRL
Administrator
Huge Kama
Posts: 2,027
|
Post by 3RRL on Aug 8, 2010 3:30:32 GMT -5
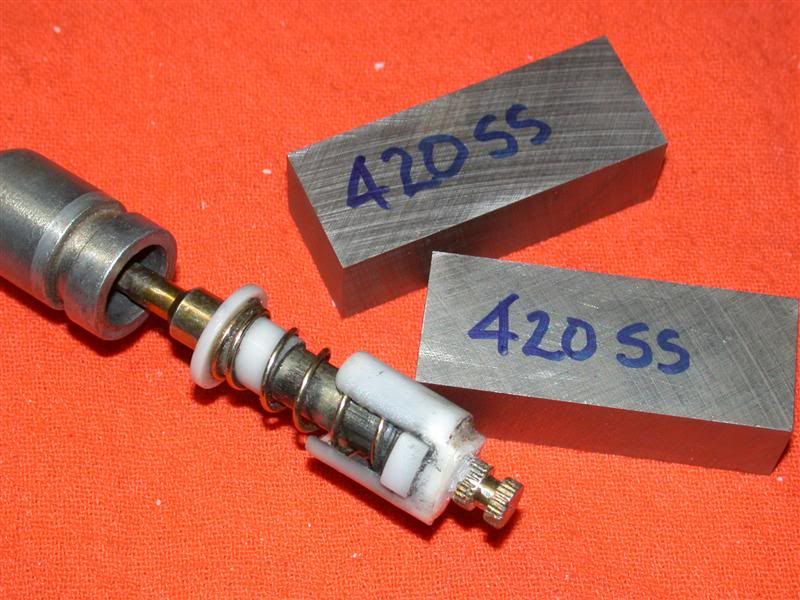
The next thing I did was to carve back the plastic to a point I could measure to. I cut it back to the top of the slot (groove on one side) and made some measurements. Using that, I had a definite point to measure from, and the bottom of the new piece would form the top of the slot (groove). My goal was to re-create the broken off piece and re-attach it to the brass ferrule in much the same manner the plastic was attached to it. But first I had to make a sketch of what I wanted to do. I decided to use 420SS tool steel for the new ends.  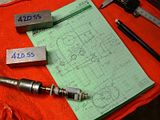 First was to shape and fit the steel into the housing, to be sure it would slide freely. I set the milling machine up and used a radius cutter to machine the sides. Then I stuck the two pieces into the housing and checked the fit. I made two pieces so that if the other one breaks, I will already have a new end to put on it. The machined pieces fit nicely... 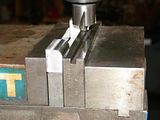 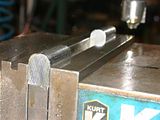 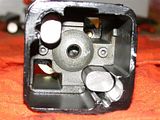 |
|
3RRL
Administrator
Huge Kama
Posts: 2,027
|
Post by 3RRL on Aug 8, 2010 3:53:37 GMT -5
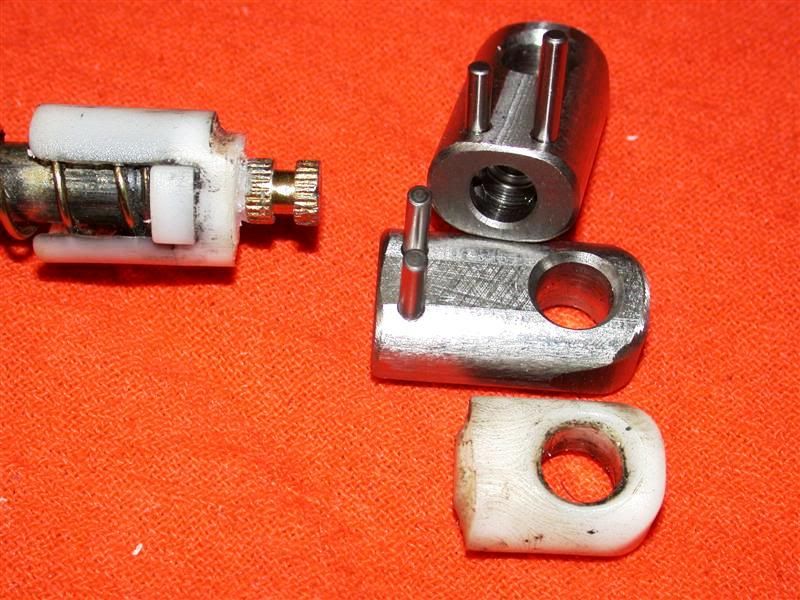
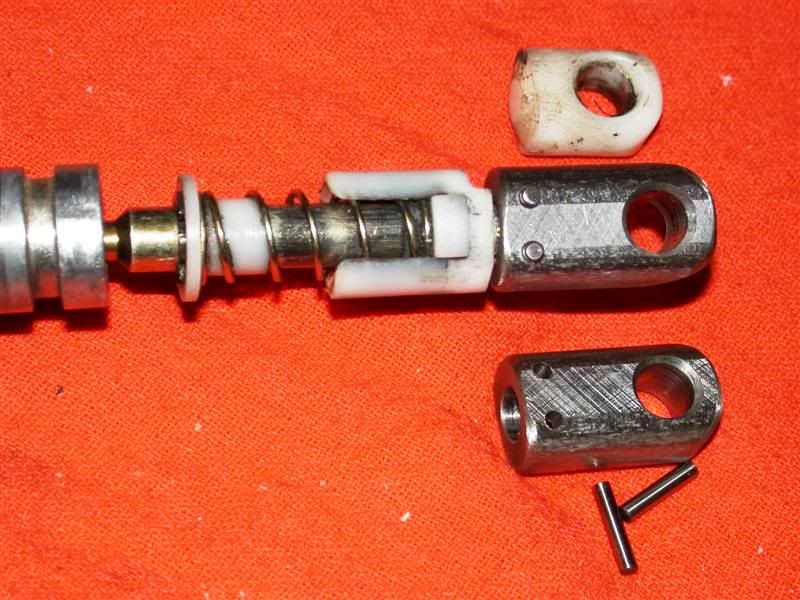
After machining the shape, I installed the holes into the new pieces. The main large hole is where the trunnion or toggle shafts of the joystick fits into. They had to be chamfered correctly to allow for all the movements the joystick makes. Then I calculated where to install 2 dowel pin holes. I used a .125" reamer so the dowel holes are a slight press fit. Those holes also need to be positioned with a slight interference against the brass ferrule groove. When the dowels are pressed in, they will capture that groove and the new top will be attached to the rest of the plastic cable end. You can see how that works in the close-up photo with the dowel pin partly in place.  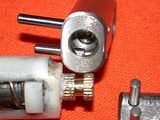 The hole in the bottom of the new pieces is for the brass ferrule to fit in. If my measurements are right, those dowels should end up exactly in the middle of the brass recess when the top is pushed home. I showed the broken off plastic next to the new steel top so you can see the shapes are almost identical. Below is the result when I pushed the new stainless steel tops onto the brass ferrule. I tapped the dowels into place and they captured the brass ferrule, which in turn, keeps the new top pieces secured to the cable. I am not concerned about alignment of the radius'ed sides, because those sides are always held inside the joystick housing. All they need to do now is to slide up and down, pulling the cable up and down. 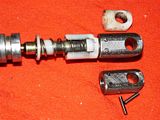 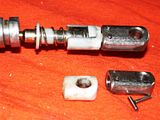 Tomorrow I will put the joystick housing back together again and add a little grease...then try it out.  Dang, I should've taken a photo of the repaired cable end in comparison to the plastic good one. Maybe I can get that tomorrow too? Thanks for looking, Rob- |
|
3RRL
Administrator
Huge Kama
Posts: 2,027
|
Post by 3RRL on Aug 8, 2010 14:02:16 GMT -5
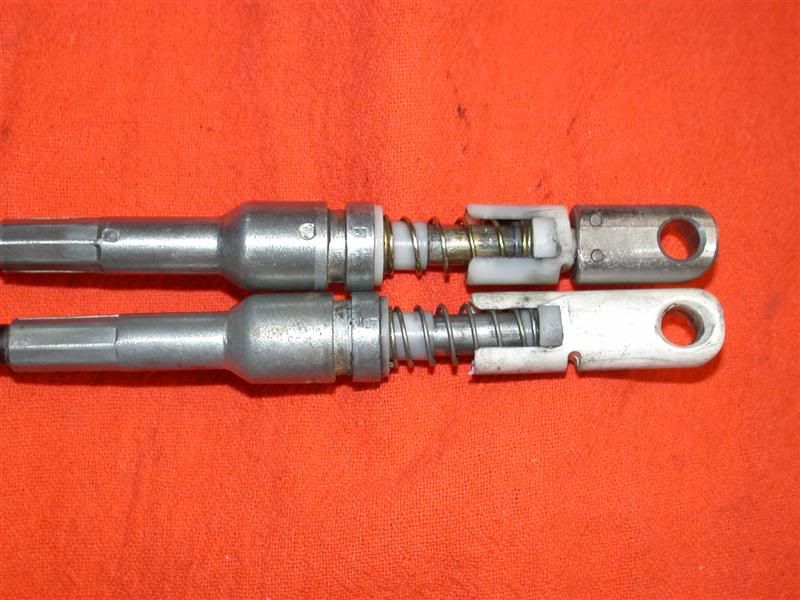
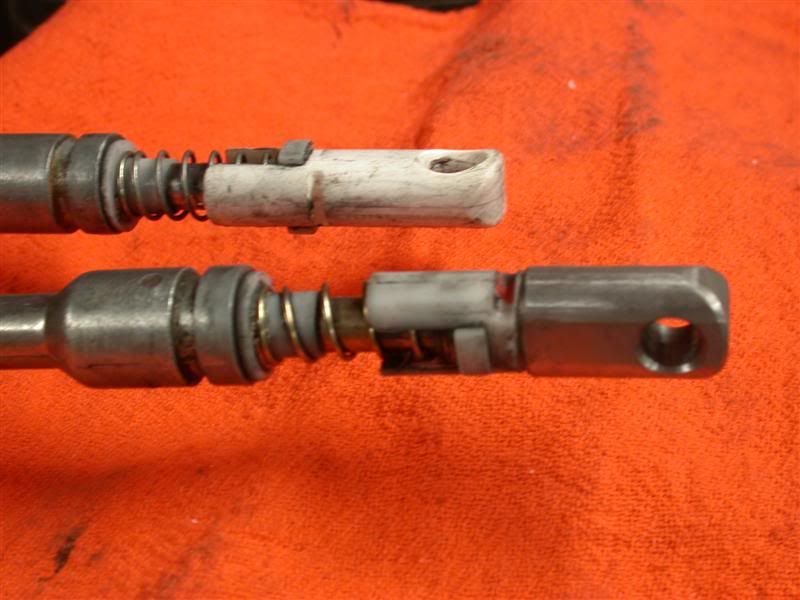
Thanks Kenny! This morning I went to install the repaired cable. I took a couple photos to show the original plastic end vs the repaired cable with the steel end on it. First photo shows them side by side to see that the hole, shape and over-all length is the same. The second photo shows that the dowel pins have now been blended into the body so they don't stick out any more. 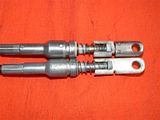 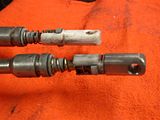 |
|
3RRL
Administrator
Huge Kama
Posts: 2,027
|
Post by 3RRL on Aug 8, 2010 14:21:10 GMT -5
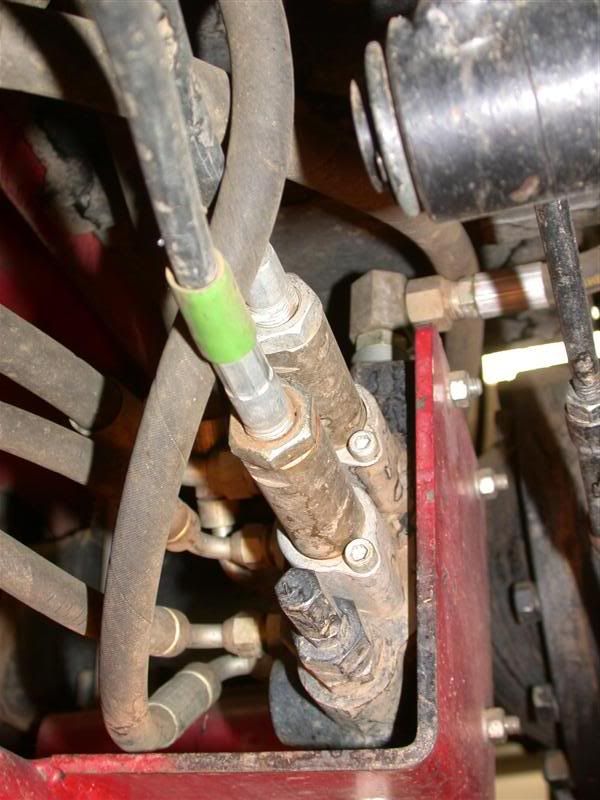
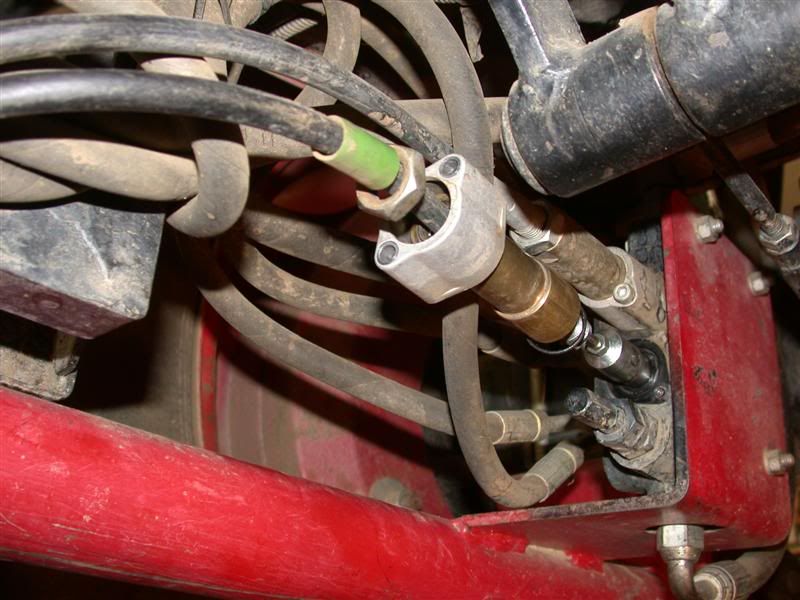
To re-install the cables into the Cofle joystick housing, there are grooves on the outer sheath ferrule. There is a "keeper" bracket on the bottom of the housing that pivots to catch those grooves. The photos below show that pivoting bracket in the open and closed position. Then tighten the cap screws to keep the bracket engaged.   The joystick has those trunnion or toggle shafts. In order to get the cables on those, you need to loosen the cable at the valve end. That will give you some slack to to get the cable ends onto the trunnions and into the housing. 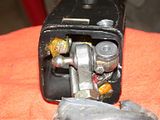 My FEL valve sits underneath the tractor and is a little tricky to get to. Loosen the lock nut and remove the cap screws that hold the cable onto the valve spool rods. Then you unscrew the adjusting collar to expose the actual cable end. Mine has a large dowel pin that connects the cable end to the spool rod on the valve. Below are some photos showing that procedure and the cable disconnected from the valve.  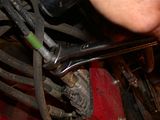  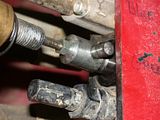 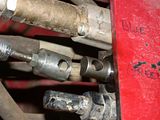 |
|
3RRL
Administrator
Huge Kama
Posts: 2,027
|
Post by 3RRL on Aug 8, 2010 14:30:01 GMT -5
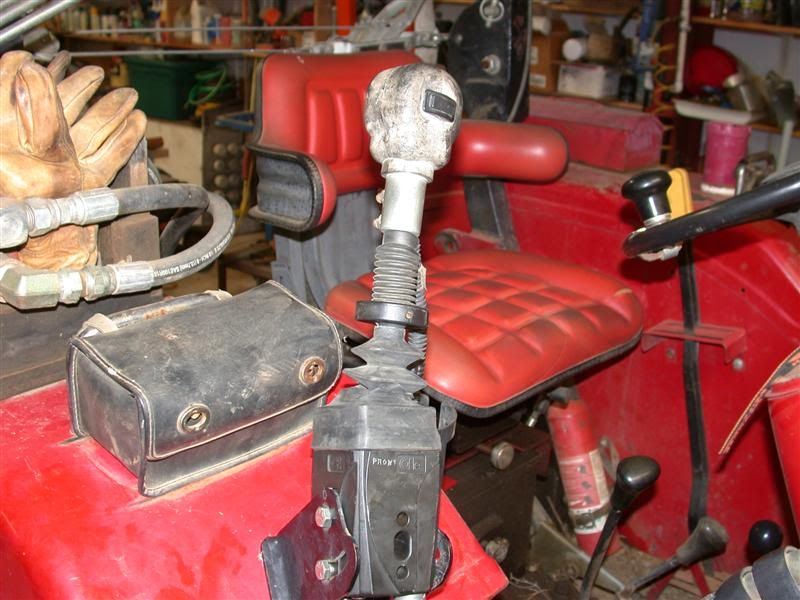
Once the cable is off the valve, there will be some slack on the other end...the joystick end. Now you can put the second (repaired end) onto the trunnion toggle. On this Cofle joystic, there is one flat head socket screw that holds the second trunnion toggle in place. Once that is tightened, the joystick toggles are secured into the housing. Pictures below show the joystick inside the housing and also the entire thing mounted back onto the fender. 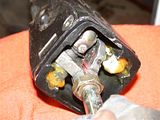  That's all there is to it. Except you do have to crawl back underneath to adjust the play out of the joystick and re-fasten all the components. I adjusted mine so that there is less play than before. I tried out the FEL in all functions and it worked just fine. I don't anticipate breaking off that new stainless steel end anymore. But I have a second end cap ready for when the other plastic piece fails. Rob- |
|
roy697
CTW Advanced Member
 Roy's Pond
Posts: 303
|
Post by roy697 on Aug 8, 2010 14:50:42 GMT -5
Looks pretty neat. Thanks for sharing.
|
|
|
|
Post by stumppuller on Aug 8, 2010 23:10:19 GMT -5
Rob - I believe that you live off the grid and probably that also means that you have a plain old "vanilla" phone line (no Fiber optic or DSL). If so, how is it you can send us such copious notes and photos all the time?
Bruce
|
|
3RRL
Administrator
Huge Kama
Posts: 2,027
|
Post by 3RRL on Aug 9, 2010 19:14:31 GMT -5
Thanks for the interest in my repair guys!
I figured I saved myself a couple hundred bucks (at least) for a couple hours work. That doesn't count dis-assembling and removing the joystick and the valve end connectors. I'd have to do that anyway to install a new cable. This way, I'll be able to re-use those 420SS ends on the other control cables, when the plastic breaks. My steel tip will probably not wear out or break off. And if the cable itself breaks, all I have to do is punch out the dowel pins that hold it to the brass cable ferrule and put it on another cable. I have one spare already from 2 years ago when I bought a new cable to replace it.
Regarding the photos and all, yes, I do live totally "Off Grid". No electrical lines, no gas lines no sewer lines, no water lines and phone lines either...nothing connected to the street below. What I use are cell phones and an AT&T Air Card. Cellular technology for internet. We have a 3G tower in line of sight and the performance of the air card is similar to DSL speeds. Most of the time there is no buffering to watch videos, they just start playing.
We got the card initially for VPN (virtual protected network) into work.
Satellite has a slight delay and loses the "handshake" in a VPN. But the air card does not. At the time, AT&T offered an unlimited program, but now they have limits, even on their super deluxe plan, for bandwidth usage. We, however, are grandfathered into the old "unlimited" plan and get great performance.
Rob-
|
|
|
|
Post by Lynn on Mar 20, 2015 22:12:58 GMT -5
We recently had one to break exactly like that on a New Holland TL100DT Tractor with a Bush Hog M546 Loader. New Holland dealer nor Bush Hog dealer could fine a replacement. I searched the internet for one with no luck. I cleaned the break good with alcohol and re-attached with a Plastic Weld product. I noticed the name "Cofle" on the body of the joystick, so I googled that name and somehow stumbled upon this site. I appreciate the time and effort spent by Rob explaining his repair with pictures to illustrate. I'm hopeful the Plastic Weld product will hold, but if it doesn't, I will certainly take advantage of the helpful information Rob has shared. Thanks again, Rob.
Lynn
|
|
|
|
Post by Fowler farms on Nov 15, 2017 15:01:08 GMT -5
Would you sell me 2 of the ends you built 8702094415
|
|
|
|
Post by Cindy on Jul 28, 2019 20:03:00 GMT -5
Would you sell me 2 of the ends you built 8702094415 |
|
|
|
Post by Cindy on Jul 28, 2019 20:05:01 GMT -5
Did you ever get a response about buying some of those connectors?
|
|
|
|
Post by Cindy on Jun 16, 2020 15:40:28 GMT -5
No I never got a reply. Can 3RRL administrator CTW team put me in touch with this guy?
|
|
|
|
Post by John on Jul 9, 2021 11:18:33 GMT -5
No I never got a reply. Can 3RRL administrator CTW team put me in touch with this guy? |
|