|
|
Post by linus69 on Mar 26, 2008 18:25:43 GMT -5
Very nice Rob, a very nice and extremely attractive package, you`ve done well, and that valve kit she is installing looks good too.
Paul
|
|
3RRL
Administrator  Huge Kama
Posts: 2,027 
|
Post by 3RRL on Mar 26, 2008 18:38:08 GMT -5
Another option she chose was to get replacement quick connectors from Ronald. So she had to remove both males and females on the tractor and put on the new ones. Ronald suggests you do this to avoid any problems caused by the stock connectors. When she got done putting them on, all she had to do was connect them from the valve to the tractor. Ronald's instructions provide a good set of step by step instructions and photos that show where all the hoses go. 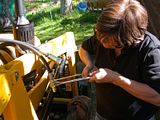 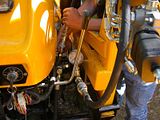 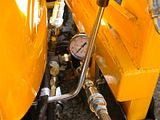 So that's all there is to it. I forgot to time her for this last part but I'm certain it was about a half hour. That means the entire installation can be done under an hour easily ... especially if it's a straight swap out and no power beyond or new quick connects involved. The only thing not shown is the hose protector that comes with his kit. Here she is proud as a peacock of what she did. 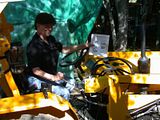 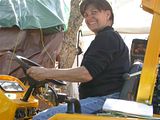 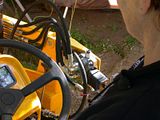 She removed the "good luck" horseshoe on the outside of the new bracket so she could paint it a different color. Ronald puts one on the new bracket as a nice custom touch. These photos show how nice the FEL valve kit looks after installed, even without the horseshoe on it. 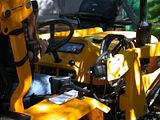 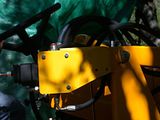 Valve evaluation ... was it worth it? We did not give it a full field test, but I'm sure it would pass with flying colors. Instead, we tried out the new valve functions right after installation. There were other hydraulic connections and valves to install yet, and we wanted to get to them after trying Ronald's valve. In doing so, there is a noticeable difference in how the valve feels. The joystick is much smoother ... easier to control and move in comparison with the stock valve. It was much easier to "feather" the functions too. Also, that groan when curling the bucket before ... disappeared. So I'm sure it was due to the old valve not working perfectly like Ronald's valve. That alone was worth it. In addition to those benefits, Loretta now has a true "float" feature which the old valve didn't have either. The quick regen feature allows for rapid dumping of the bucket. And there is the power beyond to feed the other valves in line properly. Everything worked great! Bravo Ronald, I would give your kit an A+ for quality, ease of installation, and how well thought out it is. I would recommend this valve replacement kit to anyone who has the stock ZL valve. It is definitely worth the money. Loretta had no problems whatsoever. Rob- |
|
3RRL
Administrator  Huge Kama
Posts: 2,027 
|
Post by 3RRL on Mar 26, 2008 18:40:42 GMT -5
Thank you Paul,
Loretta will be home from work soon so she can add her personal comments to the thread.
|
|
|
|
Post by bracabric on Mar 26, 2008 20:10:11 GMT -5
Wonderful work Mrs.3RRL, you have my complete admiration, and it looks like you enjoyed yourself as well,
Dick
|
|
|
|
Post by Ranch Hand on Mar 26, 2008 20:28:54 GMT -5
Thanks for the kind words Rob !
Loretta, you go girl ! I really like the way you laid out the hyd hoses..... just like I like it !
You did a really nice install. I like the yellow bracket.
Everyone really seems to be happy with there ZL20 & ZL30 loader after the valve upgrade.
Thank you both again !!!
Ronald
Ranch Hand Supply
|
|
GuglioLS
Administrator  Jinma354 LE
Posts: 1,276
|
Post by GuglioLS on Mar 26, 2008 21:23:41 GMT -5
Wonderful job Loretta! and great photo documentation Rob.
I could not help but notice how nice and neat the hose routing is now as compared to the spaghetti mess of hoses with the OEM valve. It now has a much better appearance in addition to the improved functionality. I agree it's worth it.
I see you installed a pressure gauge too! - very nice.
So what's next?
Larry
|
|
3RRL
Administrator  Huge Kama
Posts: 2,027 
|
Post by 3RRL on Mar 26, 2008 23:34:54 GMT -5
Next is the other valve related installations such as:
- The installation of a pressure relief valve right after the pump. (you already noticed the gauge)
- The solenoid true third function grapple valve and electronics.
- The relocation of the rear remote valve and rear remotes.
- The dump trailer single acting cylinder valve.
- The side link valve (old FEL valve).
- All new brackets for the valves.
- Additional plumbing for all that jazz.
- Soon to be grapple addition itself too.
Loretta is going to be a busy gal over the next few visits to camp.
|
|
|
|
Post by Mrs3RRL on Mar 27, 2008 0:23:37 GMT -5
Loretta is going to be a busy gal over the next few visits to camp. Yikes! What have I gotten myself in for??!! This was actually very easy to install Ronald's bracket and valve. He has great instructions, with clear photos and all the hoses and connections are labeled in the photos. I'm not a very accomplished mechanic, so it took me a while to make sure I really understood each step before I did it. And then figuring out what size wrench to use (but I'm getting better). I just took my time, though.... even though it drove Rob crazy. ;D Thanks, Ronald! |
|
quikduk
CTW Life Member
   Dog House
Posts: 552
|
Post by quikduk on Mar 27, 2008 10:37:39 GMT -5
The install looks great Loretta. I can't wait for the action videos. ;D
|
|
|
|
Post by Mrs3RRL on Apr 15, 2008 15:23:11 GMT -5
Thats great! Pretty soon she is going to ask why you keep breaking "her" tractors and she might even start charging you labor!!!  ;D ;D ;D  Well, I know it isn't 'broke', but when he's adding all this stuff, it sure doesn't run. You know, on Huge Kama, he added all this stuff over a long period of time.... so he had a lot of seat time in between. I haven't been able to get any seat time in over a month. Of course, neither has he ;D |
|