3RRL
Administrator  Huge Kama
Posts: 2,027 
|
Post by 3RRL on Feb 6, 2008 11:29:36 GMT -5
|
|
3RRL
Administrator  Huge Kama
Posts: 2,027 
|
Post by 3RRL on Feb 6, 2008 11:35:36 GMT -5
By the way, I switched implements several times over the 3 days and one of the times I had put the backhoe on. Well, it was completely connected ... drag links, top link, ROPS link and subframe. I noticed my hydraulic side links were not completely sucked up to normal for the backhoe so I went to adjust them up, to tighten the backhoe fit to the tractor. Well, I was pretty tired and not thinking, so I adjust one at a time instead of both together. SNAP went my upper lift arm, the opposite one of the 20 ton cylinder I was working. That made me really happy. All this brute work I put Huge Kama through and I break his arm myself! But I fixed it. It broke where I had machined the clearance for the cylinders to pivot. But I guess it was strong enough for the work it's done but not strong enough to overcome that 4" cylinder. Now to go do that welding and grinding you saw on the repaired upper lift arm. 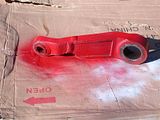 I finished my backhoe work before I took it off to repair it though, since I didn't need it to hold up the backhoe anyway. A lot of work had been done up there and it's starting to look nice and neat now. You can see I'm kinda tired now, cleaning up my saws. 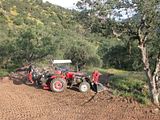 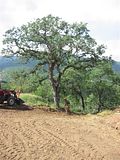 |
|
3RRL
Administrator  Huge Kama
Posts: 2,027 
|
Post by 3RRL on Feb 6, 2008 11:40:04 GMT -5
Here are a few more shots of the area with the limbs cut up on the trees and the ground cleaned up. You should see my burn pile now! That at the end of the first day so we were dog tired but felt good about accomplishing a lot of work. There was lots more to do this weekend. 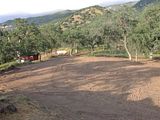 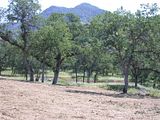 All this work just so the rock bluff would look "cleaner" Loretta said. Shees.... But it does look cleaner and is a little safer from a hap hazard fire now too. Here's a view from later that weekend when I was grading my road again. This is from about 150" below and about 900 feet away. Looking better now, don't you think? 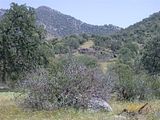 |
|
3RRL
Administrator  Huge Kama
Posts: 2,027 
|
Post by 3RRL on Feb 6, 2008 11:42:14 GMT -5
Oh, and wasn't kidding about "working on the edge", trying to get those Oaks and Buck brush from behind the rock out cropping. Here's a shot of a trail I had to make so I could get decent footing without going over the edge. This one is from on top of the rock bluff. 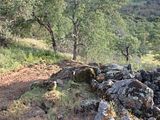 This one is from below the trail. 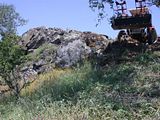 And here is one from the side of the trail, looking towards the rock bluff. It's showing the view Huge Kama has. 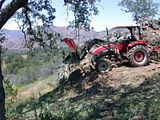 |
|
3RRL
Administrator  Huge Kama
Posts: 2,027 
|
Post by 3RRL on Feb 6, 2008 11:46:37 GMT -5
Couple notes about the tractor...
About the upper lift arm.
Brad had warned me that machining the clearance like that would weaken them and I was a ware of that. Even so, they performed all the task I wanted under severe use. I was able to lift the tractor off the ground using the boxblade and the cylinders fully extended with out damage. That is how I cut those gutters so good because all the weight of the tractor is keeping the boxblade down into the Earth. If they were to break from anything, that would surely have done it. Even without machining the clearance I sure I would have snapped one extending that 4" cylinder with the backhoe all connected with my 7 point hoe mount. After I repaired it, I cut some more gutters jamming that side into the hard gutters and it worked fine, so I'm not concerned about it. I used 7018 AC rod to make the repair.
About the grapples.
There are times I don't use them, but I always leave them on the bucket anyway. They don't interfere with digging or regular bucket use so why take them off. I have plenty of lift power as it is. The really neat part is when I do encounter a big boulder or log or brush to pop out, they are there ready to use. It is so handy to have them for those moments. Then of course there is real brush clearing and logs from tree trimming. That is a "must use grapple" situation and they are invaluable in the amount of work they do for those chores. I can't imagine how I would have moved all that shrub/trees/ logs/bushes/dead stuff as quickly and cleanly as I did with the grapples. It would have taken several times as long to do and a lot more manual labor and tedious raking etc.
Even one grapple (the norm) mounted on the bucket would have done everything I wanted. Instead of 18" wide like mine are, perhaps go 24" or 30" wide with one set. That's all you really need to do 99% of what mine can do. In retrospect, that's what I should have done ... make one set a little wider.
Rob-
|
|
3RRL
Administrator  Huge Kama
Posts: 2,027 
|
Post by 3RRL on Feb 6, 2008 11:58:06 GMT -5
|
|
3RRL
Administrator  Huge Kama
Posts: 2,027 
|
Post by 3RRL on Feb 6, 2008 12:03:24 GMT -5
Went up this weekend and the builder had the forms for the footings up already. Here is a shot from the road going to the homesite. And a little closer up to see the background. 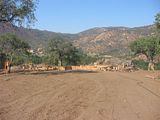 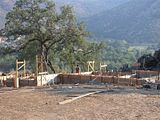 Couple more shots to show where/how the home will be located against the rocks and views. That rock is what I was standing on shooting the above photo. Now I'm on the rock bluff itself in this next one. Another angle looking South. 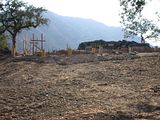 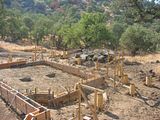 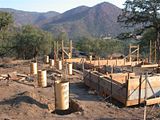 |
|
3RRL
Administrator  Huge Kama
Posts: 2,027 
|
Post by 3RRL on Feb 6, 2008 12:05:03 GMT -5
These two looking North/West from the lower rocks. 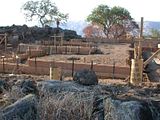 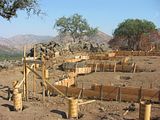 And this one a little more directly North. It also shows the large outcropping of rocks sheltering us from the steep 150' drop off. 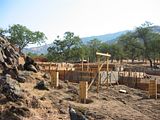 |
|
3RRL
Administrator  Huge Kama
Posts: 2,027 
|
Post by 3RRL on Feb 6, 2008 12:09:38 GMT -5
Part of our Deck will go over the top of the large outcropping so they have to secure pillars into those rocks. Again one to the North but looking down from the large rocks top see the footings they have to pour. You can see the solar shed in the background and the well tent way back past the barn pad. 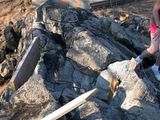 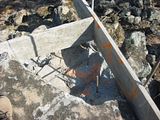 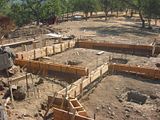 |
|
3RRL
Administrator  Huge Kama
Posts: 2,027 
|
Post by 3RRL on Feb 6, 2008 12:09:55 GMT -5
Another shot of the footings near the large rock outcropping. The main floor will level with the top of the big rock outcropping. It is about 10' higher than this view. So our main view will be directly over the top of these rocks and down the cliff. Another shot of more footings and stuff. This will be the front of the home ...the front porch entry looking to the right ... East. I think the spot we settled on for the home is perfect. I think the views will be glorious in all directions. Also a perfect defensive location with an elevated position affording surveillance and shooting lanes to all parts of the property. 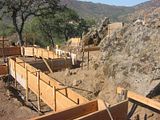 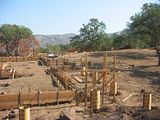 And here is the steel ring liner for the water tank. It is 6" tall and will be re-enforced with #5 or #6 Rebar before they pour the concrete. The builder will prepare this further to his liking. I just had to find the spot for it. 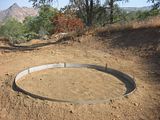 |
|
3RRL
Administrator  Huge Kama
Posts: 2,027 
|
Post by 3RRL on Feb 6, 2008 12:14:31 GMT -5
What a difference from the last 3 years of posting photos of my land and camp and all the prep work. Indeed we are excited now that they have finally started. It has been a long journey to this point so we kept it low key, in case there were more hurdles to overcome. This is the first home built from scratch for either of us, so we got to pick the location and the way it sits. The home will be situated with exceptional views of the scenery but also of all entry and exit points and most of our access road. The small cliff on the West reminds me of how an impenetrable fort would be situated against it in the frontier days. With the enemy needing to "scale the walls" to gain entry. The other sides allow full view of the hill sides sloping down to our meadow and the road leading to our homesite. This is all fascinating stuff to me. When I was a kid watching the old Western movies, I fantasized about having a home in the wilderness and how I would locate it for maximum defense against the Indians. Or in the steaming jungles where your safari home would be situated aloft with decks to see any predators that might come calling on you. So if you are of the same persuasion as me, I kept all this in mind when I got the chance to do it. Hence the comment about a perfect elevated defensive position, surveillance and shooting lanes. Maybe it's a little far fetched from reality, but I never dreamed it would come true. Now I've got the opportunity to live my own fantasy, so why not?  Here is a welcome sign I have posted (among others) at the chained entrance of the property. It is 197-3/4 meters (approximately ;D) from the middle of the rock outcropping and in plain view from the homesite. That is dead zero for all the :06's and 1-1/2" low hold for the .378 Weatherby Mag. The visitors always get a kick out of my humorous signs. This sign does not apply to my friends who, of course, are never out of range.  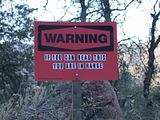 Rob- |
|
biggkidd
CTW Expert
 A World Away!!!
Posts: 226
|
Post by biggkidd on Feb 6, 2008 13:04:27 GMT -5
Rob, Every time I see that sign I want to go & make one or two. ;D KIDD  |
|
3RRL
Administrator  Huge Kama
Posts: 2,027 
|
Post by 3RRL on Feb 6, 2008 14:43:37 GMT -5
Rob, Every time I see that sign I want to go & make one or two. ;D KIDD  Yeah, that's exactly what I did when I first saw one. Makes you think twice... Rob- |
|
3RRL
Administrator  Huge Kama
Posts: 2,027 
|
Post by 3RRL on Feb 6, 2008 14:49:42 GMT -5
I converted the pdf plans to jpg so you can see the drawings. IMO, the drawings don't do justice to what the home will really look like, but here they are. Notice also that the large rock outcropping is not drawn into these plans. The 1st floor plan will be at the same height as the top of the rock outcropping. The living room will face West, looking over the entire valley. Front, Rear and Side Elevations. 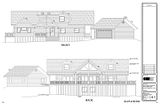 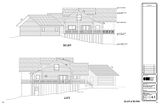 These are the floor plans. 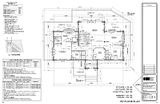 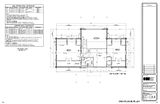 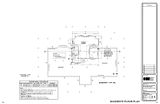 |
|
3RRL
Administrator  Huge Kama
Posts: 2,027 
|
Post by 3RRL on Feb 6, 2008 14:58:20 GMT -5
|
|