3RRL
Administrator  Huge Kama
Posts: 2,027 
|
Post by 3RRL on Feb 6, 2008 18:22:31 GMT -5
Remember, I had about 3 minutes on this thing so I was pretty careful. I decide to take another route instead of felling that Oak right then. Actually, there was only one limb in the way which I got into the Kama fel bucket and cut off to reduce future problems. Anyway, I backed out and went around the homesite circle. I worked my way between the barn slab and the well site and finally got into position to put it down. 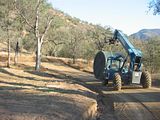 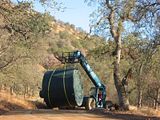 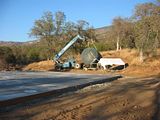 |
|
3RRL
Administrator  Huge Kama
Posts: 2,027 
|
Post by 3RRL on Feb 6, 2008 18:23:15 GMT -5
Here's how I did that. 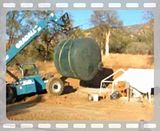 |
|
3RRL
Administrator  Huge Kama
Posts: 2,027 
|
Post by 3RRL on Feb 6, 2008 18:24:52 GMT -5
Once I managed the tank down, I had to reposition the straps so they were on the top end of the tank. This was a tricky operation. I needed to tilt the tank upright very slowly with the Gradall until it would right itself. The tank is super heavy too, like about 800 lbs. My plan was to use 2 x 4 planks place all around the concrete pad. So when I tilted the tank up, it could stand up but not necessarily right on the pad. I got lucky and when I tilted it, it gently slammed down but standing upright. I would use the 2 x 4's and leverage to get it centered. 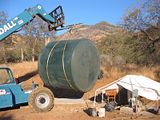 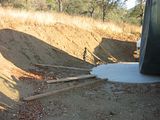 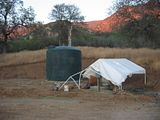 Well, we were very lucky no one got hurt. I was especially careful not to have anyone around or near the Gradall when I was moving or tilting the tank...only myself. That thing is really nice and powerful. After we got the tank upright, we had to twist it on the pad so the outlets and top door were in the right position. So what I did was use the straps around the diameter of the tank loose. Then I put three 2 x 4 planks in the strap equally spaced and started twisting them to tighten up the strap. When they were all tight, I again used leverage, with the 3 of us using the 2 x 4's pushing them into the ground at the same time. We were able to twist the massive tank exactly in the center of the slab and also with the openings facing the right directions. Loretta took several videos of the me in the Gradall moving the tank around, but I figured LOL ... you had already seen what you needed to without cringing too much. Hope you enjoyed THAT story as much as I did. Rob- |
|
3RRL
Administrator  Huge Kama
Posts: 2,027 
|
Post by 3RRL on Feb 6, 2008 18:26:54 GMT -5
I hope they don't mind me using the Gadall. I did not screw it up luckily. At first I was planning on dragging that thing all around with the Kama to get it to the spot and then upright it. You know, use what you got. Where there's a will there's way, etc. I have learned a lot from you guys and others too. These forums are great! I find there are things you just got to do regardless. You know, make do with what you got and figure it out. Working alone like that up there can get me pretty weary, but I keep going. It's a lot of fun and the feeling of accomplishment is priceless. There's still a lot to do as far as brush clearing. But now that I have my Blazer and trailer up there, moving rocks for road repairs and driving up and down that steep hillside to get that brush will be a breeze. My cousin will be out this week and we're going up there. He doesn't know it, but I bought him a bunch of work clothes so he can help me. I told him they were "cowboy clothes" since he was gonna be on my ranch. Little does he know.  |
|
3RRL
Administrator  Huge Kama
Posts: 2,027 
|
Post by 3RRL on Feb 6, 2008 18:29:06 GMT -5
I went back up with Loretta and my cousin Adrian from Holland. He had never been to the property but follows this thread and updates Loretta sends to the Holland relatives. He was pretty amazed at the size and diversity of the property... to see it in person. They just don't have anything like that in Holland. He just loved the progress on the log home too. We were fortunate to see several bucks as we drove up and later more bear tracks on the roads and trails. It blew his mind when it all settled in. As we drove up on Buckhorn, the only paved street that leads up to our property, we could see the log home taking shape behind the rock formation. In the past, the rocks just blended in with the background, but now with the log home looming above the rocks, you can really see it coming in. Here are some more pictures. They now have the entire first floor laid and even put in the base of the second floor. The second photo is making the turn from the drive (on top) which shows the progress. You have seen that same view as the house is growing. But for a change, we walked around the rocks and down the hillside a bit to take these photos. There was nothing to see from this view before since it was all hidden by that rock bluff. Now that the log home is rising, you can start to see it from down there. It looks pretty cool from this perspective. I imagine when the second floor gets laid, it will be even more dramatic. And with the roof on, even more so. 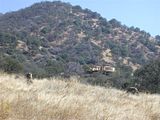 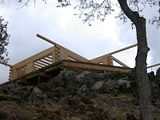 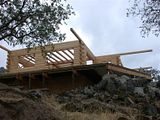 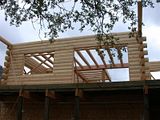 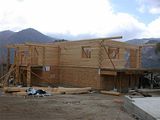 |
|
3RRL
Administrator  Huge Kama
Posts: 2,027 
|
Post by 3RRL on Feb 6, 2008 18:32:23 GMT -5
|
|
3RRL
Administrator  Huge Kama
Posts: 2,027 
|
Post by 3RRL on Feb 6, 2008 18:34:56 GMT -5
|
|
3RRL
Administrator  Huge Kama
Posts: 2,027 
|
Post by 3RRL on Feb 6, 2008 18:36:43 GMT -5
Yes indeed I am quite impressed with their workmanship, considering I am a tool maker and they made this comment....
"the worst customer we ever had was a tool maker" hahaha. So I try my best to keep it low key and not roll my eyes when I see they missed something by a 1/4".
What looks like paint is just a sealer they put down for while they are working on that surface. Knowing the rainy season is coming up, I thought that was good of them to do. However, now they are telling me that in two weeks, they might be starting to put the roof on ... so around the end of October. That would be really great.
They also said they would have a couple more guys available to frame the garage and put the log siding package on it. The log siding will look exactly like the log home except it is not a complete log. I wish I'd taken some photos of it.
Then in a week or two, when the metal barn package arrives, they will have a dedicated crew to put that up. Things should look a lot different around the first of December, I imagine.
What did you think of that photo driving up Buckhorn, as we approached our entrance to the property? Do you remember what that looked like before? Now you can see part of the log home from far away.
Rob-
|
|
3RRL
Administrator  Huge Kama
Posts: 2,027 
|
Post by 3RRL on Feb 6, 2008 18:41:43 GMT -5
For the first time, I was able to get a glimpse of South Camp from up there. You can barely see the tent canopies, but you can see them. The views are outstanding. I'm thankful to have found the right spot on the property. To be honest, I found that spot the first time we hiked on the property. Spent all day looking for a better one, but realized it would be a perfect place for the home. That was the MAIN reason we bought that parcel instead of the 32 acres next to it. Here is a photo of the homesite long before it was the actual homesite. You can see the rocks behind me that the home snuggles up against now. This was 3-½ years ago. I had to get rid of some lethal residents first. If you look to the right on that rock beside me, there is another diamondback. 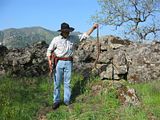 Those rocks don't look like much from the plateau side (up top). But from the front, they are quite different. Here is a photo of my cuz Adrian in the front, below the house, and the two of us taking in the view from there. They are a LOT bigger than you can tell from the other photos. 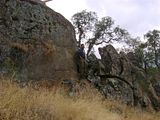 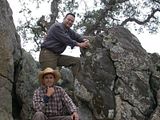 Yeah they are bigger than you think. There are some boulders that are bigger than those near the ravine what we call "the 50 foot cliffs". That may sound funny, but we named a lot of the geographical features and trails so when we talk to each other on the radios, we know where we are. You get a hundred or so yards apart and you can't see each other anymore. You can see by the size of rock out cropping that is is pretty massive. You had mentioned before about having a geo tech, hydrologist etc before putting the house there. You can see now that the house is actually not on the rocks, which are about 30' wide. It is set back of them on the plateau about 20' behind them. Our 10' deck barely comes out to the start of the rocks, and that is on one corner only. There was no excavating done into a hillside like you see so many homes here in CA. But I am surprised that no one has made any comments about the stability of the homesite...not the builders or county inspectors etc? Perhaps that it is sitting behind the rocks (a good ways on the plateau) and not on the cliff itself makes a difference? Or maybe it's that they don't care?  Of course some of the deck supports do go onto the rocks themselves. They were cemented into the rocks and some of the smaller rocks are now cemented together. |
|
3RRL
Administrator  Huge Kama
Posts: 2,027 
|
Post by 3RRL on Feb 6, 2008 18:44:46 GMT -5
|
|
3RRL
Administrator  Huge Kama
Posts: 2,027 
|
Post by 3RRL on Feb 6, 2008 18:46:32 GMT -5
|
|
3RRL
Administrator  Huge Kama
Posts: 2,027 
|
Post by 3RRL on Feb 6, 2008 18:48:22 GMT -5
|
|
3RRL
Administrator  Huge Kama
Posts: 2,027 
|
Post by 3RRL on Feb 6, 2008 18:50:13 GMT -5
|
|
3RRL
Administrator  Huge Kama
Posts: 2,027 
|
Post by 3RRL on Feb 6, 2008 18:52:17 GMT -5
One of the things we discussed was where to put the garage in relation to the home. We didn't want it too close since it is tall, but not too far either. The connecting breezeway will give us shelter going to and from the garage. The ramp will need to have an incline or a couple steps on it to meet the deck on the home. We were hoping it would be even (level) with the first floor, but that would mean building up the garage pad even more. A couple steps won't hurt. Regarding the road, I can put down just about anything I want on it. It was designed and permitted as a dirt road. That meant there can't be any portion of it exceeding 15% slope. Anything steeper than that would require a hard surface such as blacktop or concrete. There are obvious advantages of a paved road, and without a doubt it would be a better road. But we prefer the dirt road for 2 reasons. It was ten times cheaper to install considering the length of it (over 1/2 mile and more). In any case, it sure gives us that feeling of a rural property which we wanted. Additional benefits are I get to cut gutters and repair wash outs. I guess they are not considered benefits, huh? But for me, it gives me something to do with the tractor. I can maintain it with my tractor, guaranteeing seat time.  However, if I wanted to re-route it a little, I could. Maybe some day if we get tired of maintaining it we will get it surfaced? But for now, we enjoy it as dirt and it is in pretty darn good shape ... smooth, hard and easy on the eyes. The next big steps will probably be the roof going on and then the barn construction. I am excited about that. When they start with the plumbing and electrical, I will be sure to take some detail photos. Right now, they have "pocketed" out the logs where receptacles go and drilled a 1" holes down through the logs for the wiring. I have no clue about the plumbing yet, so I'm just as interested as you are. Speaking of plumbing, I am also interested in the manner they will tie the well, water tank and all those lines together to get water to the barn and house. Then there's the fire hydrant too and the septic tank system. I'm not sure, but I think my deal is that I have to dig all the trenches for the pipes (not septic). So I better get my gauge wheel project finished so I can get with the digging. There is still a lot of brush clearing to do also on that front slope. That is a small pain, but has to be done soon. Rob- |
|
3RRL
Administrator  Huge Kama
Posts: 2,027 
|
Post by 3RRL on Feb 6, 2008 18:54:59 GMT -5
|
|