3RRL
Administrator  Huge Kama
Posts: 2,027 
|
Post by 3RRL on Feb 18, 2008 14:49:32 GMT -5
I got my new Air/Spring seat last year. Bought it from Agri-Supply on special email sale for $69.99. It's pretty nice especially for the price. A lot nicer than the stock Kama 554 seat. Here's a side shot and some photos if any one is interested.  Notice the nice thick padding and the separated back and arm rests. I wanted a separated back because with all the pivoting I do inside the seat to look over my shoulder. I was getting a sore spot on the back of my spine where my belt loops are from the thinly padded stock seat which is a bucket seat type like the one Ken shows in his thread. Now there is a gap there, and the back height rest is adjustable up or down. 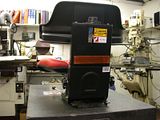 It also has a reflector on the back and an adjustment for body weight, which is tied in with a little air shock for a super comfortable ride. At least I think it's an air shock....sure looks like one to me. The weight range on the back says it's from 110 to 264 lbs. Says it's made in Turkey by Deger? 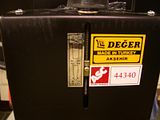 |
|
3RRL
Administrator  Huge Kama
Posts: 2,027 
|
Post by 3RRL on Feb 18, 2008 14:59:40 GMT -5
Here is the little air cylinder which is tied in to the springs and weight adjustment for the spring seat/air cushion action. A new feature not on the original. It is pretty comfy. 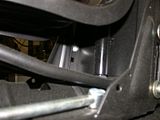 And a view from the top of the seat showing the springs behind the back rest. The rod in the center belongs to the little air shock and whole assembly is tied together. 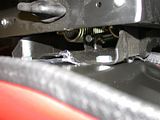 It also has a sliding base for fore and aft movement engaged by that chrome lever. The stock seat was adjustable too ... but by removing big bolts. This is another new feature and a lot easier for me. 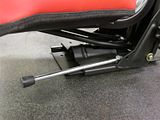 All in all a pretty good deal for the sale price. Packed with big money features but priced right for an upgrade. My brand new red retractable seat belt will go good with the red seat too. |
|
3RRL
Administrator  Huge Kama
Posts: 2,027 
|
Post by 3RRL on Feb 18, 2008 15:07:35 GMT -5
I met Ken and he gave me his old tractor seat. What a nice guy. It has a swivel base on it and I may swap it with the new seat base or make some kind of combo out of it. I mentioned I'd like to have a pivoting seat for my box blade work. So this will surely make it easier to do if I elect to have it pivot. The pivot base is more elevated too, so it's got everything I wanted. Thanks Ken, you are a swell guy. Anyway, this first photo is of my old stock Kama seat. The back rest pivoted forward to allow easy access to the hydraulic box and gets out of the way when hooking up the hydraulics for my 3pt equipment. This seat did not cover the hydraulic breather cap, hence no need for the sliding seat like on the smaller Jinma. I think that's why the original was bolted in place and had no slider. 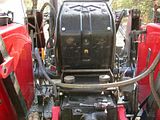 I brought the seat Ken gave me thinking I could do all the mods I wanted at camp. His seat is a lot better than my original Kama seat ... not the padding or shape, but it has a pivot and a slider bar on it. The pivot has a big ø3/4" pin going through it to lock it in the forward position. So his seat was pretty cool as is. 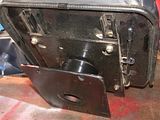 If that came on my Kama as stock, I probably would not have done this mod. My plan was to steal the pivot base and mount it to my new Deger seat, since the new seat has a really slick sliding attachment on it. At the time I did this mod, Tim Wales suggested he wanted a seat that rotated only 20° in either direction, so I kept that in mind too. Rob- |
|
3RRL
Administrator  Huge Kama
Posts: 2,027 
|
Post by 3RRL on Feb 18, 2008 15:15:00 GMT -5
When I got to camp, I took the pivot base off Ken's seat and took the slider base off the Deger seat, and of course, none of the holes lined up. But I was able to drill one plate to match the other in my camp site "garage shop". 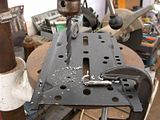 Then I put the seat onto the Kama for fitting and placement purposes. BTW, the new Deger seat has a really good air shock suspension on it. When you sit in it, the seat and back ... the whole thing moves up and down comfortably ... like those cushioned air seats in big rigs. The height is adjustable too via two knobs on the back sides. And the slider forward/aft bar works slick and smooth. It is way better than I thought! What a deal! Here it is from the back view. 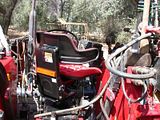 Rob- |
|
3RRL
Administrator  Huge Kama
Posts: 2,027 
|
Post by 3RRL on Feb 18, 2008 15:20:02 GMT -5
Here are a couple more photos from the front. Remember, at this point I only have it sitting on the platform to test out different positions. This one is with it pivoted towards my rear remote valve, just like Tim was talking about. I'm thinking of making it partially pivot and then also able to lock straight forward. I will need to have some sort of stop when in pivot mode, and then a locking position via pin or lever. 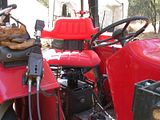 When I got in the tractor, I immediately noticed how much higher the seat was. A great view up front and back. But it had to be too close to the steering wheel in order to reach the pedals comfortably. I have not operated the tractor with it yet, but you can see the armrest do not interfere or get in the way of operating the remote valve. As a matter of fact, they are very comfortable. Here is a shot of it pointing straight forward. Looks pretty good though. 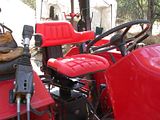 Rob- |
|
3RRL
Administrator  Huge Kama
Posts: 2,027 
|
Post by 3RRL on Feb 18, 2008 15:25:51 GMT -5
So there were a couple of things to think about in choosing the position and making it easier to get in and out of the tractor. I could pivot the seat towards me when getting in, but then I had a problem swinging my big feet over/around all the levers.
I ended up bringing the pivot mount and base home with me to shorten it up a bit. Maybe about 3" is all. After all, the seat was already in it's lowest position. The seat will adjust upwards another 2" at least, so I can play with it when I get it back to the property.
Another thing is that it was in the middle of the slide range. So if I set it properly, I could always slide the seat back to get out and in, then slide it to the work position and up. This allows me to keep some of the extra height I wanted for better views too. My new retractable seat belt will not need to be moved either, since it is bolted to the hydraulic box in the right spot already.
I thought you guys would want to know about this seat, because the price was so low compared to the $300 ones I was eyeballing. They were way out of my price range.
Anyway, this one has great features and is super comfortable.
When I'm done, it will do everything I want including full or limited pivot ability in addition to the adjustable height, adjustable air shock action, adjustable forward and aft.
Rob-
|
|
3RRL
Administrator  Huge Kama
Posts: 2,027 
|
Post by 3RRL on Feb 18, 2008 16:07:07 GMT -5
I'm working on the rotating part of the seat now. As most things go, it is not as easy as it should be. There's always something that pops up to make your day. I pried the pivoting base apart to shorten it up. It "popped" apart and a bunch of ball bearings spilled out. Seems like they used some kind of Chinese goop to seal it or keep it together? The races were frozen in there. I tried a gear puller to get the bearings out, still thinking I can save them and re-use. I couldn't budge the races so I decided to cut it off. Might be able to pound it or press it out that way? 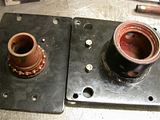 Another weird clamping set up in order to do the sawing. But it sawed perfectly square. I will use this part and maybe weld it to the Gerber sliding base, eliminating the plate with the tube welded on it altogether. Then I will do the same for the other part. If I can't save the roller bearing, I'll get a new one and fit it myself. It may not be worth saving after all? 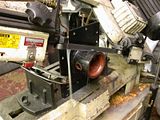 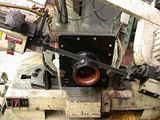 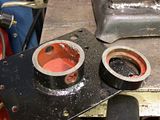 Rob- |
|
3RRL
Administrator  Huge Kama
Posts: 2,027 
|
Post by 3RRL on Feb 18, 2008 16:16:25 GMT -5
First, I cut off the tall swivel as you saw above. Then I welded that part right to the bottom of the Deger seat mount as you see in the upper part of the photo. I also wanted to limit the pivot to about 40° each way and needed to make 2 stops on bottom plate. I also wanted to lock the seat into front position, so I made a screw in lock. The screw will catch the other half. 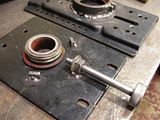 Then on the Deger plate I made the other half of the stop. When the Deger plate is placed on top of the bottom plate, those two pieces will hit the stops on the bottom plate when swiveled sideways. They are also spread apart so that the screw goes in between the stop and will securely hold the seat facing frontwards. 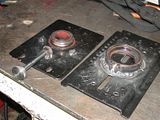 |
|
3RRL
Administrator  Huge Kama
Posts: 2,027 
|
Post by 3RRL on Feb 18, 2008 16:19:47 GMT -5
I also made a tapped receptacle welded to the Deger plate and a large washer with a socket head cap screw in it that will hold the two pieces together once the bearings are put in place. The bearing kind of "snap" together anyway, but I wanted a positive retainer to keep the seat together when I jam on the brakes just before going over the edge of a cliff or something. 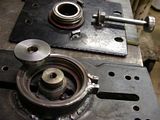 After all that, I had to make my side brackets which will fit the ones on the Kama. I will weld them onto the bottom plate after measuring the width of the Kama brackets. I have plenty of adjustment available here. I had intended to make them so they go in between the Kama brackets, but I made them to go the over them instead, that is why they are so tall. That also gives me the latitude to use the upper or lower row of screw holes on the Kama without hitting the top of the hydraulic box. 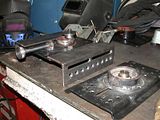 |
|
3RRL
Administrator  Huge Kama
Posts: 2,027 
|
Post by 3RRL on Feb 18, 2008 16:23:24 GMT -5
The Deger plate is upside down in those other photos, of course. When the bearings are in it, it will sit on top of the bottom plate like this. Here it is locked forward.  The bottom plate will sit anywhere from 1/2" to 1-1/2" above the hydraulic box, depending which row I use. Here it is in the unlocked position, where it can swivel from side to side like Tim was talking about doing except I have about 40° pivot to each side from straight ahead.  Now the seat will do everything I want, being able to pivot side to side, lock in a forward position, scoot front and back and also up and down. Lots of adjustments built into this arrangement. I think it would be good for fat or skinny guys, tall or short. I will paint the parts after I weld the side brackets on and after I press the bearings back together at camp. |
|
3RRL
Administrator  Huge Kama
Posts: 2,027 
|
Post by 3RRL on Feb 18, 2008 16:28:16 GMT -5
I went to camp with all this stuff to finish up. First thing was to fit the side brackets to the hydraulic box. I had to make some cut-outs for it to fit. Then bolt them on and put the base on top of that so I could tack weld the the two together. Then I took it all off to finish welding and paint it. The base with the round part on it is what came off Ken's seat. This is what the base and side brackets look like now. The Deger seat base will go on top of that.  Next was to assemble and grease the ball bearings for the pivot feature. I bolted the top and bottom together with the big retainer washer I made so it would not come apart. The retainer has enough clearance to allow pivoting. then I put that assembly on the tractor. Here it is with the Deger seat base on it now.  |
|
3RRL
Administrator  Huge Kama
Posts: 2,027 
|
Post by 3RRL on Feb 18, 2008 16:33:02 GMT -5
The Deger seat base above is what goes into the slots on the seat itself, which allows the sliding back and forth adjustment. In fitting the seat, I wanted to make sure there is enough room in either direction. It is now done and on the tractor. The view is great, the seat is comfortable and I am happy. A good mod to the tractor. Here it is finished and with my fat ass in it.  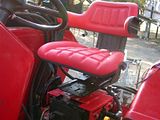  Thanks for looking. Rob- |
|
FlyHiFlyLo
Administrator  2007 Jinma 554LE
Posts: 425
|
Post by FlyHiFlyLo on Feb 18, 2008 18:45:44 GMT -5
The side bolsters on that seat really make it much safer... Do they have yellow?  |
|
3RRL
Administrator  Huge Kama
Posts: 2,027 
|
Post by 3RRL on Feb 18, 2008 18:54:57 GMT -5
The side bolsters on that seat really make it much safer... Do they have yellow?  Yeah they have yellow and all kinds of other colors too. Here's a link to a yellow one with current pricing. I see they are 84 bucks now...big deal. Agri-Supply Universal Tractor Seat |
|
FlyHiFlyLo
Administrator  2007 Jinma 554LE
Posts: 425
|
Post by FlyHiFlyLo on Feb 18, 2008 19:11:41 GMT -5
Cool, maybe I should get one for the Backhoe too???  |
|