3RRL
Administrator  Huge Kama
Posts: 2,027 
|
Post by 3RRL on Dec 12, 2008 21:56:43 GMT -5
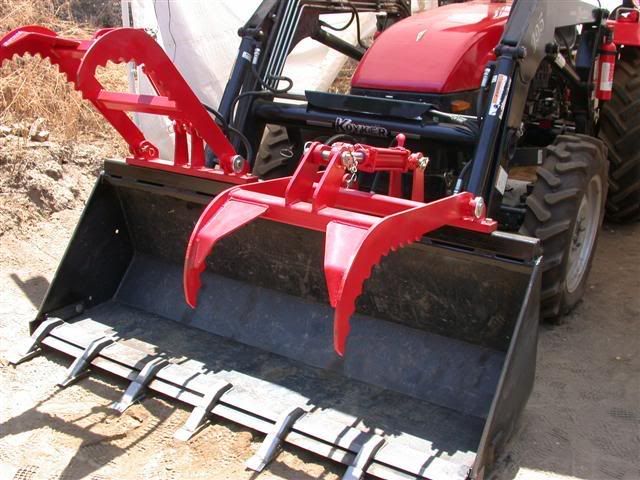
Right after I re-set the valve lash on my 2005 Kama 554 I started doing some FEL work in order to get to a pile of logs that I wanted to gather for firewood. Wouldn't you know it, I pressed the clutch pedal in and felt it give way and the tractor kept going. I had to yank it out of gear to stop. I have 580 hours on the clock now but as you know, on my model the hours are related to engine rpm. I rarely run my engine at rated rpm (2400rpm) but more at 1700 to 1800rpm because that's normally plenty of horse power and the peak torque on my engine is made around 1600rpm or so. That means I really have more like a thousand working hours on the tractor. Maybe more considering the dash didn't work for at least 50 hours when I first got the tractor. I called Chip at Artrac today and he confirmed how the clock runs on my machine. I also asked him what to do and he told me how to go about checking it out. This is gonna be major for me, since I work alone. The first thing I did was remove the bucket off the loader arms, and then removed the loader from the tractor. This is a Koyker 195 FEL. Once I got the tractor into the shop, I didn't want to get stuck having to move the loader and bucket if I had to. I figure I can move the FEL arms by themselves if I had to ... for more room to work in there.   Then I moved the tractor into the barn to remove the loader. I had never had it off before, and realized it would have been easier to do with the bucket on ... but I managed. First was to install the "storage legs" and next was to remove the large pins. Then you pop the loader off using the lift cylinders and finally disconnect the hoses. 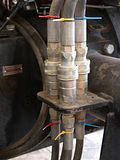 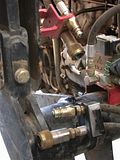 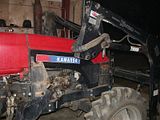 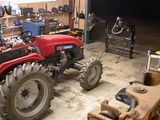 |
|
3RRL
Administrator  Huge Kama
Posts: 2,027 
|
Post by 3RRL on Dec 12, 2008 22:49:45 GMT -5
Once you get the FEL off, you can then remove the tower on the right side of the tractor to expose the inspection window for the clutch. In order to adjust the clutch, you would have to do this anyway. I had never done this nor adjusted the clutch since I purchased the tractor 3-1/2 years ago, so I recommend you consider at least checking the clutch, to be sure it's adjusted correctly. 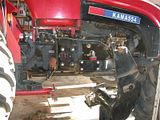 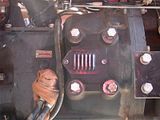 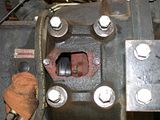 Upon looking inside there, I was shocked to see that the clutch "fingers" or release levers (3 of them) were worn completely off. So the clutch pedal and throw out bearing were pushing against nothing, which is why the tractor kept going when the fingers finally let go...the clutch never disengaged. I tried to get some close ups of the inside through that inspection cover. Below, you can see the adjusting bolt and lock washer and spring in the first photo. The second one shows scoring on the OD of the throw out bearing. Both the second and third photos show the worn off fingers. They are in between the clutch and throw out bearing if you look closely. 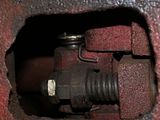 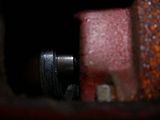 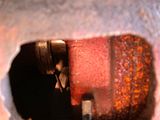 Of course that is not good news so I called Chip again and he confirmed that I have to split the tractor to fix it. The actual clutch(s) might be OK since it was not slipping. But he said to check it and the spring washers (Bellville type) and also check to see if there was a bluish coloration on the pressure plate(s), especially the main drive plate but the PTO one also. He gave me prices for individual parts and also for a complete clutch pack which includes all the components and the throw out bearing. I'll call him after I get the tractor split. But first I had to mark every single connection before removing them for the split. That is all hydraulic lines including power steering, all electrical, fuel lines, misc lines and cables etc....everything that needs to be disconnected so the tractor will split. He also recommended to "wedge" the front axle so the engine doesn't tip to the side after it's split at the bell housing. Anyway, no use crying over spilt milk, so I'll get on with it tomorrow. Rob- 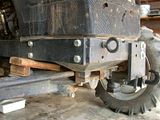 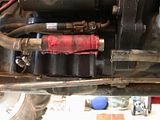 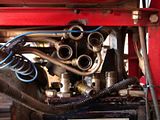 |
|
GuglioLS
Administrator  Jinma354 LE
Posts: 1,276
|
Post by GuglioLS on Dec 13, 2008 0:17:52 GMT -5
Crap
Sorry to see that happen Rob, what a big time bummer. Having to split a tractor is one of my worst nightmares. Got any theories as to how that happened? If I were to guess most likely there was no gap between the throwout bearing and fork fingers causing the bearing to constantly contact the fingers which seizes up the bearing then wears out the fingers. Constantly riding the clutch will do the same thing. So it's not a design or material flaw but more related to adjustment and operator habits.
I see your waisting no time starting to split it. At least the working conditions are more civilized inside the new shop making it more bearable. I wish I could be there to help.
I wonder it be a good idea if Brad, Parry and CantinJack inspect the gap between the throwout bearing and fingers on their tractors before something like this happens to them? Equally important is the gap be exactly equal between all three fingers.
Knowing you, you will get it split, repaired and back together in record time. With that many hours, perhaps it worth replacing the clutch disk as long as it's split? Once properly repaired and adjusted, with conservative use, a clutch should last many decades and thousands of hours. My old ford tractor has at least 4000 hours and 55 years of service on the original clutch so I know it's possible to get a generation out of one.
Take lots of pictures and be careful my friend!
Larry
|
|
|
|
Post by Rich Waugh on Dec 13, 2008 9:47:38 GMT -5
Best of luck with the job, Rob. If anyone can do it, you can, I know. Based on what I've read about your other tractor work, I'd give pretty good odds that you'll come up with a better way to do it than what is customary, and make other improvements to the tractor while you're at it.
I'll be interested to watch your progress on this since I've never split a tractor. Not something I would want to do, but if I can learn from your experiences I'll at least have some background if ever I should find myself in a similar position.
All the stuff you've done to that tractor before has been done outside, working on the ground, right? Do you think that working inside a nice clean garage will throw you off your game? (grin)
Rich
|
|
3RRL
Administrator  Huge Kama
Posts: 2,027 
|
Post by 3RRL on Dec 13, 2008 11:24:59 GMT -5
Hi guys,
Yeah, it's something I was definitely not looking forward to. I never did adjust nor check the clutch gaps so that's a possibility. I rarely ride the clutch, I'm pretty aware of that. But there was another theory posted on another board about the possibility of a branch getting stuck in the linkage. It was explained like a "another foot on the clutch pedal" if not discovered. Indeed I've found branches stuck all over the bottom of my tractor and inside the different linkages and even hoses. I'm thinking it was just not checked and adjusted right, but it was an interesting observation.
Like I said before, once I get it split I'll asses the damages and call Chip for all the parts.
Working in the new shop will sure be nice, it's just pouring outside right now. I'll go out there and start taking off the connections when it warms up a little. Don't know how fast I'll be going since I'm documenting and writing notes for every step. This is all new to me.
Rob-
|
|
|
|
Post by stumppuller on Dec 13, 2008 13:00:52 GMT -5
Rob - You should have your own syndicated TV series, sort of a cross between "This Old House" & that L. A. Chopper show. You could cover your exploits of developing your land and comming up with various ingenious tractor fixes. The flow of problems that come your way would be the glue that holds the story line together. If you ran out of problems, I could mysteriously disconnect something or other without you knowing it & you would have to figure it out & fix it. Sounds like a winner.... a real-life reality show.
We could visit the factories in China to see how they are made & how the local people use the equipment; explore the history of their tractor industry. We could look at the oils they use and accuse them of putting "Rat Mucus" in their tractors for oil & see what their response is. (kind of like the last episode of Boston Legal, where Denny confronts the Chinese with paint ball guns. I know, I'm getting kind of crazy here)
The show could also visit with other like-minded folks on this board showing what their exploits are in different parts of the world - Canada, Argentina, Sweden, Alabama.
Time to go take my meds. - Bruce
|
|
FlyHiFlyLo
Administrator  2007 Jinma 554LE
Posts: 425
|
Post by FlyHiFlyLo on Dec 13, 2008 16:59:56 GMT -5
6 months ago you would have been doing this in the Mud!
Shop is sweet!
|
|
3RRL
Administrator  Huge Kama
Posts: 2,027 
|
Post by 3RRL on Dec 13, 2008 22:25:19 GMT -5
Ha, you guys are too much!
Bruce, here I am sweating it now you want to make a reality show about it. shees.
With all the repairs I have, some being the same, they'd think they were watching re-runs. ;D I'll tell you what, this Chinese tractor stuff is a fun ride for sure!
Yeah Scott, you are right on.
Last major repair I did was in the snow. Larry picked a fine time to visit about then. I think Rich mentioned the same thing about working outdoors in his post. The shop is really sweet. I just have to finish putting it all together if I can keep from breaking my stuff for a day or two. Then it jumps to the head of the list of things to do.
Rob-
|
|
3RRL
Administrator  Huge Kama
Posts: 2,027 
|
Post by 3RRL on Dec 13, 2008 23:23:40 GMT -5
Well, you guys are very supportive and I appreciate the help. No way could I have split the tractor at my camp, especially now that it's pouring here and forecast is snow. My blocks would have sunk into the mud and I doubt I could've moved either side away from each other. Let alone get it back together. I told you I was going to "go for it" today. But first, I made a detailed list of everything I could think of that needed to be disconnected so it could go one way or the other. Besides the hydraulic lines and fel brackets, there are a bunch of other electrical and linkage connections that need to come apart. I had to asses which was the easier disconnect. Besides the notes, I took the time to label just about everything on the tractor itself, even the obvious ones. I used yellow tape as a marker to write on so a connection could easily be found later when re-assembling. Here are a few pics of that, (you asked Larry) but there were way more than shown here. 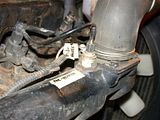 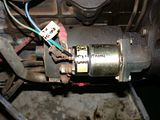 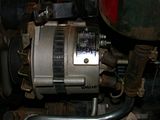 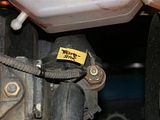 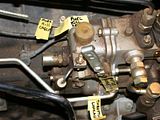 |
|
3RRL
Administrator  Huge Kama
Posts: 2,027 
|
Post by 3RRL on Dec 13, 2008 23:50:23 GMT -5
One of the connections is the return to the fuel tank coming from the fuel injectors. I was going to disconnect it but realized I might start having diesel leak all over. I had to drain my tank to get it below the level. Just before I did that I cleaned the sediment bowl and screen and also made a new gasket for it. 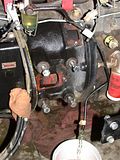 I forgot to mention I also had to drain a lot of the hydraulic fluid when I disconnected the hydraulic lines and finally drain the middle box because the 4wd shaft needed to be disconnected. Speaking about that, I had a heck of a time trying to remove the front drive shaft. I loosened both front and rear bolts and then tried to slide the protective tube together. Here's what it looks like underneath. 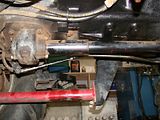 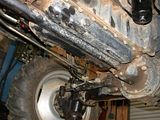 I could only slide the front towards the rear a little bit so I worked on the rear, sliding it to the front. This finally exposed the splined shaft coupling bushing. I found the roll pin and knocked it out and slid the coupling farther onto the shaft to disconnect the front shaft from the rear drive unit. 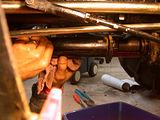 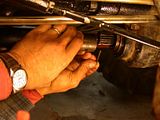 There's supposed to be a "spacer" between the shafts and mine did not have one there, but there was a little space about 1/4" or so. There was not enough play in the front splined connection to allow enough room to slide the shaft off the front drive. I couldn't get it away enough from the rear drive unit. I didn't want to force it down and bend or break it, so I left it on as long as it was now disconnected from the rear half. It will slide and stay with the front half for the split. I will remove it completely later to figure it out. But what's the trick to removing it and then re-assembling it? I need to know that from you guys. |
|
3RRL
Administrator  Huge Kama
Posts: 2,027 
|
Post by 3RRL on Dec 14, 2008 0:15:13 GMT -5
So far so good and I was pretty sure I had everything disconnected for the split. Some things would remain on the front half and some on the rear half. I'd spent about 4 or 5 hours screwing around and worrying about that so I double and triple checked. I cut heavy wood blocks to size to support the two halves and position the two hydraulic car jacks I had. I will use the wood as a safety factor and the jacks to roll the two halves apart. Then I got in there and removed all the bolts around the bell housing. Loretta came to help roll the tractor apart at this point. We decided to roll the rear end away from the front. We blocked the front wheels and split the tractor in half!!! 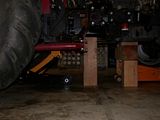 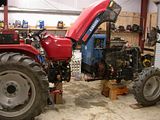 Whew, what relief that was. We adjusted both jacks to take the pressure off the dowel pins and carefully rolled the rear away from the front a little at a time. Each time moving the safety blocks after a small move. It split nicely. After getting the two halves a good distance apart, I was able to take these shots. In the rear half is the throw out bearing. It slides back and forth but was a little "sticky" for my linking. There is scoring on the face and the OD of it. On the front half is the mighty clutch attached to the flywheel. It is Huge. You can see the 3 "fingers" completely worn off at the tips. 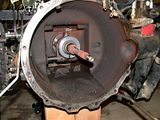 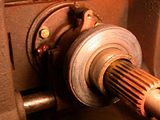 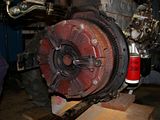 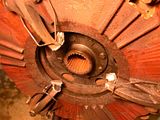 This is where I stopped for the day. I had about 6 or 7 hours in getting this part done. A lot of it was marking, labeling, disconnecting, and worrying, but a lot of it was struggling with that front drive shaft. The actual split was the easiest part! We will be driving back down South tomorrow so I won't get any further until we come back on Wednesday. At that time I'll do further dis-assembly of the clutch and throw out bearing and components. After I take photos and post them, I will determine what needs to be replaced. Any tips and suggestions from you guys are welcome. Rob- |
|
GuglioLS
Administrator  Jinma354 LE
Posts: 1,276
|
Post by GuglioLS on Dec 14, 2008 9:51:49 GMT -5
Rob,
Amazing getting it split so quickly. Good job marking everything you took off.
I wonder what the deal is with the front drive shaft? After you got it split did you figure that out? Man those fork fingers sure are worn down to nothing. Did you look to see what the condition of the clutch disc's looks like?
Before you take the clutch pack off, maybe a good idea to measure for making or purchasing a clutch pilot bearing alignment tool?
As long as you got it apart, perhaps it be a good idea to replace both the Main and PTO clutch disc's?
Larry
|
|
3RRL
Administrator  Huge Kama
Posts: 2,027 
|
Post by 3RRL on Dec 14, 2008 21:32:39 GMT -5
Rob, Amazing getting it split so quickly. Good job marking everything you took off. I wonder what the deal is with the front drive shaft? After you got it split did you figure that out? Man those fork fingers sure are worn down to nothing. Did you look to see what the condition of the clutch disc's looks like? Before you take the clutch pack off, maybe a good idea to measure for making or purchasing a clutch pilot bearing alignment tool? As long as you got it apart, perhaps it be a good idea to replace both the Main and PTO clutch disc's? Larry Hey Larry, 28° this morning man! Little chilly for me!! Yeah, amazing an old dude like me with only his delicate old wife split that giant Kama in two ... imagine that? I was super careful to mark everything. I took way more time doing that and worrying about it. I found out from a couple other guys like Brad and Greg that the front drive shaft cannot be removed without a) splitting the tractor b) Brad loosened the front axle housing and tilted it enough to get it off. It was suggested to put the 4wd shaft on while putting the tractor back together. What a nightmare that will be trying to line everything while trying to get the tractor back together. What a stupid design!!  I mentioned I just may cut that shaft and make another splined bushing that allows removal and installation while the tractor is together...don't know if I'll have time to do it, but I'm seriously thinking about it. I left the property this morning so I have not removed the clutch or throw out bearing. I haven't inspected anything up close yet. I figure I'll have time next week to make a complete list and call Chip. Then he can advise me on what to order. His place will be closed between Christmas and New Year for the week, so I want to order the replacement parts so he can ship them before he closes. Chip also advised me to make or get a clutch concentric alignment tool. He said he got his from Napa. If I decide to purchase the clutch pack from him, I presume it will include all the clutches, pressure plates and disc springs, the fingers and other springs and whatever bearings I need for both halves. I'll have to verify that with him though. I don't want to be short of a part and have to order it again. Once I get a good look at things next week, I can make up my mind which way to go. Rob- |
|
FlyHiFlyLo
Administrator  2007 Jinma 554LE
Posts: 425
|
Post by FlyHiFlyLo on Dec 14, 2008 22:22:27 GMT -5
Looks like a splitting headache. ;D
Are you going to use your forklift to put it back together?
|
|
3RRL
Administrator  Huge Kama
Posts: 2,027 
|
Post by 3RRL on Dec 15, 2008 11:41:43 GMT -5
Looks like a splitting headache. ;D Are you going to use your forklift to put it back together? Hahaha, splitting headache... Actually, the split itself was the easiest part. I hope I don't have to use the forklift to put it back together. Right now it's blocked up with wood and 2 rolling car hyd car jacks. I think I can roll it back together the same way? rob- |
|


