|
|
Post by bradblazer on May 7, 2009 0:07:28 GMT -5
I finally started on the subframe for my big ol' ARPS 730. I'm making the rails out of 2x4 tube with the back 2/3 beefed up by adding a 2x2 tube to the underside. At the very back I am adding a short piece of 2x2 to the top to mate the rails with some 2x8 tubing that will attach to the hoe mounts. I'm making a quick disconnect at that joint. The idea is to be able to raise the backhoe end to engage a set of hooks that provide alignment so the connection can be pinned. 2x4 tube with existing 3/4" plate on each end:  2x2 tube with existing 1/2" plate. It was a long piece I cut in half. 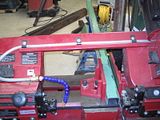 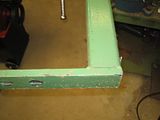 |
|
|
|
Post by bradblazer on May 7, 2009 0:11:02 GMT -5
|
|
|
|
Post by bradblazer on May 7, 2009 0:16:19 GMT -5
|
|
|
|
Post by bradblazer on May 7, 2009 0:18:26 GMT -5
|
|
|
|
Post by bradblazer on May 7, 2009 0:20:36 GMT -5
|
|
|
|
Post by bradblazer on May 7, 2009 0:29:04 GMT -5
Here they are as far as I've gotten so far. The pins are 1" (cat 2 toplink pins) Next I need to fit them to the tractor then I need to make the backhoe attachment points.  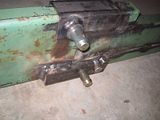 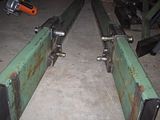 |
|
3RRL
Administrator  Huge Kama
Posts: 2,027 
|
Post by 3RRL on May 7, 2009 12:20:36 GMT -5
Progress looks great Brad.
You're using the right stuff I see. I found out you almost can't make it too heavy duty. Hey, your welds look really good too. I also like that spiffy bandsaw you got. Is that one you got at Homier?
I love your concept of hooks for line up and then pins to secure ... a very simple and excellent attachment. I wish I'd made mine more like that instead of just pins and relying on exact line up. Live and learn ... Yours should be a sturdier connection and yet easier to attach and remove. Good thread and great photos Brad!!
Rob-
|
|
|
|
Post by bradblazer on May 7, 2009 21:48:09 GMT -5
Thanks Rob.
I got that bandsaw from Northern Tool marked with a crazy less than half price. It is a 6x10 gear drive. I think the 7x12's are better saws but it does what I need.
All of the steel is from my pile.
I hope I can weld up the backhoe adapter and maintain a good fit to the quick connects. So far I've been using ful 1" pins for alignment while I weld. The Cat 2 pins allow a clearance fit. The last set of reinforcement collars I welded on around the upper pin holes in 180 degree continuous welds. I had to remove the pins with a sledge. My 12 ton press wouldn't touch it. Re-reamed the holes with 1" bit in a hand drill. Good to go.
|
|
GuglioLS
Administrator  Jinma354 LE
Posts: 1,276
|
Post by GuglioLS on May 7, 2009 21:58:20 GMT -5
Hey Brad, This is the most exciting thing on the forum in a couple of weeks. It's been dead around here, almost like me  Those 7018 stick welds look fantastic, like Rob, I want to make sure taking the opportunity to complement you on the professional craftsmanship. The hook and pin arrangement should work like a charm. Hope to see more progress as time allows you. What is the plan connecting it at the top link / TPH box / ROPS? Hope you don't ming me taking the liberty re-arranging all your photos. I was getting carpel tunnel syndrome scrolling thorough the pics  ;D Larry |
|
3RRL
Administrator  Huge Kama
Posts: 2,027 
|
Post by 3RRL on May 7, 2009 22:58:23 GMT -5
Larry, thanks for fixing up all Brad's photos like that. Hey, I miss you dude!
Brad, one thing I learned a long time ago when using a pin for welding line up is tack, tack and tack before running the entire bead. You can use the hammer to "loosen" the way the pin fits by banging the it and the tacks around until the pin slips through everything. Then when you run the remaining beads it should move only a tiny bit ... at least it will be closer to a slip fit that way and sometimes comes out perfect. One inch reamers are not cheap !!
Your good buddy,
Rob-
|
|
quikduk
CTW Life Member
   Dog House
Posts: 552
|
Post by quikduk on May 8, 2009 16:04:59 GMT -5
Since I haven't been here for a while, I will ask the newbie (future) backhoe guy question. I vaguely understand how our tractors can hold the subframe up at the FEL with the included brackets but how is Brad's setup going to make it easier to line up and how does it all work? Can someone post a sketch of how it all goes together. I like the beefiness and welding job but re: how all the tubes, pins and sorted brackets assemble into a whole...  If I remember, Rob's has this massive tube subframe thing with rear struts and the T&T cylinders to cinch it all up. It looks cool anyway.  ;D Other than these stupid questions, Hi to everyone out in CTW-land... ;D ;D |
|
|
|
Post by bradblazer on May 8, 2009 22:52:10 GMT -5
Ken, That's a pretty valid question. I was thinking yesterday I never took a good unhooked picture to clarify how it fits together. So here it is. The part on the left will stay on the tractor. The part on the right will stay on the backhoe. I back up to align the parts, then hook up the backhoe hydraulics and use the outrigger and boom controls to raise the backhoe side to engage the hooks on the pins with the upper end of the 2x8 nesting in the upper channel. Once fully engaged, the pin holes are aligned so I can insert the upper and lower pins to lock the connection. 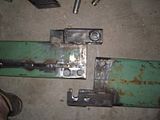 It should become much more clear when complete. Unfortunately I don't have any sketches. I just get tired of fighting Inventor for stuff I need to get made at work.  Larry, Thanks for the edit. I keep forgetting how to do that. I get the best looking welds just dragging the stick in a straight line, slowly, keeping the arc force pointed back into the puddle. I feel like I'm still figuring it out. For some reason I really enjoy stick welding. Maybe it's the suspense of waiting to see what's under the slag.  Have you tried out the stick feature of your Russkie welder? I'll weld up a fixed top link connection as a safety but the pinned connections look like they have about a 3x safety factor as a sole support. Rob, Thanks for the tips. I was tacking and having pretty good luck until that last set of collars I got lazy and just welded them up. It turned into a lot of work.  For reaming I have an old 1" rotabroach I can use a wrench on and the 1" S&D bit I can chuck up in the hand drill. If I run them through the hole the top link pins slide in nicely. The rotabroach doesn't catch like the drill and in extreme cases I can screw it onto the shaft out of my tube notcher. I used it that way when I had to drill out some 7/8 holes to 1" to mount the stabilizers. My wrist was hurting like crazy trying to use the S&D bit.   |
|
3RRL
Administrator  Huge Kama
Posts: 2,027 
|
Post by 3RRL on May 10, 2009 11:16:37 GMT -5
I know what you mean about your wrist hurting.
Is that a Harbor Freight 1/2 drill motor? I have the exact same one (like 39 bucks) and it has so much torque I snapped that plastic side handle clean off. It now has a 1/2 pipe handle instead. But you really have to hold on and be prepared if the drill bit snags.
I was going to add about your connections.
One thing I wish I had done was add "V" shaped lead-ins to the connections. I would be sure to add about 1/2" or 1" long projection to help align the 2 halves as you are backing the tractor up to the hoe. Not only the line up, but also square to it. You don't have to be as exact as the "V"s will force the connections to meet as you back up. It may jostle the hoe a bit but then the hoe will eventually "square up" to the tractor connections and you can easily pin it then.
Everything else looks really good.
On edit, I read that your plan was to "tilt" the backhoe so you could engage the hook, right? Be sure the 2 lower corners where the hook part is are cleared to allow you to make the hook up that way. I'm not sure if you have figured for this already or not, but if the two ends butt up to each other, there has to be enough clearance to make that hook work when the hoe bracket is tilted.
Did you try the tilting fit on the bench that way already?
On further edit, did you consider making a "sliding" in slot hook up with parallel "V" ways? That is, parallel to the two tubes with a "V" lead in. That would eliminate the need for tilting altogether. You back the tractor up to the hoe mount until the 2 tubes but up to each other and pin it. The lower hook with "V" lead ins would position the top pin hole. You just need to be in far enough to pin it. There could be some clearance there, front to back for the pin to be easily pinned. The hook slot keeps the subframe from moving up and down. I would not be concerned if the subframe could slide back and forth a quarter inch or so, but up and down would be solid.
Rob-
|
|
|
|
Post by Rich Waugh on May 10, 2009 21:49:09 GMT -5
After lending my 1/2" drill motor to a neighbor and having him break his damn arm because he didn't believe me about the torque that HF drill has, I adopted a new policy on using it. I do what I was taught years ago to do with the old B&D 3/4" brutes. You put a long enough pipe in the side hole that you can brace it against a fixed object to stop the dam drill from turning you upside down. That little hint has saved a number of injuries over the years.
New rule: I don't lend that neighbor any more tools, either.
Rich
|
|
|
|
Post by bradblazer on May 10, 2009 22:15:24 GMT -5
I don't like the thumb dial speed control on that drill. With a trigger I can more easily do torque compensation without letting it gain so much momentum. I also have a Craftsman not quite so heavy but it does pretty well and the trigger speed control helps a lot. Rob, I wasn't really planning on tilting the backhoe so much as raising it straight up to engage the hooks. The wyes are good idea to help me back in. Something like this (look for a red sketch bracket)?  As I raise it to engage the hooks, the radius on the corners of the tubing should also help it to self-align. I spent quite a bit of time carving a rear axle bracket from a piece of 6x8x1/2 angle iron. I have the left rail clamped/supported in place. I was thinking of a far forward attachment but there is just no elegant path for that. I decided to just cut the rail at the loader horizontal tube support and weld a bracket (made of the cutoff piece) to the bottom of the tube like Rob did on Loretta's tractor. Here is a very crude sketch on a photo.  |
|