|
|
Post by stumppuller on Jan 13, 2010 22:19:27 GMT -5
Rob - don't fret over not balancing the con rods. Diesles are slow running engines, so balancing them may well have been an unrealized effort anyway. Balancing a 7,000 - 10,000 RPM engine is a different matter though.
Wrench on!
Bruce
|
|
rayh
CTW Member
 Devonn 554
Posts: 52
|
Post by rayh on Jan 13, 2010 23:55:16 GMT -5
Rob
Was the reason for balancing the rods to get away from some of the vibration in this engine? All inline 4 cylinder engines have an inherant vibration...some worse than others...it comes from the arrangement of the pistons. THE LONGER THE STROKE THE WORSE IT IS. In order to eliminate this many manufacturers install a counter balancer in the engines, driven by a set of gears turning twice engine speed. But this makes them more expensive and Chinese want to keep cost down...so very few Chinese engines use harmonic balancers.
The engine will run just as long vibrating slightly or not, gauges, light bulbs and operators may not.
Good luck!!!
RayH
|
|
3RRL
Administrator  Huge Kama
Posts: 2,027 
|
Post by 3RRL on Jan 14, 2010 10:33:51 GMT -5
Yeah, I figured balancing couldn't hurt. I knew it would a very small difference, if any at all. It just seemed like the right thing to do while I was in there. Didn't seem like a big deal to me to go through the steps since I have the time and equipment. But now, since I can't get the pistons out from the bottom, I won't do it. I'm waiting till it warms up a little to go out to the barn workshop.  Rob- |
|
3RRL
Administrator  Huge Kama
Posts: 2,027 
|
Post by 3RRL on Jan 14, 2010 21:17:48 GMT -5
OK, today I got the oil pump and crankshaft out. Shown are the old and new of each, and a mess on my steel breakdown table. 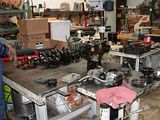 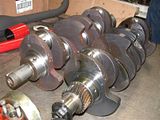  |
|
3RRL
Administrator  Huge Kama
Posts: 2,027 
|
Post by 3RRL on Jan 14, 2010 21:39:06 GMT -5
I removed all the crankshaft and connecting rod caps. You can see from the photos below that the bolts come off with the caps. I had marked each of the rod caps before, and the main caps are numbered 1 through 5. The numbering pad is shaped like an arrow (sort of), and all the arrows must face towards the front of the engine. Also shown below are the new main bearings. One half (the bottom half) has the oil galley hole and internal groove and the other has the start of the oil groove on each end only. That bearing goes into the cap.   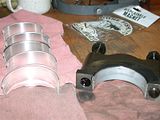 |
|
3RRL
Administrator  Huge Kama
Posts: 2,027 
|
Post by 3RRL on Jan 14, 2010 21:57:56 GMT -5
|
|
3RRL
Administrator  Huge Kama
Posts: 2,027 
|
Post by 3RRL on Jan 14, 2010 22:09:32 GMT -5
After writing down all those details, I finally lifted the crank out. Shees, it was heavier than I thought. I also noted that each of the main caps were pocketed into the journal web so they can not spring out. They are fit with a slight interference fit. Anyway, I got the crank out and started to remove the pulley bolt and gear to put on the new crank. I wore my best flannel for that picture. ;D   Loretta and I spent the rest of the day removing old torn gaskets. Tomorrow we'll start cutting out new ones. When the new rod bearings arrive, I can install them and the main bearings. Rob- |
|
3RRL
Administrator  Huge Kama
Posts: 2,027 
|
Post by 3RRL on Jan 16, 2010 22:05:36 GMT -5
Got a little more progress today. I didn't take any photos, but Loretta and I got the new crankshaft installed ... sitting on the new main bearings in the block. I did manage to get those thrust spacer washers going the right directions. I torqued up the mains and rod caps and checked to see that the crank still turns freely. Then off to finish up making the rest of the gaskets for further assembly. Loretta spent a great deal of time helping me clean off the parts and making new gaskets.  We used 1/64" thick general purpose gasket material for the front and rear and main oil sump. The oil pump used 1/32" thick material and the oil pan has a new rubber gasket. Below are photos of gasket making. Some of you might do it differently, but this is how we did it. We traced around the perimeter and cut out using either scissors or a razor blade (or both). Then for clearance holes, we used a large ball bearing and pushed it into the screw clearance hole. Then tapped it with a hammer to outline or punch out the hole. The line up of holes turns out excellent using that method. Here are some of the gaskets made that way. 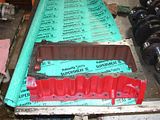    |
|
3RRL
Administrator  Huge Kama
Posts: 2,027 
|
Post by 3RRL on Jan 16, 2010 22:20:03 GMT -5
In that third photo above, you might have seen the new rubber gasket for the oil pan? We again traced the outline and cut that out first. We also traced each hole with a maker. Then we used a set of hole punches from Harbor Freight and a hammer to punch in the holes. Then cut the middle out, leaving about 1" wide gasket.  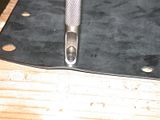  While Loretta was busy doing that, installed the new oil pump. I had to prime the pump before I installed it by pouring oil into the intake tube. I used a drill motor to spin the shaft to see the oil working it's way through. After that, a new pilot gear and 12 x 40mm dowel into the flywheel end of the crankshaft. When she had the bottom end gaskets completed, I was able to button up the entire bottom half of the engine.  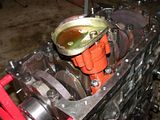 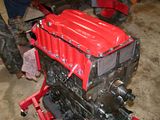 |
|
3RRL
Administrator  Huge Kama
Posts: 2,027 
|
Post by 3RRL on Jan 16, 2010 22:27:22 GMT -5
Once the bottom half was done, we spun the engine upright. Next was to install the gear housing (with new gasket) and the injector pump and cam shaft gear. I lined each gear up so the idler gear and others all fell exactly to the teeth that were marked before dis-assembly. I installed the front front pulley, and then the alternator and also a new fan belt. Finally installed the power steering hydraulic pump and connected up the fuel injector pump lines. Here's what it looks like now. Rob- 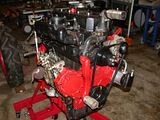 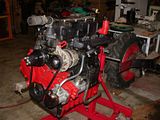 |
|
|
|
Post by Rich Waugh on Jan 16, 2010 23:49:54 GMT -5
Great looking job so far, Rob! You documentation is a big help to the rest of us, though I hope to never need to refer to it myself. :-)
I'm eagerly awaiting hearing how it runs with all the good work you've put into it.
Rich
|
|
GuglioLS
Administrator  Jinma354 LE
Posts: 1,276
|
Post by GuglioLS on Jan 17, 2010 12:11:44 GMT -5
Hi Rob,
I've been following all along from the start of all this. I must say it's pretty much left me speechless. What an incredible amount of work in such a short period of time. Making the gaskets alone takes an incredible amount of patients and a steady hand making all those inside and outside curved cuts. Loretta is a real trouper sticking by your side and helping out through all the phases of this amazing engine rebuild story. I must say I really like the new two tone paint job on the engine, it looks really sharp like that.
Whew! your on the home stretch now! I bet your chomping at the bit to try it out. The anticipation wanting to see what the oil pressure is going to be has got to be tremendous. Cant wait to see her back together and your smiling face behind the wheel.
Larry
|
|
|
|
Post by linus69 on Jan 17, 2010 15:47:12 GMT -5
That tractor of yours seems to be like the "Portrait of Dorian Gray"
The more you two seem to work on it, the younger you both look in your pictures, amazing.
Paul
|
|
|
|
Post by bradblazer on Jan 17, 2010 19:16:16 GMT -5
Man that is nice work. The engine looks great! Pretty soon it will qualify as "Made in USA"  |
|
3RRL
Administrator  Huge Kama
Posts: 2,027 
|
Post by 3RRL on Jan 17, 2010 20:43:25 GMT -5
Thanks a bunch guys! Yeah, I hope nobody ever has to go through what we went through ... twice! But I'm hoping it's gonna be worth it. The engine sure does look nice though. I had the opportunity, so I changed out those other things like the fan belt (my 2nd Napa one), the pilot bearing, all new "O" rings where needed, new banjo bolt rubber coated washers called "Stat-O-Seals", new fuel and oil filter, new air filter last time around, and new motor components of course. Figured might as well get it 100%. While everything is easily accessible. You know my Kama is going on 5 years old already. And you guys are right about Loretta. She works her ass off without complaining. She knows how important it is to me. She is a real trooper and knows I miss my tractor. You would think after all this we would look a lot older ... as least I feel that way.  Today, we took it off the engine stand and mounted the engine on the front wheel half of the tractor. I tried to get the motor onto the rear half by itself, hanging from the engine stand, but no go. I could never get it line up or tilted correctly. Bet we spent the whole morning trying to do that. Finally gave up and mounted it to the front half. Then we spent the entire afternoon trying to get the 2 tractor halves together ... no go there either. We made several attempts but just couldn't get it closer than 1". I think we have to make a couple more little adjustments, right or left or up and down? We gave up just now and will try again tomorrow. I took the week off to complete it. I really thought I'd be hooking up all the electrics, hydraulics and put the radiator back on, but that didn't happen. I'm a little disappointed for the moment. Thanks for all the encouragement! Rob- |
|