3RRL
Administrator  Huge Kama
Posts: 2,027 
|
Post by 3RRL on Jan 28, 2008 18:09:20 GMT -5
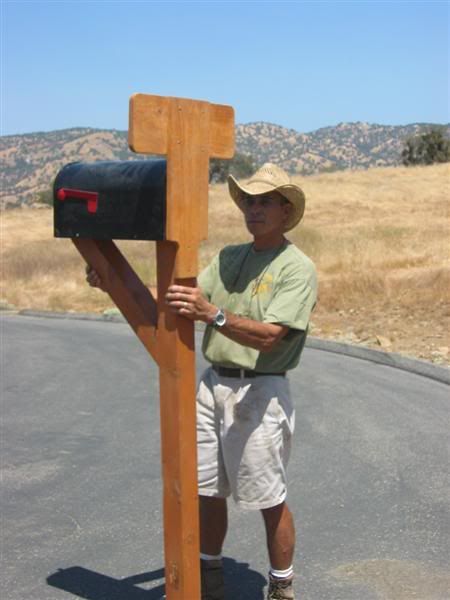
I told you guys it was a busy weekend for us. Among other things, we finally got our address for the rural property so Mrs. 3RRL ran down to the Fire department to order the address plaque. They are blue flourescent so they can be seen easily by emergency vehicles. When it came in this weekend, she asked if we could put up our mailbox and the address. So I got out the lumber and sawed up the pieces and screwed it all together. Then she sealed and stained it and I bolted the steel mailbox onto it. It's nothing special, but she really likes it. This is a back view of it before going into the ground.  And this is the front view showing our new street address sign.  |
|
3RRL
Administrator
Huge Kama
Posts: 2,027
|
Post by 3RRL on Jan 28, 2008 18:10:33 GMT -5
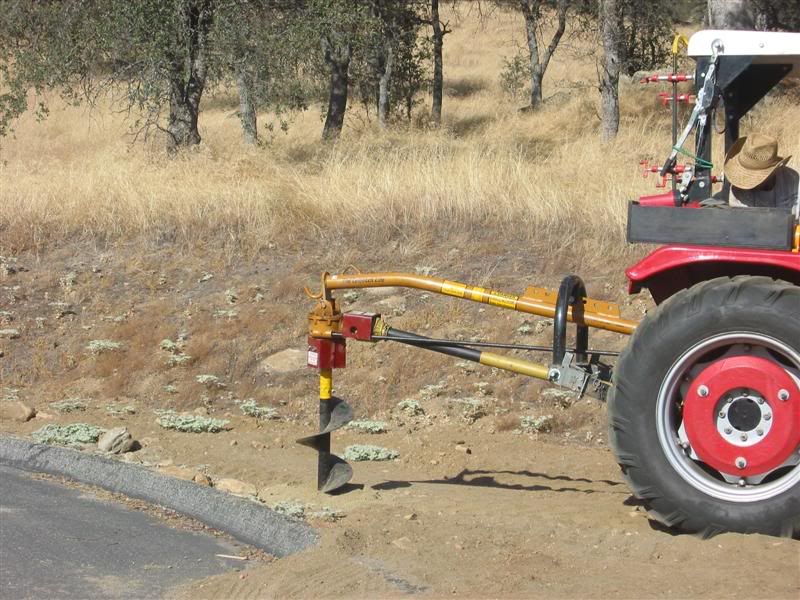
So now I had to dig the hole for it so I tried out my Leinbach Post Hole digger. I got the PHD and hooked that up to the Kama. Boy, you can't believe how easy it was to switch over from the boxblade, the brush hog and then to the PHD using Pat's EZ system. 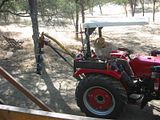 Then we went up to the road entrance and dug a hole with it. The mailbox is only 6' tall so I figured I'd need a 2' to 3' deep hole to have it end up around 3' to 3-½' off the ground. In talking with the Post Office, I was surprised there no specific requirements or standards for installation? The only thing they did was send the mailman out and he put a big rock where he wanted the post, so that's where I put it.  |
|
3RRL
Administrator
Huge Kama
Posts: 2,027
|
Post by 3RRL on Jan 28, 2008 18:11:29 GMT -5
After removing some of the loose sand with a coffee can, we stuck the post in and propped it up with some rocks and straightened it. Then we mixed up some concrete. Prior to that, I had cup the top and bottom off a 5 gallon plastic bucket to use as a mold so the concrete could be poured above ground about 6". I did this so when we weed-eat around it we will not cut into the wooden post itself. Then I will cut the plastic off the concrete when it's set. Wes also got to put his initials in it. So this is what it looks like in the ground. We like it. 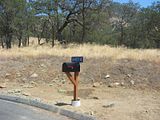 This is how it looks from the front. 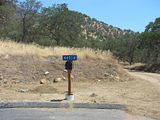 |
|
3RRL
Administrator
Huge Kama
Posts: 2,027
|
Post by 3RRL on Jan 28, 2008 18:13:11 GMT -5
The post hole digger ran in there pretty quick except a couple of small rocks. I ran it just at about idle speed. As you can see, there was mostly soft earth for the first 1-½' and the it got into the harder decomposed granite before reaching depth. Mrs 3RRL didn't get it from start to finish, but she managed to get a little video of it drilling the hole. It will take a while to download, hope you can view it. 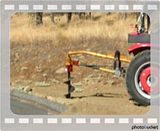 Rob- |
|
|
|
Post by bracabric on Jan 28, 2008 18:54:32 GMT -5
Looks good Rob and Mrs. 3RRL, now we know where to find you!!
Dick
|
|
3RRL
Administrator
Huge Kama
Posts: 2,027
|
Post by 3RRL on Jan 28, 2008 20:23:03 GMT -5
Dick,
I've seen photos of your PHD and it sure looks to be a better quality than my little Lienbach. You should post a couple photos of it in your own thread. Guys can make comparisons when they get ready to buy one.
Rob-
|
|
|
|
Post by bracabric on Jan 29, 2008 11:08:59 GMT -5
Rob, I'll do that, but don't forget that mine cost A LOT more than your Lienbach so I ought to have got a bit more!!
Dick
|
|
|
|
Post by bracabric on Feb 7, 2008 19:49:06 GMT -5
Some time ago I bought a PHD to speed up the large amount of fencing work that I have to do (circuit of 85 acres approx plus field divisions ). The cost was quite a lot more than you would have to pay in the USA but the quality is very good and I can happily call it "heavy duty" after initial success in the winter and spring, it became extremely difficult to get it to penetrate as the ground dried and subsequently baked hard, We are well into summer in the driest year for 50 years and almost all wells near the farm have gone dry.With the help and advise of my friend Ken (Quickduk) I ordered some parts from the USA and a friend who commutes between Miami and Santiago (where I live most of the time) brought them down to Chile for me. Pictures show cutting off of blade at bottom of auger flight and subsequent drillings,   Following pictures show tooth addition modifications,     Last pictures show the complete and modified PHD,   I have tried it out on the concrete like ground and the penetrating ability is greatly enhanced and it has been well worth doing, I have a much improved PHD, some time in the future however I may add a "Pengo" fishtail centre bit just to complete the job and on Ken's recommendation, Dick |
|
3RRL
Administrator
Huge Kama
Posts: 2,027
|
Post by 3RRL on Feb 7, 2008 23:42:39 GMT -5
Great mod Dick.
I'll have to do that for sure since mine doesn't really cut that good.
You said they were Pengo parts right? I think I know where to get them.
Thanks for sharing those photos.
Rob-
|
|
|
|
Post by bracabric on Feb 8, 2008 9:05:32 GMT -5
Rob, have a word with Ken (quickduk) he set me straight as to what I needed AND where to get it, part numbers, address, 'phone numbers etc. I think the company was called "ground Hog" and is in Californ-i-a !!
Dick
|
|