3RRL
Administrator  Huge Kama
Posts: 2,027 
|
Post by 3RRL on Feb 28, 2008 13:15:10 GMT -5
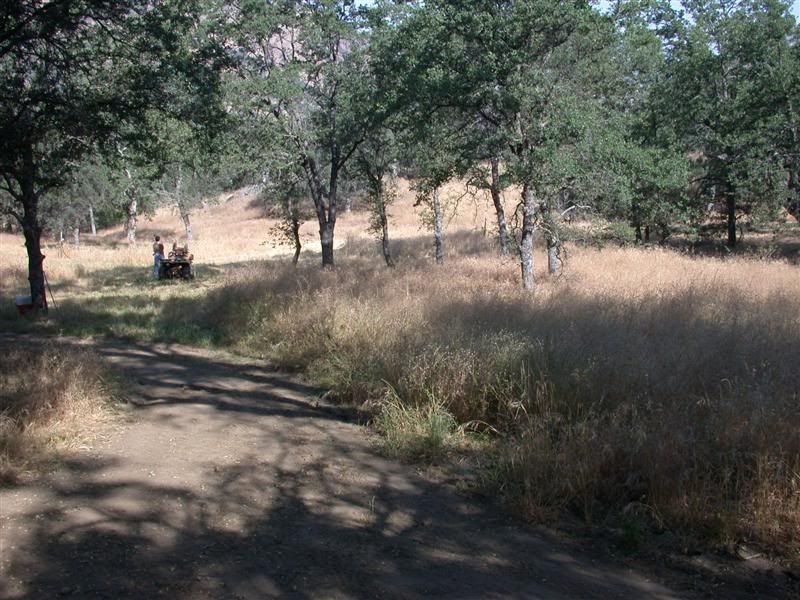
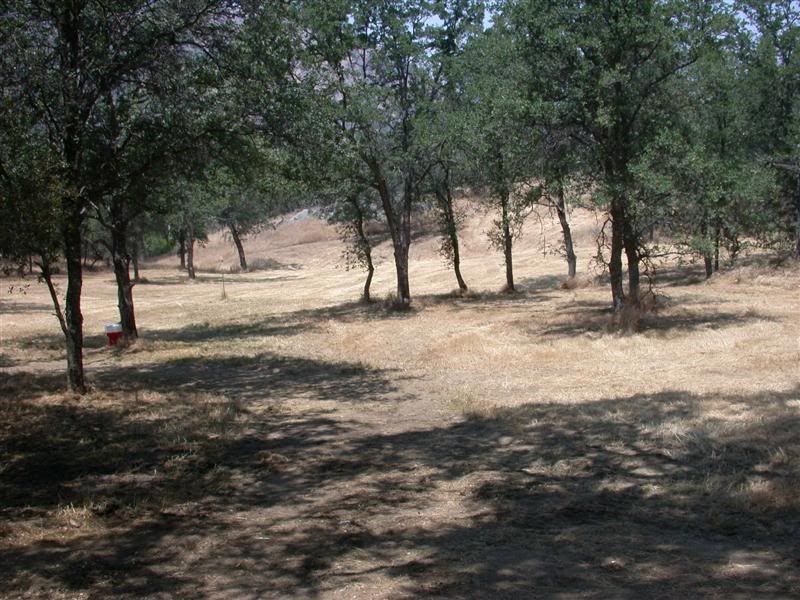
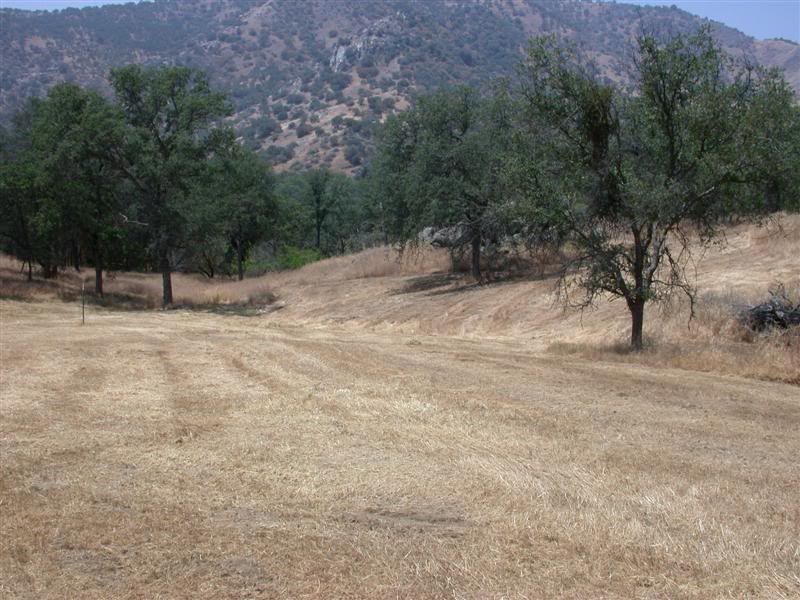
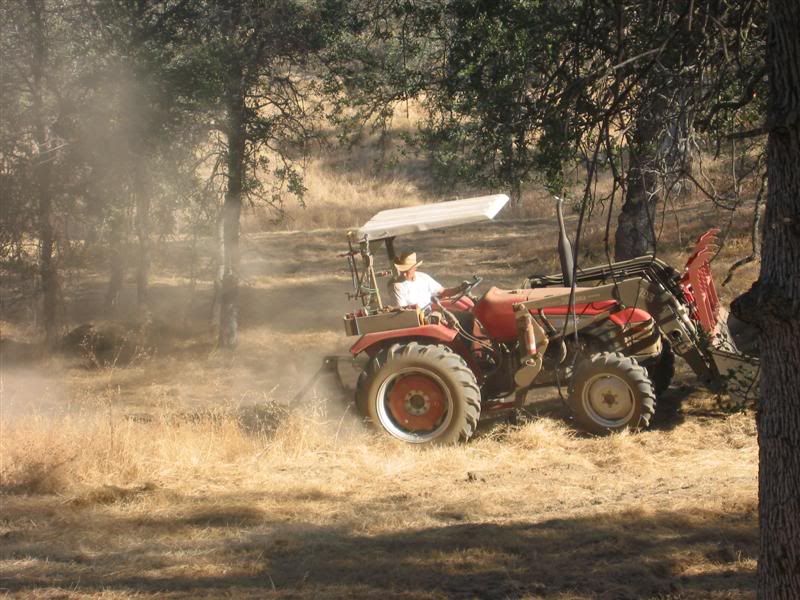
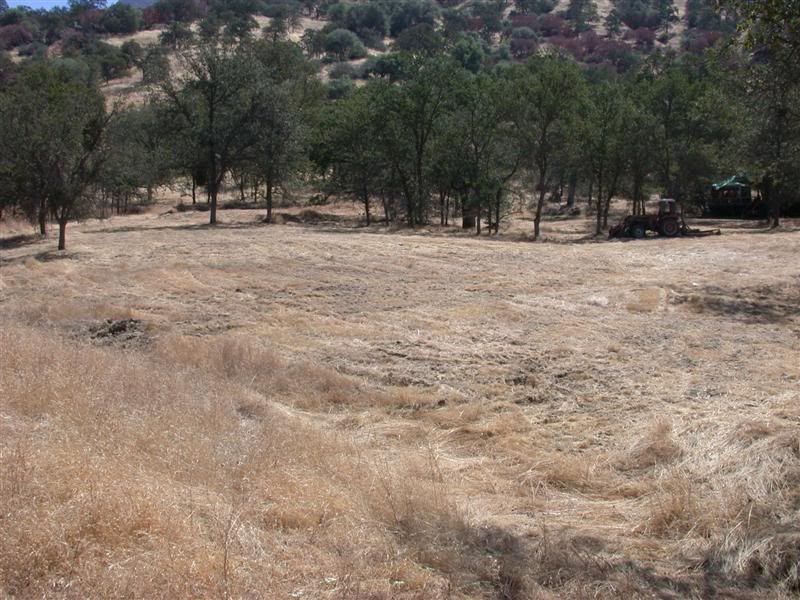
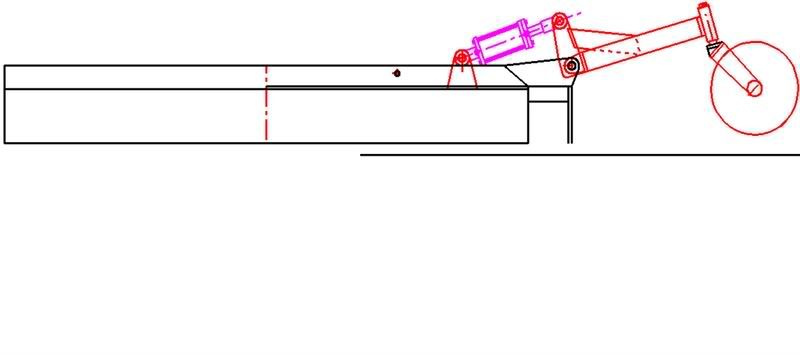
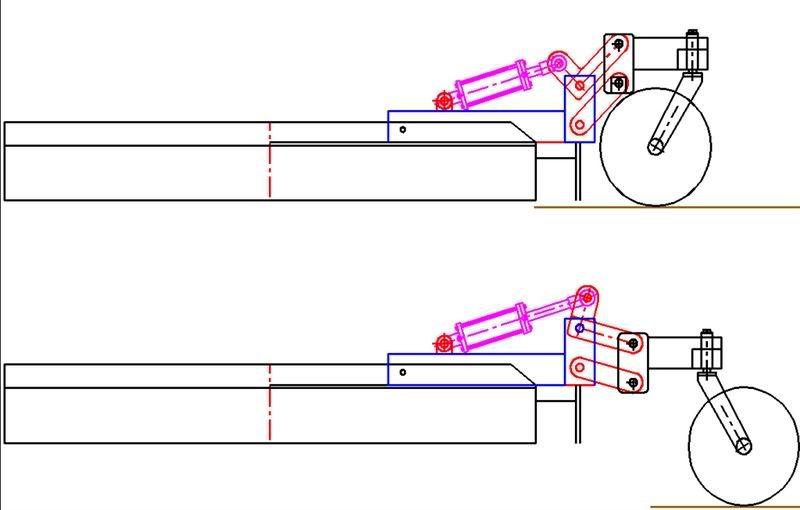
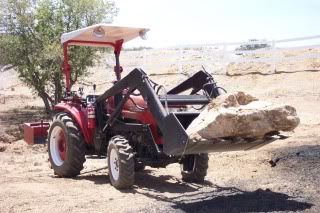
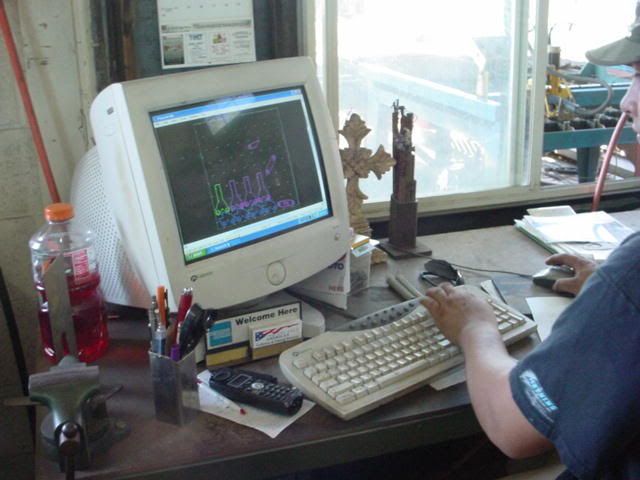
Hi, You may remember from adding home made chain guards to my Howse rotary brush hog mower that I saved a bunch of money by making them myself instead of buying them. I wanted to use that money towards making it so I could lower and raise the rear wheel as easily as my 3pt lowers and raises the front of it. I've decided to modify the wheel brackets and add a hydraulic cylinder that will let me make the adjustment from the seat via my rear remote control valve. Why did I want to do that? Well, on my rural property where I mow, there are a few areas where the RC bottoms out when set to 6" cutting height. I would like the ability to raise both front and rear of my mower for these occasions. Right now I have to unbolt the trailing wheel frame and move it to the higher (or lower) setting. But one setting does no good for all areas on my property....it is not a "field. It slopes and is hard to cut. I have 6" high grass stalks where I could have 2" high stalks, and scalped areas where I should have short grass.     You can see I cut a lot of dirt every time I mow.   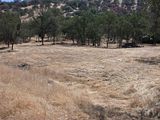  I thought about how I would operate the system and if I would have enough time to raise and lower not only the 3pt, but also the rear wheel. But since the area is so rough and bumpy, I mow very slowly anyway. I'm not sure yet, but it should give me lots of time to adjust them both for those spots. As I get used to it, I'm sure I will get better like I did adjusting my hydraulic boxblade rippers, 3pt and separate side links while driving. Anyway, this is my first concept using the single tail wheel on the mower. (Click to enlarge) 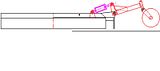 Now, before I go on the the next level, this concept is the best and easiest way to make your tail wheel hydraulic. Keep that in mind if this is something you want to do. What I've done to the concept in the following posts is really overkill and not necessary, even though it's pretty cool and turned out nice. If I was to do it over again, I'd probably stick to this first concept. So I wanted to mention that first. Rob- |
|
3RRL
Administrator
Huge Kama
Posts: 2,027
|
Post by 3RRL on Feb 28, 2008 16:47:47 GMT -5
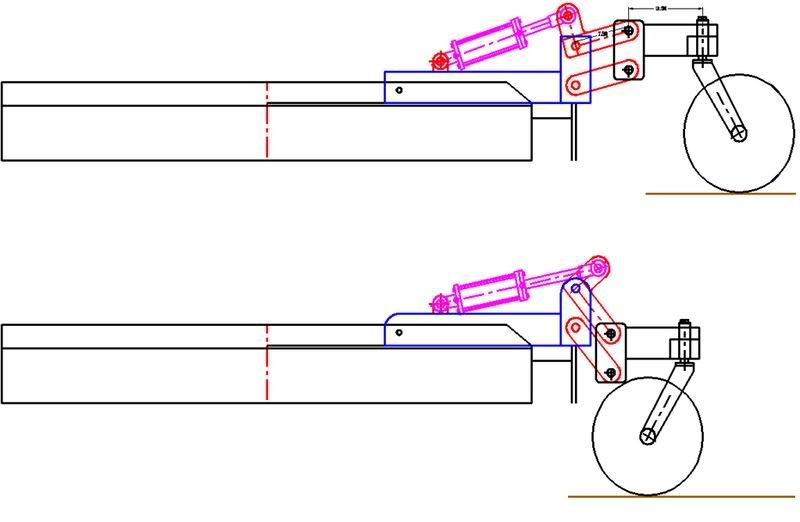
I wanted to make the new connections out of scrap material I have lying around the garage to keep the cost down to a minimum again. It's easier on the pocket book and the ears that way. I have all the hydraulic fittings, hoses and quick disconnects already, and a whole bunch of scrap steel. All I'll need to buy is a new hydraulic cylinder (since my old ones have pitted rods) and some 1/2" pipe. OH, and another double pilot operated check valve (DPOCV) from Mark Carter at CCM. I want the DPOCV so the wheel stays relatively where I place it while mowing and bouncing around. So far I have less than a hundred bucks invested for those items ... not bad. Then after thinking about it, I have enough steel tubing to add strengthening to the RC, like the heavy duty models. Not only that, but I have enough to alter the pivoting of the rear wheel by making a self-leveling pivot instead of the one like in the first drawing. That means I have to buy extra pins for the pivots but it only came out to 20 bucks. So here is the second drawing showing the self leveling wheel assembly. 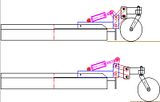 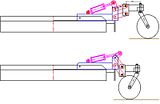 You can see as I lower and raise the tail wheel, the fork stays level throughout the travel. It will also clear the RC blades when I'm going in reverse and the wheel pivots around backwards. The way I have it set is I have 1" of clearance from the ground to 14" clearance when fully extended. That is more travel than I currently have with the stock bolt on adjustment. Rob- |
|
3RRL
Administrator
Huge Kama
Posts: 2,027
|
Post by 3RRL on Feb 28, 2008 16:49:29 GMT -5
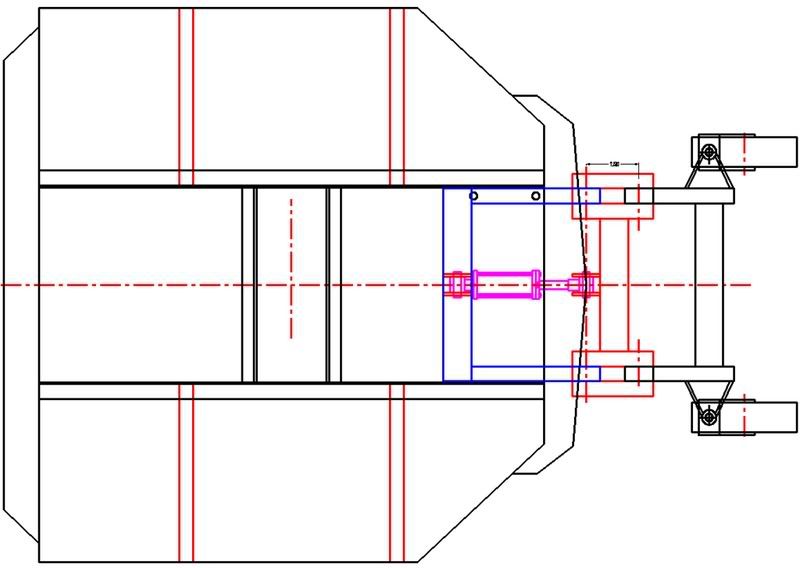
After thinking about it some more, the real heavy duty models have 2 tail wheels instead of one, so I decided to order another tail wheel assembly with fork from Howse. That set me back another 135 bucks plus shipping. So now I'll have a little over 255 bucks into my project. That is still OK with me since that's about what I saved by not buying the chain guards. So I'm still on track and within budget. I'm sure I'll spend a little more than that though, by the time I'm done. Hopefully under $300 for everything. So here is the top view of the cutter showing the dual tail wheels and the extra reinforcing bars on the RC body. 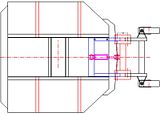 I think this is going to come out nice. It's a lot more work than the first idea, but so what? I like it better. Now, I have everything on order already and just waiting for the stuff to get here. Then I'll start by slitting some of the rectangular tubing I have. I will turn some of it into "U" channel for the extra support of the RC main body and frame instead of buying it. Rob- |
|
3RRL
Administrator
Huge Kama
Posts: 2,027
|
Post by 3RRL on Feb 28, 2008 16:58:01 GMT -5
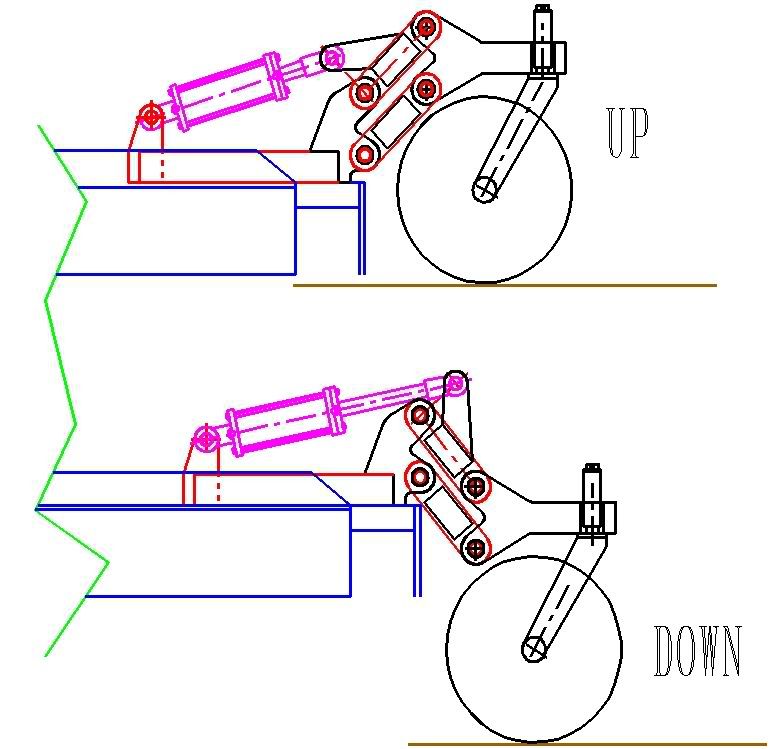
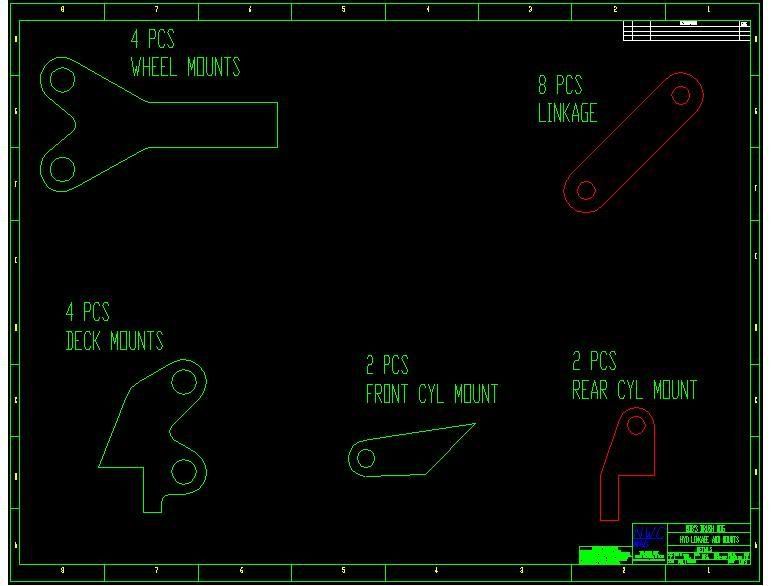
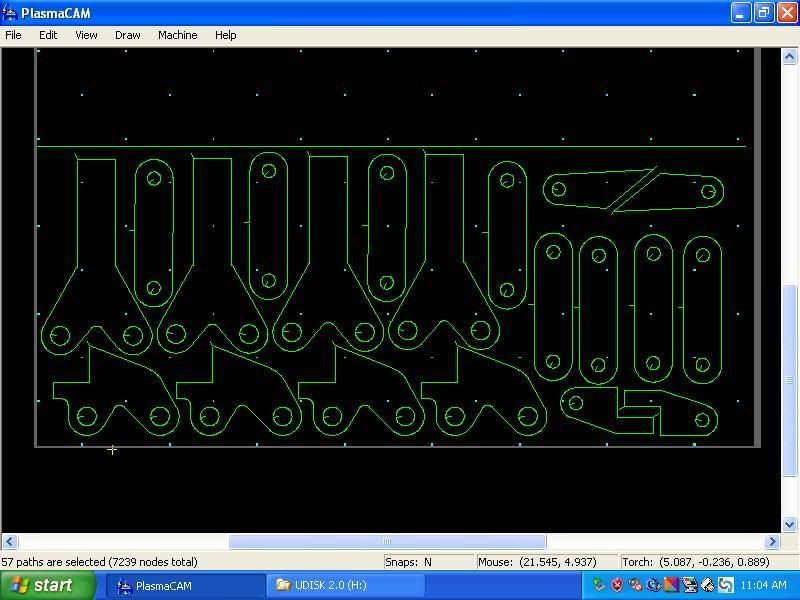
After reading the start of my project, my good friend Larry (gugliols) made an incredible offer to have the linkage plasma cut for me. This of course, blew my mind, because it's unheard of for a guy to offer something like that. With his kind offer to have the parts plasma cut, I was able to design some free shapes that fit the linkage much better. As you saw before, I had the linkage made out of 2" x 4" steel tubing. It would have worked but would be awful bulky and not nearly as nice looking as plasma cut parts will be. I will show you what the brackets and linkage will look like now with the plasma cut parts. (Click on image to enlarge) 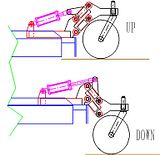 The reason I did not opt for the plasma cut parts in the first place was to build with only materials I had. This was driven by my desire for keeping the cost down to a minimum. But with Larry's kind offer, it's allowed me come up with a much nicer looking linkage. Looks pretty cool now huh? Thanks Larry  |
|
quikduk
CTW Life Member
 Dog House
Posts: 552
|
Post by quikduk on Feb 28, 2008 17:29:47 GMT -5
You showed me this when I was up visiting you guys. It really turned out great.
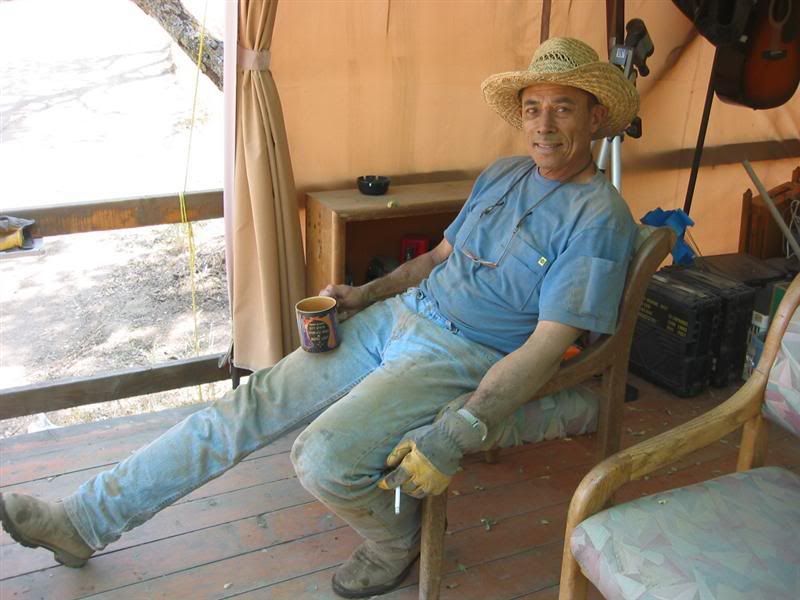
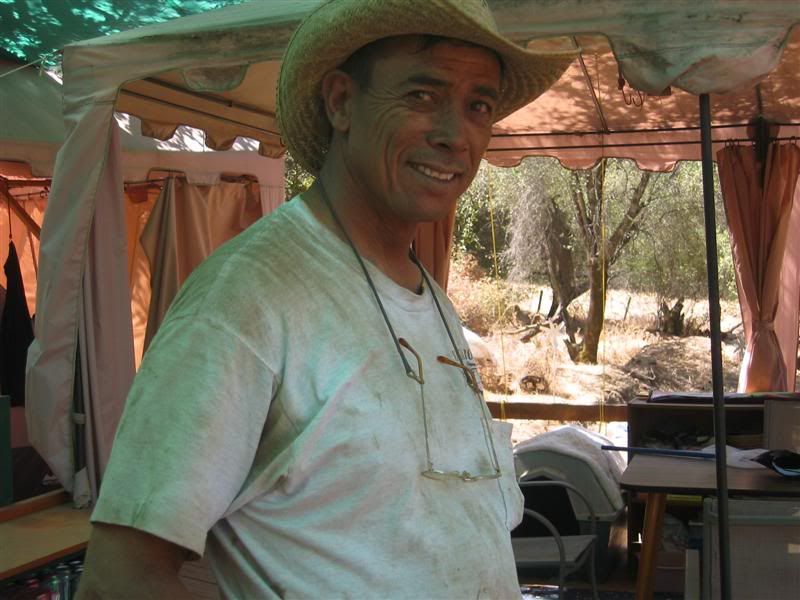
BTW, what is with the lounging around picture and the "cheese" for the camera? Get back to work man!
|
|
GuglioLS
Administrator
Jinma354 LE
Posts: 1,276
|
Post by GuglioLS on Feb 28, 2008 17:42:52 GMT -5
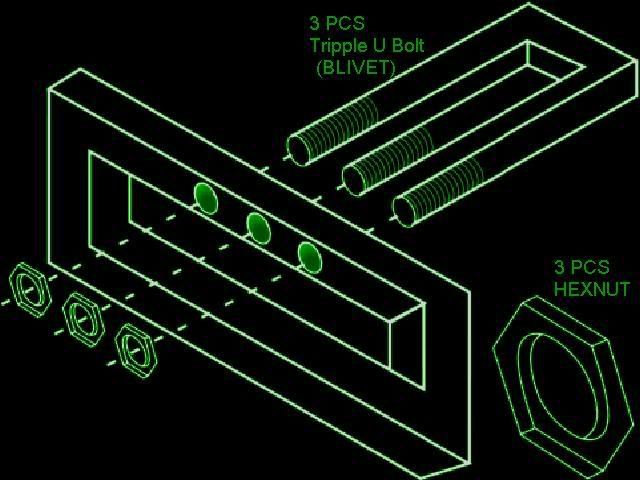
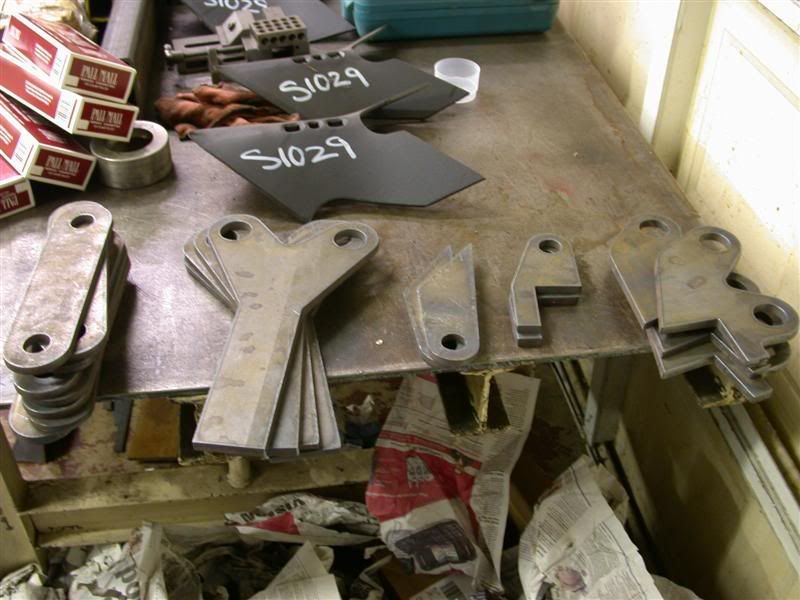
I offered to get parts plasma cut as a favor for Rob, he took me up on the offer, so now I better get busy and get this done. Rob, I took your drawing file that you sent me over to the plasma cutter and uploaded it into the cutter software. I hope to have them cut sometime Saturday. Rob, I hope you don't mind, Here's a picture of all the parts: 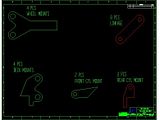 Maybe you need some of these to bolt it all together?: 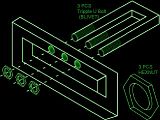 Larry |
|
GuglioLS
Administrator
Jinma354 LE
Posts: 1,276
|
Post by GuglioLS on Feb 28, 2008 17:47:50 GMT -5
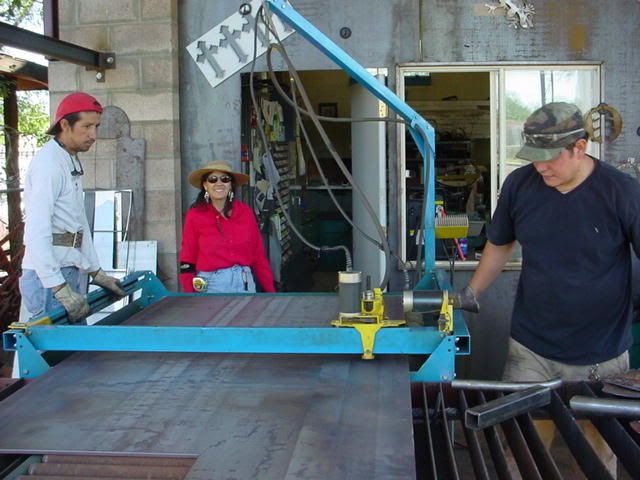
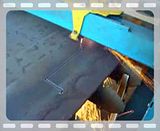
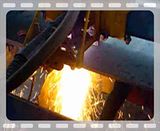
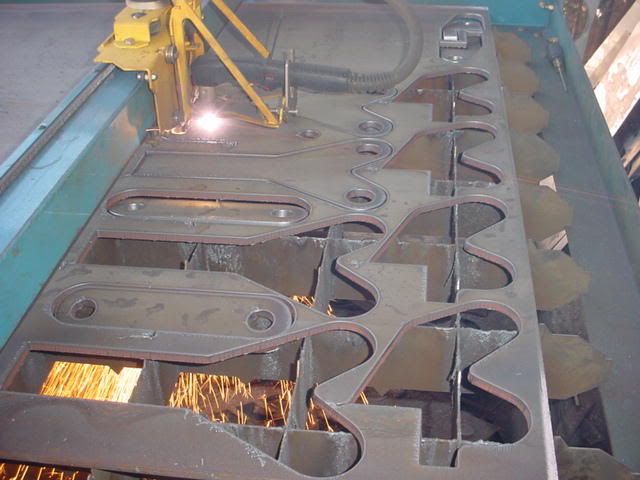
Rob called last night, he said there is no rush to get the parts, but that if somehow I could get them soon he would really appreciate it. I got the feeling he needed something to do other than golfing all day everyday so I chanced going to the plasma cutter shop a day early. I figured I better get something to bribe the plasma cutting crew, so a quick stop to Krispy Kream was in order. Amazing how far a donut will go to get what you need. After I showed up with the goodies they took a little break, then got right to work. This is the Crew, The gal in the center is the owner of the metal shop that I frequent to get everything for all my projects. 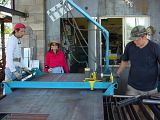 First was to copy & paste Robs parts then duplicate the multiple quantities, then lay out everything for best fit on the 3/8 plate.  Here is the layout with all the parts ready to cut: 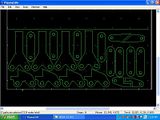 Larry |
|
GuglioLS
Administrator
Jinma354 LE
Posts: 1,276
|
Post by GuglioLS on Feb 28, 2008 17:50:40 GMT -5
|
|
GuglioLS
Administrator
Jinma354 LE
Posts: 1,276
|
Post by GuglioLS on Feb 28, 2008 17:54:04 GMT -5
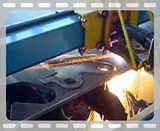
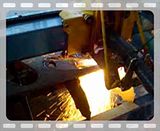
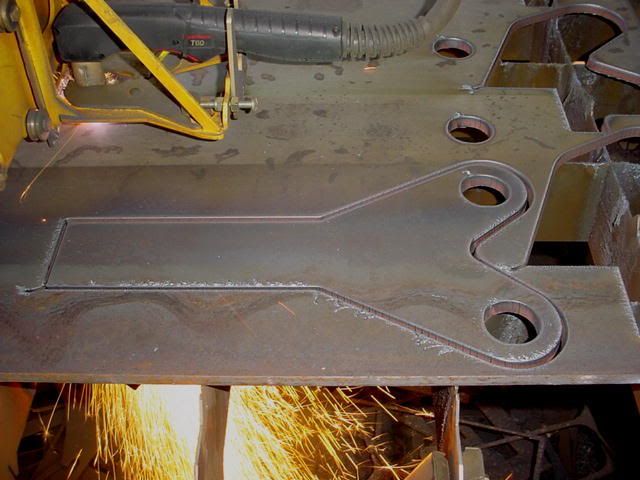
Here are the wheel brackets and a picture of overall progress. The cutter is working great the edges are crisp and clean: 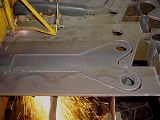 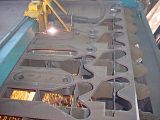 Larry |
|
GuglioLS
Administrator
Jinma354 LE
Posts: 1,276
|
Post by GuglioLS on Feb 28, 2008 17:56:24 GMT -5
Total cutting time was 33 minutes, not bad, I wonder how long it took Rob to draw these? I know it took me longer to pack them up for shipping to Rob than it did to cut them out. Here are all the finished parts ready to be packed and shipped. I had to let them cool off, But most were still a little warm when packed up. 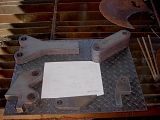 Here is the negative: 48" x 21" - 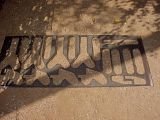 Thanks for the opportunity to do this little favor for you, it was my pleasure. Larry |
|
3RRL
Administrator
Huge Kama
Posts: 2,027
|
Post by 3RRL on Feb 28, 2008 18:51:16 GMT -5
Ken, thanks for the interjection...
BTW, what is with the lounging around picture and the "cheese" for the camera? Get back to work man!
ESAD hahaha
Larry,
Thanks also for adding all that informative Plasma cutting detail to the thread. Perfect timing, it wouldn't be the same without your input.
I'll do the same when you post your marathon gear box thread.
Greg, what do you think of my invention so far?
lol ... Your comments always add some spark and free entertainment to the threads. The beauty of this board is we are all free to speak as we want, you included, so I'd really like to hear what you have to say about this one.
BTW, I'm leaving in about 10 minutes up to the property to work on my roads so the Rire Marshall can get up the road and sign off on the barn and road. He went up during those nasty rainstorms we had in a 2 wheel drive ... what a numskull. hahaha
Anyway, I'll be back Sunday evening to continue this thread and several others. ;D
Rob-
|
|
3RRL
Administrator
Huge Kama
Posts: 2,027
|
Post by 3RRL on Mar 3, 2008 21:20:50 GMT -5
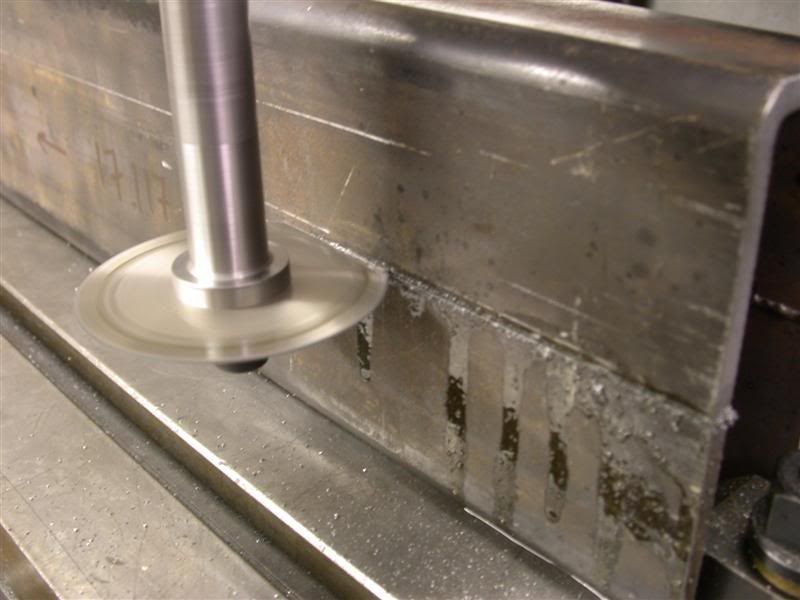
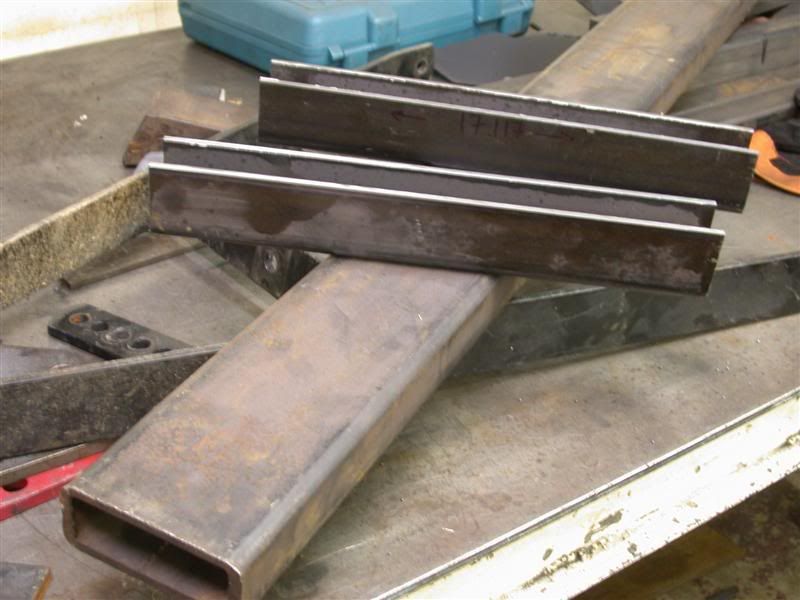
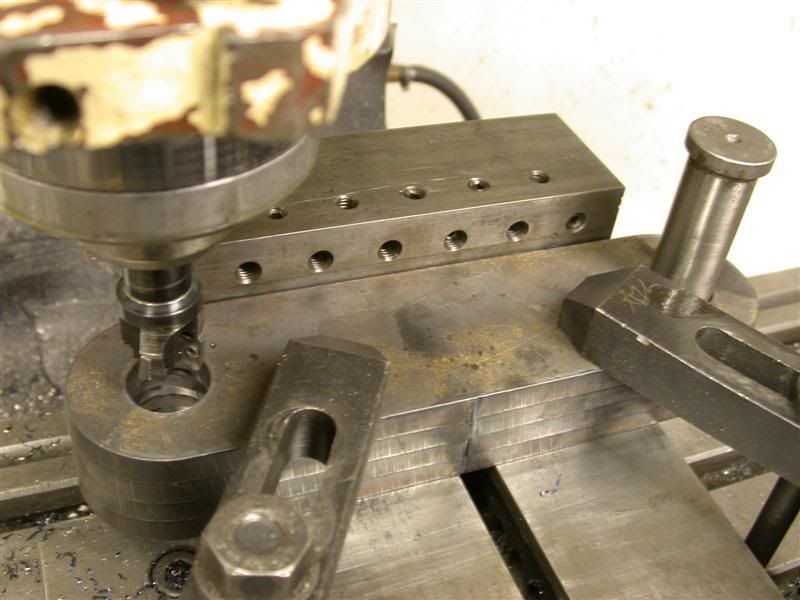
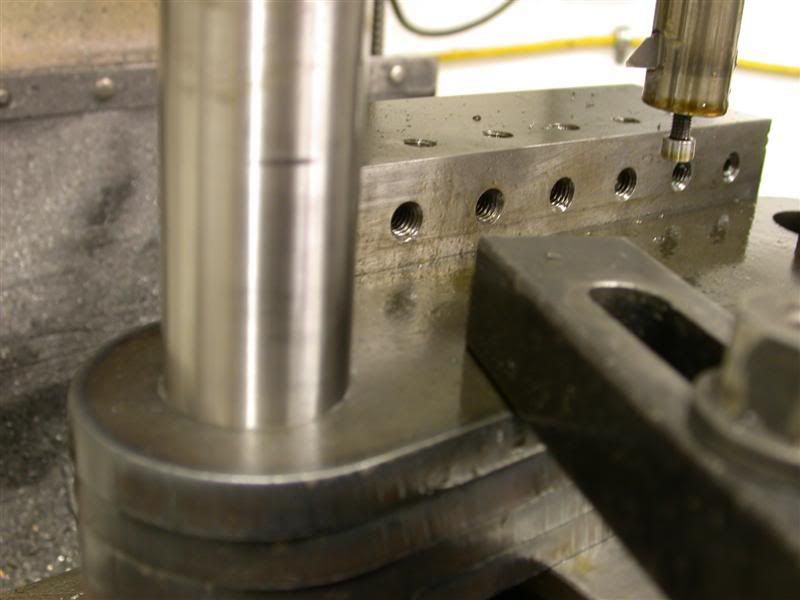
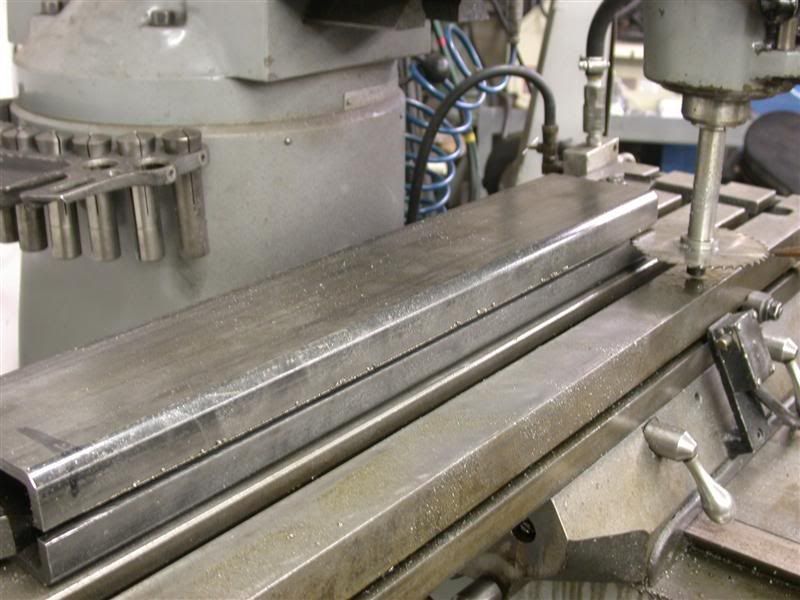
While I waiting for Larry to send me that fine plasma cutting stuff, I started back on my end of the project. I told you about trying to use what material I had on hand and that I had to be frugal about it. I thought I'd share how I'm doing it. I had some 1/4" wall rectangular tubing that was 2" x 5" which was way to big and heavy to use for any of these pieces. My plan was to saw them in half to get "U" shaped pieces that would end up 2" wide and 2-1/2" tall. That gives me twice as much material then to use for this project. I don't have a vertical band saw so I made a mandrel for some small tooling slitting blades I had in my tool box. I bolted the tubing on the milling table and cut them in half. Didn't take very long at all. 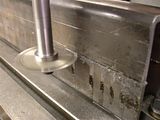 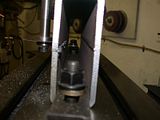 And the cut came out as though it was milled finished, so I didn't even have to mill them afterwards at all. Here is the sawed finish and this is what they look like next to a whole bar of it.   These "U" shaped pieces will become part of the tail wheel assembly that moves up and down. I will make some more for the hydraulic pivot frame that is welded to the rotary cutter. And also some for the reinforcement of the cutter body instead of the usual angle iron. There will be different lengths, of course, for the different uses. These "U" shapes will be very strong when welded to each other but not nearly as bulky and heavy as a whole bar of it. Rob- |
|
3RRL
Administrator
Huge Kama
Posts: 2,027
|
Post by 3RRL on Mar 3, 2008 21:25:15 GMT -5
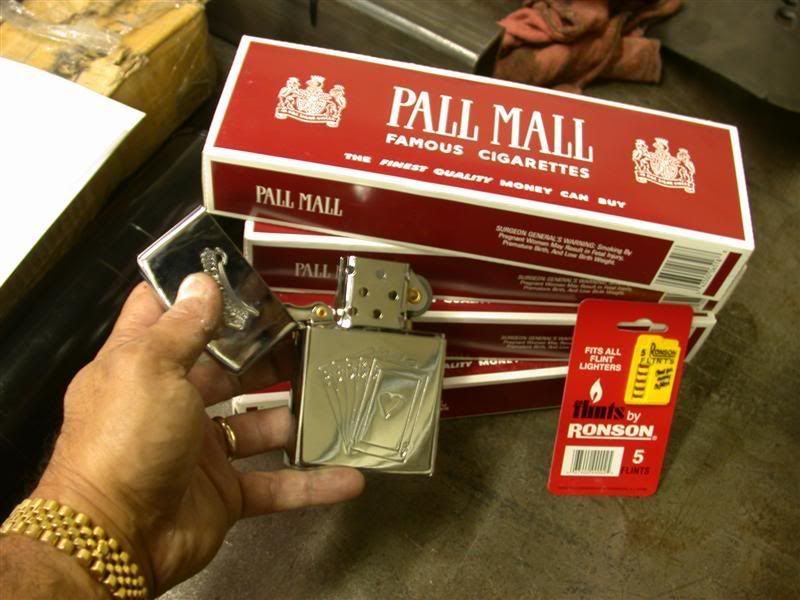
Hey Larry, I got the FedEx packages today and I'm super excited. Man, you must have spent hours wrapping each piece individually like it was a wine glass! They look great too. Here is a picture of the pieces he sent. Not only that, but Larry sent me a surprise also. Here are 4 cartons of my favorite Pall Malls and a giant Zippo lighter and flints!!! Hooo eeee! Geez Larry, you must have spent a fortune on that stuff.   What can I say ... thank you sooo much for the freebie plasma cutting and all that steel and the super nice gifts too. I will owe you for life, I'm sure. thanks thanks thanks thanks.... |
|
3RRL
Administrator
Huge Kama
Posts: 2,027
|
Post by 3RRL on Mar 3, 2008 22:06:41 GMT -5
I didn't waste any time on the stuff Larry sent me. Like boring out the 1" diameter holes for the pins and the 1.375 diameter holes for the bushings. 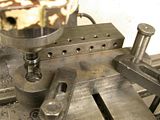 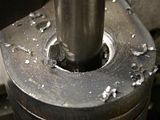 I ran out of scrap leader pins and bushings and found another set a little larger. So I decided to make the top pivots using the larger pins and bushings. Here is how the 1.250 diameter pins and also the 1.625 diameter bushings fit the bores. I only have one more set of holes to bore out now. That one where the bushing is sitting on the plates. 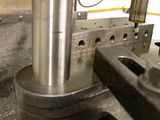 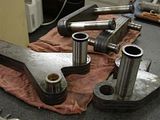 I have a little more steel slitting to do to make enough pieces from the scrap tubes I had. I've most of it slitted in half and also milled to length. Man, there are a lot of pieces after all. I better get busy with the rest of the machining. I have to cut and grind the hardened bushings and leader pins to length yet. I will do that on my surface grinder with a thin cut off wheel. Look at all this steel now. 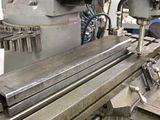 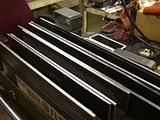  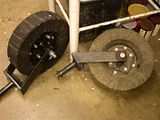 I also got the other wheel in from Howse yesterday. I will have to make tubular sleeve and a frame for it so it's like the one I got. Howse lost my order the first time and so I emailed them. They said they didn't get the order? Then they said they did but no one took care of it. So I called them and talked to a guy who said he would personally ship the wheel. He also said he would send it next day air and not charge me anything for shipping because I had been waiting 2 weeks for it. Ground alone was about $30!! So air was probably a lot more. I thought it was swell of them to send it like that without charging me. The last thing I'm waiting for is the 3/8 BSP fitting I need for the DPOCV. I will make up that hard line like I did for my backhoe cylinders and then take all this stuff up to camp. I'm not sure I will have everything ready before I leave for the 1 week vacation? Hope those fittings get here tomorrow. |
|
3RRL
Administrator
Huge Kama
Posts: 2,027
|
Post by 3RRL on Mar 3, 2008 22:10:31 GMT -5
I know this is not the most exciting project and probably not very useful since I only mow like 2 times a year right now. But when I move up there I will have a couple more meadows to mow than I do now. It will be a fun gadget to run. The plasma cutting sure made this a lot better looking linkage than what I first had in mind. Thanks again Larry for giving me all that stuff. Using all scrap steel and slitting that stuff to make it useful is time consuming. But I've got nothing else to do anyway. I ended up busting 3 of those slitting saws, but got all of it done except the pieces that will be welded to the RC body. But all the stuff for this frame and linkage is cut now. I finished making the spacers for the linkage. They are sets that will fit between all the shapes that were plasma cut. 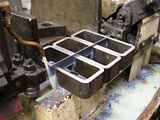 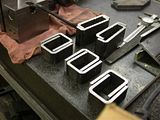 I also cut and ground the hardened bushings, then welded the links together using the spacers. The spacers also provide rigidness against twisting. I welded them up with the pins and bushings in place and clamped up to keep them in line. They are like giant links for a giant chain. They are very solid now. 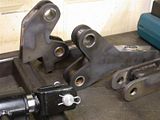 Rob- |
|