quikduk
CTW Life Member
 Dog House
Posts: 552
|
Post by quikduk on Feb 29, 2008 18:25:41 GMT -5
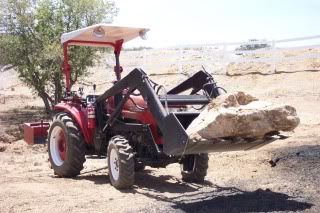
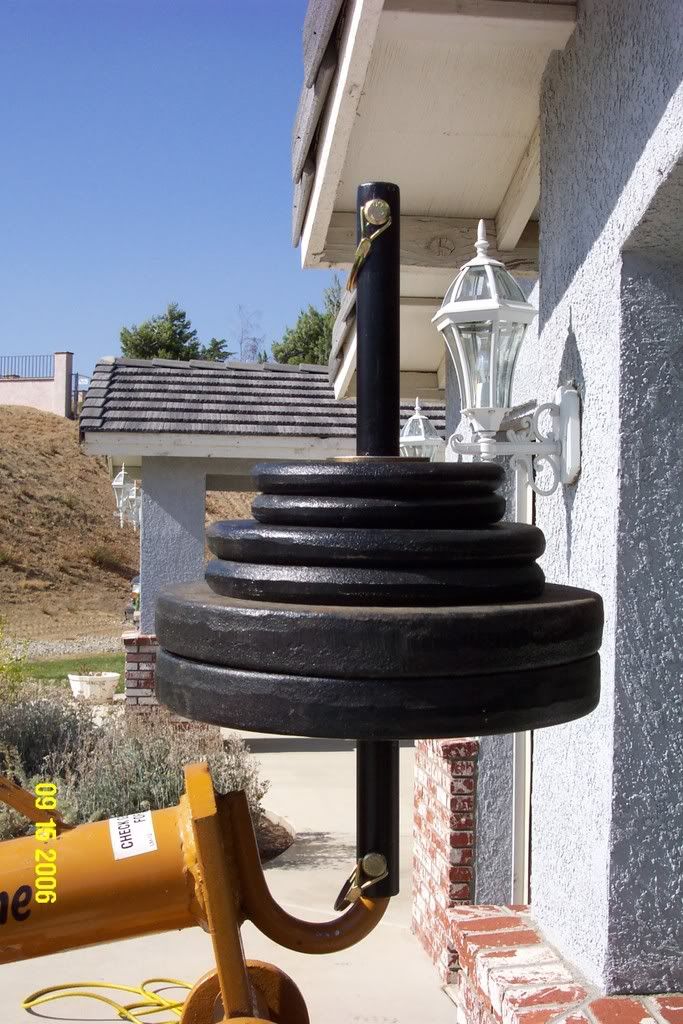
I mounted up the PTO auger and tried it out. The PHD works well with the 9" auger bit. I modified the upper portion of the arm (above the gearbox) to accept some added weights to help it dig in the hard-pan soil I have. I will play with the weight until I get the best combo. I drilled a hole in some 1" OD pipe/tubing (I never remember which dim corresponds to which type) and through the rear "hook" on the auger. I then welded a 1/8" fender washer to the tubing just high enough to avoid hitting the boom. I only had 80# of weights, however I am going to buy a few more of either the 25#'ers or several of the larger ones to get from 200#-300# of total weight. They are relatively inexpensive cast iron or steel. The weights plus the hyd. side links really help it dig now.  |
|
quikduk
CTW Life Member
Dog House
Posts: 552
|
Post by quikduk on Feb 29, 2008 18:25:59 GMT -5
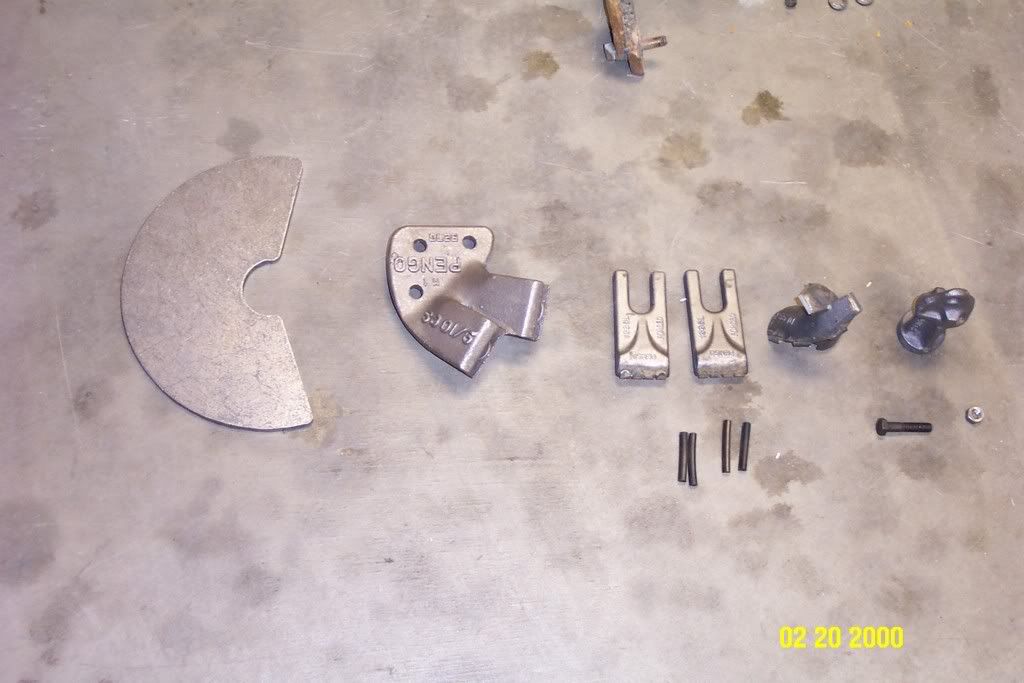
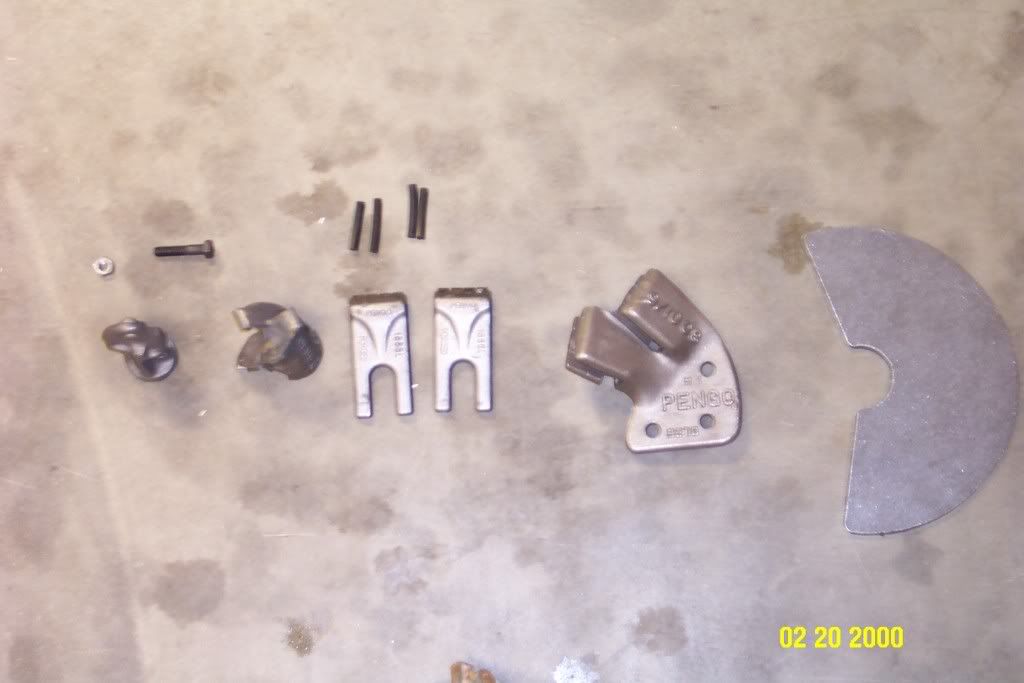
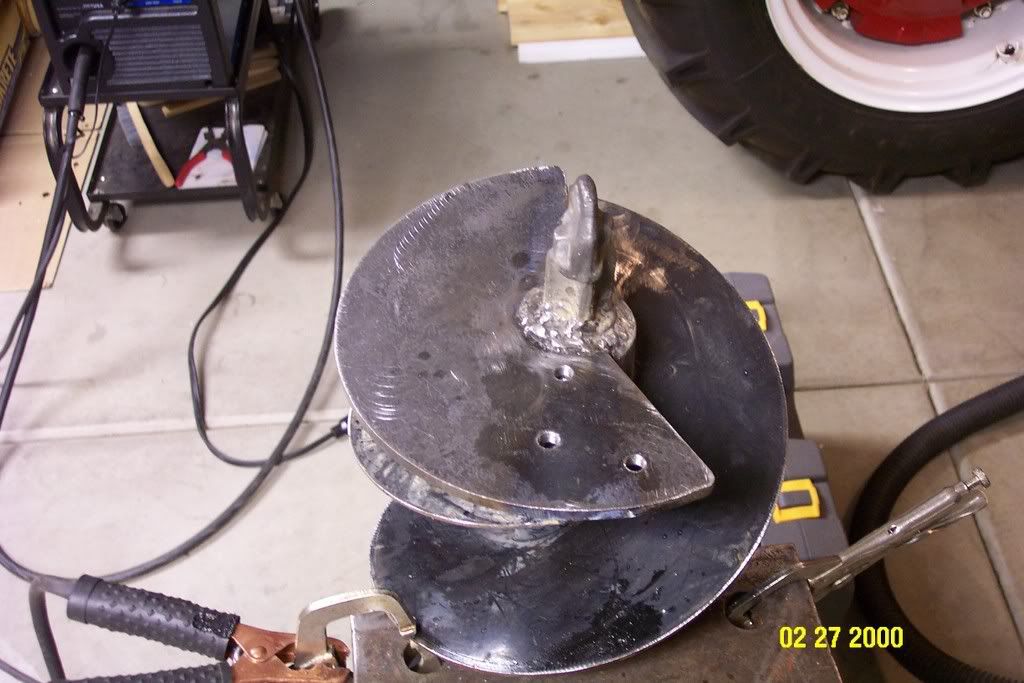
Well this mod. works o.k. but the Leinbach auger bit isn't as aggressive as I would like. I investigated some options and I decided to modify it (what a surprise). What I came up with is that I could cut out and weld a half circle, 9" in dia. out of 3/8" cold rolled plate to the bottom of the auger. I will then add a Pengo SB25 tooth mount with two 1336 carbide teeth, as well as a Pengo 140 center point shank and tip with carbide cutters. This combination is how Ground Hog builds their better augers and the cost for the parts and the steel plate is around $138. This isn't chicken feed, however it will make my auger dig like a hot knife through butter. I may also be able to get 20% off so that would save me almost $28 bringing the cost down to $118. That isn't too bad and their carbide cutters and teeth are extremely durable.
|
|
quikduk
CTW Life Member
Dog House
Posts: 552
|
Post by quikduk on Feb 29, 2008 18:26:29 GMT -5
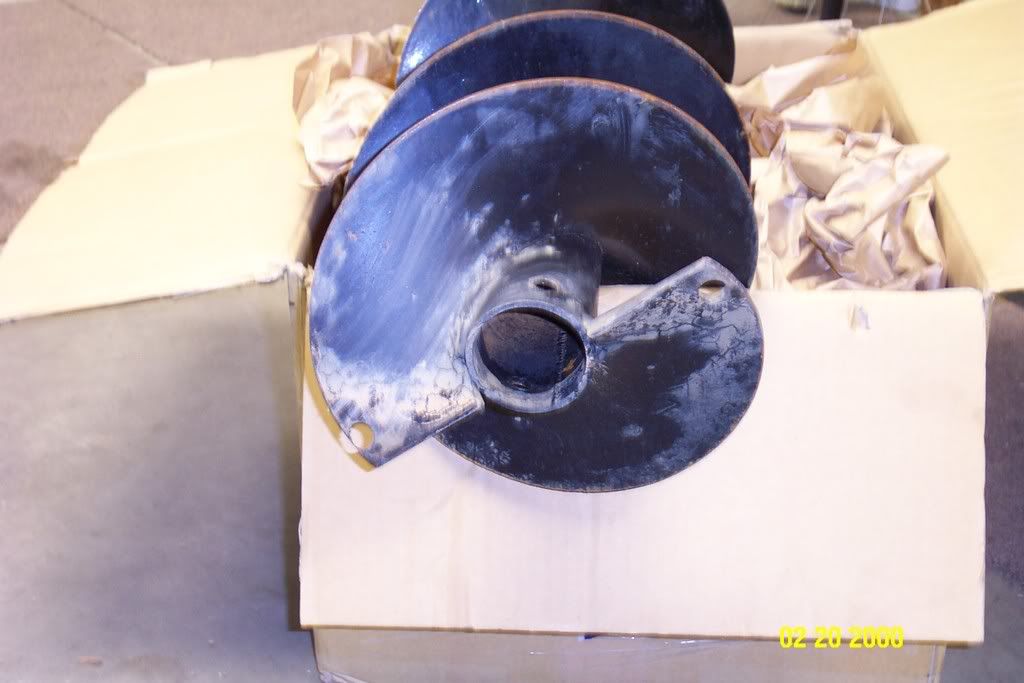
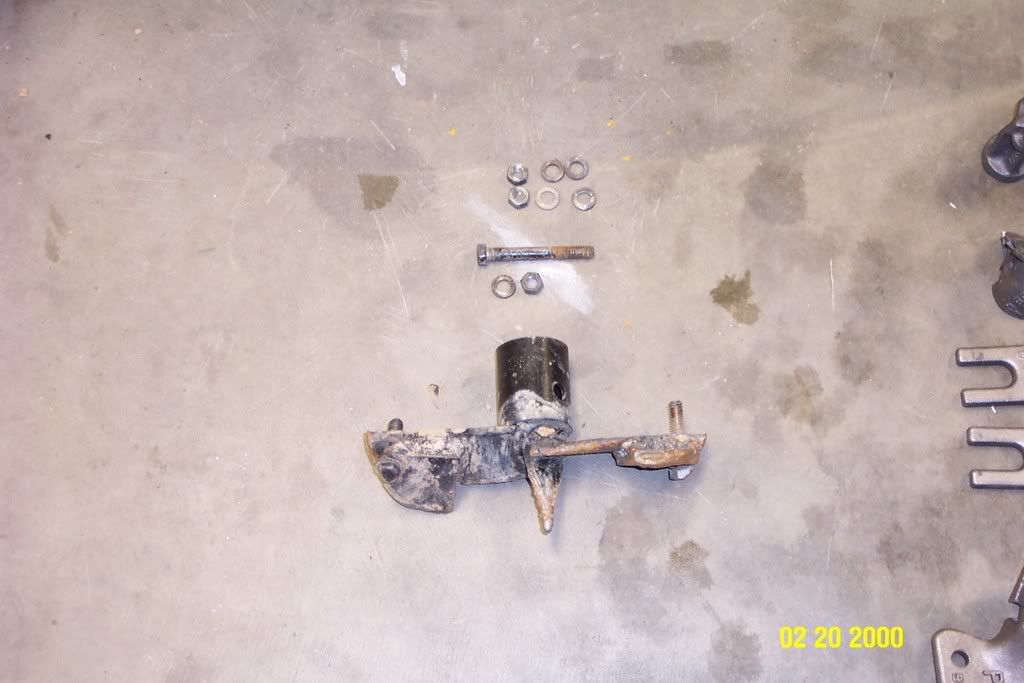
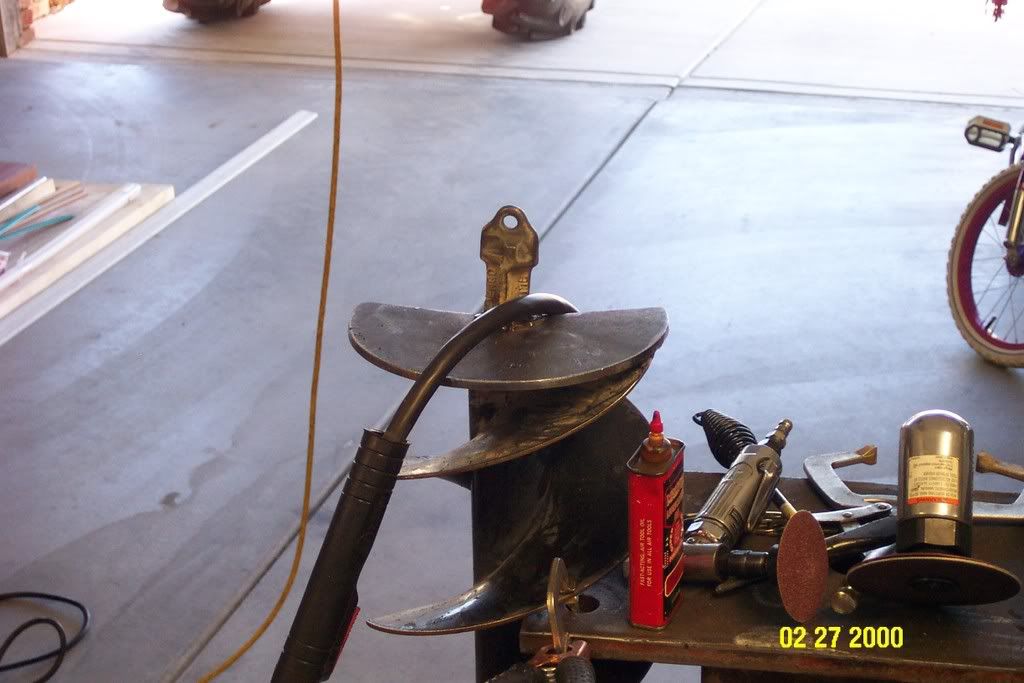
Here are two shots of the Leinbach auger bit, one with the “wings” of the flighting, the other with them cut off and ground down to accept the semi-circular plate for the cutting bits. 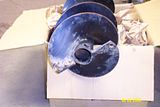  Here is the modified stock bit and cutting edges that are now shot after only 20 holes. I had welded some plate on to help dig more holes after the first 5 holes wore out the bit but they didn’t last either. 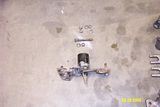 |
|
|
|
quikduk
CTW Life Member
Dog House
Posts: 552
|
Post by quikduk on Feb 29, 2008 18:27:19 GMT -5
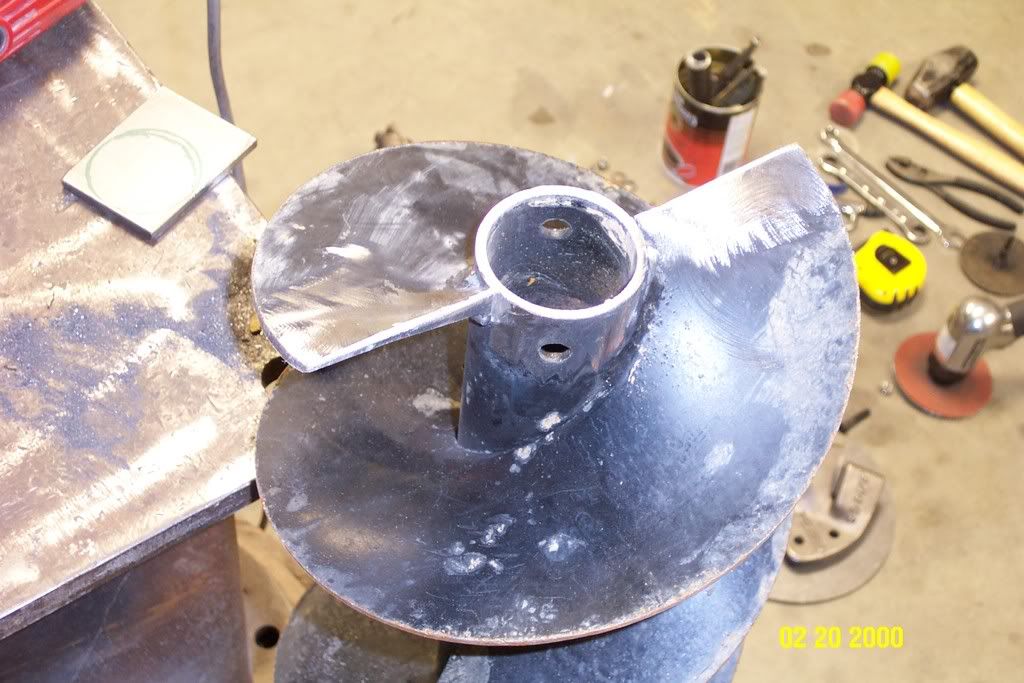
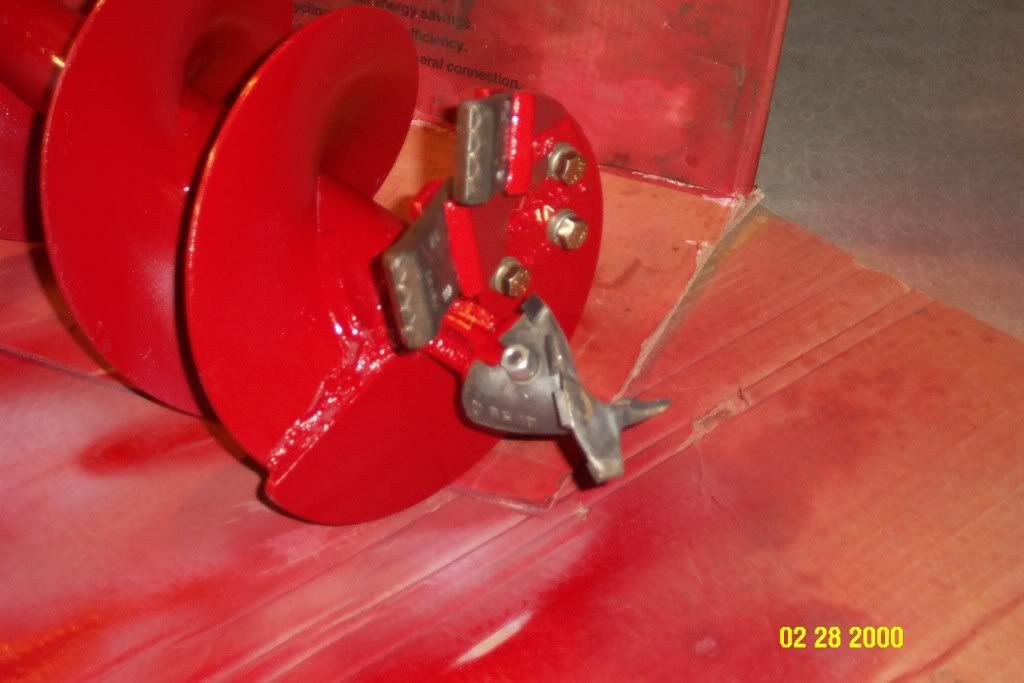
Once I got the plate tacked, I had to cut a sort-of modified circle out of some 1/4" stock to fill in the end of the auger tube. I was then able to mount the center bit shank and weld it in place. I drilled the three holes to bolt the tooth shank to the restrictor plate rather than welding it on as Ground Hog does since I have seen first hand how the ground at my place wears away steel. I can then replace this shank as required. The trick is to flip the teeth over BEFORE the ground wears into the shank. You basically should check it after digging each hole, at least in hard-pan, rocky soil. I then had to tap the holes for the three 3/8" grade 8 Cat bolts, which are backed up by grade 8 split ring lock washers and flat washers. I did this since when the restrictor plate is welded to the auger flighting, there isn't enough room for a nut on the other side of all three holes. While these bolts could wear away during the cutting/drilling process, I will be checking them to see how they hold up. They should be far enough away that the bulk of the grinding wont hurt them.  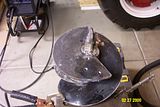 They aren’t pretty welds but they are deep and doubled up. |
|
quikduk
CTW Life Member
Dog House
Posts: 552
|
Post by quikduk on Feb 29, 2008 18:27:40 GMT -5
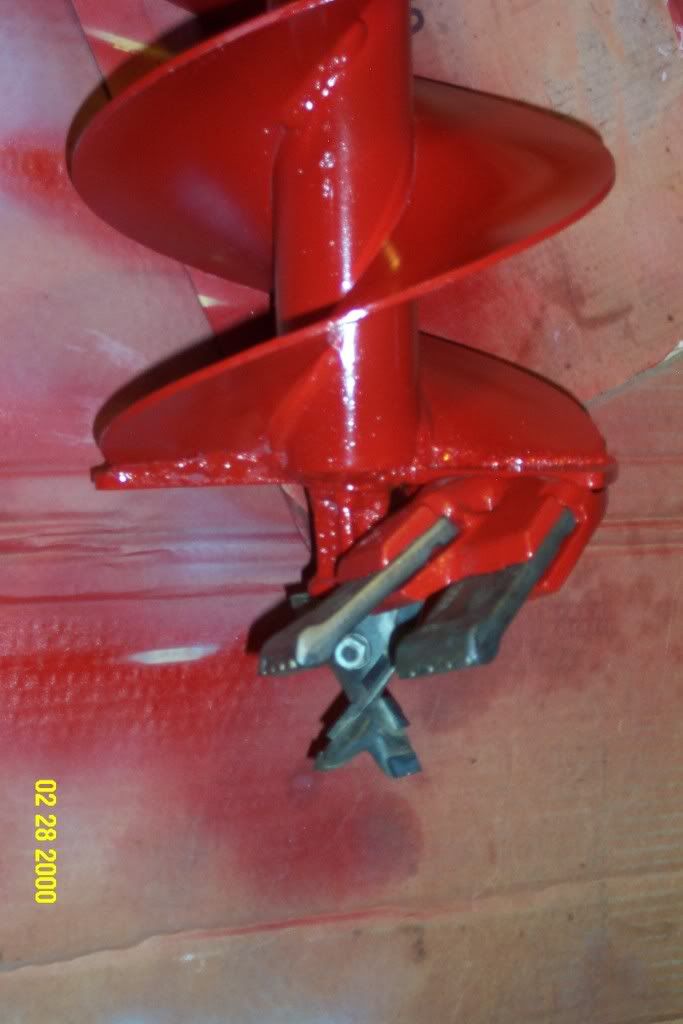
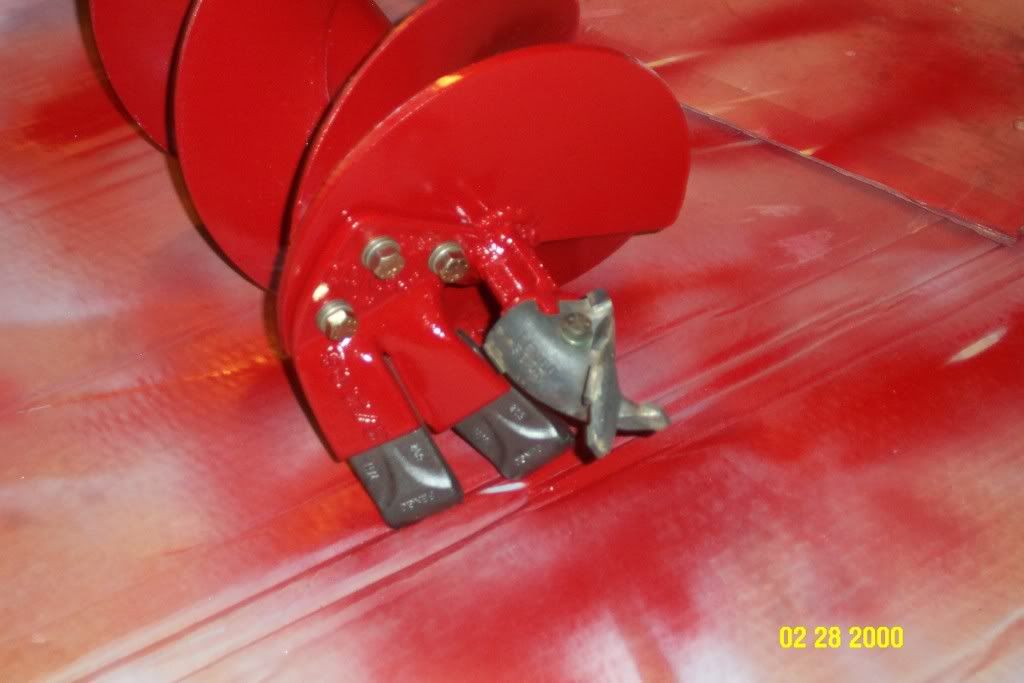
BTW, a comparable bit from Gearmore etc. runs nearly $300-$400 depending on the quantity and type of cutting edges and bits. Ground Hog, the auger company that I bought the Pengo parts from, welds on the center point "shank" but the tip is replaceable. They also weld on the twin tooth cutting edge "carrier", but the teeth are also replaceable. Here are the finished pics of my auger mod. with the Pengo carbide cutting teeth and fishtail. Both the fishtail pilot point and the cutting edges are all carbide tipped/faced. After drilling over 145 holes on the fencing project and numerous trees, they hardly look worn at all. 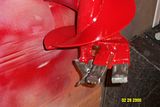 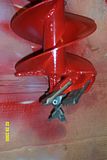  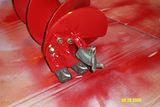 ...and yes, it does match my tractor. ;D |
|
|
|
Post by bracabric on Feb 29, 2008 20:26:33 GMT -5
Ken, Good to see your PHD mod again, how is it working for you? As you know I copied most of the tooth part of your mod with your help, but still don't have the penetration I would like, goes in about 6" and then just goes round and round but no further down.I think I shall have to send for the Pengo center bit "fishtail" after all and maybe even add some weights. Have to admit though that the ground here at the moment is like hard baked concrete.
Dick
|
|
3RRL
Administrator  Huge Kama
Posts: 2,027 
|
Post by 3RRL on Mar 3, 2008 15:31:20 GMT -5
Ken, nice work there. What did that kit cost you?
I will be checking them to see how they hold up.
Did they make a noticeable difference in cutting? Was it worth it?
Rob-
|
|
quikduk
CTW Life Member
Dog House
Posts: 552
|
Post by quikduk on Mar 3, 2008 18:58:52 GMT -5
Thanks Rob and Lucky Dick. After I added it all up, the parts were a bit more, I think around $158 US. It really helped digging the rest of the 140 some-odd fence post holes at our property for the vinyl fence project. I had some holes that were still so hard I had to fill them with water and let them sit for either a few hours (if it was warm) or a day or so (if freezing). Either way, the moment I went back, the carbide teeth tore through the remaining hard pan and made it look easy. The original tip wore out after less than a dozen holes.  What also helped was my T&T mod as I could now position, center, tilt and control the constant movement of the auger from my seat by myself. This made it much easier to dig the holes as I didn't need a spotter too often to insure I was plumb and it makes it safer for all if you are not standing on sloped or slippery ground when this thing is turning. I also keep a poised foot on the PTO disengagement lever JIC. Glad you liked the mod. The Leinbach is a "budget" PHD compared to the Gearmore and other brands. In retrospect, I should have opted for either a QA loader with a hyd. PHD or a bolt-on hyd. PHD that mounts to the side of the bucket. This would make it a LOT easier to get to difficult places and drill on slopes. |
|
biggkidd
CTW Expert
A World Away!!!
Posts: 226
|
Post by biggkidd on Mar 3, 2008 20:45:05 GMT -5
Ken, A great mod done well. Hey Guys I got to talk with Ken on the phone the other day. How cool is that. Its so neat getting to talk with you west coast guys. Ken your teeth are a vast improvement. You did a nice job getting that all welded up and true. PHD or a bolt-on hyd. PHD that mounts to the side of the bucket. This would make it a LOT easier to get to difficult places and drill on slopes.
Now when I say this remember I drill a thousand or so holes a year. But I am not sure you would actually want one of the front mounted ones. Its harder to see where your point hits than with it behind you. The front loader style works great on a bobcat but on a tractor you are so far away (6' or so) its hard to get the hole in the right place. If you have the one mounted to the side of the bucket it is doable though. If you have the quick attach thats in the center of the FEL its impossible to see what you are doing. I tried both kinds out in the past and unless its on a bobcat where its just a couple feet in front of you the TPH is easier to use. The down side is you have no down pressure. TSC does have a down pressure kit they sell. I would like to get one at some point. Just my 2 cent. KIDD  |
|