3RRL
Administrator  Huge Kama
Posts: 2,027 
|
Post by 3RRL on Feb 19, 2008 22:37:48 GMT -5
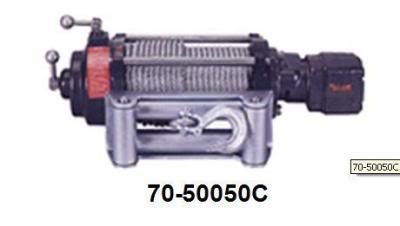
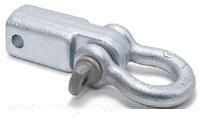
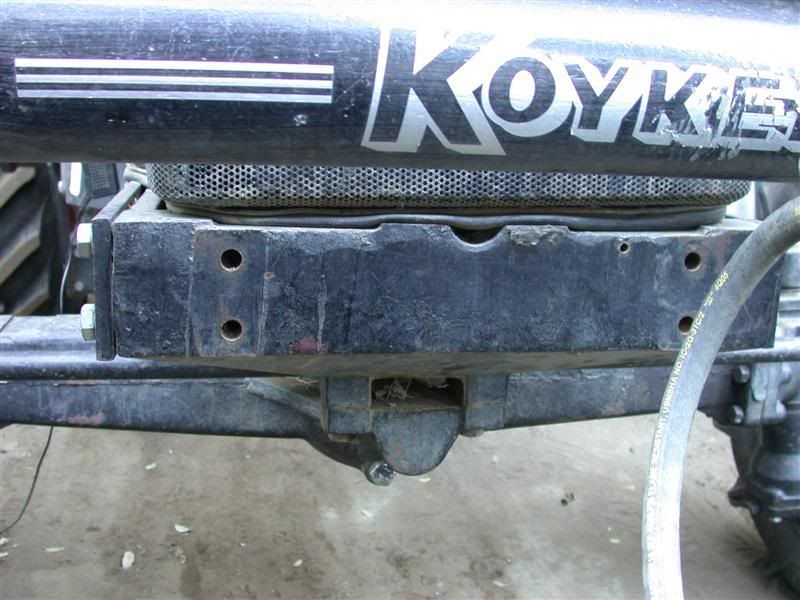
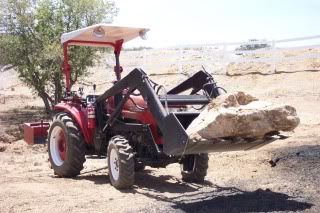
Several months ago, I bought a 10,500 lb Mile Marker 2 speed Hydraulic Winch model 70-50050C. It came with a clevis that you can slip into a trailer hitch. I got it off eBay for $695 + $45 shipping, so I thought it was a pretty good deal. 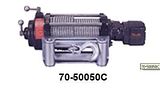  I wanted to mount it on my Kama 554 so it can be used either on the front or the back of the tractor. My challenge was to figure out a good mounting system to make it easily movable from front to rear. You never know which way your going to need it...either to pull the tractor out of a bad spot or maybe through it. I decided my best bet was to use a receiver hitch for both front and rear, and put the winch on a platform that I could plug into the receivers. The rear would be pretty easy, but the front needed some thinking. I would need to make the winch miss the fel and also have room to run the hoses back, out of the way. Here's the front and rear of the Kama. 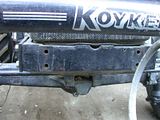 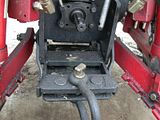 |
|
3RRL
Administrator
Huge Kama
Posts: 2,027
|
Post by 3RRL on Feb 19, 2008 22:44:22 GMT -5
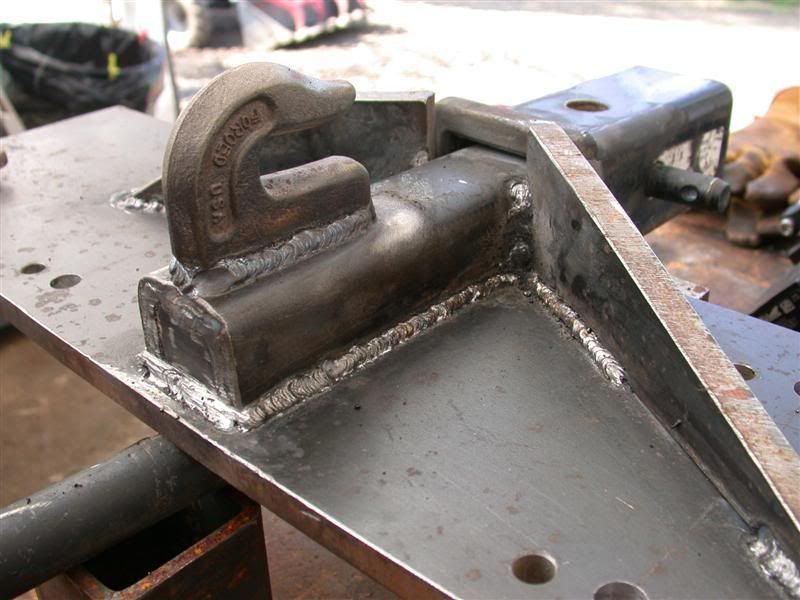
I didn't take a lot of photos to show what the two pieces look like, so I'll show them welded up and painted. The first picture shows the tray the winch will sit in and it is upside down. The second one a close up of the bottom of the tray after welding. I reinforced the bottom with gussets and added a grab hook to it. The hitch that slips into the receiver has a solid piece of steel welded inside it. 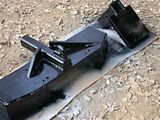  |
|
3RRL
Administrator
Huge Kama
Posts: 2,027
|
Post by 3RRL on Feb 19, 2008 22:58:09 GMT -5
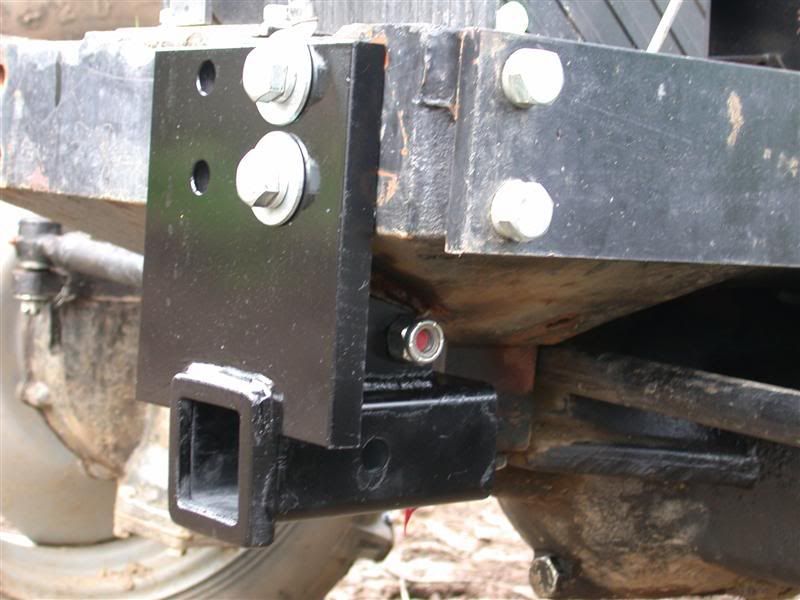
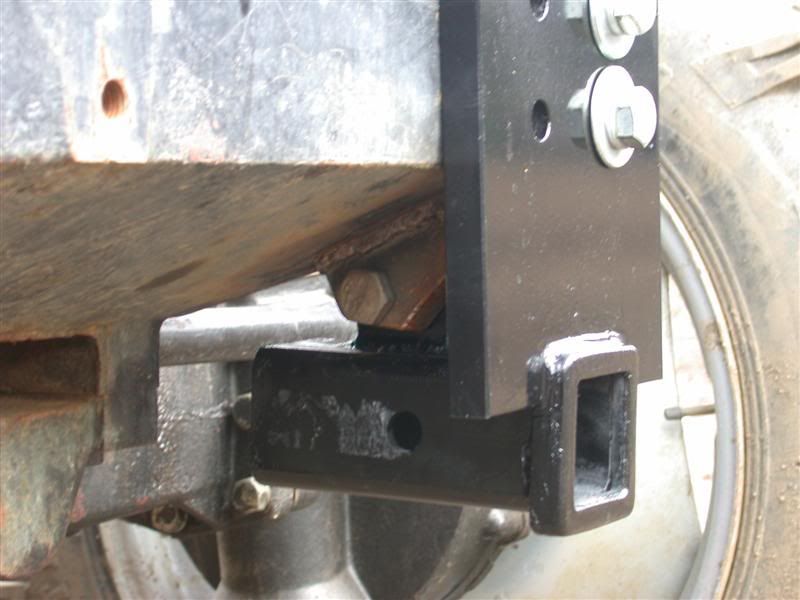
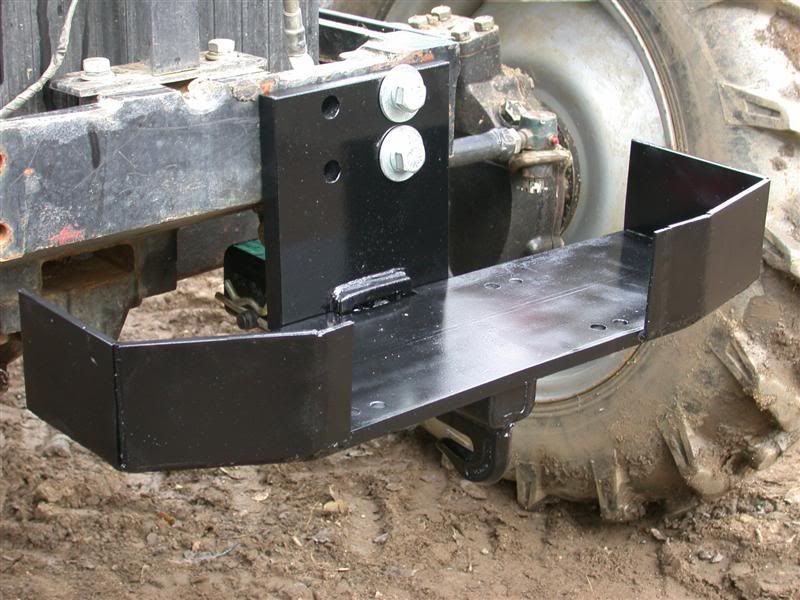
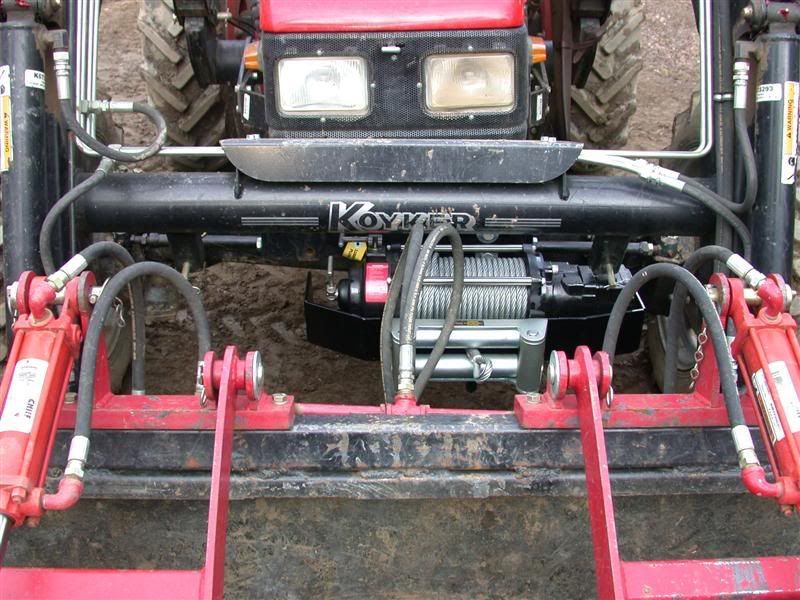
The following pictures show how the receiver is bolted to the front of the Kama. Notice that I only used two 5/8-11 bolts to hold the plate to the front. But also notice that I welded another attachment below/underneath which is also bolted to the receiver plate. That should help keep the plate from wanting to twist up under load. It was tricky making the piece that is welded onto the tractor, since that part of the tractor is on an angle. I had to get the bolt hole lined up just right and weld it in place underneath. 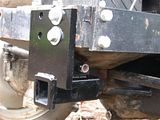 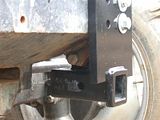 The pictures below show how the tray fits into the receiver. The tray has some "guards" welded on in front for protection. The winch will be bolted to the tray using those holes. I put an extra set of holes in, in case I needed to shift the winch over in order to have the hydraulic motor in and out lines clear the side of the tractor. Otherwise they would interfere with the side of the tractor frame. In addition to that, the height and depth of the tray, and it's location all had to be planned out so the bucket would not hit the winch. 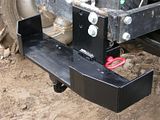  |
|
3RRL
Administrator
Huge Kama
Posts: 2,027
|
Post by 3RRL on Feb 20, 2008 12:50:42 GMT -5
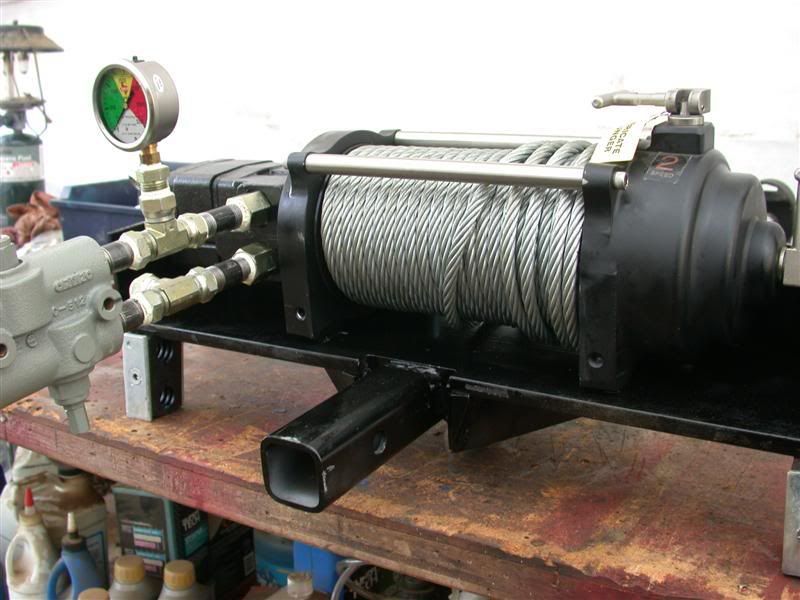
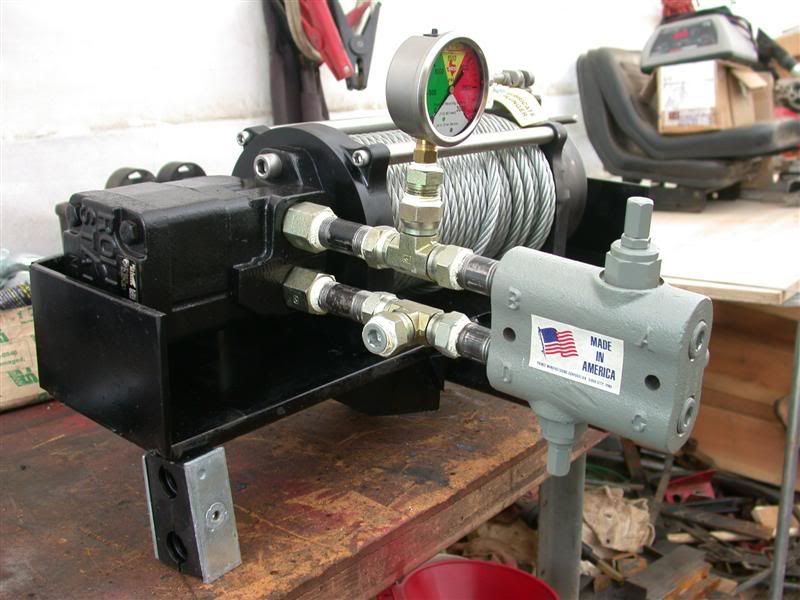
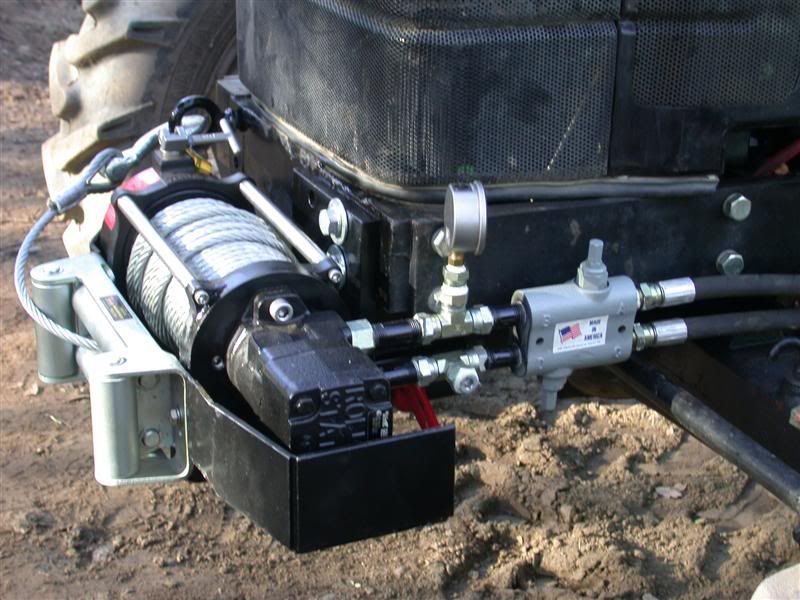
Here is the winch bolted to the tray after connecting the hydraulics on the bench. You can see I ran hard lines from the hydraulic motor to a pressure reducer or "cushion valve. I was lucky the centers of the motor matched the centers of the pressure reducer valve. I got the valve at Surplus Center. It can be adjusted from 1500psi to 3000psi and handles up to 30gpm. It bypasses to the opposite side to prevent surge, over pressure or cavitation. There is a gauge in between on a "T" to set the correct pressure going to the hydraulic motor for the "retract". Mile Marker was specific to have a maximum of 1500psi going tot their winch. I have another "T" for the feed out, but have not installed a gauge there yet. I don't anticipate as much a load in that direction, but if there is, I can put a gauge there also.   On the other end of the cushion valve are outlets for hoses. The winch "unit tray" will have 5' long hoses and QD's on the end. Those will plug into my front or rear remotes. I can run the front remotes through my grapple control valve and the rears via my rear remote valve. So they can be operated from the tractor. Pulling myself out from a stuck position will allow me to operate the tractor at the same time this way. For pulling loads ...rocks or trees... I thought about adding a remote control so I can hook up and walk with the load I'm dragging, but I'll try it this way first. Loretta will be there to help connect and disconnect the loads for me. Rob- |
|
3RRL
Administrator
Huge Kama
Posts: 2,027
|
Post by 3RRL on Feb 20, 2008 13:11:40 GMT -5
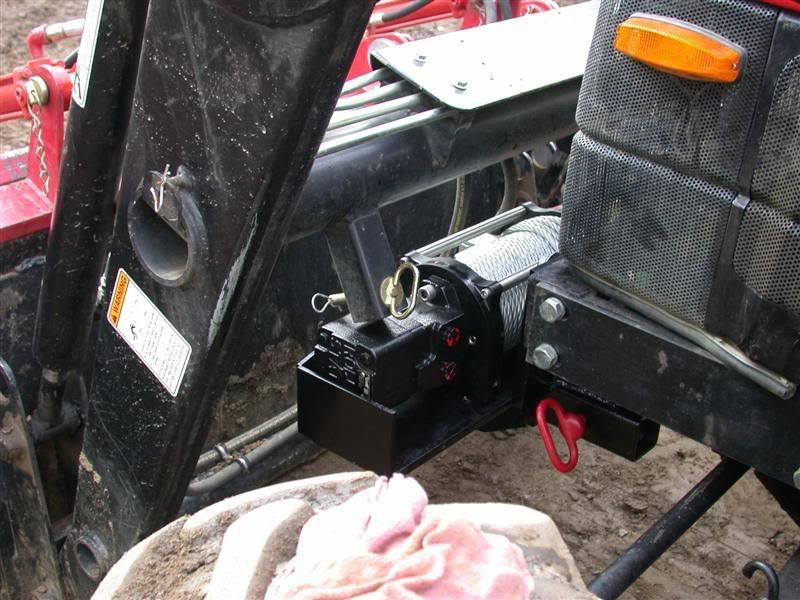
After bench testing, I took the tray to the tractor and mounted it. I needed to check for clearances. The hoses from the grapple flexed towards the motor, so I moved them so they were going sideways, folding to the left in that first photo. I also noticed the receptacle for the "legs" of the fel was very close when I put the fel all the way down to push the front of the tractor up. I didn't want a problem there so I cut that one off and welded it back on a little to the side, out of the way.  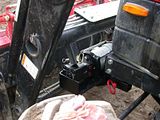 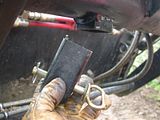 Ken was visiting during that part so he helped me with removing and re-routing the front hydraulics. He also tapped and installed that eyebolt for the winch hook. Here's Ken, Loretta and myself at camp. He might have some more photos?  Rob- |
|
3RRL
Administrator
Huge Kama
Posts: 2,027
|
Post by 3RRL on Feb 20, 2008 13:33:10 GMT -5
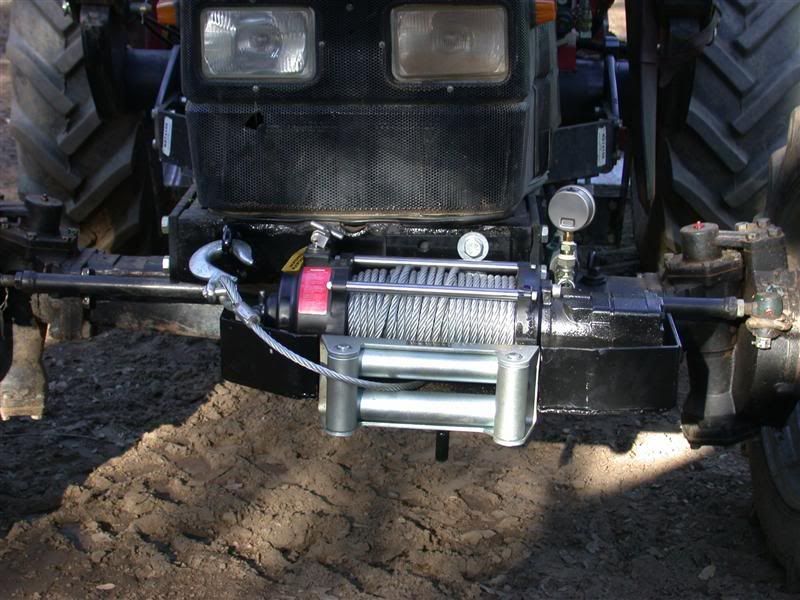
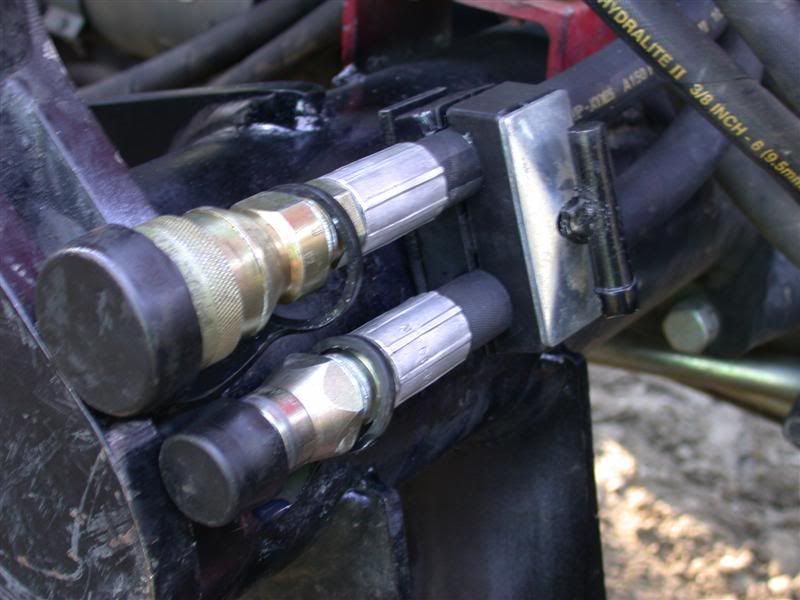
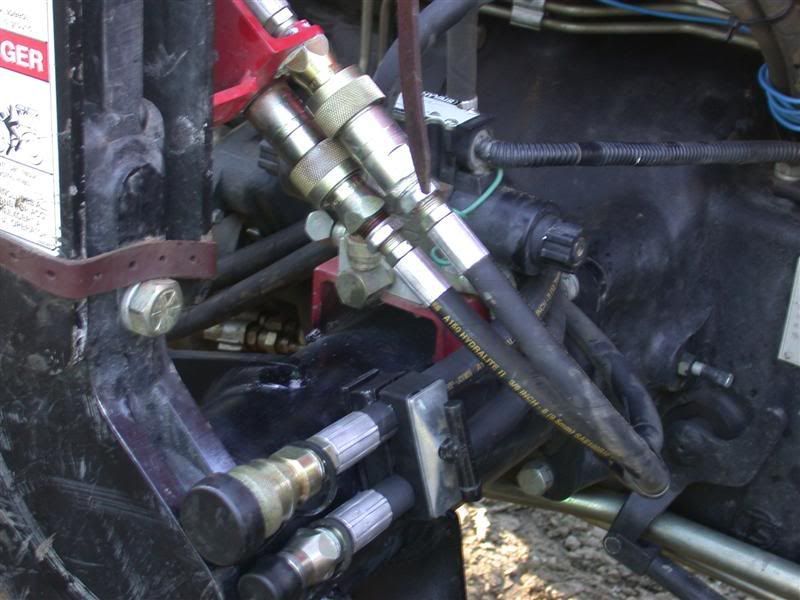
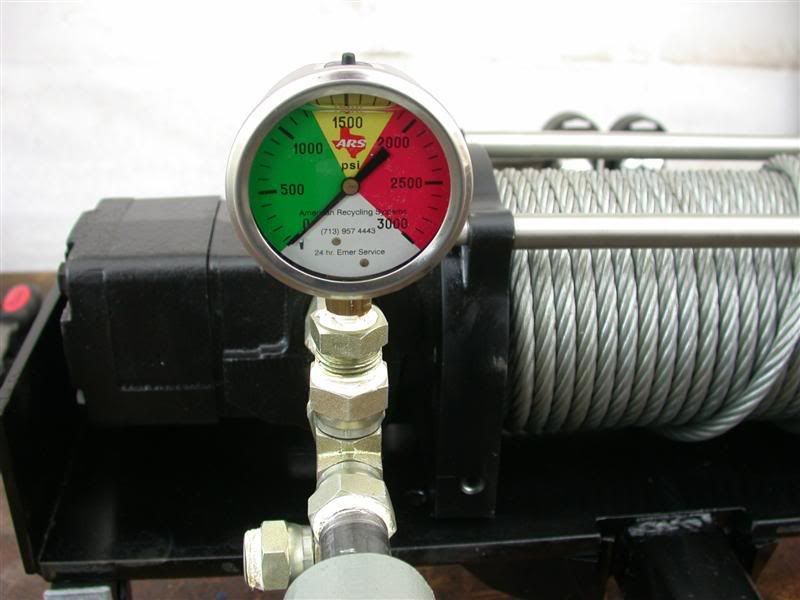
After getting the unit mounted and fitted to the front, I ran the motor hoses back towards the cab where the QD's are. These are after fitting and the fel up, out of the way. You can see the eyebolt Ken installed for me here, and the hoses now connected to the rear of the cushion valve.  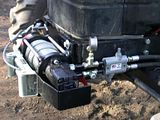 I bought a hose clamp for 2 hoses and welded a "handle" to the bolt so I could undo it when I wanted without a wrench. So all I have to do to use the winch is unplug the grapple and plug in the winch. Same for moving the winch from front to rear. Just take out the hitch pin and remove the winch with hoses and plug into the rear receiver. Then plug the QD's into my rear remotes.  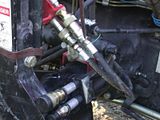  That last photo shows the pressure gauge. The yellow zone is where I set the pressure to be at... about 1500psi. I can see it from the tractor seat, but now that it's set, everything should be OK. I haven't attached the rear receiver to my draw bar yet, but I already have the receiver. I ran out of time but will do it next trip up. My first big project is to winch out those Buckbrush on the slope in front of the log home. There are some areas pretty steep where I'd rather not take the tractor. A couple of the guys that visited the property (Ken, Brian and his brother Mark and even Larry) made quite a few comments about it when they saw the slopes in person. Thanks for looking, Rob- |
|
3RRL
Administrator
Huge Kama
Posts: 2,027
|
Post by 3RRL on Feb 20, 2008 18:09:27 GMT -5
Ken, Why don't you tell the story how it didn't work at first. When I plugged the winch into the grapple hoses instead of the valve QD's. Duh.  But then also how I reeled you in using 2nd gear on it. Rob- |
|
GuglioLS
Administrator
Jinma354 LE
Posts: 1,276
|
Post by GuglioLS on Feb 21, 2008 23:43:05 GMT -5
Rob,
Well that winch is super heavy duty. I am amazed the cushion valve lined up perfectly with the motor. And it's looking super sano with the minimum amount of hoses and fittings. I especially like the protective tray bracket you fab'd up, it fits like a glove. This is a most impressive winch project. Well I guess it would have sure come in handy when YOU got everything buried to the axles at camp a few weeks ago. How's the cable speed on it?
Larry
|
|
3RRL
Administrator
Huge Kama
Posts: 2,027
|
Post by 3RRL on Feb 22, 2008 15:11:01 GMT -5
Yeah, it should come in handy from now on... for whatever.  The hydraulics came out sweet. I bought pre-made hoses from Agri-Supply so they were only 10 bucks for both. The cushion valve was $39 and the gauge was $15. All that steel for the tray was under $50 bucks including the scrap I had lying around the grage. The receivers cost me $20 bucks for both. I had spare QD's , "T's" and the nipples already, so I only got $135 bucks in it total to get it totally hooked up. That is for the ability to connect this winch to either front and rear position. Not bad. I'll use it to up root and drag off the Buckbrush on that steep slope below the log home. I still have to weld a receiver to my tow bar so I can use it on the rear of the tractor. As far as the speed, I can only compare it to the small electric winch I use. This hydraulic winch is a 2 speed. In low it's about the same speed as the electric winch but in 2nd speed it flies. The power in low is incredible. I reeled Ken in while he was keeping tension on the cable for me. Perhaps he can comment better about the speed? BTW, what is the stuff to lubricate the cable? Does Napa sell it? Rob- |
|
quikduk
CTW Life Member
 Dog House
Posts: 552
|
Post by quikduk on Feb 25, 2008 23:21:38 GMT -5
I didn't want to mention the obviously mis-labeled Chinese/American QD snafu. You and I would NEVER make such a silly mistake. I think maybe we hadn't had enough coffee yet that morning.  Re: the 2nd gear thing, you mean the high-range-yank-my-arms-out thing? That thing spools so fast in high range it would beat Larry's tractor running in low-reverse. ;D It is a very sweet setup though. Rob, if you use a large HD snatch block with it, you can double your pulling power for those really BIG jobs. Just remember to always damper the cable, block it with your FEL and hide on the joystick side JIC. |
|