3RRL
Administrator  Huge Kama
Posts: 2,027 
|
Post by 3RRL on Feb 6, 2008 10:08:41 GMT -5
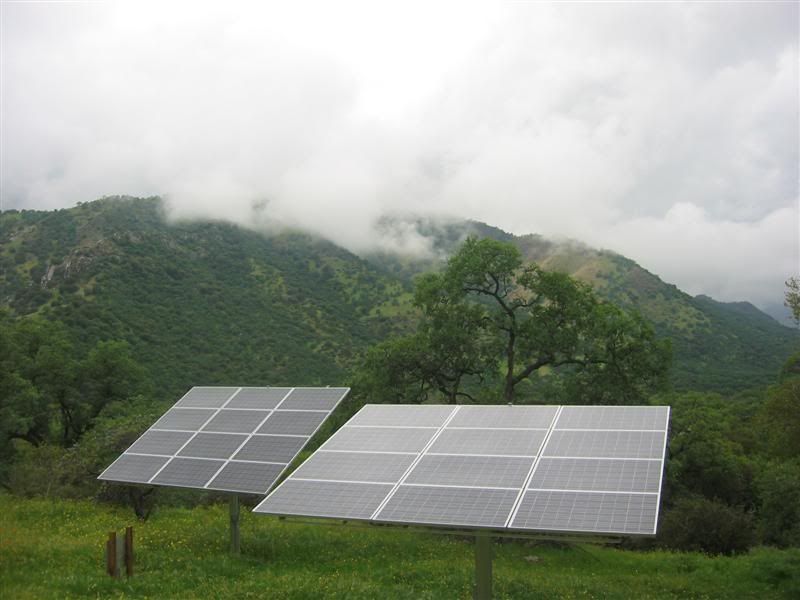
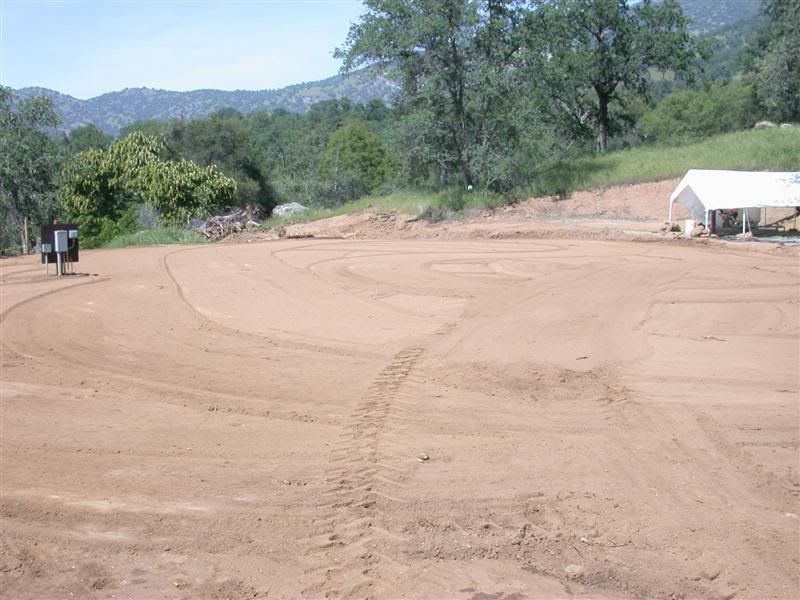
Here are a couple more looking down the DG pit. You can see how hard the DG is to cut out. I was able to cut a lot by back dozing with Robo blade but sometimes it just stopped the tractor in it's tracks leaving all 4 wheels spinning. Then I tried to rip it and sometimes it would catch and dig in, sometimes skid. I also took the fel bucket and jammed the toothbar into it to pry chunks out. All three methods allowed a ridge where I could then cut off another slice. All this was really tough on the big Kama. That tractor has paid for itself just doing this job. I am so proud of it! The pit overlooks the solar panels from East to West. 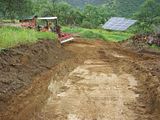  |
|
3RRL
Administrator
Huge Kama
Posts: 2,027
|
Post by 3RRL on Feb 6, 2008 10:10:04 GMT -5
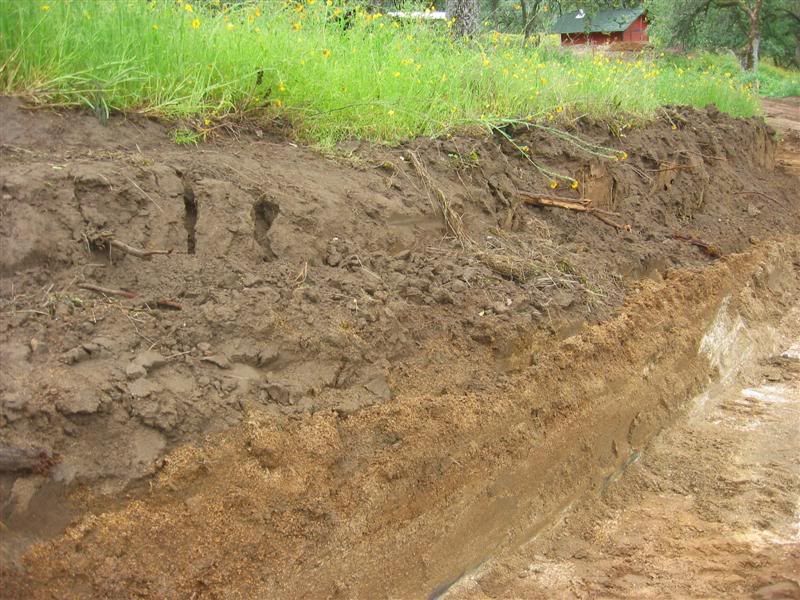
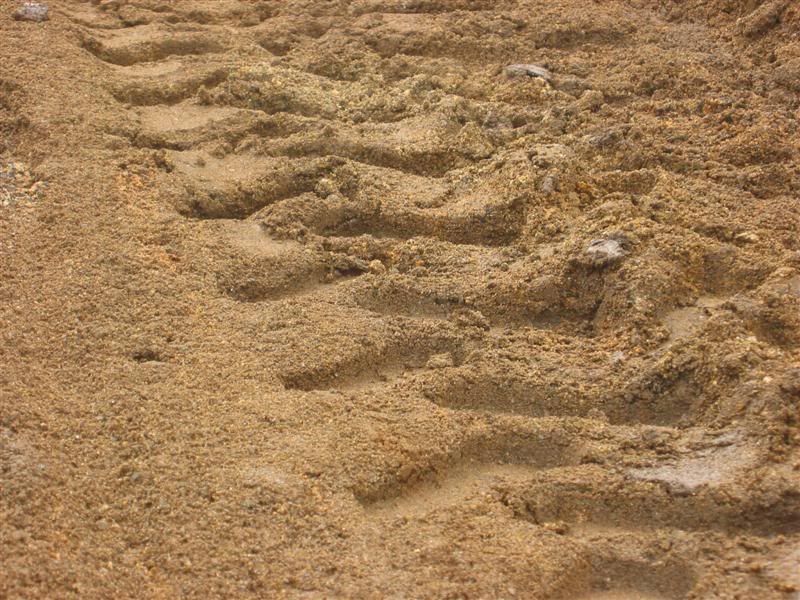
I wanted to talk a little more about the decomposed granite on the property. This is the same stuff that is spread on my dirt roads as a topping. It was all cut from pits like this one. Once you get through a couple feet of dirt, there is the DG, and it is HARD man! Here you can see the different layers as I cut lower and lower. 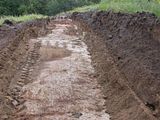 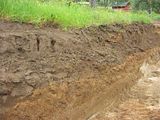 |
|
3RRL
Administrator
Huge Kama
Posts: 2,027
|
Post by 3RRL on Feb 6, 2008 10:12:13 GMT -5
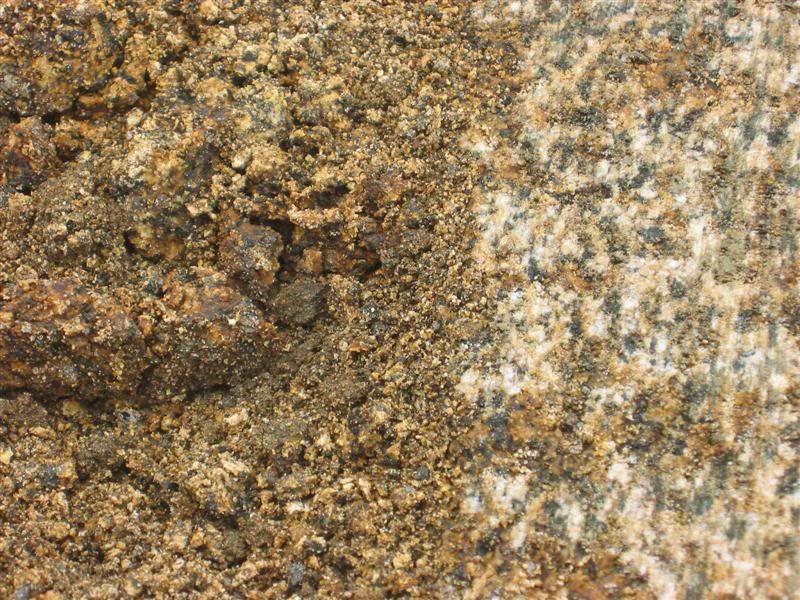
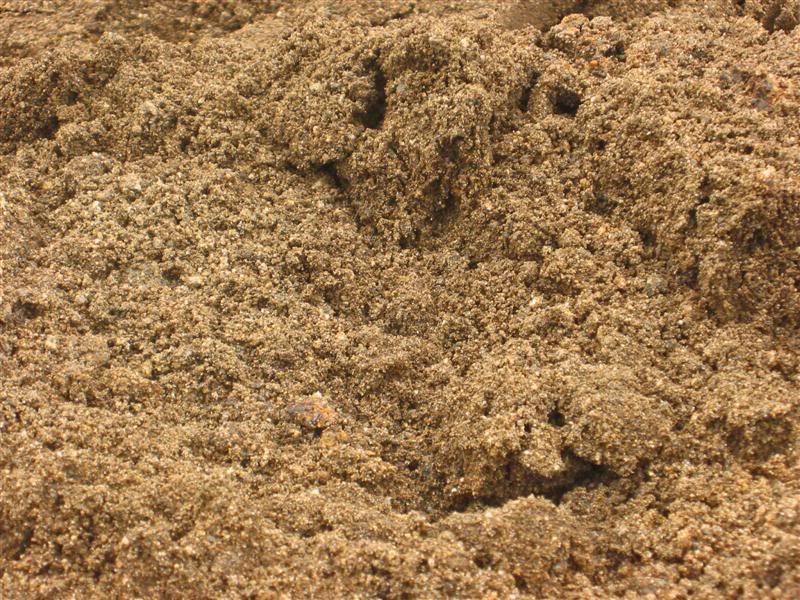
This stuff makes great topping since it is basically crushed rock. When the D-9 and excavator was here, they cut through it a lot easier than the Kama by comparison. But then the Kama is not a bulldozer either. Here you can see a close up of how rocky it is when I cut chunks out. Then after scraping a layer off, it turns into coarse sand. After I get piles and piles of it dug up, I move it to the barn pad and distribute it layer by layer. Compacting it with the dirt mixed in will make for a solid foundation. 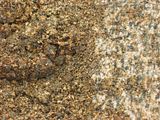 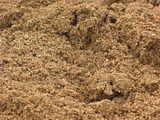 Here is another interesting comparison between the dirt and the DG. This photo shows the Kama tire track in the dirt. This one is the Kama tire track in the DG. Notice the difference between the depth of tread where the DG holds up much better than the dirt. That's why my dirt roads hold up so good under the rainy conditions. And where there is very little DG on the road, it is slippery and muddy. There is a noticeable color difference too. 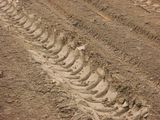  |
|
3RRL
Administrator
Huge Kama
Posts: 2,027
|
Post by 3RRL on Feb 6, 2008 10:36:44 GMT -5
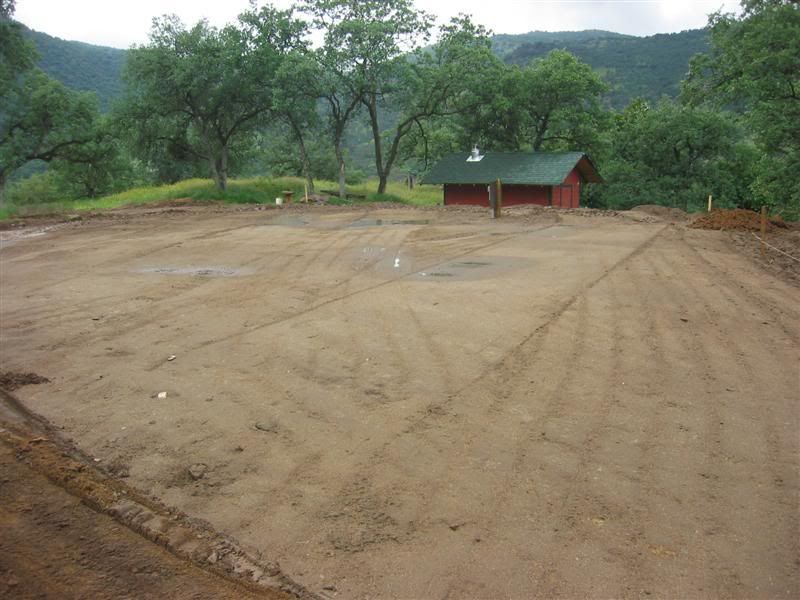
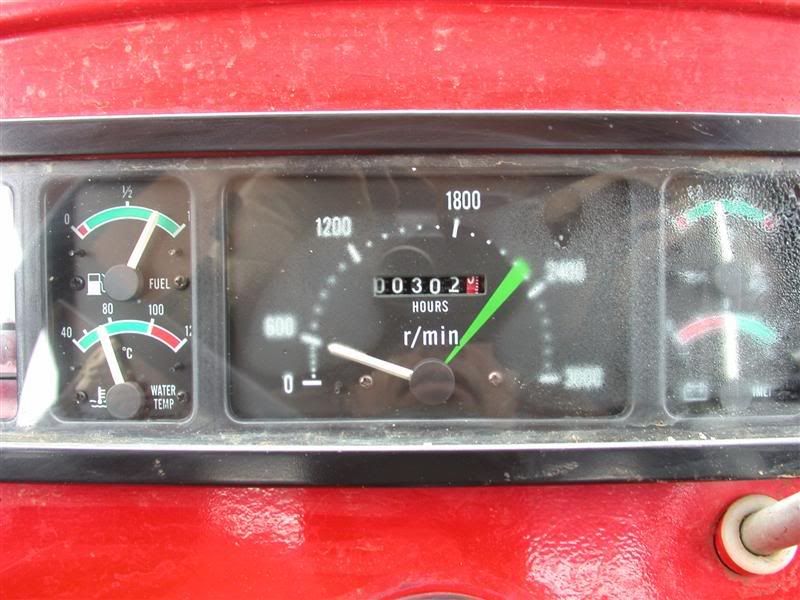
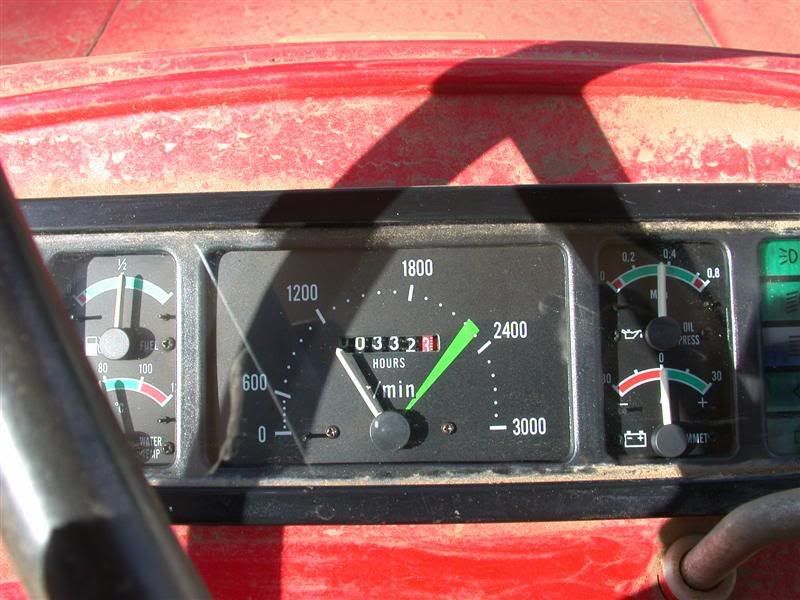
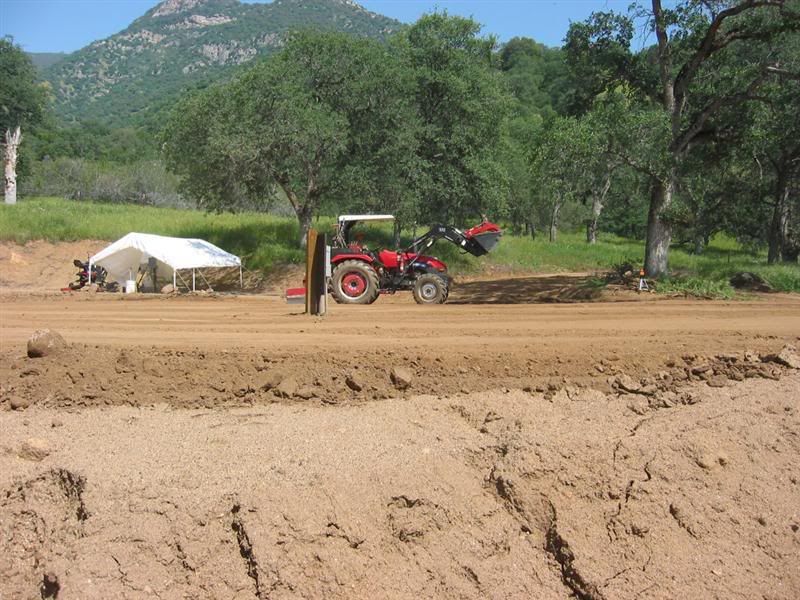
So this is all I got done this weekend. This is how I left the barn pad until next weekend. It's getting close to being finished now, but there is still more leveling and grading to get it right. But it's starting to look like something now. I wish I had more time to spend up there and did not waste 8 hours driving every weekend, but that's just the way it is. Plus I am so busy at home with my new project (real work) that I can't get away during the week. Another interesting thing is that my Kama registered over 300 hours on the meter. I have way more seat time than that, since I only run it between 1500 and 1800 rpm. Plus the 35 hours that are not registered at all when dashboard did not work. So I definitely got my money's worth with this tractor. Other than the dumb electrical problem, the minor breakdowns I've had would have happened to ANY tractor the way I push it. I'd like to see any other one survive that DG cutting or moving those giant logs and boulders over my terrain like my Huge Kama did. 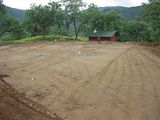 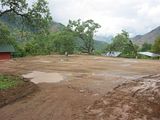 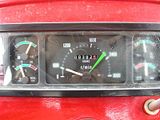 |
|
3RRL
Administrator
Huge Kama
Posts: 2,027
|
Post by 3RRL on Feb 6, 2008 10:38:04 GMT -5
Thank you for the kind words fellow members.
I have indeed learned a lot about dirt work. I am especially impressed with the control the top and tilt allows for both grading and digging with the boxblade. I have never had any worries about the fel performance digging and moving dirt or other objects. It does not discriminate in work assignments. The addition of the dual grapples is just icing on the cake.
Right now I figure I've dug and moved about 500 yards total. How many truck loads would that be? Anybody know? It is more than one truck load right? ... I have no idea.
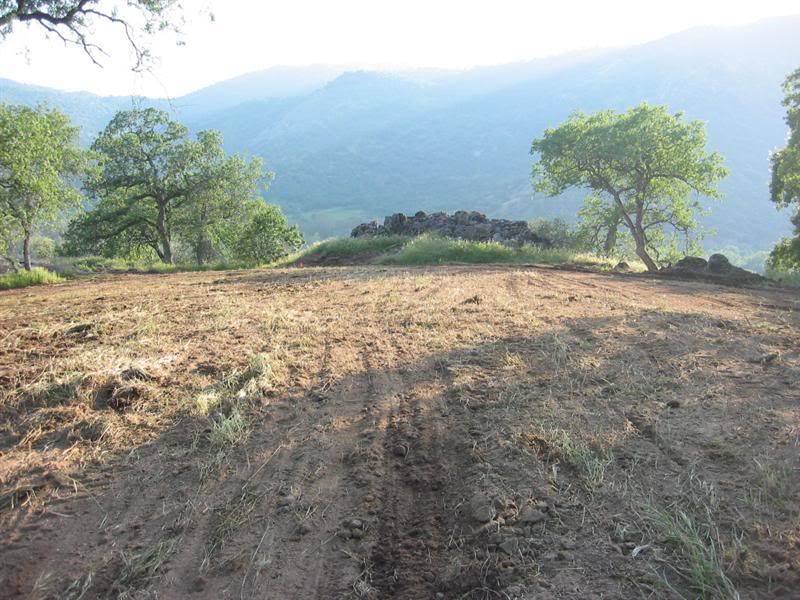
The pad is built up large enough to easily fit the 40' x 50' barn structure. It is also high enough on all sides where I can concentrate on just cutting/grading it level without having to dig more DG. I think I can finish it this coming weekend. After that, I will start clearing the vegetation off the homesite pad. I don't need to grade it, because much of the house will be stem walled footings. The natural slope of that area will lend to how the house is built and fits the terrain. It will have a small basement where it slopes down, a main floor at rock height, and a top floor.
In this thread I have emphasized how I feel about the Kama's performance so far. In past threads I have put it up to tasks which would normally require a bull dozer too. It just goes to show you that if used properly and diligently, you can get a lot done with a tractor like that. I know there has been a lot of stress put on it because of the way I've used it, but that's what I bought it for. If it broke down right now and I had to throw it away I'd still be money ahead for sure. However, I inspect the machine and lube it every use. On one of the inspections, Loretta found a front lug nut in the dirt. On checking the others, there were several on the fronts only that were loose. The rears were tight. Just don't take it for granted that things will stay tight. Always do your pre-check when using your equipment, especially when subjecting it to severe duty as I have.
As soon as I complete the barn pad and clearing, I will do another complete service including changing all the oils and filters/strainers, front and rear ends, transmission, fuel and air cleaners, valve lash adjustment and head bolt re-torque. I am considering changing the radiator fluid too, but it seems I may not have to? What are your thoughts on this? I will also take that opportunity to set my fronts and rears (tires) out to maximum width. I'll use the manual as a guideline for any addition service required.
|
|
3RRL
Administrator
Huge Kama
Posts: 2,027
|
Post by 3RRL on Feb 6, 2008 10:49:43 GMT -5
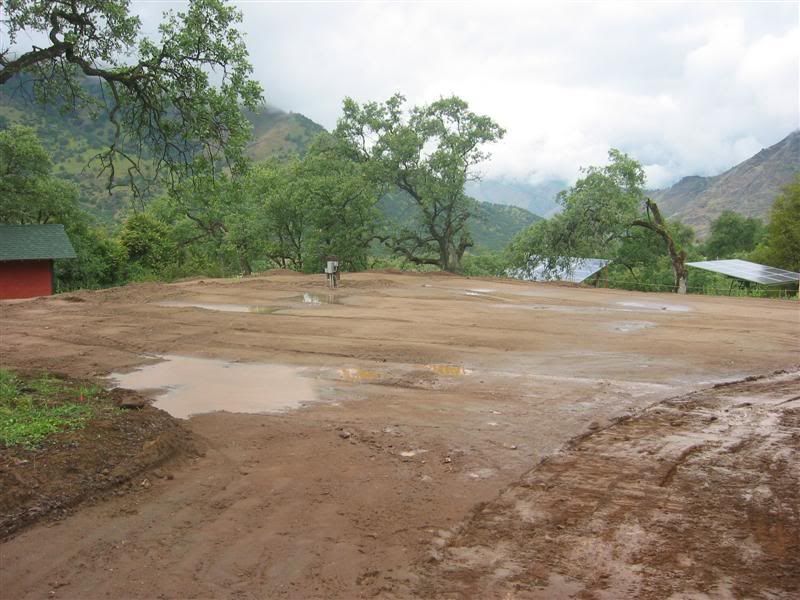
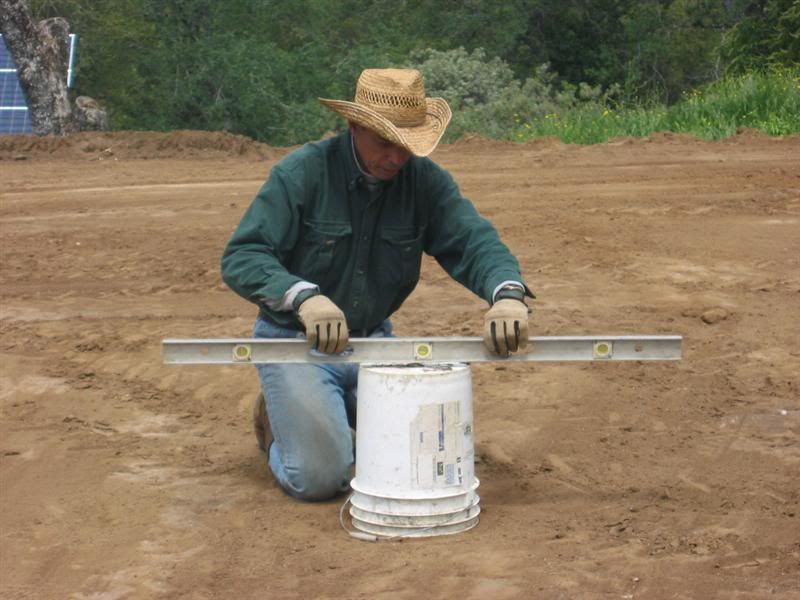
Loretta and I drove up Friday afternoon to continue preparing the barn pad. The weather forecast was for rain, so we wanted to get as much done while we could. The first thing I did was set up a 5 gallon bucket as a leveling stand so I could use a laser level to shoot level. We pounded in wood stakes all around the perimeter of the pad, larger than the footprint of the barn ... about 10' per side larger. Then used the laser level on top of the bucket and marked each stake. We determined which stake mark was closest to the ground and measured it. Then we measured down on all the other stakes to determine ground level. We were going to string twine from a center stake to each perimeter stake and also around the perimeter. That would tell me where to cut and where to fill, but it started getting dark. 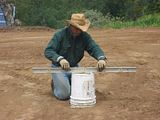 Well, it rained that evening and it was still wet and muddy when I arrived with the tractor the next morning. I had forgotten my camera so Loretta drove up the next morning and took these shots. You can see there are some low and high spots that I want to level out better. But overall, it is not too bad. It should not take too long to do the final leveling. Compacting all the dirt I moved last week took a long time, but paid off. Unfortunately, this is how we left the pad until next week when it is supposed to be sunny again. 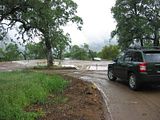 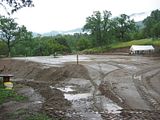 |
|
3RRL
Administrator
Huge Kama
Posts: 2,027
|
Post by 3RRL on Feb 6, 2008 10:56:39 GMT -5
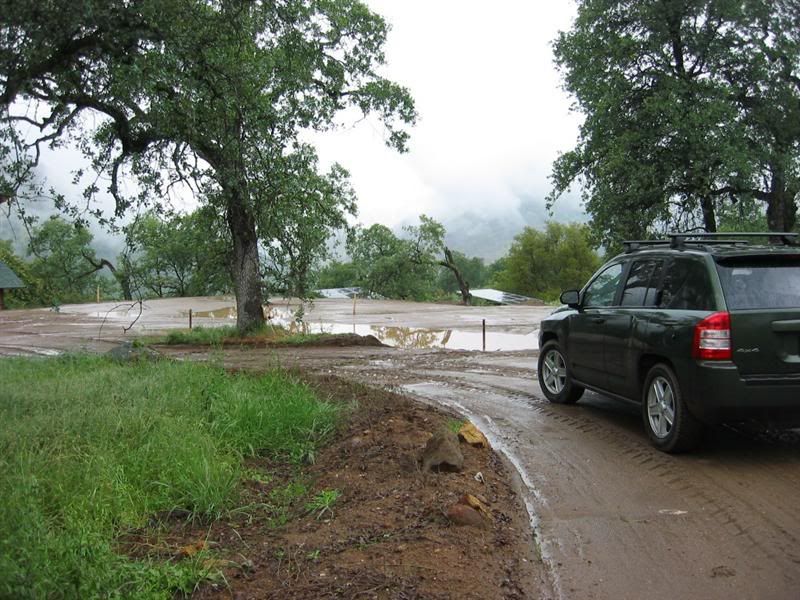
It was raining most of the day so there was no way I was going to get any grading done on the barn pad. I decided to start clearing off the homesite vegetation. This was a big and messy job with everything being wet and muddy. I made a trail to a dump area where we had previously stowed some brush. Someday I'll either chip or burn that pile. This is the homesite itself with the rock formation in the background. I still have a lot to do but I am wisely waiting until next week to complete it. 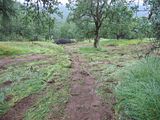 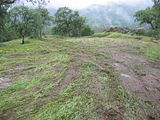 During this clearing, while backing up my boxblade, I bumped into the rocks. Then my shuttle shifter got kind of stuck ... jammed. So I wiggled and pushed it into forward, but then it would not go back into reverse? I took the rears out of differential lock so I could use the steering brakes and made a couple more passes down to the dump area. This was scary because I had to make a generous enough turn so I could use my steering brakes or I'd be stuck down there. In doing so, it forced me up higher on the bank to turn than I felt safe. It was muddy and slippery so I only made a few more runs and decided to call it a day. I returned to camp to repair the shuttle shift problem. I was hoping I didn't break anything major. |
|
3RRL
Administrator
Huge Kama
Posts: 2,027
|
Post by 3RRL on Feb 6, 2008 10:58:50 GMT -5
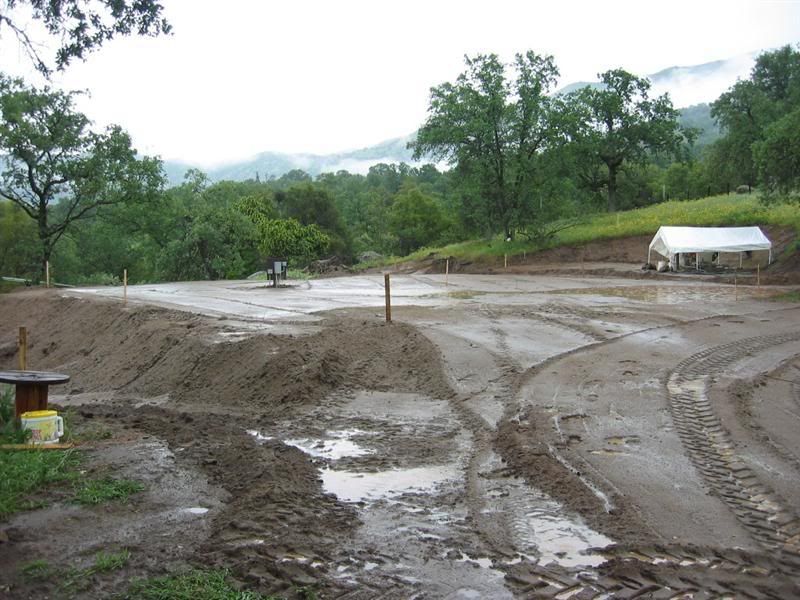
This weekend was a BIG work weekend. We got a lot done and I got a lot more hours on the clock. Got to the barn pad and there was standing water in a low area. It had rained very hard last week. Anyway, we started by setting up the rotary laser I bought at Harbor Freight as per Tim's suggestion. The laser on it was great, but when spinning, I could not see the laser's projected line no matter how much I varied the rotating speed. I finally just aimed it by hand and marked all the posts.  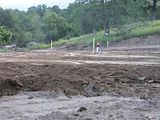  |
|
3RRL
Administrator
Huge Kama
Posts: 2,027
|
Post by 3RRL on Feb 6, 2008 11:04:03 GMT -5
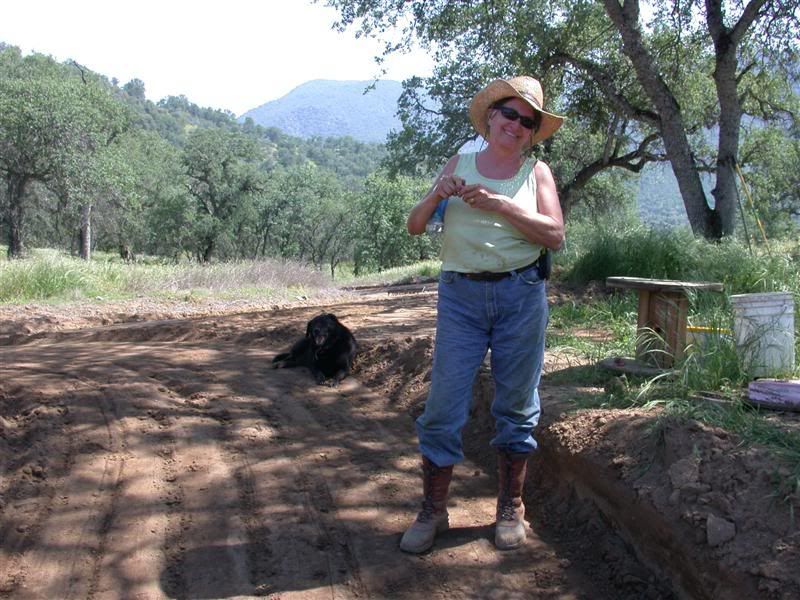
While removing the water in that low spot, adding DG to it, we moved over to the homesite to do more clearing work on that part. You saw last week where I had scraped much of the 3 foot tall vegetation off it, but it was not completed. This was after a couple more passes with the boxblade to make it better and better. Loretta and Coco were kind enough to stick around and tell me what to do. Loretta took many photos of the work done this weekend. There is a lot more to do on both barn pad and homesite. 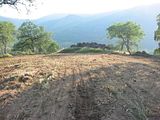 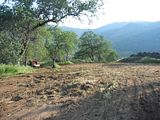 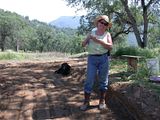 |
|
3RRL
Administrator
Huge Kama
Posts: 2,027
|
Post by 3RRL on Feb 6, 2008 11:07:35 GMT -5
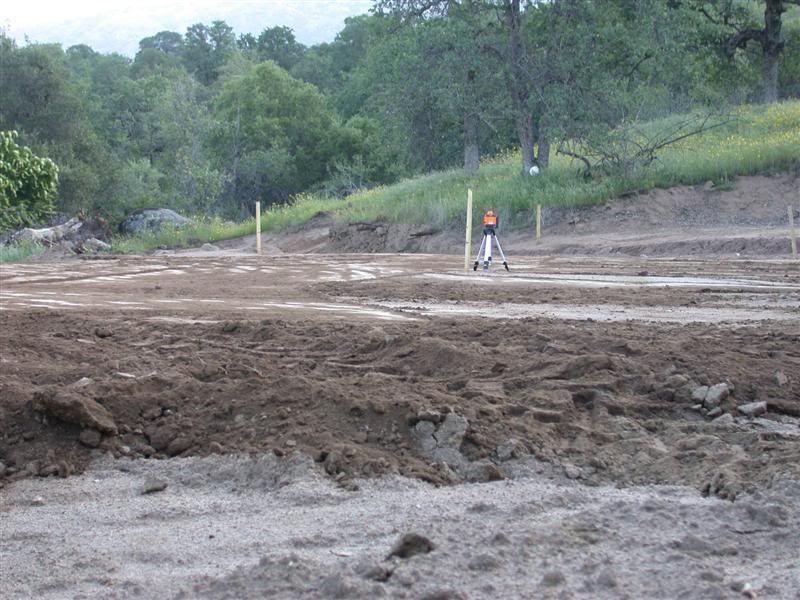
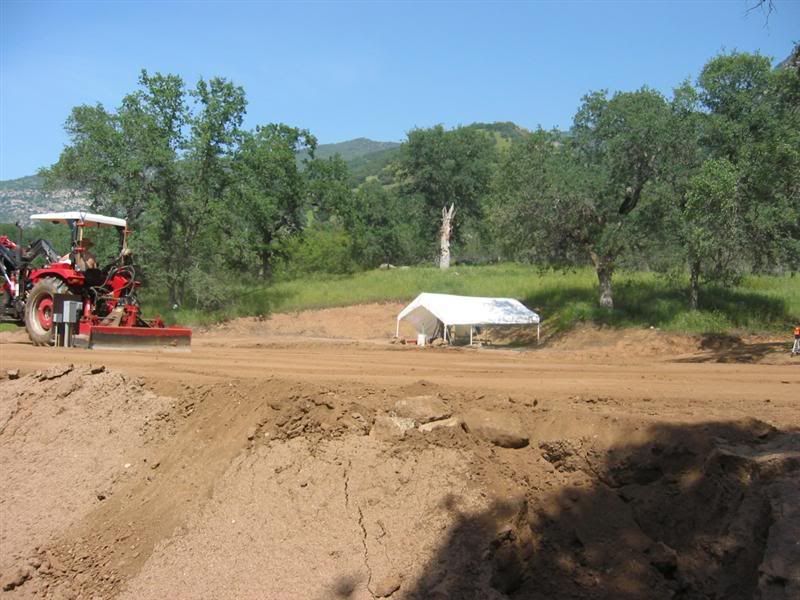
It took Loretta and me a long time to get the entire barn pad level. We did a small section at a time until it measured the same distance down on the post we drove in. Here's a shot of it starting to level up nicely. I drove around the surface dragging the boxblade to see how it felt and also to see how the compacting held up. Even driving the 8,000lb Kama very near the built up edges, it was very hard and firm. So I was happy about that. The barn pad will be set in from the built up parts a good 10 to 15 feet anyway. It is a pretty big area and more leveling than I had ever done before. But using the technique of doing sections, it really came out nice and flat and parallel (pretty much). I hope it will be acceptable by my contractor. He is meeting us this coming Friday to inspect the work. This shot Loretta took really shows that it came out pretty good. I watered and compacted after that for the last time just to make it look good when he arrives. 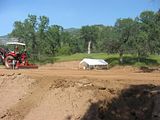 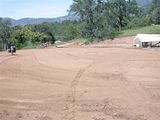 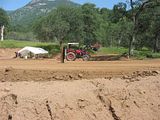 |
|
3RRL
Administrator
Huge Kama
Posts: 2,027
|
Post by 3RRL on Feb 6, 2008 11:10:59 GMT -5
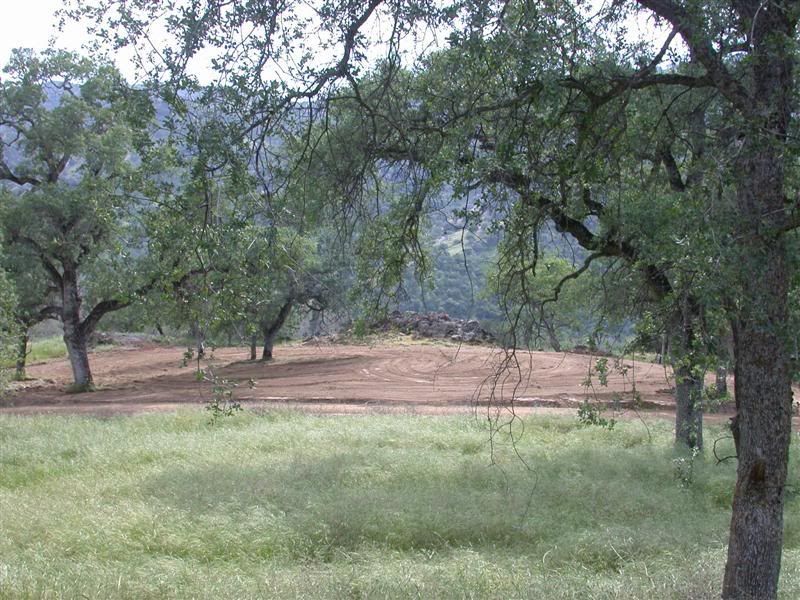
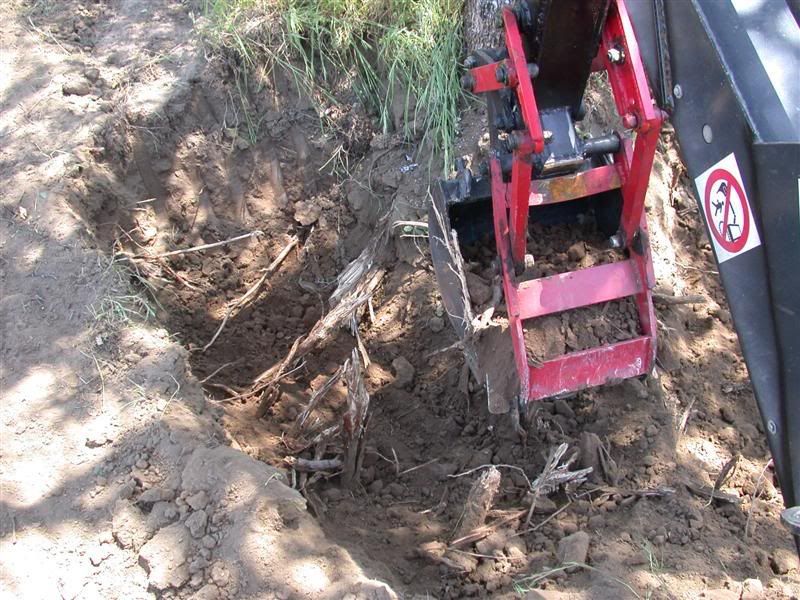
I figure the barn pad is done for now unless the contractor wants more done to it. If he does, I'm gonna tell him to shove it. hahaha. So that left us with the clean up of the homesite itself. After making what seemed like a hundred passes with the boxblade, it started to look pretty good too. Here is a shot near the end of the day from a ways out. You know it was covered with tall stuff like is shown in the foreground.  Loretta did all the weed eating around the rocks and trees and I continued to cut off the tall vegetation. Then there was one multi-trunk Oak tree to remove. It wasn't huge, but the darn roots were tough as nails. I had to dig a big circle around the tree and then get in there and chop the big diameter ones off with an Axe. The backhoe tore the smaller ones out. BTW, the mechanical thumb worked great in yanking out those roots and moving dirt.  |
|
3RRL
Administrator
Huge Kama
Posts: 2,027
|
Post by 3RRL on Feb 6, 2008 11:14:59 GMT -5
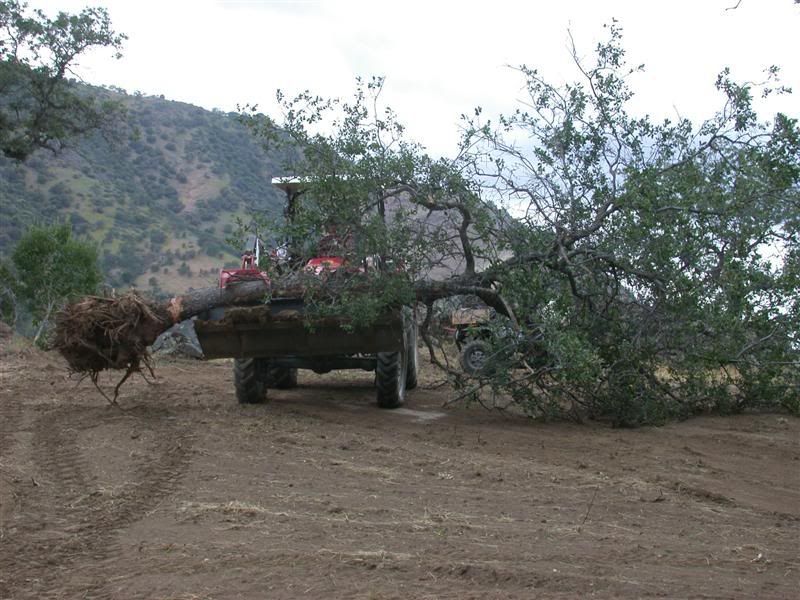
After spending several hours digging, I got to a point where I thought I could push it over with the backhoe. I purposely did not fell nor limb the tree. I figured once I got it going over, the extra weight would keep it going down. Plus, we don't need anymore wood as there are about a million downed trees to choose from. Another thing was time. I needed to get this done today because we were leaving in a couple hours. 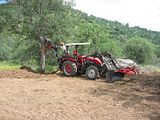  There is always the good part after all that hard work. Here is a fun video of pushing the Oak over.  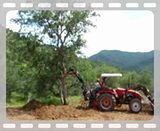 |
|
3RRL
Administrator
Huge Kama
Posts: 2,027
|
Post by 3RRL on Feb 6, 2008 11:18:06 GMT -5
After I pushed it over, I had to get the root ball out of the huge hole. So I tried to grapple it out with the bucket grapple. Man, that thing is heavier than it looks. But I managed to get it out of the hole so I could chain and drag it to my dump area. I could only lift it barely out of the hole. I realized later that I had the tractor at only 1500 rpm (duh  ) and should have gassed it up to pump up the hydraulics a little more. I did that a couple of times when other loads pooped out and ran the tractor at 2300rpm and the fel was strong as all get out. 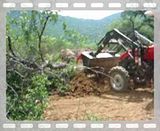 |
|
3RRL
Administrator
Huge Kama
Posts: 2,027
|
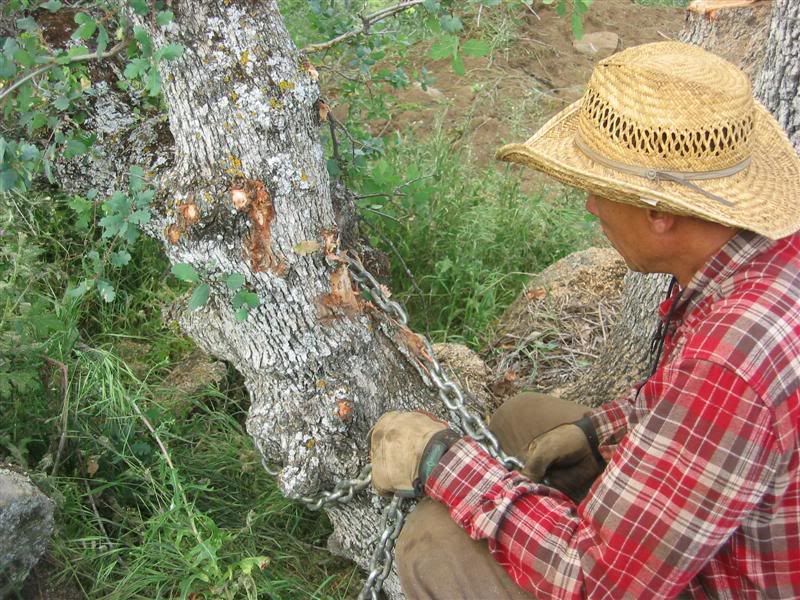
Post by 3RRL on Feb 6, 2008 11:22:03 GMT -5
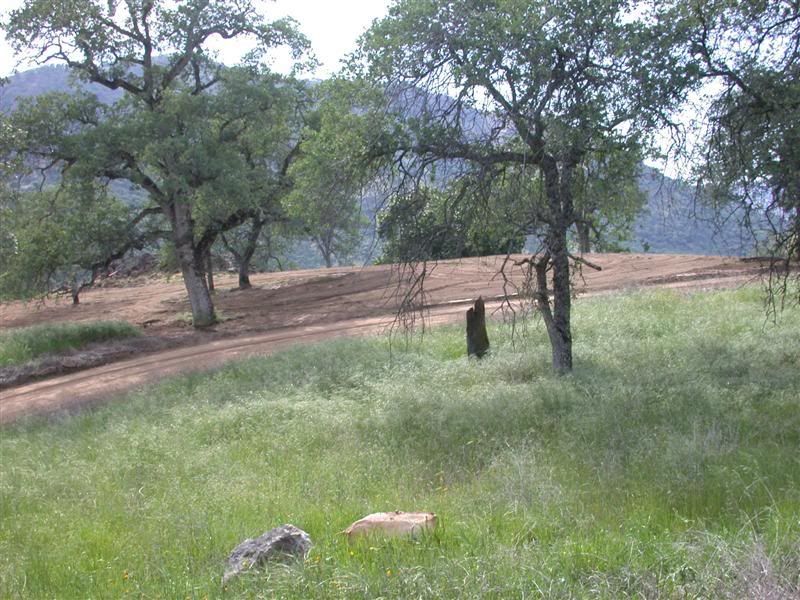
Here I am chaining up the Oak to drag it down to the dump where there is a lot of other brush ready to burn. More than likely I'll come back and buck it for firewood though. This is the dump area where I took everything too. It's about 100 yards from the edge of the homesite down a slope. So that's how we left the homesite when it was all cleaned up. You can see it past this part of the road. It should be good enough for them not to lose any tools in the tall grass. That was the main reason for the clearing. Now I can start working on the road repairing some gutters and ruts after the rains. 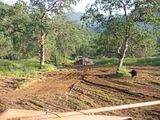  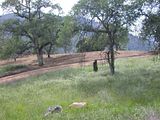 |
|
3RRL
Administrator
Huge Kama
Posts: 2,027
|
Post by 3RRL on Feb 6, 2008 11:27:10 GMT -5
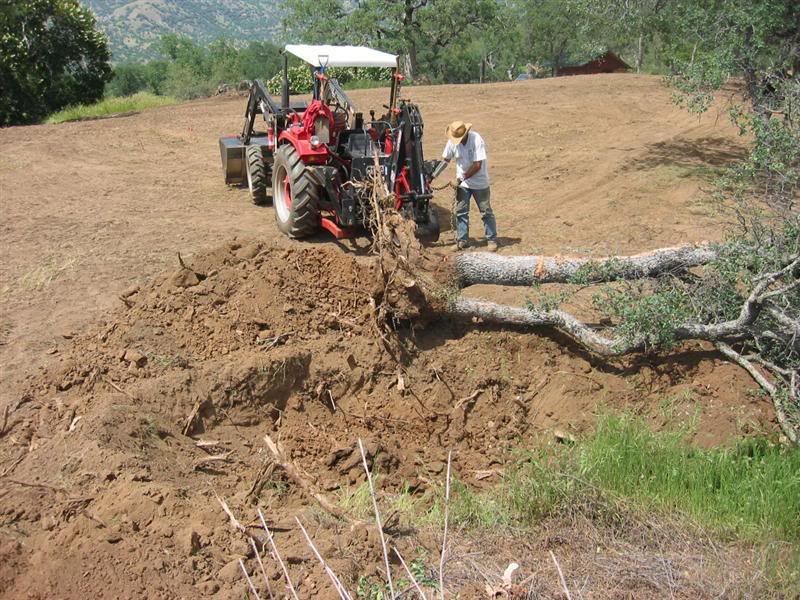
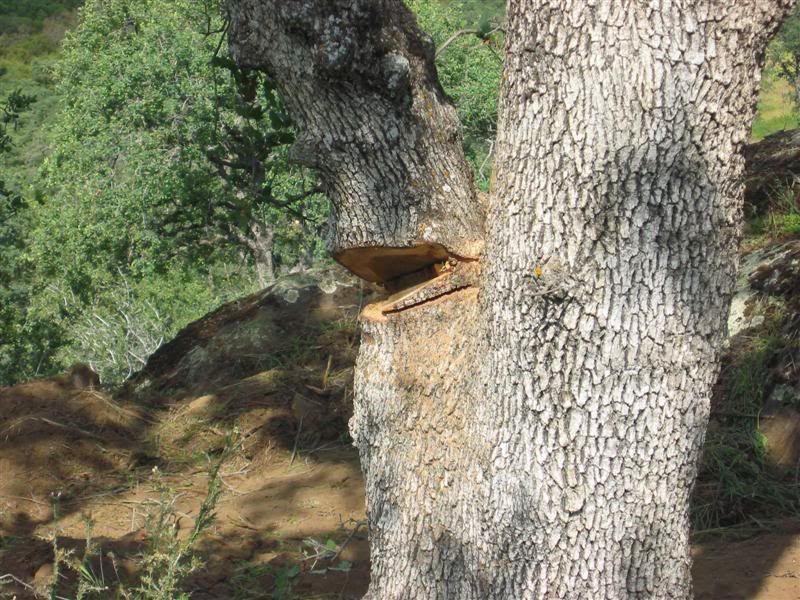
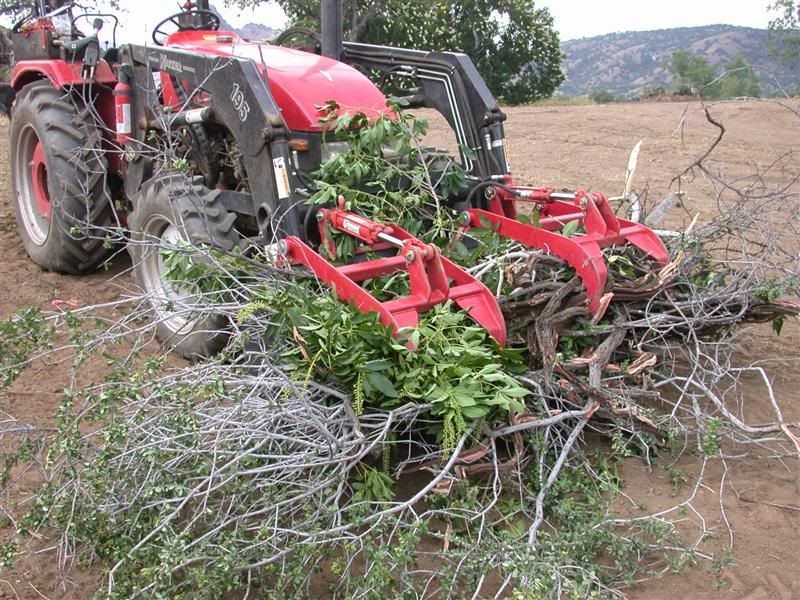
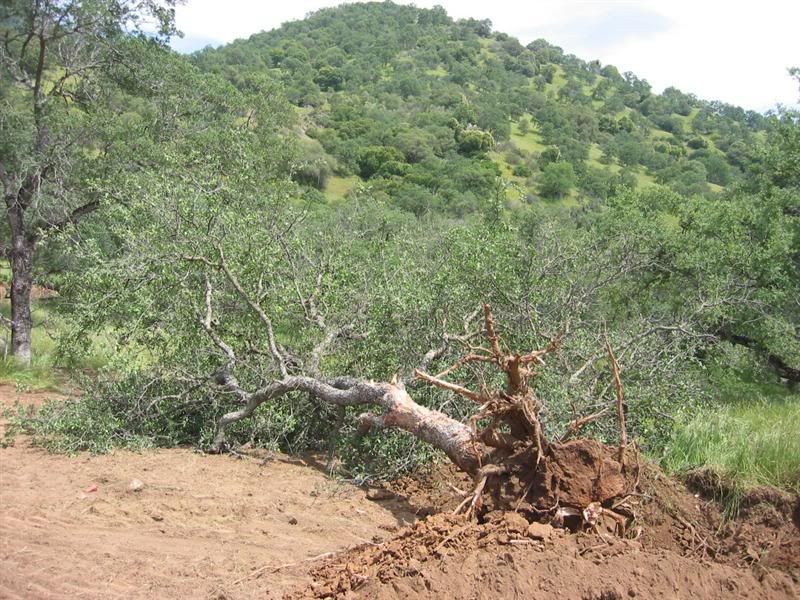
This trip turned out to be another marathon 3 day work weekend at Three Rivers. Man, I can't remember working this hard, especially since it is getting hotter already. We had the meeting with the GC to inspect the work we did on the barn pad and homesite clearing. He got is (transit level) unit out to shoot the grade on the pad first and he laughed at my grade job. I was really worried but he had a grin from ear to ear because when he checked it for level, it was mostly within a 1/2" except one area that was water logged and it was low by 1-½". He said that was pretty good and would be fine for his work. So then he asked me about compacting it and I told him I did just what he said ... lay down about 3", water and drive the tractor over every square inch. We started to place flags to mark the barn and he could not push the flag into the ground. "I guess it's compacted pretty good" he said with another grin on his face. He had to get "whisker markers" and pound them in with nails. That went pretty good and he was happy with what we had done. Then he inspected the homesite and said it was good enough for his crew to work on and lots of space to put their tools. After he left, Loretta and I went back to work continuing to remove another Oak tree and also pruned/limbed about 10 more where they were in our view. This was really hard work in the heat. Lucky I had the grapples working for me. Here are some photos of cutting and grapple work.  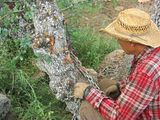  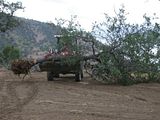 |
|


 ) and should have gassed it up to pump up the hydraulics a little more. I did that a couple of times when other loads pooped out and ran the tractor at 2300rpm and the fel was strong as all get out.