3RRL
Administrator  Huge Kama
Posts: 2,027 
|
Post by 3RRL on Feb 6, 2008 18:57:40 GMT -5
|
|
3RRL
Administrator
Huge Kama
Posts: 2,027
|
Post by 3RRL on Feb 6, 2008 18:59:38 GMT -5
|
|
3RRL
Administrator
Huge Kama
Posts: 2,027
|
Post by 3RRL on Feb 6, 2008 19:01:02 GMT -5
|
|
3RRL
Administrator
Huge Kama
Posts: 2,027
|
Post by 3RRL on Feb 6, 2008 19:04:12 GMT -5
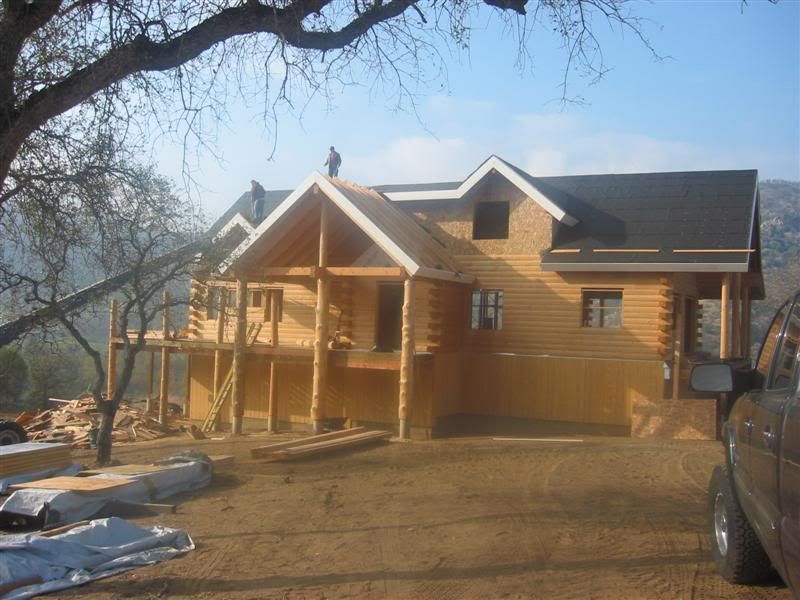
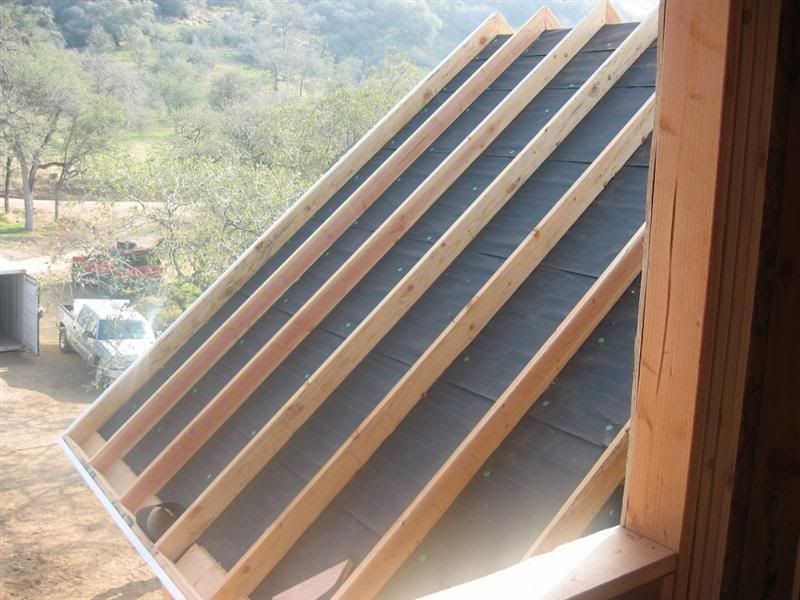
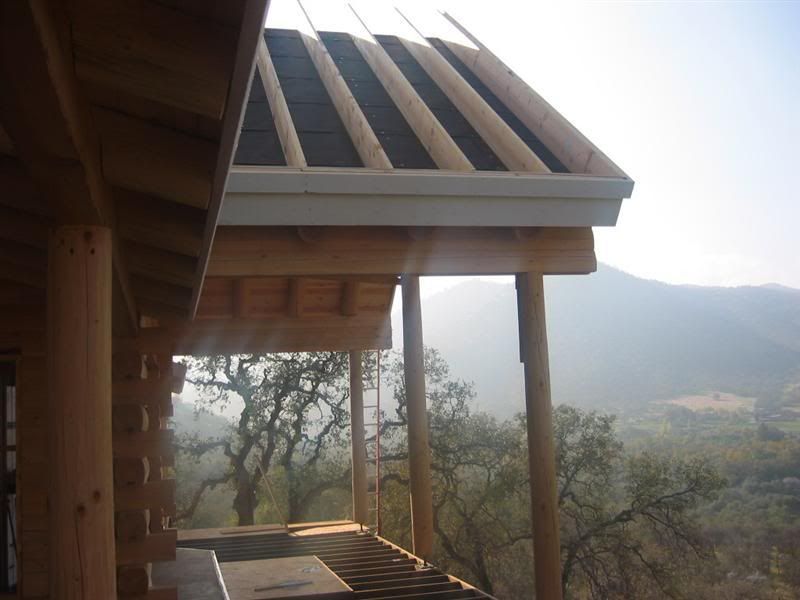
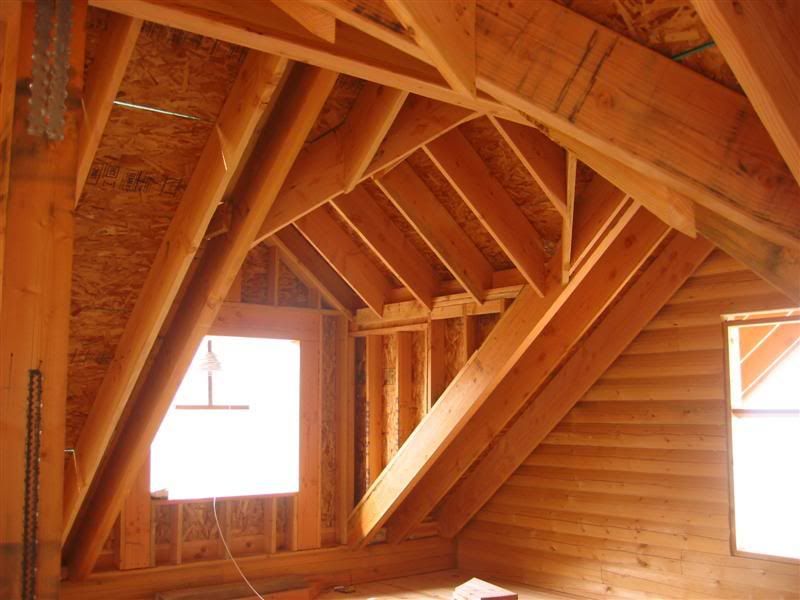
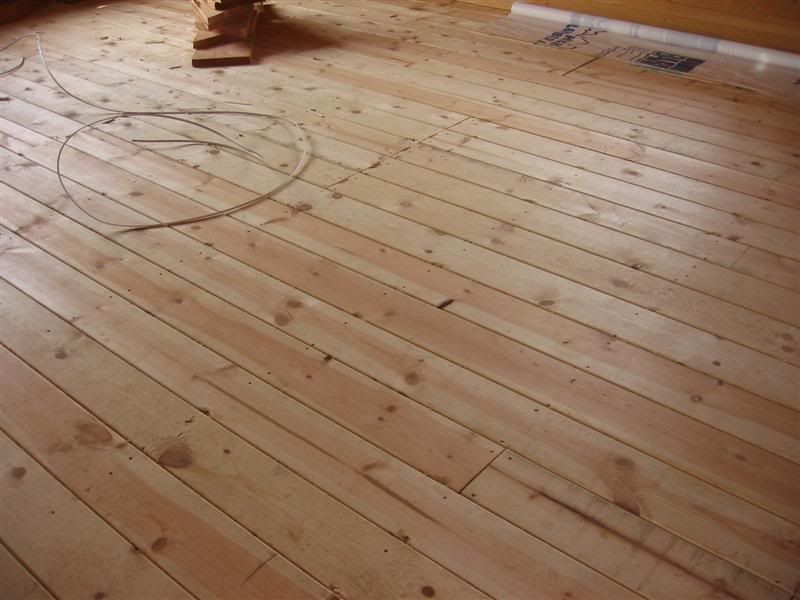
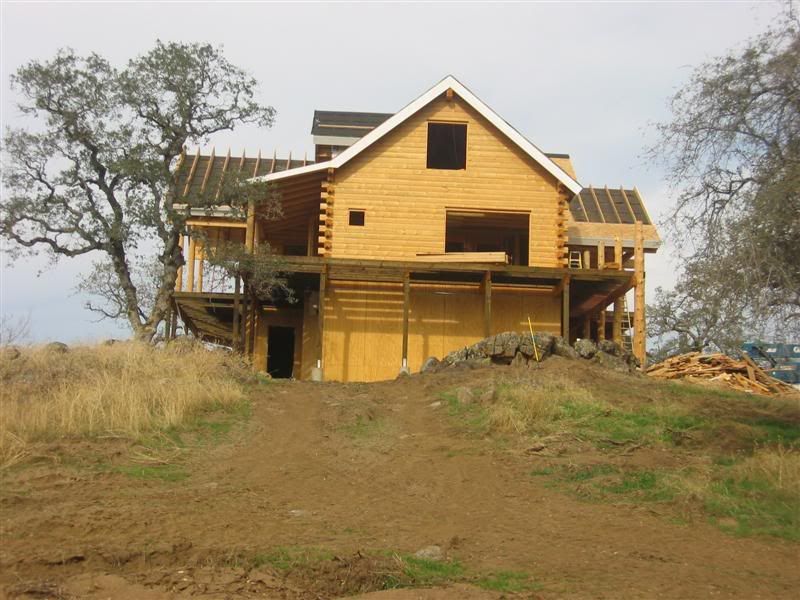
The deck around the house will have 2 x 6 planks down. The OSB you see is just for them to walk around for now. OSB is a flaked wood which is glued together I think. It is used as a cost effective under layer for roofs and even siding a lot. The bottom of the home has wood siding sheets and will be stained and sealed. Those beams holding up the main floor are 2 x12 boards and they are covered with OSB...I don't know why? You can see the naked 2 x 12 above my head. Maybe they are covering it to paint? I don't know but I will ask them. Progress has slowed down now but there are some significant changes to show. Most of these photos are from similar angles as the others so you can see the difference. I'll probably make fewer updates in the future unless there is significant progress so as not to bore you too much. The progress we noted was mainly how they have the roof prepared to put the metal on. They also framed several of the rooms on the main floor so we can see what they are like. We also saw some evidence of them running electrical lines in a few (very few) places. The second story is going slow now. This set of photos shows what the home looks like from our drive below and getting up to the homesite.   You can see some of the roof has plywood covered with tar paper. On top of that there are 2 x 6's over the front porch, but 2 x 12's over the rest of the home for added insulation in the living quarters. Those spaces will be insulated and they separate the interior roof from the exterior roof. They will put plywood again on top of the 2 x 6's and 2 x 12's. Then they will put the metal roof on top of that plywood. So it is a suspended roof.     |
|
3RRL
Administrator
Huge Kama
Posts: 2,027
|
Post by 3RRL on Feb 6, 2008 19:05:52 GMT -5
|
|
3RRL
Administrator
Huge Kama
Posts: 2,027
|
Post by 3RRL on Feb 6, 2008 19:08:17 GMT -5
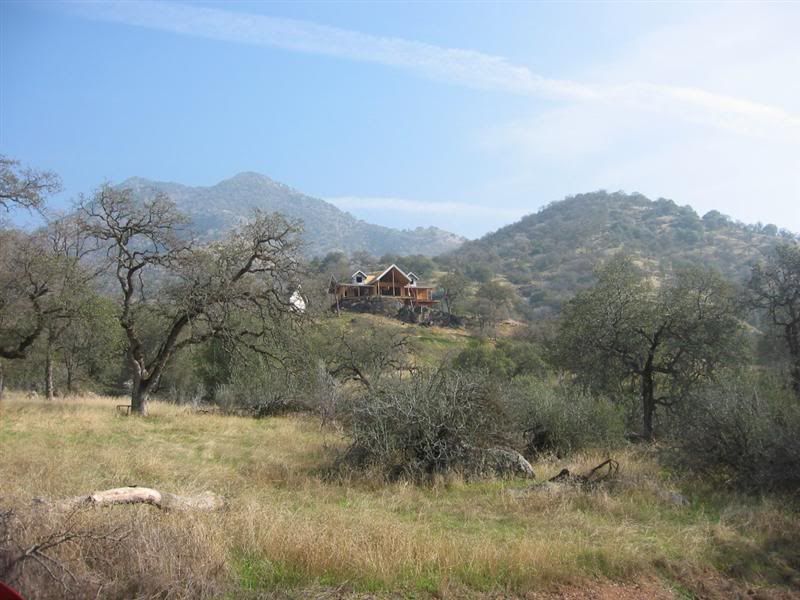
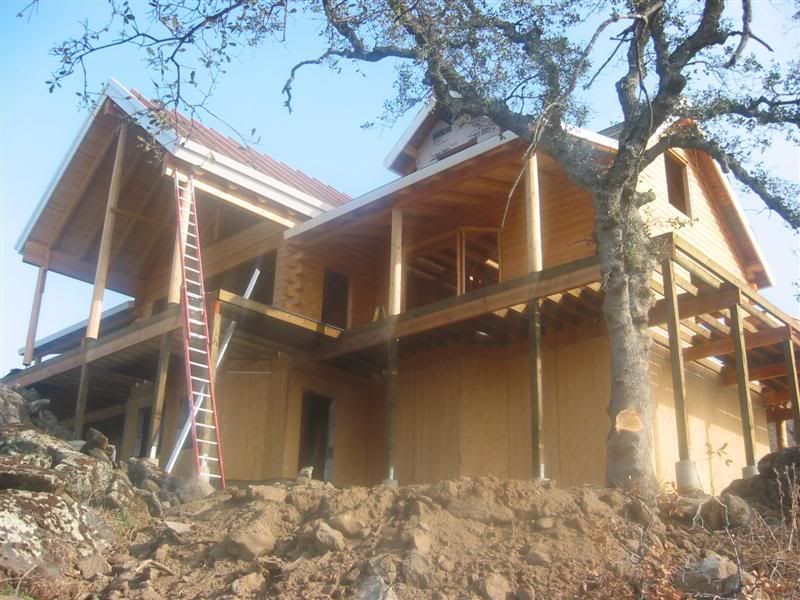
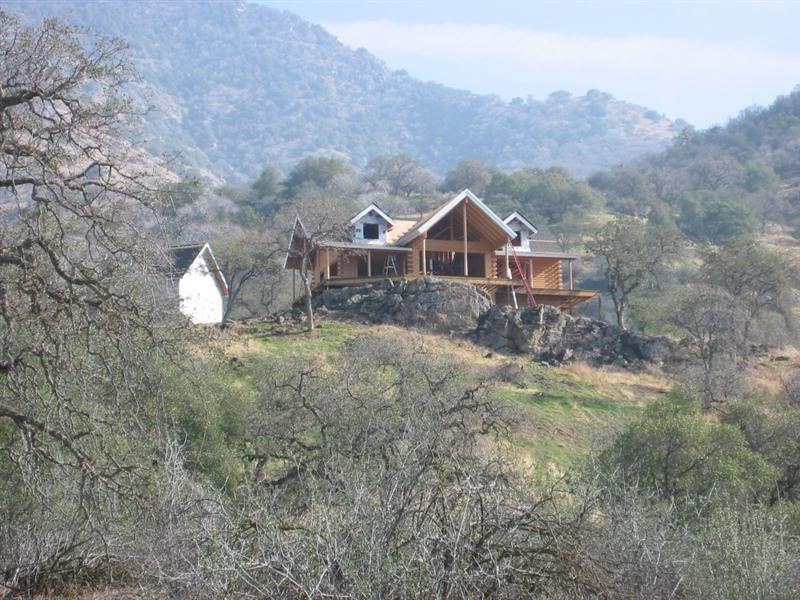
Here's some photos of the home from a couple different views showing what it looks like now. The last photo is zoomed in a bit as we come up our drive. It looks pretty cool perched up behind those massive rocks. It looks pretty natural up there and I don't think we could have found a better location to frame the house like that.     Like I said, I'll probably make fewer posts in the future until there is some substantial progress being made. Perhaps the electrical and plumbing work? We did make a couple changes to the master bath, but they were minor. The metal barn package is supposed to arrive the first week in December, so that might be interesting to see it going up too. I know there are a lot of barn threads going on right now so it will be interesting to compare how they do mine. Oh, and remember that last photo angle too. I've got some coming when it snowed up here. |
|
3RRL
Administrator
Huge Kama
Posts: 2,027
|
Post by 3RRL on Feb 6, 2008 19:14:20 GMT -5
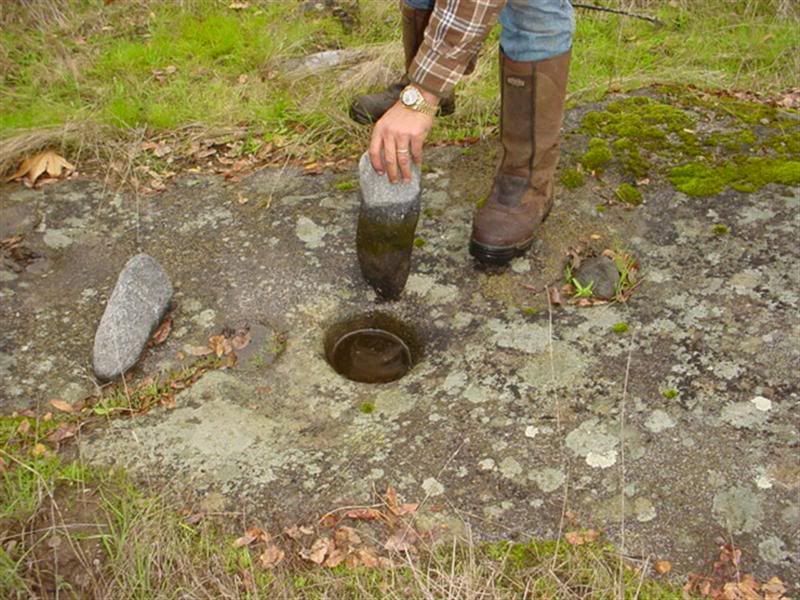
About the roof... Basically it will have like a double roof. Actually a triple roof if you count the metal roof on top of the 2 wooden ones. Plus there will be 12" of insulation between them. When they first talked about a "metal" roof, I was wondering about what it would sound like in the rain or hail storm. I love the sound of rain but surely didn't want to hear and "indoor" rain storm. But now I'm not too worried about that anymore. It sounds pretty good to me. As a side note: This area is well known as the residence of the Kaweah Indians. Next property over there are many Indian relics and stones with pot holes in them where the squaws ground up acorns with morter and pestle. Larry has seen them. I'm thinking the homesite spot may also have bee used as an Indian camp years ago. Here's a link to the history of Tulare county. TULARE HISTORY FROM WEBand here are some photos.         |
|
3RRL
Administrator
Huge Kama
Posts: 2,027
|
Post by 3RRL on Feb 6, 2008 19:16:41 GMT -5
We did go back up this weekend since it was supposed to pour up there and I wanted to check on the new camp tarps. Unfortunately, I had checked the Rancho weather (where it poured) thinking it was the 3R weather.  It was good anyway since there was a little more progress. They started to erect the steel barn and I took several photos of that. Bad news is I left my camera at camp, so I will post those when I get it back. Here are some pictures of us hiking to the home from the South/West corner of our property. A different route through the woods instead of taking the road up there. You can see it through the trees as we get closer to it. It also gives you and idea of the sloping terrain and where it's located from a different perspective. As we approach the home, you can see the clearing we had to do around it. This Spring all the natural flowers and grasses will grow back. In order to keep it fire safe, we plan on irrigating the surrounding area to keep it green year round. Otherwise it will all die and turn into a tinder box.      |
|
3RRL
Administrator
Huge Kama
Posts: 2,027
|
Post by 3RRL on Feb 6, 2008 19:17:44 GMT -5
You can see that they now have the roof done with the second layer and the tar paper on it. It's ready for the metal roof to go on now. This set of pictures shows more interior framing and a couple views. Looks like they got the floor down on the 2nd story and some of that framed too, but those pictures ar on my camera (at camp), so here is the main floor again. I found out it's quite a hike to get up there from the corner of the property. A couple views out our bedroom are to the South. You can see clearly see the canopies at South Camp from up here now. Also is a photo of our meadow in front of South Camp. It's starting to green up already.      |
|
3RRL
Administrator
Huge Kama
Posts: 2,027
|
Post by 3RRL on Feb 6, 2008 19:19:37 GMT -5
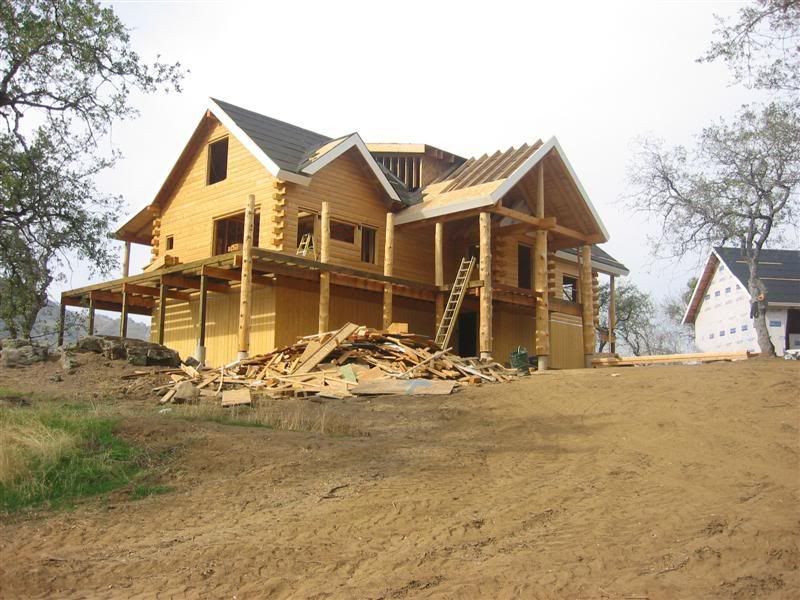
We ended up driving up Saturday morning instead of the usual Friday night. I had to attend a funeral for my dear friend of 38 years and did not get home until late. When we drove up, a couple workers were staining the front of the home. We choose Bronze Pine and it comes out warm, rich and colorful. We really struggled between two stains and decided on this one. The other was a shade lighter but it was more of a yellow tint, and we didn't like that as much. We wanted it to look a little more rustic than the light colored ones we've seen. Here are some daytime photos showing the natural color where he has not finished yet verses the stained color. The stain we choose has a hint of red in it. It is not as noticeable during the day, but the night time photo shows up much darker red in the headlights. During the day, however, it is a lot lighter, but still very pleasing. I'm glad we went with it. It was my favorite after all.       It is supposed to rain up there next weekend (yes I got the right area this time), so we will probably go up again to get my camera and do some work on my busted ATV. I also have a hydraulic winch project I'm working on. I'll share that in another thread soon. Last weekend I ended up mounting the backhoe and doing several hours of digging, repairing some clogged culverts and making the gutters better. I'll see how they hold up with the coming rains now. It also got down to 26°F (-3.3°C) on Saturday night. Cold!!! |
|
3RRL
Administrator
Huge Kama
Posts: 2,027
|
Post by 3RRL on Feb 6, 2008 19:43:51 GMT -5
|
|
3RRL
Administrator
Huge Kama
Posts: 2,027
|
Post by 3RRL on Feb 6, 2008 19:45:28 GMT -5
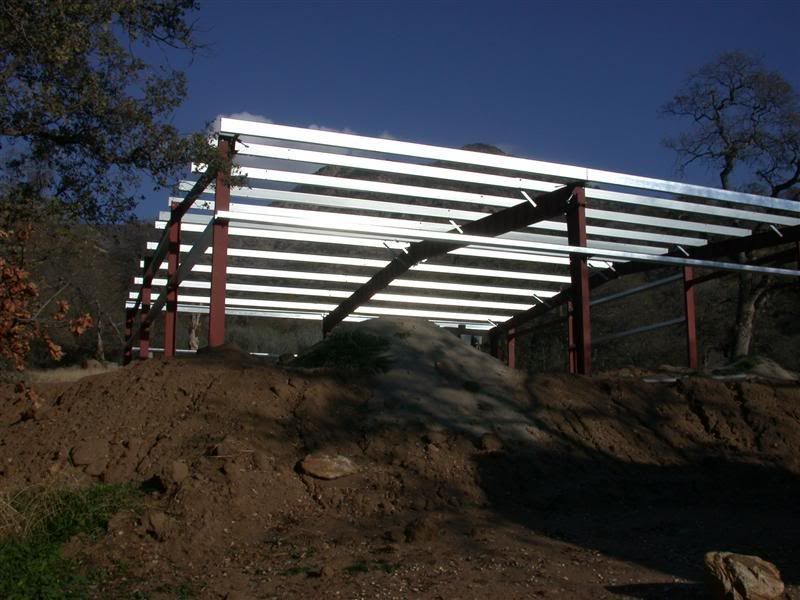
These are a couple close-ups showing some of the metal beams. Also a view with the solar shed in the foreground. The rest of the metal siding and insulation was delivered, but it was still down by the culdesac. The downpours we had last week made our dirt road a slimy mess. They will trailer those pieces up to the homesite this week.     |
|
3RRL
Administrator
Huge Kama
Posts: 2,027
|
Post by 3RRL on Feb 6, 2008 19:47:07 GMT -5
I scraped about 100 yards of mud slime off the road. On some places I got down to DG (decomposed granite). However, in order to gain traction in the mud, I carried a bucket full of dirt/mud while doing all this ... not good for the front wheel drive. I had been warned against using 4 wheel drive while using a super heavy load in the bucket and I should have listened. There were some loads pushing the mud/dirt that I couldn't budge my Koyker 195 loader, so I know it was way over 3,000lbs. Well, I blew out a couple teeth on the right front bevel and ring gear. I locked up the right wheel for a second and then rolled over it. I had to get it back to camp so I drove it (causing more damage). I would stop to back up and then go forward again until I got it home. Now I have to order parts and perform surgery. I'll fix whatever is broken. Well, it was to be expected with how I treat that Kama. I'm surprised those front gears lasted as long as they did with how I've abused the poor thing over the last 2-1/2 years! Here's what that looks like. Also some pics of the road and gutters I cut before the rain hit.     |
|
3RRL
Administrator
Huge Kama
Posts: 2,027
|
Post by 3RRL on Feb 6, 2008 19:48:49 GMT -5
|
|
3RRL
Administrator
Huge Kama
Posts: 2,027
|
Post by 3RRL on Feb 6, 2008 19:49:41 GMT -5
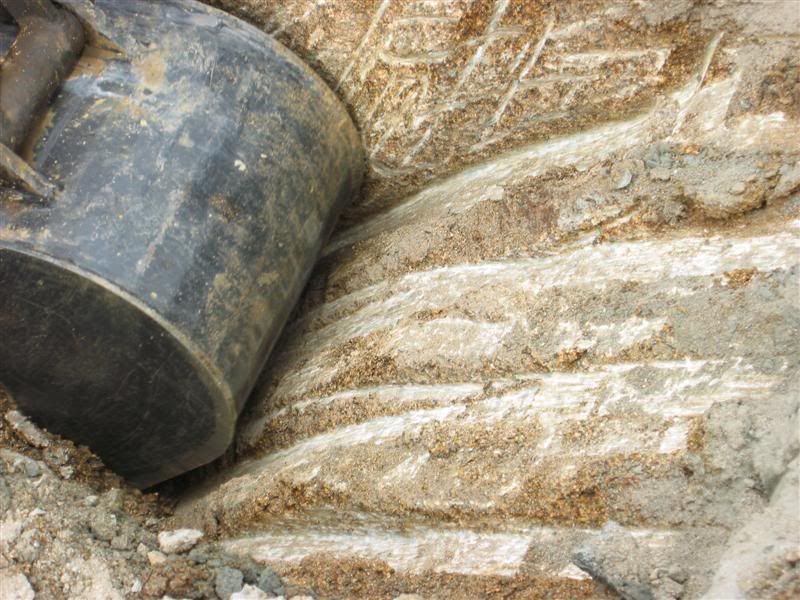
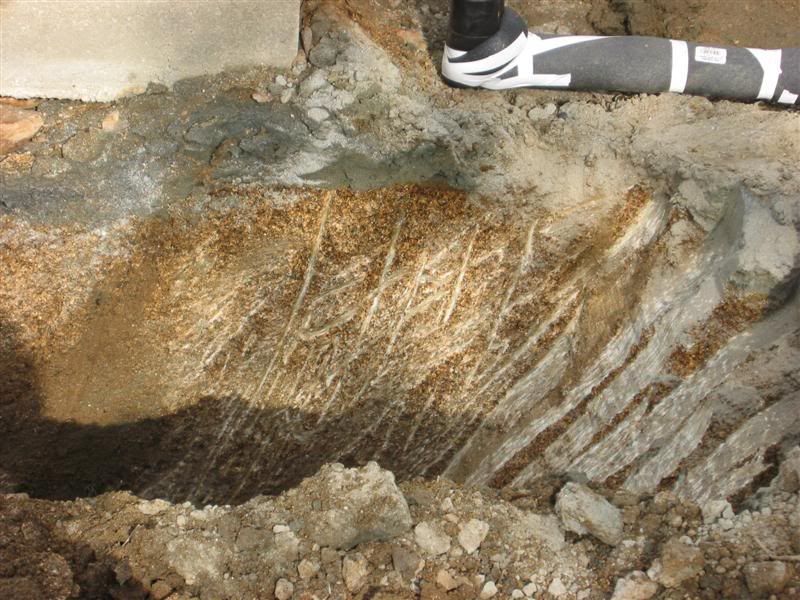
Here are a couple short videos of the painstaking process showing how hard it was at this end of this trench. I'm sure glad the entire 30' trench was not like this part. I didn't hit the DG until I was at least 18" deep on the other parts. So the top layers were much easier to dig with the Nardi Back Hoe than this last section was. It is a pretty good backhoe but I sure wish I had a real TLB for jobs like this. This one shows the start of the end trench. Notice how my articulated mechanical thumb is kept out of the way. However, it is not disconnected. Just have to control the curl function so it does not interfere. I did use it to hold the dirt in the bucket when I cleaned out the trench as in the other photos.  |
|