GuglioLS
Administrator  Jinma354 LE
Posts: 1,276
|
Post by GuglioLS on Jan 17, 2008 23:35:55 GMT -5
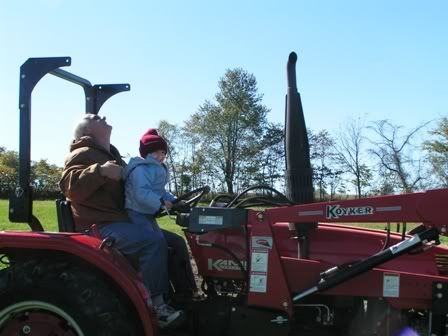
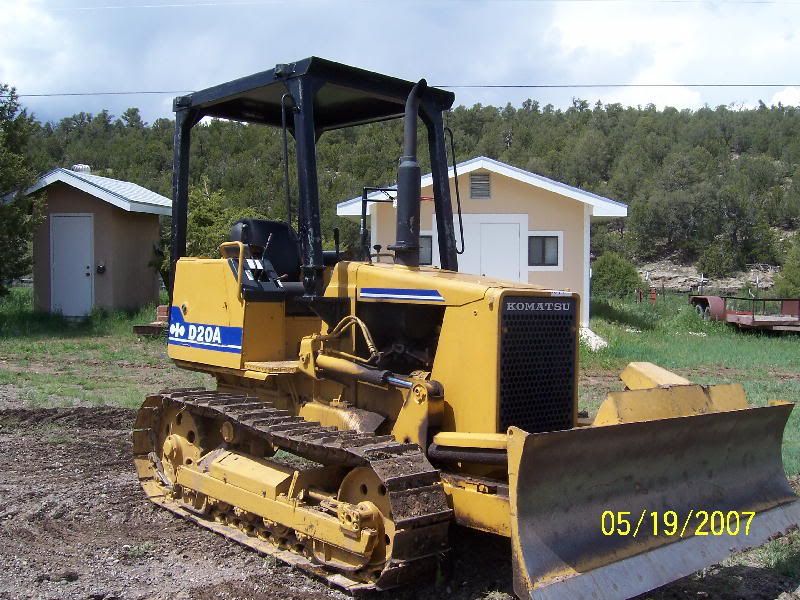
A while back in some previous posts, I hinted that I have been looking at bull dozer's for some road construction to get up the hill on my property. I have seen quite a few over the last year or so. I have done my home work in learning what to look out for and most of them were pretty high priced and very worn out. Last week on a road trip back from El Paso, TX, I stopped at Tumbleweed Equipment & Auction Co. to see what may have been on the lot - www.tumbleweedequipment.com I always stop there to check out everything, it's a great relaxing break from all the driving. Here is what I stumbled across:  This one was in good enough condition and priced right, so I actually test drove it. It was just too cool   Larry |
|
GuglioLS
Administrator
Jinma354 LE
Posts: 1,276
|
Post by GuglioLS on Jan 17, 2008 23:36:47 GMT -5
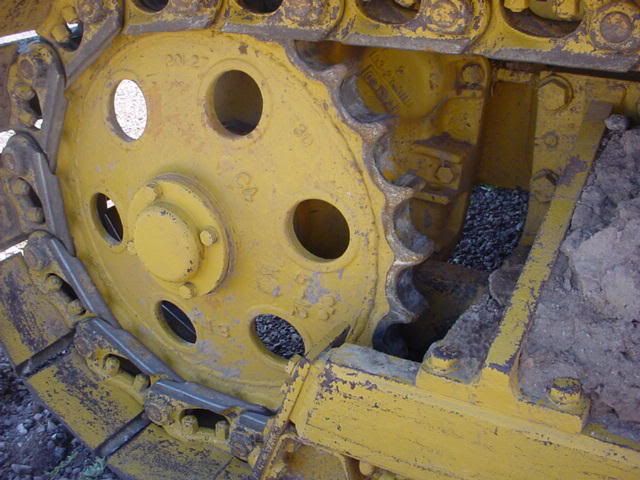
The undercarriage (Tracks, Drive Sprockets, Rails, & idlers are in great shape. The right rear drive sprocket have lots of life left in them:  The front idler and rails show plenty of room for keeping the tracks tight:  Left rear sprocket is evenly warn and matches the wear pattern of the Right rear sprocket:  Rear view of the tracks:  Larry |
|
GuglioLS
Administrator
Jinma354 LE
Posts: 1,276
|
Post by GuglioLS on Jan 17, 2008 23:37:39 GMT -5
It has a Six way blade - Up/down, Angle left right, Tilt Left Right.  Left side engine:  Larry |
|
GuglioLS
Administrator
Jinma354 LE
Posts: 1,276
|
Post by GuglioLS on Jan 17, 2008 23:38:35 GMT -5
Right side of engine:  And another one of the blade from a little farther back:  Larry |
|
GuglioLS
Administrator
Jinma354 LE
Posts: 1,276
|
Post by GuglioLS on Jan 17, 2008 23:39:41 GMT -5
Ok now what needs fixing: For some reason, two of the right side hydraulic cylinder rods for the blade are badly pitted and the seals leak. The left side are perfect. No biggie they can be rebuilt.   The last thing is - it does not turn right. However if you wiggle the right turn lever, then it turns. There are a bunch of linkages with turnbuckles for the steering levers. It is most likely out of adjustment. Lastly I buried the blade into the ground so as to spin the tracks to make sure the track drive and steering break clutches were OK. And they were, Both tracks spun and dug into the ground evenly. This pretty much confirms the right steering problem is a linkage adjustment. I made a counter offer and it was accepted. I made arrangements to get it picked up & delivered to my place, weather permiting, hopefully no later than sometime this Saturday. Larry |
|
GuglioLS
Administrator
Jinma354 LE
Posts: 1,276
|
Post by GuglioLS on Jan 17, 2008 23:46:59 GMT -5
Well the weather cooperated with me today. The sun was shining and there was a light breeze, it was perfect weather for working on a Bulldozer. The biggest concern I had with the purchase of this machine was that it would not turn right when you pulled the right steering break lever. I read over the manuals I got and discovered a simple adjustment for the steering breaks. So first thing this morning I went out there, pulled off two bolts removed a small cover, tightened up the adjustment bolt a few turns and Shazam! The steering now works perfect ! ;D Here is a picture of my "new" (dirt cheap - used) Dozer at it's new home:  After making the break adjustments to both sides to make them even, I tested out the steering, here is a video of it doing a figure 8. The dozer is amazing, I have never driven or operated a dozer before. It will now turn on a dime: 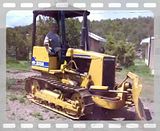 I will need to drain all the fluids and replace the oil & fuel filters. I think this thing uses about 55 gallons of oil in various places  I also need to reverse the cutting edge on the blade. After that I think it will be ready to go. Oh need to set the valve lash - I doubt this poor neglected dozer has had any of the required scheduled maintenance. Engine-----------------8 liters 15W40 Clutch case---------- 6 liters 10W Transmission case 16.5 liters 30W Hydraulic reservoir 33 liters 15W40 Final drive (Steering clutches) Left & right 12 liters ea (24 total)10W Total 87.5 L or 23 gallons of various oils. Fuel tank 60 liters (15.8 gallons) All in all, this was a smoking deal, and I am fortunate to have found this little machine. I will need to practice on flat land so that I can develop skills in operating it safely and efficiently. The purpose of all this is to use it to cut a road to access the other 3/4 of my property. Larry |
|
GuglioLS
Administrator
Jinma354 LE
Posts: 1,276
|
Post by GuglioLS on Jan 17, 2008 23:47:54 GMT -5
I did a little dozer maintenance today:
First order of business was to reverse the cutting edge on the blade as it was worn down to the minimum. After removing all 18 bolts I flipped the cutting edge over, the other side of it was NEVER used, so now I have a brand new cutting edge. Two nuts were frozen so I heated them up with an Oxy-Acetylene torch and they came right off.
Then I wanted to take a look at the condition and level of all the fluids. Well I was extremely surprised:
The left & right final drive oil was right at the full mark and the oil looked brand new. It was clear, no sludge, no slime, no particles no nothing !, except clean clear oil.
Then I checked the transmission - same thing, clean and clear as a whistle.
Now on to the Clutch (it has a wet clutch) ditto, no oil change needed.
The hydraulic fluid was about 1 qt low - it uses 10W-40 for the hydraulic fluid.
The engine oil was a little black but right at the full mark. I will change the oil & oil filter for the engine. That way I will know for sure when to start the regular fluid & filter change schedule from this point forward.
I was a little concerned I was going to see some really bad fluids, in fact, I thought I was going to have to flush out years of abuse and neglect. Fortunately that was not the case so I believe the machine was maintained in a reasonably well fashion.
After the dozer was all check out, it was time to do some mowing with the Jinma. I mowed 5 acres, then whacked all the weeds. When all my regular chores were done, I took the dozer out to practice a little before supper. It was a good day.
Larry
|
|
GuglioLS
Administrator
Jinma354 LE
Posts: 1,276
|
Post by GuglioLS on Jan 17, 2008 23:53:55 GMT -5
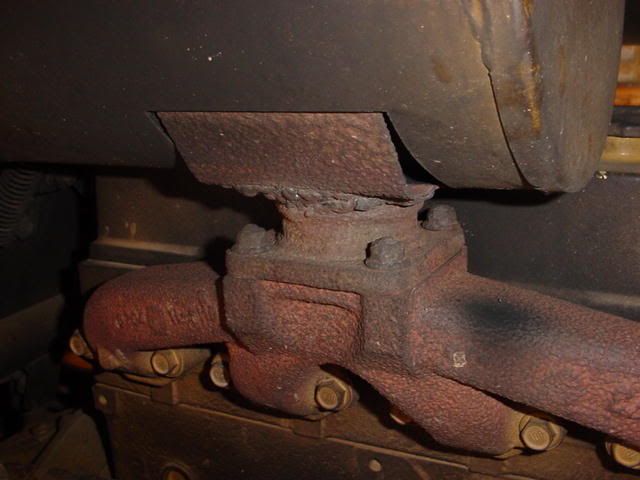
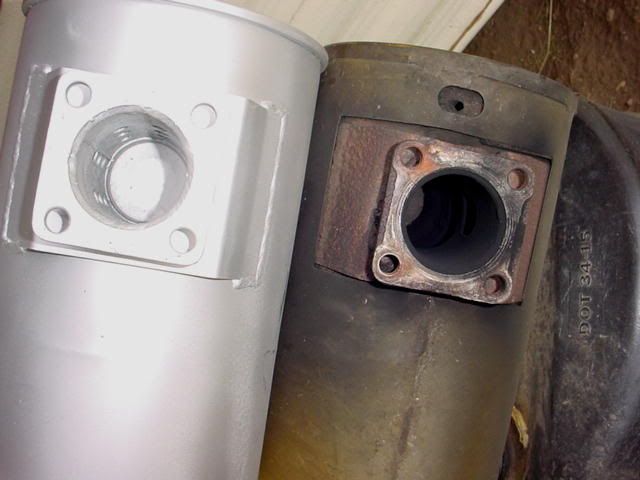
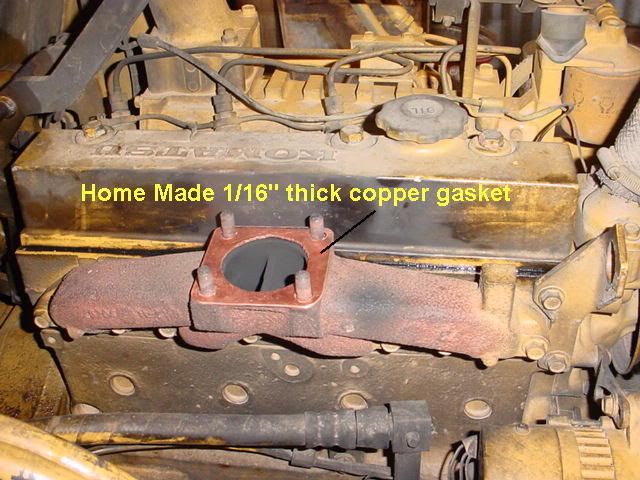
It was Dozer Maintenance day today 5/27/07 @ 1748 hours on the proof meter. I am documenting this here so that I can print it out and and place it in my owners manual.  First thing was to replace the muffler - it was rusted out, leaking all over the place, causing soot deposits all over the engine compartment. The four nuts holding it on are shot. They came off no problem after heating them up with the Oxy-Acetylene torch: 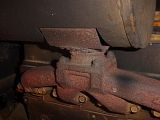 Here you can see it rusted all the way through from the inlet to the outlet. There are supposed to be baffles in there: 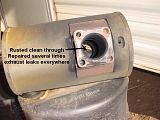 Here is a side by side comparison of the old muffler and new one: 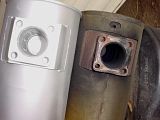 The gasket between the manifold and muffler is a one time use made of paper thin steel. So I made a new one out of a 1/16'" thick copper plate I had laying around: 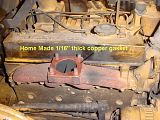 I replaced those rusted out and torn up nuts with some nice new hardened steel ones:  This is what it looks like now : 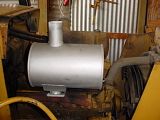 This concludes the muffler replacement procedure. Larry |
|
GuglioLS
Administrator
Jinma354 LE
Posts: 1,276
|
Post by GuglioLS on Jan 17, 2008 23:55:23 GMT -5
When I had removed the muffler, there was easy access to the valve cover. So I removed it to check the valve clearance. The rocker arm is pretty black with sooty oil deposits. I will change the oil now and at 50 hour intervals until this clear up. The valve lash clearance is 0.3 mm for both intake and exhaust. There is a mark on the front pulley for TDC. All I had to do was rotate the engine using a ratchet wrench, then look for the #1 intake valve to open, then close then look for the TDC mark. In the manual it states I can adjust 4 valves at that point, the ones I can adjust are in a chart printed in the manual. After those 4 valves are adjusted, rotate 360* to TDC again, then set the other 4 valves. This sure beats rotating over and over for each set of valves. Most of the valve gaps were a little over 0.3 mm which is a good thing. I set them all to the 0.3 mm spec. 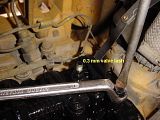 I called the Komatsu service dept about head bolt re-torque. They said unless you want to remove and replace every head bolt, do not to do it. Head bolts are torqued to the specified value ONE time during assembly. After a head bolt is torqued, the threads are stretched and the gasket is permanently seated. The service tech said "if it ain't broke - don't "fix" it". So I did not mess with it. End of valve lash adjustment procedure. Larry |
|
GuglioLS
Administrator
Jinma354 LE
Posts: 1,276
|
Post by GuglioLS on Jan 17, 2008 23:56:13 GMT -5
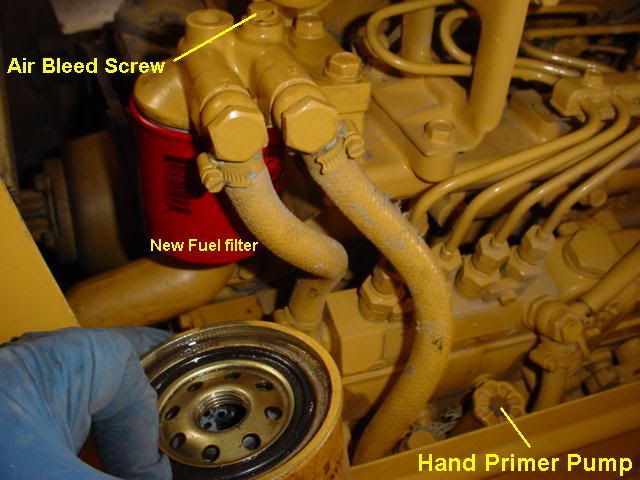
After the valve lash adjustment, Now it was time to drain the oil, remove and replace the oil filter. It takes a NAPA Gold 1206 oil filter: 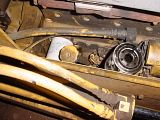 I used Chevron DELO 400, 15W40 Heavy Duty oil for Diesel engines, it took eight quarts: 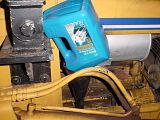 Then I removed and replaced the Fuel Filter with a Baldwin BF-954: 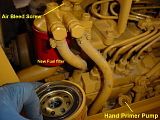 End of Engine oil, filter and Fuel Filter replacement. Larry |
|
GuglioLS
Administrator
Jinma354 LE
Posts: 1,276
|
Post by GuglioLS on Jan 17, 2008 23:59:41 GMT -5
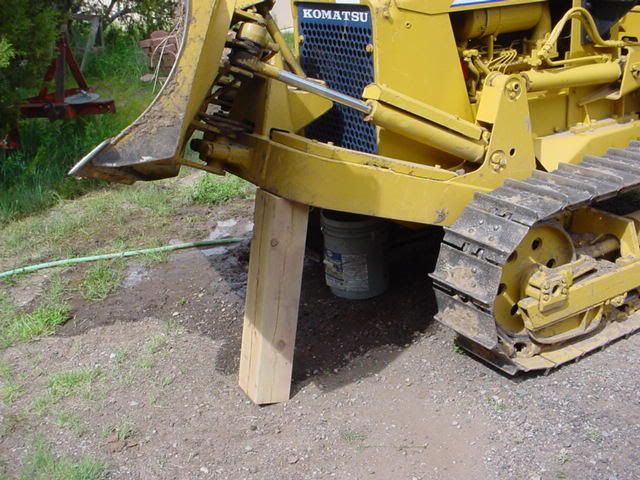
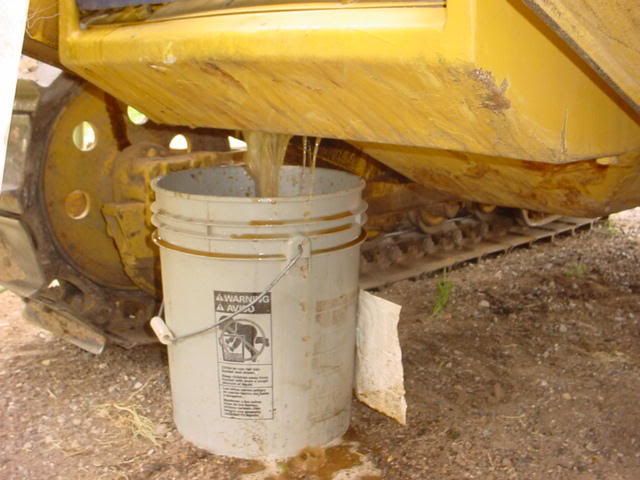
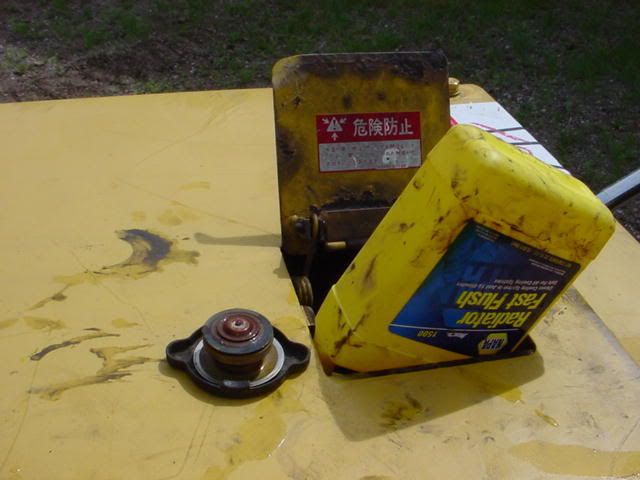
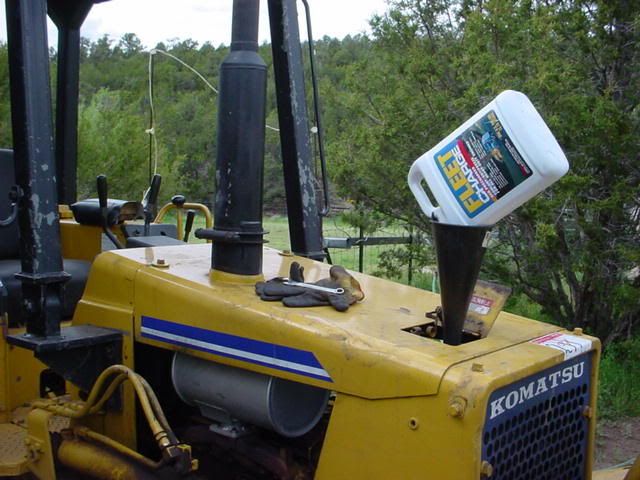
Next up was the cooling system maintenance. I had to crawl under the front of the blade to get to the radiator drain. So I blocked up the blade for safety:  I drained the radiator: 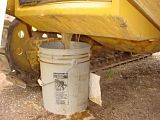 Then the engine block: 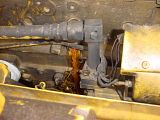 I FLUSHED & FLUSHED then flushed some more until the water came out clear. Then I closed off all the drain plugs filled the system with distilled water and added some coolant system flush and ran the Dozer for a half hour. Then I Drained that out and flushed again until the water came out clear again.  After all the flushing I had a pretty big puddle of mud  I then filled up the coolant system with 1 gallon of Fleet charge SCA antifreeze, then one gallon of Distilled water, then added 2 quarts of pre-diluted Fleet charge for a total of 10 quarts of coolant: 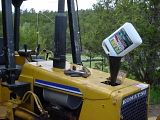 End of cooling system maintenance. Larry |
|
GuglioLS
Administrator
Jinma354 LE
Posts: 1,276
|
Post by GuglioLS on Jan 18, 2008 0:00:13 GMT -5
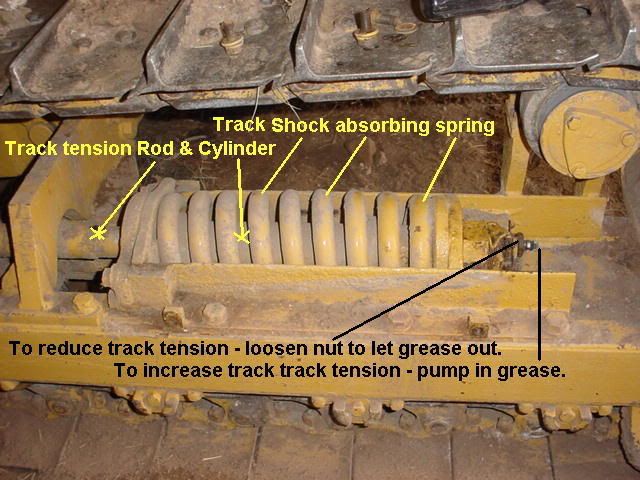
By this time I am trashed - I look like a dozer mechanic - black with soot, grease, oil, and mud from head to toe with a hint of diesel. Now I checked the track tension. Pretty easy just lay a board across the tracks and measure the slack in the middle. To set the tension there is a cylinder that is pumped up with grease, that in turn pushes the track farther apart making it tighter. If you make it to tight, just turn a nut and let some grease out. Check out that spring :  Tracks tension is set to 30 mm slack on both sides now. All done with that. It was real easy. Larry |
|
GuglioLS
Administrator
Jinma354 LE
Posts: 1,276
|
Post by GuglioLS on Jan 18, 2008 0:01:52 GMT -5
On the home stretch. Now it's time to remove the floor plate to check out all the gizmo's underneath. From here I adjusted the clutch pedal free-play, the break pedal free-play, and the Left / Right Steering levers free-play 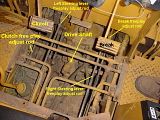 And one more adjustment - the Inertia Break band  . The clutch on this is a "wet" clutch (submerged in oil) and there are massive gears in the transmission. So there is lots of inertia and fluid coupling between the clutch output shaft and transmission input shaft. When you push in the clutch, the fluid and inertia keep the output shaft turning (a bad thing). To stop the rotation of the output shaft when you push in the clutch, there is a break band around the output shaft called the inertia break. I adjusted the tension on the break band to stop the inertia when you push in the clutch to change gears: 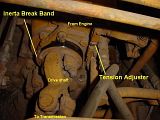 Thats it, I'm done, the Dozer is ready for some action. Larry |
|
|
|
Post by baknblack on Jan 25, 2008 21:24:16 GMT -5
One sweet machine!!!!
|
|
GuglioLS
Administrator
Jinma354 LE
Posts: 1,276
|
Post by GuglioLS on Jan 28, 2008 0:29:39 GMT -5
Dwayne,
Hey thanks man. If your ever in my neck of the woods, you are welcome to come by and take it for a spin.
Larry
|
|


 I also need to reverse the cutting edge on the blade. After that I think it will be ready to go. Oh need to set the valve lash - I doubt this poor neglected dozer has had any of the required scheduled maintenance.


 .
.