3RRL
Administrator  Huge Kama
Posts: 2,027 
|
Post by 3RRL on May 11, 2009 10:24:55 GMT -5
OK Brad, I see what you mean now.
I like the front bracket welded to the FEL mount like on Loretta's tractor. That will distribute the force fore and aft saving the midsection of the tractor.
Looks good...
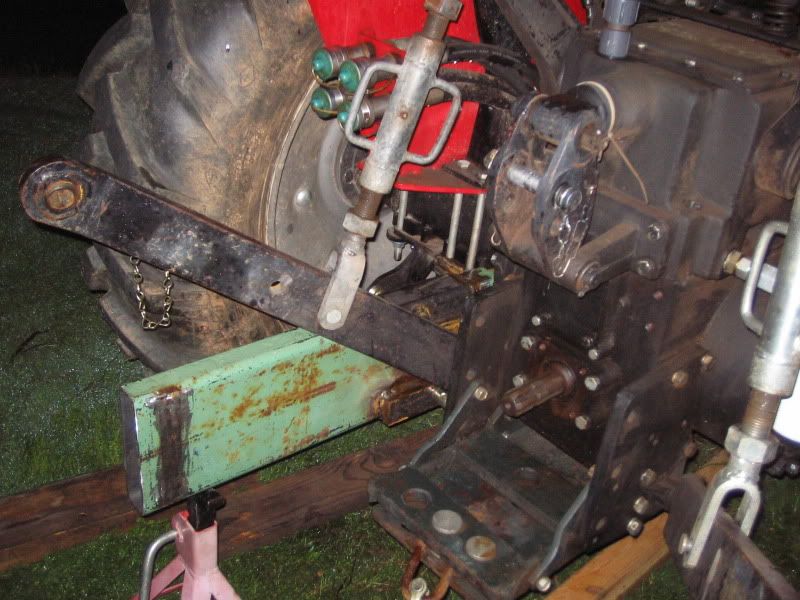
I see you have the lower lift arms removed from the tractor.
Is that going to be the way your mount will be? Too bad you couldn't find a way to leave them on and use them to do the raising and lowering of the backhoe to make that connection. It would be one less thing to remove when adding the backhoe. And you might not need to plug the backhoe in to use its hydraulics to make that connection. Once connected, the lift arms could be out of play relying on the pin and hook connection of your subframe.
Just "brainstorming" with you Brad in case your plans are not set in stone.
There have been many times suggestion brought up in a thread that have been of benefit to me, yours included. So I am just throwing things out there for your consideration. I think your basic subframe mount concept is fantastic. Just trying to get you to think about the little things that might be of benefit while hooking up etc. You know, something like, "dang, I wish I had done that" or whatever.
Anyway, I am thoroughly enjoying your thread. You are a clever man! Thanks for the detailed responses and photos.
Rob-
|
|
|
|
Post by bradblazer on May 11, 2009 15:34:31 GMT -5
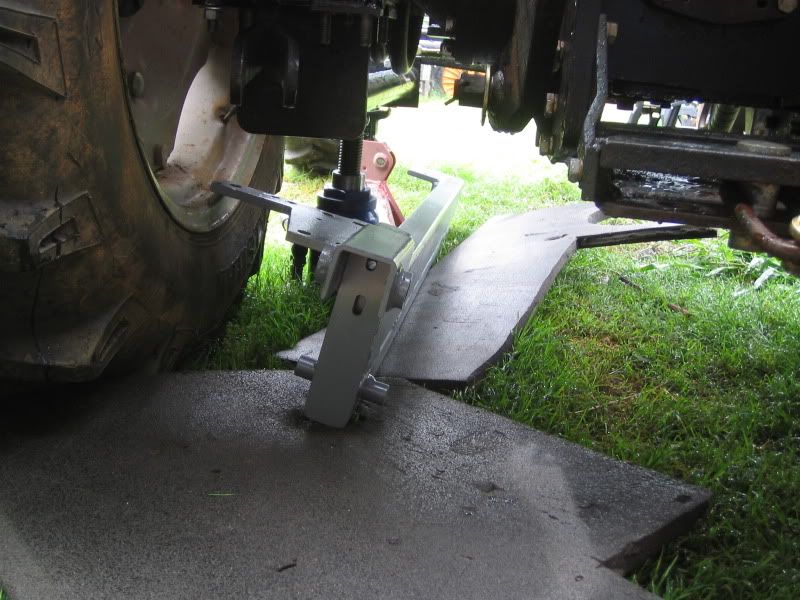
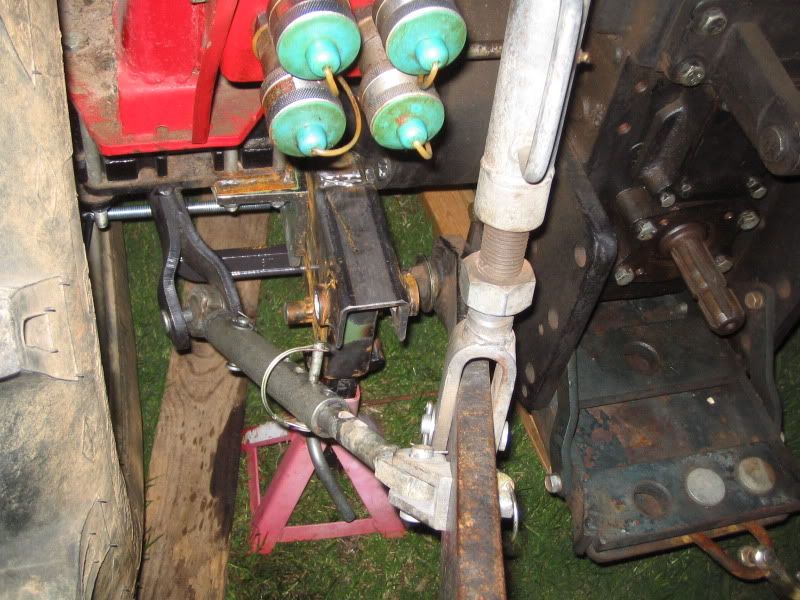
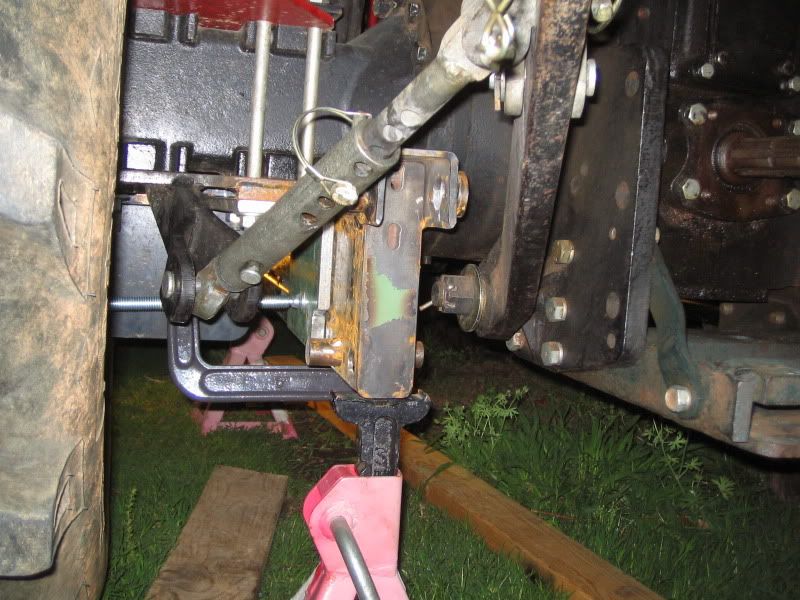
The lift arms are still on. I swung it to the side for the pic. In fact, once the rails are on, I will probably not be able to remove the castle nut holding the arm on without removing the whole side plate. That may still be easier than removing the rail. The backhoe will be a little closer in than than the lift arm ends but I may be able to stick them through the pockets on the backhoe and lift it that way.
Thanks for the ideas. I'll try to do a little on it tonight.
The side links are removed. I may add some little brackets to pin the ends to just to keep them out of the way.
|
|
3RRL
Administrator
Huge Kama
Posts: 2,027
|
Post by 3RRL on May 11, 2009 19:37:06 GMT -5
Alright Brad, sorry to be such a pain....
In fact, once the rails are on, I will probably not be able to remove the castle nut holding the arm on without removing the whole side plate.
Have you considered boring a hole in the side plate(s) ... a clearance hole with your hole saw so you can get a socket on that hidden castle nut? I don't imagine that would hurt the strength of the bracket in the direction of support at all. If worried about it, you could weld a tube (piece of pipe) into the clearance hole for added strength.
Crap, I wish I was there with you while you were figuring all this out.
lol ... I know I could drive you nuts in about 10 seconds. ;D (like I'm doing now.)
Rob-
|
|
|
|
Post by bradblazer on May 11, 2009 22:00:50 GMT -5
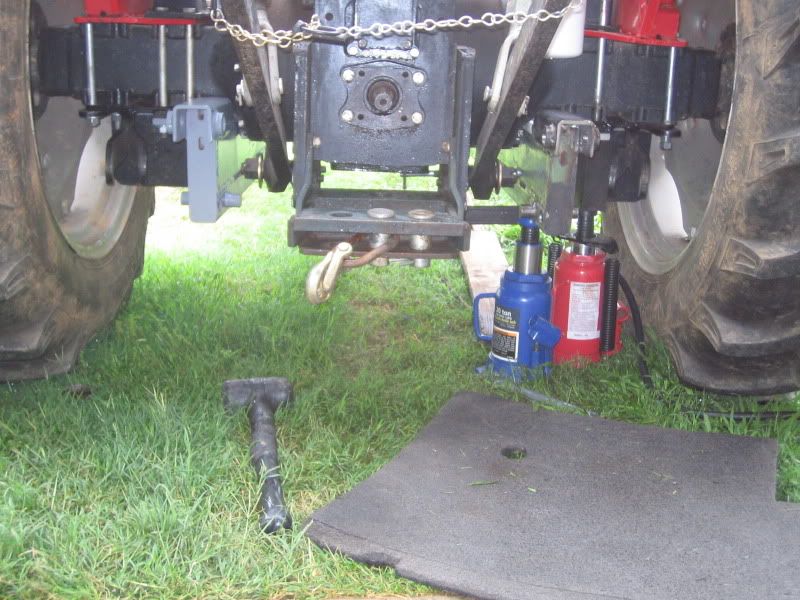
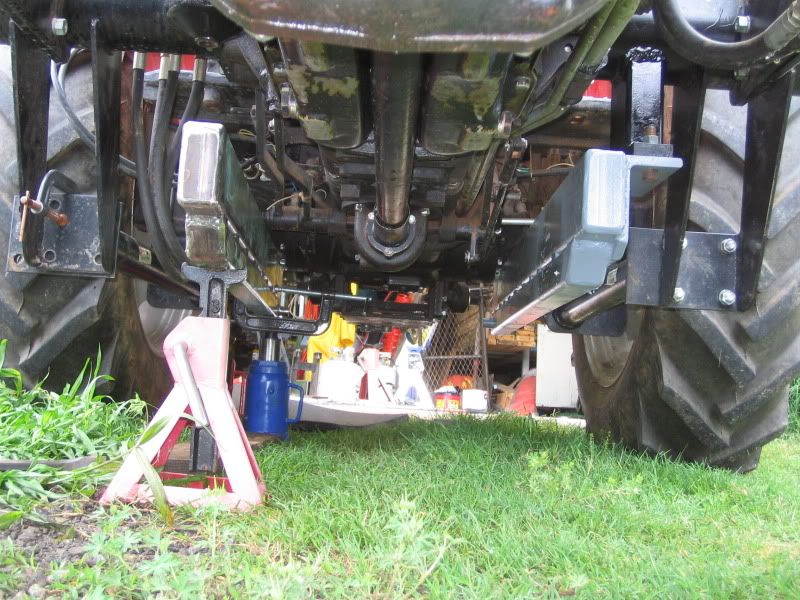
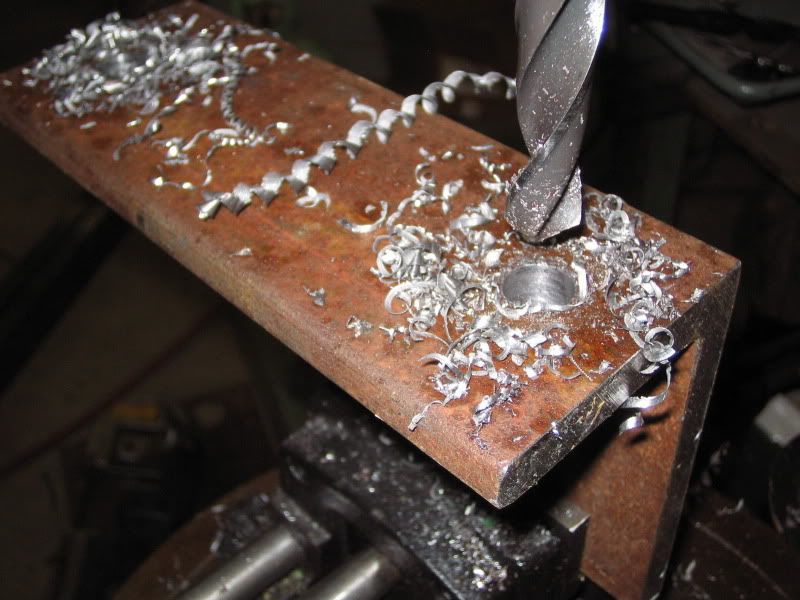
Hey, it's nice to have someone else with inside knowledge of the tractor interested enough to provide his ideas. Since I haven't had to remove the lift arms yet in 200hrs, I'm not too worried about a little extra work to get them off. I can still easily access the nut, it will just be really close trying to get it all the way off. Here are a couple of pictures of the inside of the assembly. 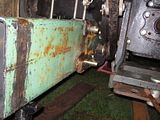 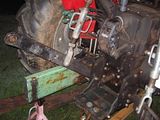 |
|
|
|
Post by bradblazer on May 11, 2009 22:07:53 GMT -5
|
|
|
|
Post by bradblazer on May 11, 2009 22:20:00 GMT -5
|
|
|
|
Post by bradblazer on May 13, 2009 21:50:04 GMT -5
|
|
GuglioLS
Administrator
Jinma354 LE
Posts: 1,276
|
Post by GuglioLS on May 13, 2009 22:37:19 GMT -5
Nice work Brad,
Those certainly are some unique one of a kind metal parts that you fab'ed up. Almost like abstract art, the big difference being yours have a useful function and fit like a glove. I see your working out in the grass, and in one pic it looked like some tractor parts were rain soaked. Is your tractor under the wood / tractor shed you build a while back?
"Have you tried out the stick feature of your Russkie welder?"
Not yet, I'm spoiled rotten with MIG. When I need to do some hard facing or OH, I will use it for sure. I have found MIG is not ideal for OH (Over head) welding, the nozzle tends to get splatter inside and short out.
Larry
|
|
|
|
Post by bradblazer on May 14, 2009 8:50:22 GMT -5
Thanks Larry, "Is your tractor under the wood / tractor shed you build a while back?" It is now.  .. I had it backed up to the door of my shop while I was working on it. Too much crap inside to drive in.  We have been fortunate to get plenty of rain so far this spring. I'm camping with the Scouts this weekend so we're guaranteed to get some more.  |
|
|
|
Post by bradblazer on May 14, 2009 20:07:39 GMT -5
Went to Fastenal today and ordered some 9/16" grade B7 all thread and gr8 nuts to replace the M14 rear axle tie bolts. While I was at it I ordered replacements for the M14 bolts that secure the loader towers (like the ones Rob broke) Their pricing was strange but the 36" lengths of all-thread were something like $5.25 each. Anyhow 4 pieces of 9/16 all-thread, 25 nuts & washers, plus 10 m14 bolts came to $33, less than his quote for 1 meter of M14 all-thread. It'll be here Monday AM. Next best price I found was McMaster: www.mcmaster.com/#98957a612/=1vke3a |
|
GuglioLS
Administrator
Jinma354 LE
Posts: 1,276
|
Post by GuglioLS on May 15, 2009 0:39:39 GMT -5
Hey Brad, sounds like you got a good deal, what grade M14 bolts did you go with for the FEL tower brackets? The Scout camping trip sure sounds like fun, Good to see you spending time with the kids on the weekend and working on your tractor during the week when your supposed to be at work ;D So your getting rain? what's rain? I sure wish we would get some, it's so dry here you can spit and it doesn't hit the ground. Larry |
|
|
|
Post by bradblazer on May 15, 2009 21:51:15 GMT -5
Hey Brad, sounds like you got a good deal, what grade M14 bolts did you go with for the FEL tower brackets? I went with the 10.9. The camping trip was canceled due to forcast severe weather. I should be able to make some progress on the backhoe. |
|
|
|
Post by bradblazer on May 17, 2009 22:36:12 GMT -5
|
|
|
|
Post by bradblazer on May 17, 2009 22:47:39 GMT -5
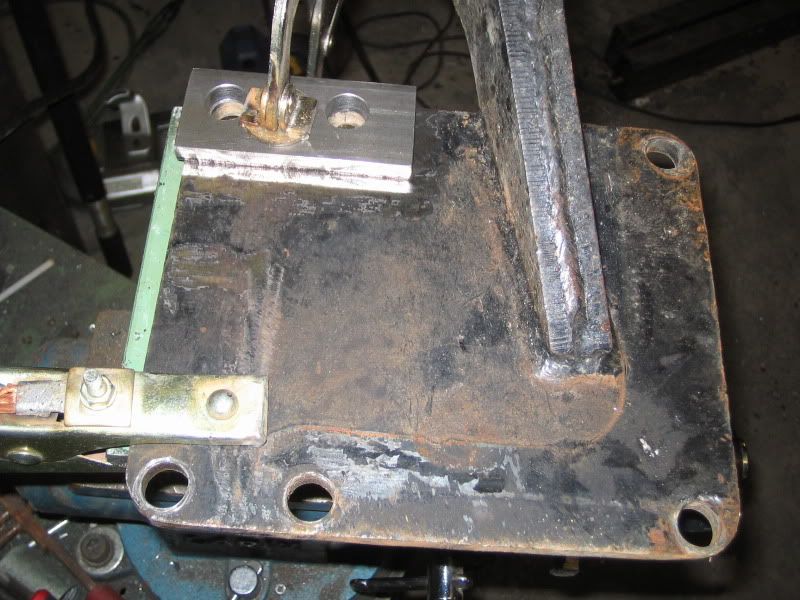
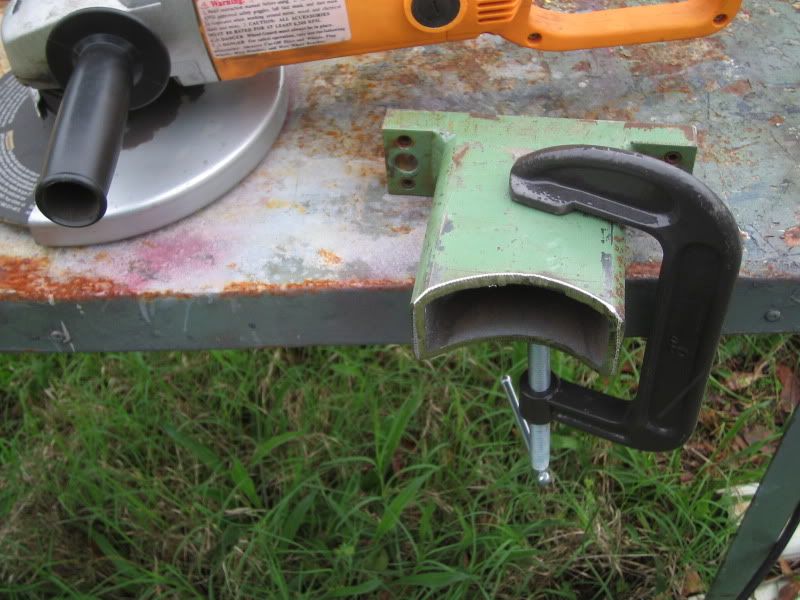
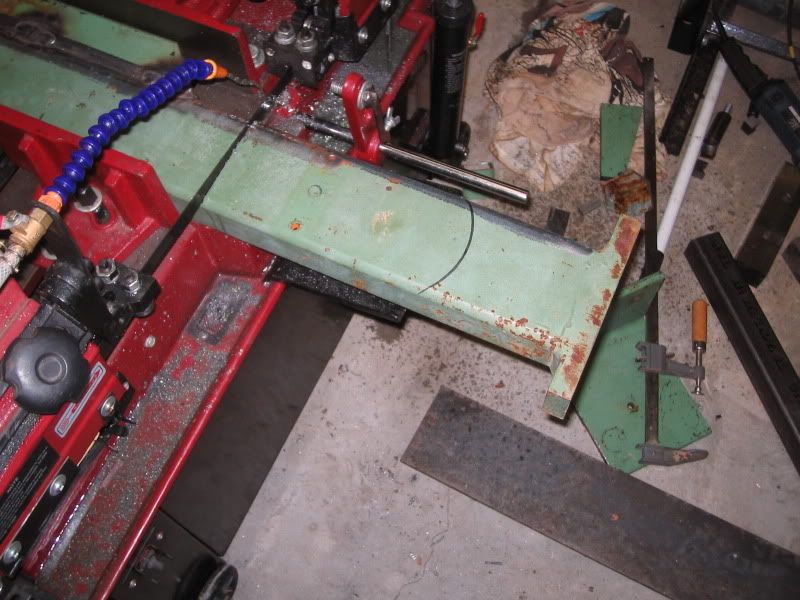
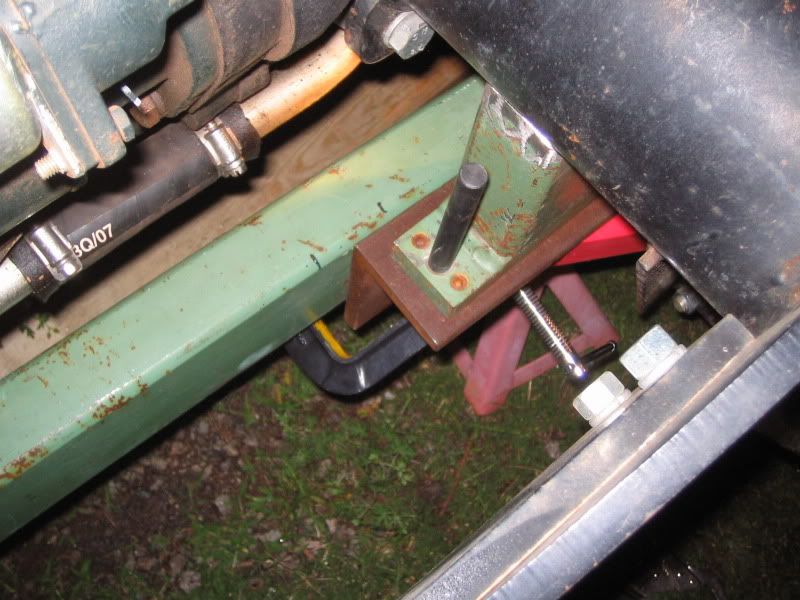
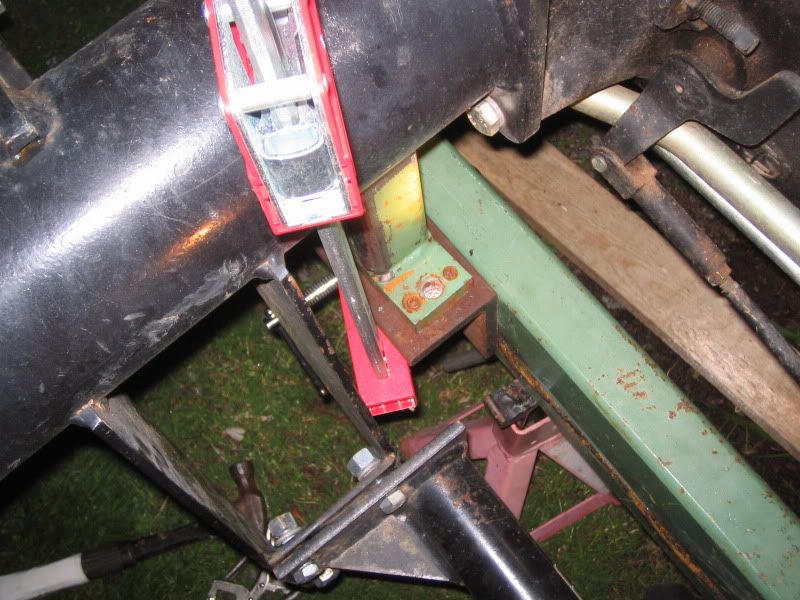
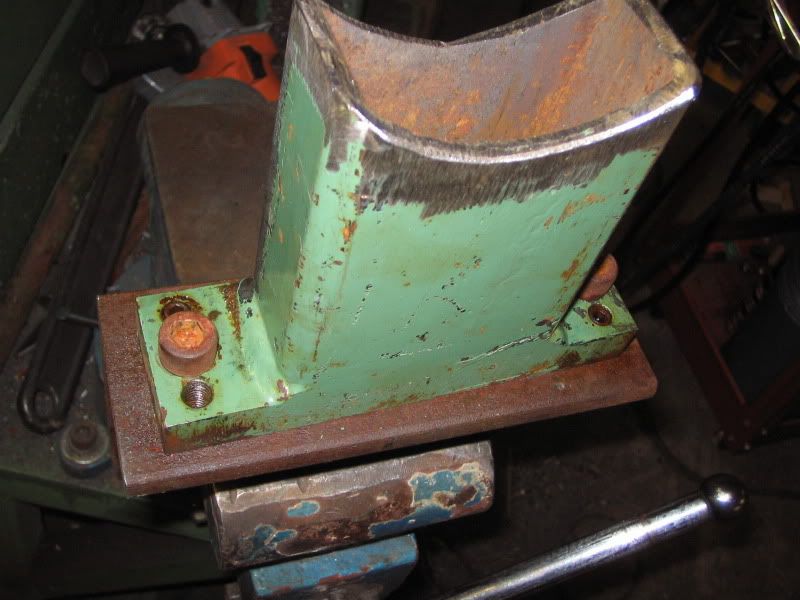
You could see in the last pics I am fitting the other rail. Here is some of the prep work. Capped the end.  The loader brace engages three bolts in an L-shape. I welded some 3/8" spacers to the base plate at the other bolt holes to match the thickness of the loader brace.   Here is the piece that will be welded to the loader tower tube. I used the 9" grinder to get the final shape. 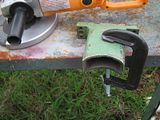 I didn't get a final progress pic but I have the brackets tacked to the rail and loader tower tube. Just need to weld them up and paint them so I can get the rail installed. |
|
3RRL
Administrator
Huge Kama
Posts: 2,027
|
Post by 3RRL on May 18, 2009 10:43:02 GMT -5
Outstanding Brad!
Those are tremendous backhoe subframe components.
Rob-
|
|


 .. I had it backed up to the door of my shop while I was working on it. Too much crap inside to drive in.