GuglioLS
Administrator  Jinma354 LE
Posts: 1,276
|
Post by GuglioLS on May 19, 2009 22:46:56 GMT -5
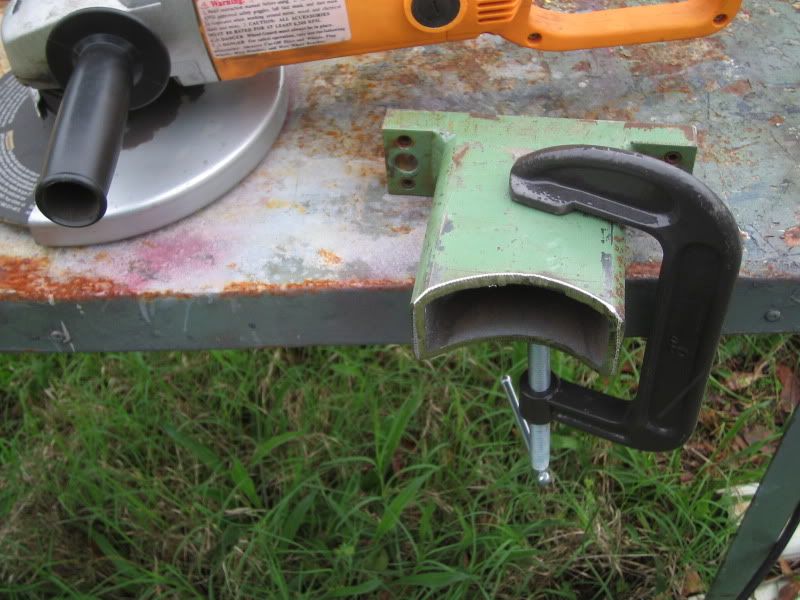
..............snip.....snip..... Here is the piece that will be welded to the loader tower tube. I used the 9" grinder to get the final shape. 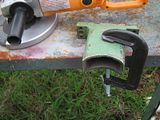 Brad, It's really coming along nicely. Those two weld-on parts you made for the tower tubes look great, did you grind the entire semicircle from the 90* cut? OAN....I don't get the paint scheme, is that red primer and a gray finish coat? No doubt this is a very difficult build to get everything to fit just right. I have to wonder....do your arms sometimes feel like they are going to fall off after working under the tractor for any length of time? Mine sure do. You seem to have hit the jackpot with the metal you got for doing this, it looks like tear-outs from a demolition of pallet storage racks or something similar like structural steel from a building. Larry |
|
|
|
Post by bradblazer on May 25, 2009 21:39:12 GMT -5
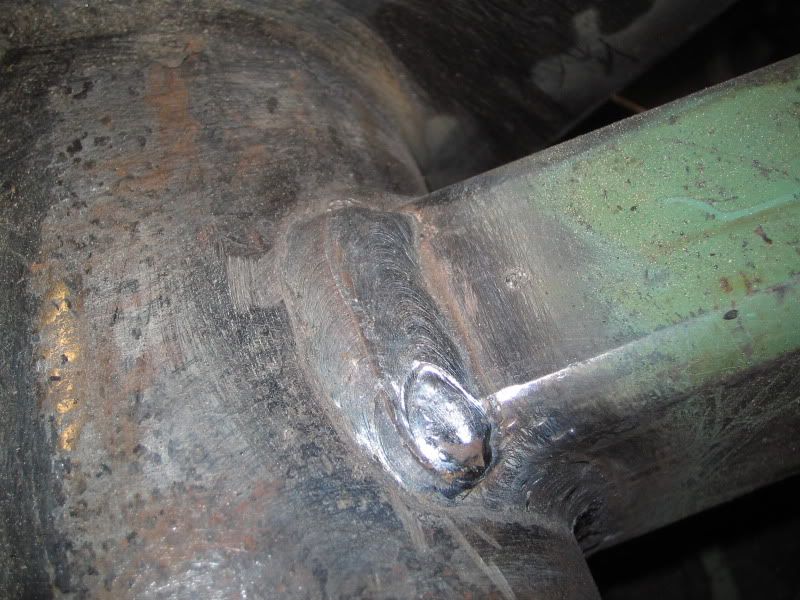
Larry - Sorry I didn't notice your comments until just now. To cut those arcs I traced them with a sharpie, then cut with the portable band saw from each end as close to the curve as I could get, then ground the rest to the line. Yeah, it's red primer and grey finish. I was hoping to get black on the cheap. I went to Lowes and bought a gallon of the $14 floor and utility enamel and asked to get it tinted black. It didn't have enough space in the can to do more than darken it a little.  The color looks okay though to me. I know what you mean - working overhead or under a vehicle the weight of my own arms feels like a ton! I basically clamped the parts in place and tacked them on with the little portable 80 amp inverter. On that heavy metal out of position and under-powered my welds look like @#$%. They make Rob's look like robot laser welds in comparison. So.... I just take the parts into the shop and cover them up with 5/32 7018 at 180 amps.  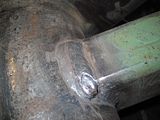 Those towers are some heavy, awkward SOBs to lug around though. |
|
|
|
Post by bradblazer on May 25, 2009 21:56:58 GMT -5
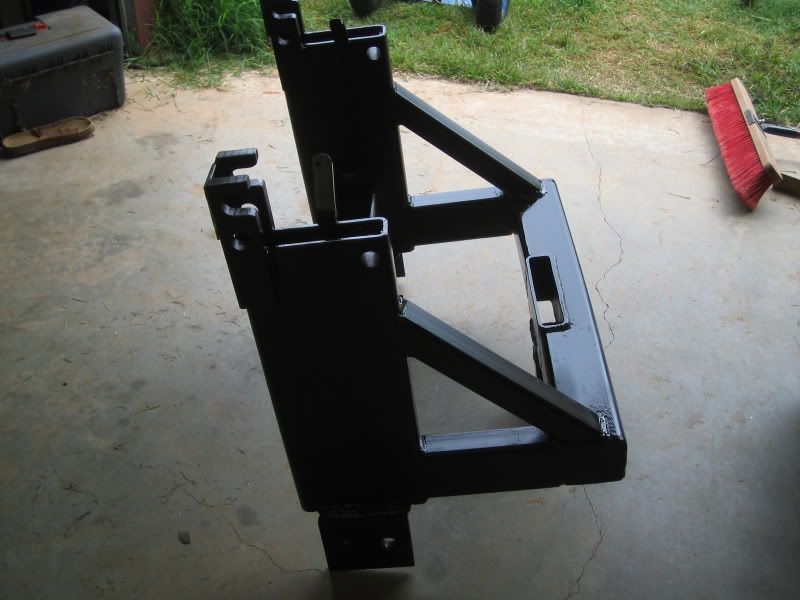
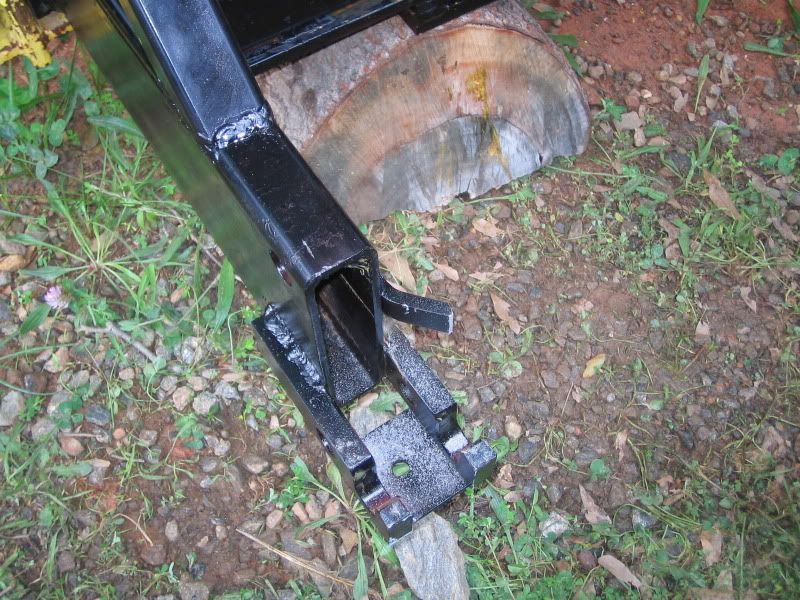
Okay Think, Saw, Drill, Grind, Weld, Paint Yada-yada-yada... I'll call this part the adapter. It was too rainy to use real paint so I used the rattle-can black fast-drying Wal-Mart paint. That strange pocket in the top link support bar is where I cut off the 2x8" tubing you can see. (used steel, what can I say?) 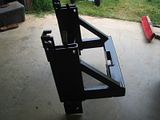 The next step after this took about a half hour and some back pain to get the thing on the backhoe. The lower tabs drew out due to the three-pass welds I made. I used a length of all-thread to pull them together enough to slip them into the capture slots on the BH. All 3 connections are double pinned. Thank goodness this isn't where I am connecting every time. 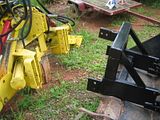 The 3RRL Guide Tabs were interfering with the lower link nuts so I had to trim them. 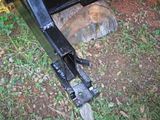 |
|
|
|
Post by bradblazer on May 25, 2009 22:04:19 GMT -5
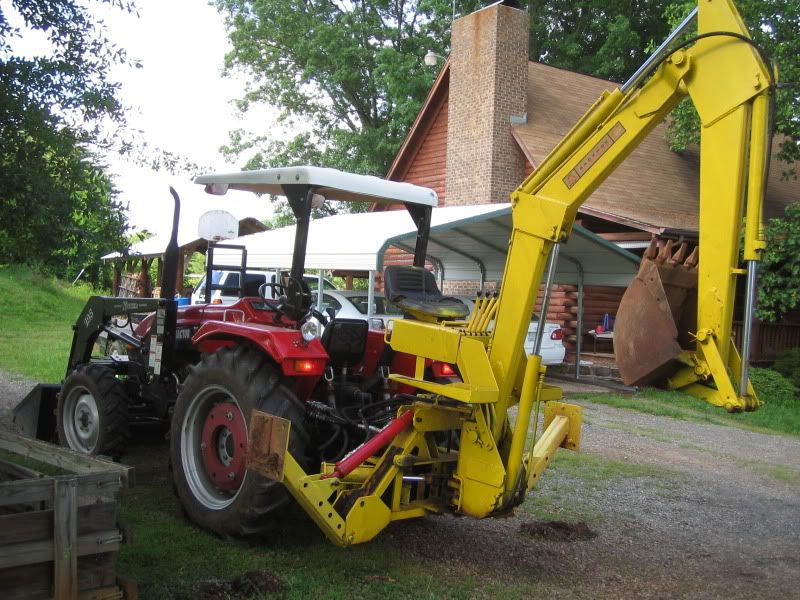
Then I backed up to the hoe. The lower links stuck through under the top link support of the adapter frame so I raised the 3ph and it pulled the connections together and I was able to PUT IN THE PINS!!! 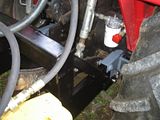 The hydraulic connection is simple - only 7 hoses  4 for the rear remotes to power the stabilizers and 3 to the BH stack (in, power beyond, and return)  |
|
|
|
Post by bradblazer on May 25, 2009 22:27:27 GMT -5
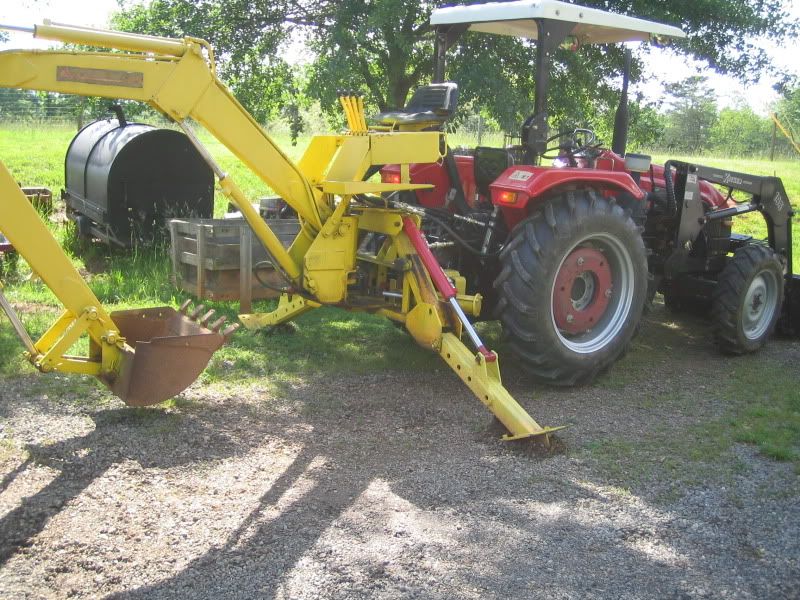
Check out the big cooker behind my TLB. That was a machine enclosure I picked up for $5 after the telco bust. I gave it to my friend Brad who made it into a cooker that I get to borrow but before I got rid of it I removed some frame components that included the 2x4 rails used in this project! It all comes together.  The 6x8x1/2 angle (rear axle brackets) , 2x8x1/4 tube (Adapter rails), and 4x4x1/4 tube(Adapter top link bar) came from a crazily heavy built custom push cart I got at the same auction. Most of the short pieces of tube, etc I get out of the maintenance/fab shop dumpster (roura-hopper) at the plant. When I see useable stuff, I stash it until I have enough to do a property pass. I have to pay the scrap rate for it. It just went down to $.045/lb.   The rear wheels are just off the ground. The non-pivoting feet dug in and prevented lifting any higher. 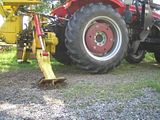 Sorry no action shots yet. I did extend the boom and let it jerk a little with the stabilizers up and the connection seems rock solid. No noise out of the connection. The tractor just bounces on it's tires. There is a pocket on the bottom of the adapter for a 1x3" solid drawbar support that I forgot to insert. 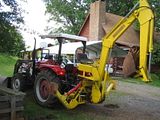 |
|
|
|
Post by bradblazer on May 25, 2009 22:48:29 GMT -5
Made a deal for a hoe
« Thread Started on Mar 30, 2008, 7:54pm »
What's 14 months among friends?
|
|
GuglioLS
Administrator
Jinma354 LE
Posts: 1,276
|
Post by GuglioLS on May 25, 2009 23:46:49 GMT -5
   Congratulations Brad, What an honor to be the first to congratulate you on completing the subframe for your monster hoe. WOW that thing is awesome. I'm worn out just from reading and viewing all the great photos of your update. So it was tough getting it attached to the hoe end but the hook & pin end went together without a hitch? Nice work, great planning and superb execution. Larry
|
|
|
|
Post by bracabric on May 26, 2009 14:22:30 GMT -5
Super stuff Brad, you are one gifted and determined Hombre !! Oh and I like the way you keep stuff that will be very useful "one day" I am exactly the same and it saves a fortune !!
Dick
|
|
3RRL
Administrator
Huge Kama
Posts: 2,027 
|
Post by 3RRL on May 26, 2009 14:55:49 GMT -5
Brad, awesome job man. That really turned out great !!! Then I backed up to the hoe. The lower links stuck through under the top link support of the adapter frame so I raised the 3ph and it pulled the connections together and I was able to PUT IN THE PINS!!!Unbelievable when a plan comes together ... like the pins slipping in. You must have done an excellent job lining everything up for that to happen. The hydraulic connection is simple - only 7 hoses 4 for the rear remotes to power the stabilizers and 3 to the BH stack (in, power beyond, and return)A lot of hydraulic connections, but someday you might be able to figure out how to get all those lines onto the backhoe (via a manifold or something) so you can just plug in one in and out line. The rear wheels are just off the ground. The non-pivoting feet dug in and prevented lifting any higher. The way I do it is use the boom to help lift the rear of the tractor and also the stabilizers at the same time, sort of alternating pressure. Try it with the boom directly in back. If that doesn't lift the rear end, move the boom towards each stabilizer and do it there. That should get the entire rear end off the ground and the stabilizer feet square on the ground. You really did a superb job Brad. You should be very proud of what you did. After looking at all those photos, man, I wish my backhoe was a big and strong as yours. You really got a good deal there to begin with. If you haven't already done so, you might consider loading all 4 tires to help with the "bouncing". It will make a difference. Thanks for the great thread!! Rob- |
|
|
|
Post by bradblazer on May 26, 2009 22:41:50 GMT -5
Thanks so much guys.
Yeah Larry the hook and pin arrangement worked fine. I was pretty tickled with how it fit. You know by hand those heavy components were a little hard to slip together but hydraulic assist works wonders. I havent disconnected yet but I'm thinking the weight of the hoe will pull it apart fine.
Dick - thanks, "determined" sounds a lot better than procrastinator. Actually I have such a wealth of "Good junk" I think I need to start ebaying it out of my building.
Rob - The simplest way to reduce the connections would be to add stabilizer controls to the backhoe either with a whole new stack valve or a dual valve with PBY.
Thanks for the stabilizer hints. I am anxious to try it out but it's still raining. Plus I had to play drums with my boys playing Rock Band on the Wii.
Actually the only time it bounced was playing with the boom with the stabilizers up to gauge the rigidity of the frame. I am curious how much traction I will have with the big hoe mounted.
One thing I did discover - If I scoop a bucket-full out of my driveway, then dump it back in the hole and level it, an inch and a half of overnight rain will turn it into something like oatmeal.
'nite,
Brad
|
|
|
|
Post by bradblazer on May 28, 2009 22:21:50 GMT -5
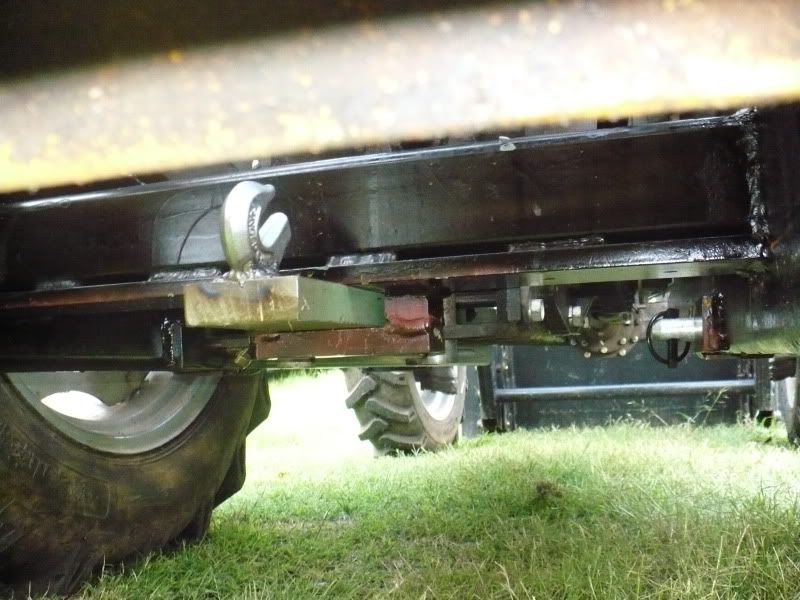
Here is the drawbar support I mentioned. I used a holesaw to make the pin hole in a piece of 1x3 solid bar. The little holes were already there. They did give the shavings a place to go while sawing.  I cut a little off so it could be inserted with the hoe in place and welded on a hook . The angle of the hook is to help retain the chain. In hindsight I could have welded the hook to the underside and the angle would have been good with the back of the hook flat against the bar.  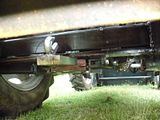 Anyhow, it inserts easily and should provide some extra support to the backhoe adapter. 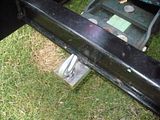 |
|
|
|
Post by bradblazer on May 28, 2009 22:38:05 GMT -5
It got dark on me but I played around with it a little tonight. I had a bunch of old plastic mulch that had been dumped in the ditch that I wanted to get rid of so I dug a big hole and buried it. Being wet and dirty it would have been a huge chore if I took it to the "convenience site." It's not in the pics but I was able to easily push the trash and backfill into the hole with the loader with the weight of the hoe as ballast. So far the work flow using the rear remotes on the stabilizers is fine. I back up to where I want to dig, put the outriggers down, put the loader down, then climb onto the backhoe.   |
|
GuglioLS
Administrator
Jinma354 LE
Posts: 1,276
|
Post by GuglioLS on May 29, 2009 20:02:57 GMT -5
......SNIP...... SNIP.....One thing I did discover - If I scoop a bucket-full out of my driveway, then dump it back in the hole and level it, an inch and a half of overnight rain will turn it into something like oatmeal. 'nite, Brad Smooth move Brad, you got like what, 18 acres of land? and you have to go digging holes in the middle of your drive way  Thats real brilliant . All ribbing aside, Nice addition with the draw bar support and tow hook like that. You should be happy with the way you did it as the tow hook will work much better welded on top and at the angle you placed it. If it were underneath, you'd be blind attaching a chain and it would tend to fall off with slack. Not only that with the hook on top, it will keep your sub frame from sliding out in the event you forget to put the pins in or shear them all off (year right). I see you wasted no time digging a land fill to bury junk on your property. It that in the middle of the driveway too? LOL. The first thing I did when I got my BH was dig a hole and bury an old slant 6 225 CI engine off my old Plymouth valiant. The rear axle off that old car is what I used to make the little trailer for the ATV. I still have the front end to bury or haul off to the junk yard. I must agree, burying it is much easier. Keep the pic's and projects coming with your new hoe. Larry |
|
|
|
Post by bradblazer on May 29, 2009 23:36:31 GMT -5
"Smooth move Brad"
Yeah, I was out of time but I couldn't resist digging something.
"Nice addition with the draw bar support and tow hook like that. You should be happy with the way you did it as the tow hook will work much better welded on top and at the angle you placed it. If it were underneath, you'd be blind attaching a chain and it would tend to fall off with slack. Not only that with the hook on top, it will keep your sub frame from sliding out in the event you forget to put the pins in or shear them all off (year right)."
Okay, I'll just paint that drawbar and call it done!
I can still add a toplink like you suggested early on. With the draft linkage as a cushion the lift box shouldn't see any stress unless something cuts loose.
|
|
|
|
Post by bradblazer on Sept 15, 2009 16:21:27 GMT -5
Quick update. I did some minor digging work, about 50feet of shallow trench for a drain line, dug out some small trees and cleared out some ditches. The backhoe works fine and the subframe is nice and rigid. I need to do some urgent cross-fencing of my goat pasture now (the little bucks are starting to display some urgent behavior) so I removed the backhoe on Saturday afternoon. It came off pretty nicely. The pins were still a little snug and it is awkward to get in there so I used a ball joint fork and pry bar and they came out pretty easily. I would guess about a 15-20lb pull to get them out. Just a little too snug to pull out by hand.
Before I took it off I did a quick check for any slop. Starting with the entire backhoe weight on the tractor I lowered the boom until it pushed against the ground to lift the rear of the tractor nearly off the ground. I repeated several times and the only give seemed to be in the tires. The boom pivots and subframe connections seem nice and tight.
Brad
|
|


 4 for the rear remotes to power the stabilizers and 3 to the BH stack (in, power beyond, and return)