3RRL
Administrator  Huge Kama
Posts: 2,027 
|
Post by 3RRL on Apr 14, 2008 14:44:55 GMT -5
I installed a spin-on suction strainer for the hydraulic system on my 554 Kama last year. I bought the filter and housing unit on line from Northern Tool. Suction line filter assembly with 3/4in. NPT ports with bypass for cold start protection. Includes 149 micron stainless steel mesh element. This filter may be used where it is not possible to use an in-tank suction strainer. Not for use with pumps larger than 15 GPM.Here is the link Suction Strainer. This is what it looks like and where I installed it on the Kama. It's located near the left rear fender where I can get to it easily. 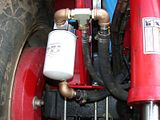 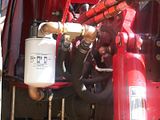 I changed it out because the OEM was a small pain to clean every time, plus I had a good size tear in the rubber elbow where the return to sump comes from the rear remote valve. Here is the stock strainer assembly and look at the tear on the rubber elbow in the last picture. The Chinese rubber is shit. 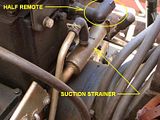 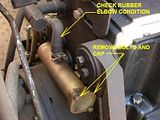 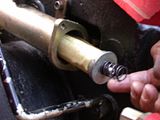 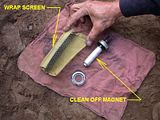 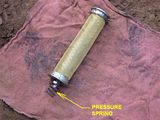 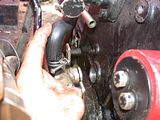 |
|
3RRL
Administrator  Huge Kama
Posts: 2,027 
|
Post by 3RRL on Apr 14, 2008 14:53:06 GMT -5
Not only did I add that spin-on strainer, but I also changed all the hoses and opted for a larger return to sump hose. With the new placement, I added quite a few feet of line so the system has more hydraulic fluid in it now then before. Here are a few details of the installation. First I drained system and then started to loosen all the connections for the suction tube, both to the pump and also from the rear valve. 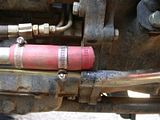 That right front banjo fitting is the return to sump on the rear remote valve. 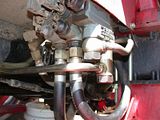 You also have to loosen the clamp that holds the steel suction line which also holds the limit safety switch to the clutch. This was hard to get to and also replace. 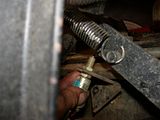 Then remove OEM strainer by removing the rubber elbow and 2 bolts that hold it to the housing. It slides out of a hole and is sealed by an "O" ring. 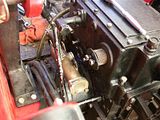 I had brought everything I needed to camp for the modification, including a 5 gallon pail of Napa AW32 hydraulic oil. 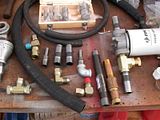 |
|
3RRL
Administrator  Huge Kama
Posts: 2,027 
|
Post by 3RRL on Apr 14, 2008 15:00:28 GMT -5
Next was to cut off the old strainer and wash the chips out of the line. 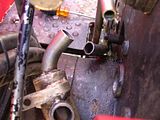 I settled on a mounting position for the new strainer wanting it somewhere out of the way but easy to get to to change the cartridge without spilling oil all over. So I found that inside the left rear fender was perfect. My wheels are set out wide and they cleared by over 6". The strainer is directly behind the steel flange too, so no chance of getting knocked off there. Not only that, but I didn't have to cut the rear remote valve return line at all. After doing that, you can then tap the hole of the old strainer going into the hydraulic box. 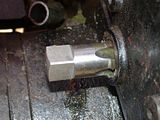 Be sure to get all the chips out by using a towel below the hole and then flushing the rest out, if any. A magnet on the tip of a scribe works real good too. 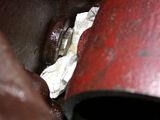 This is also a great time to tighten up the nuts and bolts that hold the hydraulic box down. I used to have to take the old strainer off to do this side. 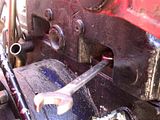 The 1/2" hydraulic hose I got was low pressure, but nevertheless, I couldn't get it on the 1/2" return line. The hose would not flex out one bit. I had to take an angle grinder to make a lead in. And then it was harder than heck to get on the rest of the way. 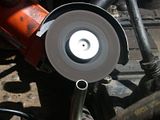 |
|
3RRL
Administrator  Huge Kama
Posts: 2,027 
|
Post by 3RRL on Apr 14, 2008 15:04:16 GMT -5
The 1" hose was no problem, because I had figured on getting barbed connectors for it. I had also gotten barbed ends for the 1/2" where the other connection would be. They worked great and were a lot easier to slip on than over the Chinese steel tube. But it all worked out. Here is a shot from inside the cab showing the elbow, 1" suction line and 1/2" line going to the front. 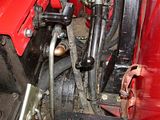 That tap I used is a 1"NPT tap. The hole in the box is Ø1-1/4 so the threads are not 100%. The normal tap drill for 1"NPT is Ø1.213. What I did is use an adapter/reducer from 1"NPT to 3/4NPT for my hose barb. On the OD of the 1"NPT reducer, I machined an "O" ring groove to help seal it. It works perfect with no leaks and is engaged fully. It is a low/no pressure fit anyway. 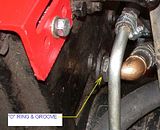 |
|
3RRL
Administrator  Huge Kama
Posts: 2,027 
|
Post by 3RRL on Apr 14, 2008 15:09:59 GMT -5
I got the hydraulics to work by priming the system. I talked to Larry over the phone and he agreed the system needed priming also. I found a 3/4NPT fitting with a 1/4 NPT inside which fit the rubber tip of my air hose. I thought I'd give Larry's suggestion a shot of pressurizing the hydraulic tank with air before tearing it all apart again. Just before I did that, I cracked the suction line bolts at the pump to allow for leakage. My idea was to slowly add some pressure to the tank to see if oil would start leaking at the loosened connection. The top is the suction line on my Kama 554. 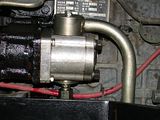 I had Loretta watching the pump while I added small amounts of air. If fluid started leaking, she was to tighten the bolts again, then start the tractor. In the mean time, I kept the air hose tightly against the fitting. I gave it a couple squirts of air to pressurize and Loretta told me it was starting to leak past. She let it leak a little more to purge and then she tightened the connection and jumped in the tractor to start it. 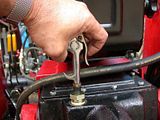 Of course I was still holding the air nozzle inside the fitting. I knew better to take it off while still under pressure, so I waited for her to work the loader several times and relieve the pressure in the tank. Then removed the air gun with no oil spray. So everything works great again. By using the large diameter suction hoses, and the larger suction strainer, I think I've increased the total amount of hydraulic fluid in the system by about 1-1/2 quarts. Before I pressurized the tank, I noticed how the fluid level had dropped quite a ways from how I left it. Aside from the amount leaked, it took a couple extra quarts. So some of it flowed through the strainer after all.  What I didn't tell you was the first time I pressurized the tank I took the air nozzle off and squirted the hell out of everything....that's why I knew better than to do it again. ;D Rob- |
|
3RRL
Administrator  Huge Kama
Posts: 2,027 
|
Post by 3RRL on Apr 14, 2008 15:23:06 GMT -5
One other thing. The OEM strainer had a magnet in the center of the screen to pick up very fine shavings of metal. I thought that was a good idea so I added a large powerful magnet which sticks to the bottom of the strainer filter. I had bought those magnets during my visit to Larry in New Mexico. I figured I could attach them to the bottom of my hydraulic suction strainer, and one for the engine oil filter too. The magnets only made contact on one circle since they were flat and the filters were contoured. I needed to contour the magnets to fit the contour of the filter and strainer so that the surfaces would match. So I turned them in my lathe. 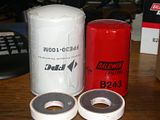 They had different angles and radius so I labeled them. Now the contact area is large and fits flush to the bottoms of the filters, and they are tight. 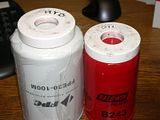 I have not fastened them in any way, other than the magnet strength. They have not moved during normal work and I can switch them from filter to filter easily. I don't think they will come off. In trying to knock them off, they merely slid out of position or to the side of the filters, but never came off. I have nearly 500 hours on the Kama now and they are still there. So I will do an oil change soon. When I do, I will cut open the oil filter at least, to see what the magnets collected. When I change the hydraulic fluid again, I'll do the same for that strainer and report back on it here. Rob- |
|
|
|
Post by bradblazer on Apr 14, 2008 22:17:55 GMT -5
Rob,
Really appreciate all of the great mods/maintenance info you post on the 554.
Brad
|
|
3RRL
Administrator  Huge Kama
Posts: 2,027 
|
Post by 3RRL on Apr 14, 2008 22:45:31 GMT -5
Thank you Brad! You have always been very kind and appreciative in your replies to my posts. I remember one in particular quite a while ago when I posted my valve lash adjustment on Joe's board. You used that thread to do yours because you had no manuals to follow. I really appreciated that and it made me feel very good...just like you did now.  Rob- |
|
|
|
Post by mariner on Apr 14, 2008 23:00:52 GMT -5
Hi Rob, You have done a nice job on your write up as well as on your tractor. You are really going to appreciate the new spin on filter setup. Changing filters out will be a breeze. Does the 149 micron element fit inside the spin on filter or is that the size of the filter itself. The reason I ask is I am using the Napa 1553 spin on, which crosses over nicely with the chinese filter. The Napa 1553 is rated at 33 micron and is about as fine as I am told, to go. Anyway, thanks for taking the time to post this - you are doing a great job, please keep up the good work. I don't know where you find the time to do all this work, visit the new house and barn, work on Loretta's machine etc. I am retired and I am busier now than I have ever been - and I no longer get paid for my efforts    Thanks Rob, another real good read. mariner |
|
3RRL
Administrator  Huge Kama
Posts: 2,027 
|
Post by 3RRL on Apr 15, 2008 10:22:08 GMT -5
Hi Jim, thanks too for the kind words.
I don't know where you find the time to do all this work, visit the new house and barn, work on Loretta's machine etc. I am retired and I am busier now than I have ever been - and I no longer get paid for my efforts
Hahaha, I am in the same boat as you and feel the same way! And to be honest with you, I did this modification about a year ago.
The 149 microns is the size of the filter straining element on my Kama strainer.
It is on the suction side of the hydraulic system. I've read where the suction side needs to be rather free-flowing (non-restrictive) so the pump doesn't work so hard and to minimize pressure drop. Or so it doesn't suffer from cavitation or a collapsed suction line in case the filter element is too restrictive. A little finer suction side strainer is probably OK though, maybe down to 110 microns or so?
In your case, your Jimna came with the spin-on strainer, right? Loretta's 284 did also.
The Napa 1553 is rated at 33 micron and is about as fine as I am told, to go.
IMHO, that is pretty fine for a suction strainer. I would use that on the return side of the system and even down to 10 microns, but keep the suction side strainer up around 110 to 150 microns. Was that the same rating as the stock strainer on it? In hotter weather it might cause a problem if your suction hose gets softer and allows itself to collapse. Or even if the strainer starts to plug up a little.
Keep a close eye on that if that was how the stock filter was.
With that in mind, I've thought about adding return side true filter in the 10 micron range. I believe Ronmar did that on his Jinma. Sounds like a good idea to me, since on that return side, the pump won't be affected from any of the symptoms listed above.
Rob-
|
|
|
|
Post by bradblazer on Apr 15, 2008 12:17:00 GMT -5
|
|
3RRL
Administrator  Huge Kama
Posts: 2,027 
|
Post by 3RRL on Apr 15, 2008 13:16:04 GMT -5
I think what Ronmar did was hook up his 1/2 remote and ran a 10 micron filter via quick disconnects to filter the return side ... a very cool idea. In our case Brad, that high pressure filter you posted would be the way to go for an external one. It would surely be easier than installing one after the last valve which is inside our hydraulic box. I've had the hydraulic box open and posted on another board all the goodies in there. I don't think I'd like to tackle doing one on the inside. I've been thinking hard about adding a 10 micron filter into the system after reading how small particles can ruin valves in the system. Ones smaller than the strainer catches, but large enough to damage valve spools. A simple but informative technical reference guide by Donaldson shows how proper filtration can help reduce mechanical wear and valve blockage. Here is the link to that: Technical Reference GuideRob- |
|