3RRL
Administrator  Huge Kama
Posts: 2,027 
|
Post by 3RRL on Jan 28, 2008 17:31:20 GMT -5
In choosing the pivot locations, making sure the thumb was out of the way when not in use was a primary concern (among everything else)  So here are some shots of the thumb and linkage folded out of the way in it's "rest" position. 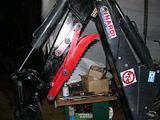 I remove the shoulder bolt from the kidney shaped arm and unbolt the link. Then use the same bolt to lock it in it's "rest" position neatly tucked. 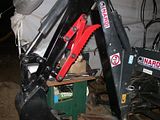 It looks pretty cool like that, huh? Here's a close-up from underneath. 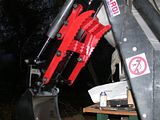 |
|
3RRL
Administrator  Huge Kama
Posts: 2,027 
|
Post by 3RRL on Jan 28, 2008 17:36:48 GMT -5
I couldn't help but notice that my thumb folds as neatly as most of the "stationary" thumbs I've seen. So I was pretty happy with that. I took a few more shots of the finished project. This is from the very front showing all the pivot points welded on and one one from the side. 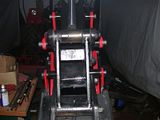 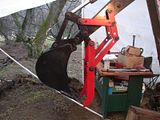 I hope you enjoyed the project as much as I did. I was very pleased to see it all come together so nicely. I'll show some photos or maybe a video of it picking rocks and other stuff later on. Here's the video of the finished "Mechanical Thumb" taken after welding but before it was re-painted. I took some videos of it but they came out too dark, so I'm showing this one instead. You can clearly see how all the articulating linkage works here. Also note the additional holes to vary the acceleration (how fast the jaw closes in relation to the bucket curl) and how wide or narrow the initial gap between the bucket and jaw can be set. 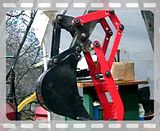 |
|
3RRL
Administrator  Huge Kama
Posts: 2,027 
|
Post by 3RRL on Jan 28, 2008 17:39:22 GMT -5
After Larry came up and fixed my electrical problem in ten seconds (a bad ground!) I took these photos and videos. As promised, Larry fixed my electrical problem in a jiffy so the first thing we did is remove the boxblade and mount the Nardi Backhoe on the tractor. I had told you guys before that the home made subframe was kinda a tight fit, but it usually takes me 10 minutes to get it on. With Larry helping, it only took about an hour.  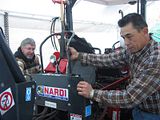 He had his side completely pinned and mine wasn't in yet, and there's not enough play in the fits to allow that. So he and I were muscling the backhoe and subframe to get it in and connected. We finally got it on and off we went to test out the mechanical thumb. Larry had the honors. 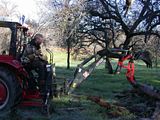 |
|
3RRL
Administrator  Huge Kama
Posts: 2,027 
|
Post by 3RRL on Jan 28, 2008 17:40:12 GMT -5
Here is a picture of the Kama with Grapples and Mechanical Thumb taken in the field near our food plot. 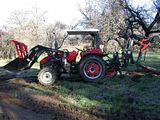 Just before that, Loretta took a video of how the mechanical thumb worked under power. Here I am checking it out while Larry operates the controls. It is working just as I was hoping it would. Now to try it out. 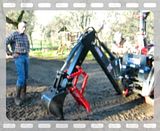 |
|
3RRL
Administrator  Huge Kama
Posts: 2,027 
|
Post by 3RRL on Jan 28, 2008 17:42:02 GMT -5
The next step was to try it on some real rocks and logs. So again, Larry worked it for the first time ever. Here he is trying to get used to my backhoe movements, and using the mechanical moving thumb. 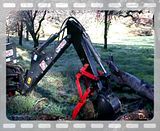 Just before that, he also had a chance to try out the dual grapple set up on the massive bucket. This was the first time he had operated the tractor and the backhoe. Larry owns a beautiful Jinma 354 and has made all kinds of mods and improvements to it. So he is no stranger to hard work. He did comment on how stable the Kama 554 was with loaded tires, and that it has a lot of power, although he did not do any really heavy digging with it. 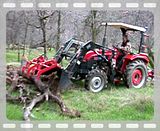 |
|
3RRL
Administrator  Huge Kama
Posts: 2,027 
|
Post by 3RRL on Jan 28, 2008 17:43:36 GMT -5
Then it was time to see if the backhoe could pick up that frozen water laden log. This is a photo of it. 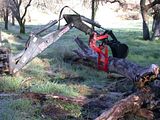 And here is a video. The log is super heavy and was a bit too much for the Nardi. As a matter of fact, when it was my turn to try out the backhoe thumb, I tried to get that big log (of course). I managed to test it to failure and tweak the jaws plus a couple of links ... crap!  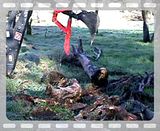 |
|
3RRL
Administrator  Huge Kama
Posts: 2,027 
|
Post by 3RRL on Jan 28, 2008 17:44:10 GMT -5
So I had to fix the Thumb and straighten out the bent links and jaws. While Larry decided to completely redo my electrical system ... (he installed an automotive fuse box and repaired several switches and connections) I went to work making additional 3/8 x 2" stabilizer bar to brace the jaws. 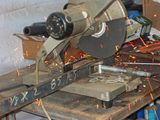 I also had some 3/8 x 1" bar stock that I cut to the length of the linkage. Then welded them on top of the linkage to make them like "T" beams. After completing that repair, the jaws and linkage were super strong. It was actually fortunate to test it to failure so I could make the improvements right there at camp. Now I know what to avoid and the limits of the mechanical thumb. 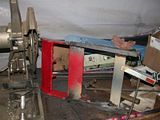 |
|
3RRL
Administrator  Huge Kama
Posts: 2,027 
|
Post by 3RRL on Jan 28, 2008 17:45:18 GMT -5
Now it was time for me to try out the thumb again. It had been raining so it was hard to get the welded areas primed and painted again, but there was enough time to do it after all. Here I am getting ready to try it out again. 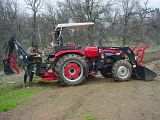 At last, success. The mechanical thumb was a lot stronger than before. In fact, I could dig dirt and pick up rocks with it. This video shows how this basketball size rock is squeezed into the bucket!! I had to tamp the bucket down to dislodge it. 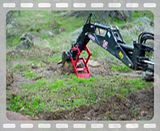 After I got it out, I picked it up again and tossed it out of the way. Now I'll be able to do some serious rock moving. 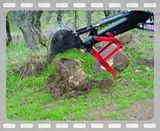 Thanks for looking, Rob- |
|
3RRL
Administrator  Huge Kama
Posts: 2,027 
|
Post by 3RRL on Jan 28, 2008 17:46:11 GMT -5
The last few weekends I have been preparing the homesite for my builder. I moved a whole bunch of rocks and dug out a big Oak tree stump with the backhoe and several other spots in hard decomposed granite. This kind of digging is very brutal on the backhoe. After making the reinforcing brackets for the linkage and jaws, I was worried the Thumb might give out again, but it proved to be super strong. In fact so strong that instead of it bending or breaking, the pivot points which were welded onto the side of the dipper stick started to tear the parent material! 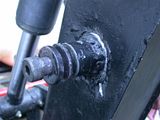 I've been using the Thumb while digging since it does not get in the way and I can "Clamshell" dirt up from awkward positions. The big rocks and roots I pulled on were pretty tough and the cylinder exerted enough power closing the jaws that the metal must have fatigued. Plus, it was not very thick at that point. |
|
3RRL
Administrator  Huge Kama
Posts: 2,027 
|
Post by 3RRL on Jan 28, 2008 17:46:47 GMT -5
You can see from the tear that when the jaws shut against the bucket or object in it, the linkage still wanted to pull that pivot more forward. Lots of power there. Anyway, I got some 3/8" thick 4 x 8 pieces of flat stock and bore holes in the so they would press fit those spacer bushings that Larry gave me for building his gear box. I had to bore the ID to make them fit around the posts, but they came in handy. 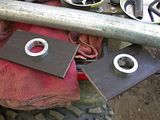 Here's what I plan to do. Weld the cracks first, then weld the 3/8" plate to the dipper stick. Press the bushing over the pivots and into the 3/8" plates. Then weld the plates to the dipper stick and weld the bushing to the plate and pivots. That will make it super strong and it will be built up like a cone. Here's a closer view by the dipper stick and pivot I fixed. 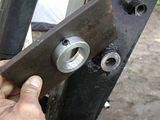 |
|
3RRL
Administrator  Huge Kama
Posts: 2,027 
|
Post by 3RRL on Jan 28, 2008 17:50:04 GMT -5
Here it's fit and fixtured, ready for welding. I had already welded the cracks and ground those weld down. 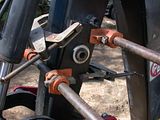 This is what it looked like after all the welding was done. You can see how the pivot post is nearly covered with steel now. It should not bend nor break off. 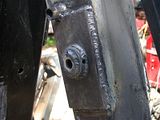 And finally cleaned, painted and put back together again. 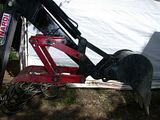 I don't anticipate any more problems since this is a really beefy fix. Unless the dipper stick folds in half or something? I've been using it regularly now in the stump removal and excavating around the power shed with no further problems. Since then dug several trenches a pulled out more Oak trees with no failures. I've also found a technique for digging where I don't ever need to put the jaws in the "rest" position. So they are always working now. I am very happy with this project. Thanks for looking, Rob- |
|
|
|
Post by Ronmar on Jan 30, 2008 13:50:01 GMT -5
Rob
That is absolutely brilliant! I have started thinking about a thumb for my HW03 backhoe. Didn't necessarily want a fixed thumb, and didn't necessarily want to plumb another circuit out to the dipper. Your thumb looks like an elegant compromise.
Ron
|
|
3RRL
Administrator  Huge Kama
Posts: 2,027 
|
Post by 3RRL on Jan 30, 2008 22:17:12 GMT -5
Rob That is absolutely brilliant! I have started thinking about a thumb for my HW03 backhoe. Didn't necessarily want a fixed thumb, and didn't necessarily want to plumb another circuit out to the dipper. Your thumb looks like an elegant compromise. Ron Ron, So glad to see you are posting here. I have read many of your threads on TBN and they are always interesting and informative. You bring a lot to this board. Please post some of the stuff you've done over the years. Regarding the articulating thumb, thanks for the compliments. It has come in super handy without getting in the way. Sort of like the bucket grapples I have. I've not had to remove either. If your hoe is anything close to mine, I'd be happy to share CAD files or .pdf , etc...whatever you can read. It could make it a little easier to determine the pivots and linkage needed, or at least give you a starting point. It is actually easier than my lengthy thread implies. One thing I would do is go thicker with the linkage than I did, as you saw I had to beef it up anyway. Any questions just ask here and I'll be glad to help if I can. You could send me a pic of your HW03 or a dimensioned drawing of the bucket and actuator and I could sketch it out for you. Rob- |
|
|
|
Post by Ronmar on Jan 30, 2008 23:22:35 GMT -5
Thanks for the offer Rob, but that will have to wait a bit. I think though that if I start another project FOR it instead of getting some work done WITH it(stump and land clearing), my wife will use it to bury me:) Maybe this summer after I get the garage/shop insulated...
I was thinking about posting some of my tractor mods and some of the stuff I have built for it just to populate the forums.
Ron
|
|
3RRL
Administrator  Huge Kama
Posts: 2,027 
|
Post by 3RRL on Jan 31, 2008 22:24:32 GMT -5
Good idea Ron,
I know you have a lot of stuff to share. It would be neat to see it all.
Also good idea to keep the Mrs. happy. There's not much you can do from 6 feet under. ;D
|
|