3RRL
Administrator  Huge Kama
Posts: 2,027 
|
Post by 3RRL on Apr 27, 2008 0:16:20 GMT -5
Thought I'd share a little story about changing out the worn inner blade on my trusty boxblade. You've seen the wear I've gotten of several years use on my hard decomposed granite roads and all the roads, trails and foundations I've built with it. The front of the side plates on the box itself have rounded and worn down about an inch, at least. I'll weld some plate back on another time. The blade itself has worn over an inch too. Worse is that in the center, the blade has worn down 3/8" more than on the ends. You can see the difference on the tape measure. So when I drag the boxblade, the cut is no longer flat. We decided to remove the inner blade and flip it over to use the good edge on it. Here is Loretta helping me chisel all the caked on dirt which is packed between the inner and rear blade so we can get to the nuts and bolts. Also some photos showing the wear of the blade at different points with the measuring plates. I'm not too unhappy since I've probably got what ... about 400 hours of good use out of this one. 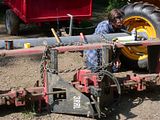 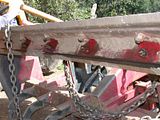 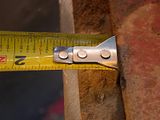 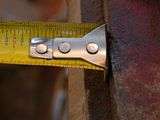 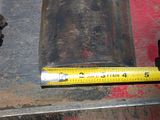 Rob- |
|
3RRL
Administrator  Huge Kama
Posts: 2,027 
|
Post by 3RRL on Apr 27, 2008 0:26:29 GMT -5
The change over is pretty straight forward, but as always, there has to be something about it that makes it interesting ... and annoying.  The bolt threads and nuts underneath got smashed up hitting rocks and dirt so they are going to be a bear to take off. They are like flat headed carriage bolts, I guess? So it's important to keep the square part inside it's pocket when twisting on them. I used K-Clamps and a 1/2" thick bar to keep them in position. The photos below show how all the bolt threads and nuts look like. And also the method I used to retain the carriage bolts in place while I torqued them off. 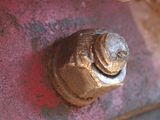 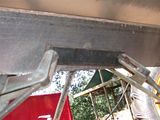 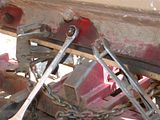 Rob- |
|
3RRL
Administrator  Huge Kama
Posts: 2,027 
|
Post by 3RRL on Apr 27, 2008 0:38:30 GMT -5
OK, the best thing to do would be to have a whole new set of nuts, bolts and lock washers for the repair, but if you're a cheap SOB like me, you'll want to save the old ones if they are still good enough to hold on a lousy blade. Plus, getting stuff like that ahead of time takes planning and we all know how that goes. The secret to not wasting the nuts completely while torquing them off those gubered up threads is to grind away the destroyed threads so the are crisp and clean on the edges. Then the nuts can come off easily without any damage to THEIR threads as well...and you can reuse them if you want. Below are some close ups of what that looks like. All I had to do was change out a couple wiped out lock washers. 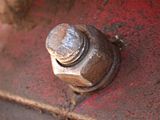 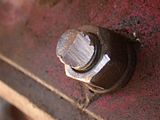 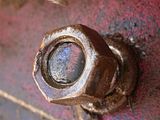 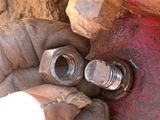 Below is a close up of the ground away destroyed threads so the nuts can come off. I used a little WD-40 to help since there was rust all over them too. This one has been cleaned up and is ready to reuse. Then shown after that is that same bolt and nut reinstalled on the cutting blade. Maybe if I get lucky, they will wear down to nothing for the next changeover. BTW, look how much that good side of the cutting blade sticks out now. 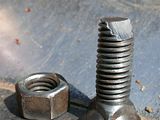 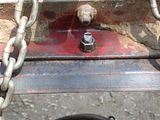 Rob- |
|
3RRL
Administrator  Huge Kama
Posts: 2,027 
|
Post by 3RRL on Apr 27, 2008 0:44:40 GMT -5
Here are a couple photos I got from the game camera as I graded my dirt roads. I had forgotten about the camera until I downloaded the photos. It's a good thing because I didn't take any while I was working. I would say that is a pretty fair finish comparing the road to what it looked like in the first picture to the second. I found the new blade edge to be really great. I'd forgotten how easy it was to get that heavy boxblade to cut nicely and easily like that. Adjusting the top link yielded a pretty smooth surface. 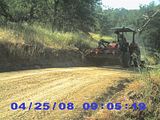 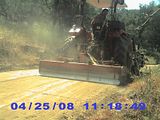 Thanks for looking... Rob- |
|
|
|
Post by tuffytractor on Apr 27, 2008 0:57:55 GMT -5
Seems like you were pretty cruel to the one side of that Blade, Rob. I guess now its time to give the other edge a little abuse. Wow, hard to believe it wears so much, but I guess that Decomposed Granite is fairly abrasive.
|
|
|
|
Post by bobrooks on Apr 27, 2008 14:49:02 GMT -5
Great post Rob.
FWIW, those are called PLOW BOLTS. Back when I worked in the field for Cat, replacing moldboards was one of the jobs I detested most (outside of replacing tracks). It was common practice to always remove them with the "hotwrench" with a flushing (rivet) tip. Much faster when you consider some moldboards were replaced on a weekly basis.
You can see a lot of my work buried 20' under stretches of Interstate 5 in Washington state. ;D
|
|
3RRL
Administrator  Huge Kama
Posts: 2,027 
|
Post by 3RRL on Apr 27, 2008 16:10:33 GMT -5
Thanks guys, and also for getting the correct name for those bolts. Plow bolts.
After seeing the condition of the threads, don't think I wasn't thinking of cutting them off myself, but then I didn't have a clue where to get replacement parts while up at camp. But the thought crossed my mind several times. ;D I was able to save the whole enchilada by clearing the beat up threads that way.
Rob-
|
|
GuglioLS
Administrator  Jinma354 LE
Posts: 1,276
|
Post by GuglioLS on Apr 27, 2008 23:25:34 GMT -5
Nice going Rob,
You brought new life to that trusty old box blade. I think you may have discovered the trick to plow bolts and that is to get a bolt just the right length to have zero threads sticking past the nut. If needed use washers or cut the bolt short. If anyone found themselves having to replace plow bolts do you think that would be a good idea?
Larry
|
|
3RRL
Administrator  Huge Kama
Posts: 2,027 
|
Post by 3RRL on Aug 12, 2010 23:07:04 GMT -5
Hey, you guys remember this old thread from a couple years ago? Well, today I replaced that old blade with a new one. Guess what, I was able to use the same plow bolts again. But for sure for the last time. They started to spin a little so I had to clamp them down to get them off and on again. Of interest is that I have 800 hours now, and the first switch (above) was done at 400 hours. So that old blade wore at about the same rate for each cutting edge on it. Below are a couple photos of the new Howse 7 foot long blade. Cost was very reasonable, I thought. It was only $85 bucks plus shipping. I took it off in one of the barn bays. Certainly a lot easier with an impact wrench and concrete floor to work on than at the old camp. Anyway, check out how much that old blade has been worn down compared to the new blade. The new one is about 6" wide and the old one measured about 3-1/4" wide. Removing the old one and installing the new one only took a couple hours to do. 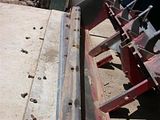 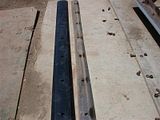 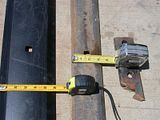 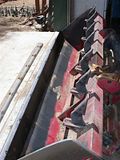 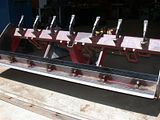 Next will be to add some side plate material back to the boxblade. They have worn up pretty good. With the new blade on, I have to tilt the boxblade back quite a bit in order to just skim the surface of the road. Otherwise it will cut like all getout! |
|