biggkidd
CTW Expert
 A World Away!!!
Posts: 226
|
Post by biggkidd on Jun 16, 2008 8:26:29 GMT -5
Tim, What a nice job your doing. How many sq. yards is your mansion going to be. I say yards because that looks to big to measure in feet.  Yep you gotta watch that heat. Least you don't seem to have the humidity we have here. I was soaked through and dripping by 7:oo AM this weeekend when we were working. The AC we put in the camper has been a god send in this heat. Keep up the good work and great pics. Larry |
|
|
|
Post by bracabric on Jun 22, 2008 11:40:37 GMT -5
Hi Tuffy T, I'd put the Lentils in a stew and lintels over the windows, work much better (ho,ho !!). What a fabulous job you are doing, you must be as hard as nails doing so much. What is the white powder in some of the pictures? has our Volcanic ash drifted so far north? or is there a Colombian connection?
Dick
|
|
3RRL
Administrator  Huge Kama
Posts: 2,027 
|
Post by 3RRL on Jun 22, 2008 21:24:48 GMT -5
Amazing lots of work Tim.
How's it coming along now? Did you get any concrete poured yet. Man it's hot down at my place.
Hope that doesn't present a problem for your pours.
Rob-
|
|
quikduk
CTW Life Member
   Dog House
Posts: 552
|
Post by quikduk on Jun 23, 2008 9:59:35 GMT -5
Great progress Tim. Man that is a LOT of steel. I can't wait to see the pour pictures. I am sure you will have a lot of trucks but the prep work you are doing is worth it. I am sure your house will be solid with all of that foundation work.
|
|
|
|
Post by tuffytractor on Jun 26, 2008 1:01:30 GMT -5
I knew I wasn't spelling lintel right..., my spell check didn't catch it, neither did I! The white stuff is marking lye. The creatures don't eat it, inexpensive, easy to replace when its scuffed out during building. Thats the stuff they use to mark baseball lines. No I haven't poured as yet, I'll be up for two weeks in July, hope to get at least two of the four pours accomplished. The (1)lower footings, (2)the lower pad, (3)the middle interior wall and upper footings, (4) the upper pad. Just the lower footings alone will be about 40 yards. I'll end up with six zones for the radiant heat, I'll post a jpg of the layout in a later post. I'm also using EZ floor for the vapor barrier and the rigid insulation as well as the mount point for the radiant tubes. www.ezfloor.com/I will by using Warmboard sub-floor for my upstairs non slab floor. www.warmboard.com/Certainly ought to stand up to any earthquake with all the steel, but our area is supposed to be seismically dormant. Just in case though... I'm not taking any chances. |
|
|
|
Post by tuffytractor on Jul 12, 2008 22:43:38 GMT -5
|
|
|
|
Post by tuffytractor on Jul 16, 2008 20:27:58 GMT -5
|
|
|
|
Post by tuffytractor on Jul 20, 2008 16:07:57 GMT -5
Here are the installments from this weeks work. Although the original plans had called for a French Drain between the split level of the building, I disagreed, being that we are in Decomposed Granite and didn't opt for putting it in. Instead I plan on installing a Slinky Coil for cooling in the 44" X 40' space. After considering that I may not be able to predict the Monsoon conditions that might come with Climate change or (far more likely) a leak in any water system in the floors above that might trap water between the floors. I opted to put the French Drain back in. Which required a bit of concrete breaking to get the drain pipe out. 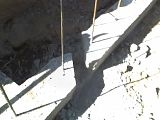 Better safe than sorry. Here is a few more pics of the Pex and the set up for the pour. 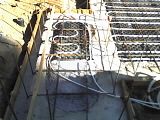 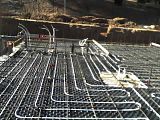 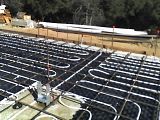 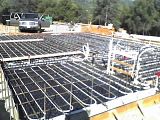 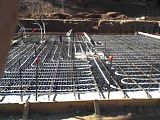 Then pressure tested all the loops going to the manifold. Most often they put the lines under pressure with water, so that if anything during the pour damages the tubes, it immediately becomes obvious. Since I was involved with getting the mud in, and we didn't have the anywhere to mount the manifold as yet, we went with this option, although not as fool proof. 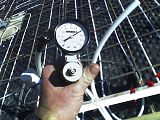 Then placed the Scree boards to best effect, to get as level a pad as possible and accommodating the many cut up sections towards the back. 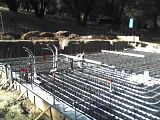 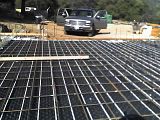 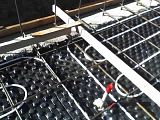 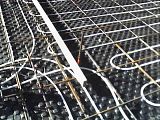  Then we got the mud in the hole. It was only 16 yards, but the heat of the day was about 100º. The first truck arrived @ 5:45 AM, the last trowel was down by 10:00, every person in our 4 man crew was whipped. But I was the proud owner of a PAD!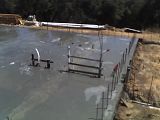 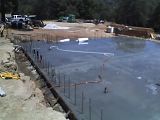 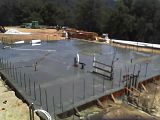 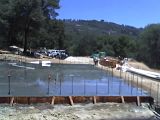 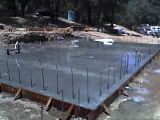 Then we had to cut the expansion joints, we could have formed then in with the concrete wet, but one of the finishers we expected called in sick and the concrete was setting too fast to get it done. So we opted for this method. I've heard of people cutting their Pex when doing this step, because a lot of people mount the Pex to the steel, sometimes it floats up. Boy would that be a drag. 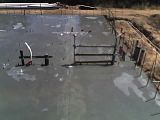 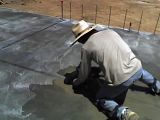 A good tip I learned while doing this part: Snap a line using a chalk line, then spray paint it with clear lacquer, holds the chalk when the water from the saw begins to spray and makes the line much more durable during construction, instead of disappearing anytime someone walks on it. Then we covered everything in Visquene (air proof and waterproof plastic sheeting), to allow the pad to cure. With that much heat, the pad would dry out too fast, this allows the trapped moisture to remain in the concrete and cure over a longer period, hopefully 2-3 weeks. Before I left I squirted in a bunch of water and trapped it in using 2 X 4 hold downs over the expanse of the pad. 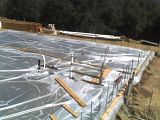 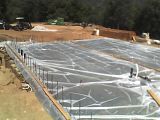 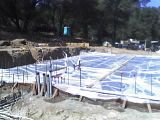 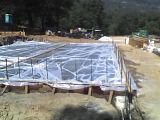 Sorry for the crappy pictures, I seem to have lost my camera and was forced to use the camera in my phone for this trip. |
|
|
|
Post by linus69 on Jul 20, 2008 17:24:45 GMT -5
That is one awesome pad Tim, very cool, nice work. I`d say your phone takes pretty decent pictures.
Paul
|
|
3RRL
Administrator  Huge Kama
Posts: 2,027 
|
Post by 3RRL on Jul 20, 2008 23:36:22 GMT -5
Indeed, I agree with Paul. That is just awesome.
You have really got a lot of lines in there Tim. That radiant heating system should work like a charm. Looks like you had the weather cooperating for that pour too, even though it was hot.
I am amazed at the amount of work you can do. (and Paul too)
Rob-
|
|
GuglioLS
Administrator  Jinma354 LE
Posts: 1,276
|
Post by GuglioLS on Jul 21, 2008 8:31:11 GMT -5
Tim,
Unbelievable I must agree with Paul and Rob's comments. I can only add that has got to be the strongest and best laid out slab I have ever seen. I think there is more steel in there than a battleship. Ive never seen the material with the knobs sticking out of it that lock the PEX heating tubes, what is that called? and what is it made out of?
Larry
|
|
quikduk
CTW Life Member
   Dog House
Posts: 552
|
Post by quikduk on Jul 21, 2008 15:28:22 GMT -5
Amazing job Tim!!! I bet you are glad this portion is complete. Pretty soon, you and Rob will both be in your new homes.
The Pex is nice for radiant floors. My parents have a rubber covered tubing rather than the Pex. It works well and hasn't leaked in almost 18 years. The only thing they have had to do was replace the boiler and one manifold. The only leak, allthough substantial enough to require replacing a large portion of their custom Maple floors, was when an in-wall line broke due to a defect in the fitting. Insurance covered it and you can't find where it happend now.
I can't wait to see more progress photos, esp. the ICF block process as I really liked the well house posts.
Keep up the great work.
Ken
|
|
|
|
Post by stumppuller on Sept 5, 2008 23:33:36 GMT -5
I'm in the early stages of a similar project of a much smaller scale; 1,800 sq ft home & a detached garage & shop. Also going the radiant in-floor heating route for both the home and the garage. I intend to use solar hot water for as much of the heating as possible. I'm especially anxious to heat the garage/shop since my machine tools tend to rust easily in the winter when moisture condenses on the exposed surfaces. The Jinma will be sleeping in a cold steel storage container however.
I've been struggling to break ground with my 284 powered backhoe & FEL tooth bucket, but am making disappointing progress. The hoe is unable to uproute even the smallest of Redwoods or Madrone & the tractor gets stopped dead in its tracks when the FEL hits a (small) stump. However, what I have accomplished has been much better than pick and shovel work, I have to admit. Maybe if I wait to dig during the rainy season, I'll have better luck penetrating this soil.
What sort of propane tank did you get that you can bury it? Who makes it, If I may ask? I've never heard of that before.
|
|
|
|
Post by linus69 on Sept 6, 2008 6:20:45 GMT -5
I too have dug many stumps with my 284 powered backhoe, I have the best luck with my 10in wide bucket in the rocky soil around here. I just keep digging a wider and wider hole around the stump, sometimes 5-6 feet from the stump. Eventually I get them out, but it is a time consuming process.
Paul
|
|
3RRL
Administrator  Huge Kama
Posts: 2,027 
|
Post by 3RRL on Sept 6, 2008 7:44:33 GMT -5
I can imagine it must be tough digging with the smaller tractors and hoes.
Although I've seen a lot of work accomplished by them too. One thing you guys should consider is getting that ripper tooth for the backhoe. Scott shared some photos of it in his thread about his tractor, I think. It is just a big giant tooth that replaces the bucket and tears though hard ground and roots.
Rob-
|
|