GuglioLS
Administrator  Jinma354 LE
Posts: 1,276
|
Post by GuglioLS on Jun 16, 2008 23:37:48 GMT -5
|
|
quikduk
CTW Life Member
   Dog House
Posts: 552
|
Post by quikduk on Jun 20, 2008 9:54:46 GMT -5
Larry,
That is great you got to spend time with your parents. Mine came down to visit last weekend and it was nice to see them again. They are 78 and 79. I think they are in Santa Fe right now but soon on their way to Vegas.
Ken
|
|
GuglioLS
Administrator  Jinma354 LE
Posts: 1,276
|
Post by GuglioLS on Jun 21, 2008 22:10:24 GMT -5
I was going to do some sandblasting to knock off all the mill slag on the rake parts prior to welding it together. I got everything ready - sand, sand blaster, hood, goggles, respirator, gloves etc...When I flipped on the breaker for the air compressor...... BUZZZZZZZZZZ..... then the breaker blows  WAHHHHH my 20 Y/O 5 HP Ingersoll Rand compressor motor does not want to start.  this sucks. After taking off the belt from the motor to the compressor pump, I tried again, same thing, motor buzzes, but no go. It turns freely by hand so the bearings are not frozen. So now I take the motor off and take it apart. Fortunatly I found the starter winding contacts burned and pitted. After sanding them down and putting the motor back together...... Viola - she starts and runs smooth again - whew.....  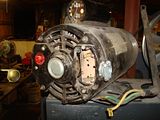 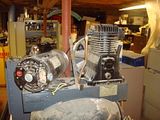 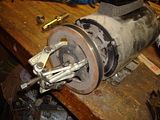 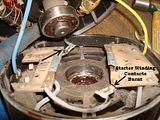 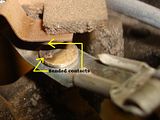 I was hoping to post some serious progress, I was lucky to get the compressor back up and running. Larry |
|
GuglioLS
Administrator  Jinma354 LE
Posts: 1,276
|
Post by GuglioLS on Jun 21, 2008 22:27:24 GMT -5
|
|
3RRL
Administrator  Huge Kama
Posts: 2,027 
|
Post by 3RRL on Jun 22, 2008 12:34:11 GMT -5
The parts are VERY clean now! They look good.
What # silica do you use in that sandblaster Larry, and what psi do you use?
|
|
GuglioLS
Administrator  Jinma354 LE
Posts: 1,276
|
Post by GuglioLS on Jun 23, 2008 0:47:00 GMT -5
The parts are VERY clean now! They look good. What # silica do you use in that sandblaster Larry, and what psi do you use? Hi Rob, Yea those parts came out nice an clean. I use "Play Sand" or land-scape sand from wal-mart. It needs to be bone dry. I run the sandblaster between 90 and 100 psi. If there are some large grains in the sand the gun clogs. If that happens I run the sand through a flour sifter to get the larger grains out. Larry |
|
quikduk
CTW Life Member
   Dog House
Posts: 552
|
Post by quikduk on Jun 23, 2008 9:46:08 GMT -5
That is cool larry. Have you thought about a HF blast cabinet? The large one sometimes goes on sale for around $200. Another option would be to build a plywood box table with sides, a back and a sloped top. It would help contain more. If you sloped the floor, you could have the remnants drop to a lower pickup point for re-use in the gun. After thinking about the price of plywood, maybe the HF would be a better deal.  The rake IS coming along nicely though.  |
|
GuglioLS
Administrator  Jinma354 LE
Posts: 1,276
|
Post by GuglioLS on Jun 23, 2008 22:21:07 GMT -5
That is cool larry. Have you thought about a HF blast cabinet? The large one sometimes goes on sale for around $200. Another option would be to build a plywood box table with sides, a back and a sloped top. It would help contain more. If you sloped the floor, you could have the remnants drop to a lower pickup point for re-use in the gun. After thinking about the price of plywood, maybe the HF would be a better deal.  The rake IS coming along nicely though.  Hey Thanks Ken, I've got a $49 harbor freight blast cabinet filled with glass beads, does that count? These parts are pretty big, sand is cheap. I once laid out a large tarp to catch more of the sand, what I discovered was much of it pulverizes into dust, and not much can be collected for re-use. Larry |
|
GuglioLS
Administrator  Jinma354 LE
Posts: 1,276
|
Post by GuglioLS on Jun 23, 2008 23:15:20 GMT -5
OK here is a small update: Finally got to do some welding on the TPH saddle mount index plate. In order for everything to line up, it was critical every part be square and true to the index plate, as well as the cylinder pin mounts and pin holes. 1-2-3 blocks were used to clamp the pin ears to the plate. If careful, no harm will come to the 123 blocks when welding. 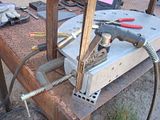 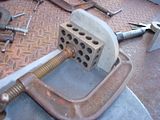 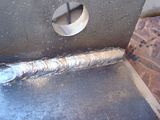 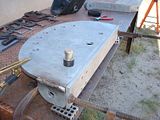 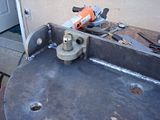 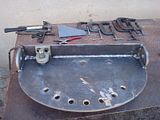 Did you notice that 1" pin in the last three pics? The goal after welding was for that pin to slide in and out smoothly. Luckily it does, so I am please that worked out. Larry |
|
FlyHiFlyLo
Administrator  2007 Jinma 554LE
Posts: 425
|
Post by FlyHiFlyLo on Jun 23, 2008 23:36:43 GMT -5
Almost there! Looking good!
|
|
GuglioLS
Administrator  Jinma354 LE
Posts: 1,276
|
Post by GuglioLS on Jun 23, 2008 23:47:14 GMT -5
|
|
GuglioLS
Administrator  Jinma354 LE
Posts: 1,276
|
Post by GuglioLS on Jun 24, 2008 0:01:04 GMT -5
Hi Fly, where the heck have you been? Thanks for checking this out. OK after the beer my welds started looking much better  I took my Bosch 9" angle grinder to cut a bevel on the pivot bushing prior to wending into place. Then bolted on the arms that were bent with the "Larry-Renze" precision metal bender, those will be welded on next. 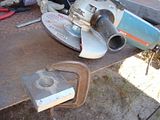 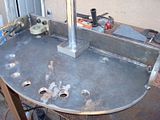 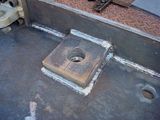 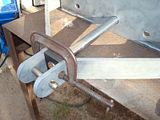 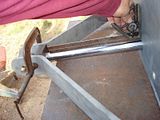 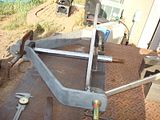 Thats it for this update. It's getting closer to mounting the plate on the tractor, finishing up the boom, attach the cylinders and rake tine mounting bar for a thorough check out. After that, I will take it apart and decide what the finish is going to be. Larry |
|
3RRL
Administrator  Huge Kama
Posts: 2,027 
|
Post by 3RRL on Jun 24, 2008 9:54:36 GMT -5
Good thing I had my welding helmet on when I looked at your photos.
Great progress Larry. No doubt there is a lot of prep work and set up behind the scenes. That is a big project when you consider all that you're doing. Thanks for keeping us in the loop with the stories and great pictures.
I know how time consuming just that part is, and I appreciate it.
Rob-
|
|
|
|
Post by bracabric on Jun 24, 2008 16:37:54 GMT -5
|
|
GuglioLS
Administrator  Jinma354 LE
Posts: 1,276
|
Post by GuglioLS on Jun 25, 2008 23:17:39 GMT -5
Good thing I had my welding helmet on when I looked at your photos. Great progress Larry. No doubt there is a lot of prep work and set up behind the scenes. That is a big project when you consider all that you're doing. Thanks for keeping us in the loop with the stories and great pictures. I know how time consuming just that part is, and I appreciate it. Rob- Thank you Rob, Yes, very time consuming and as you surmised, allot of prep and setup behind the scenes, but also very rewarding. Like you and many others, I very much enjoy being creative, making something become reality from idea to design, fabrication and overcoming challenges. This is more complicated and time consuming than the dump trailer I was able to build. Although this rake is smaller in size, the level of complexity and amount of interrelated parts are more challenging for sure. Still, no where near the level of complexity and precision machining required for you to build that gear box for our joint 360* rotating blade project or one of those injection molds you are famous for. Building this "little" rake humbles me and allows me to appreciate all that much more what goes into making just about anything. You must be going through withdrawals by now with all your machine tools transitioning between homes. Larry |
|