red
CTW Advanced Member
 
Posts: 306
|
Post by red on Jun 9, 2008 17:40:01 GMT -5
Does your wife know about machining and metal bending? Must be something in the water or the effect of wearing those wooden shoes. I sometimes wonder if that little dutch boy ever got his finger out of the Dyke?
Larry[/quote]
Larry I can't get her any where near the tractor -in fact she'll leave or get outta sight when I'm using it. And I keep pointing out Rob's posts with all the machining that Loretta's doing and she mumbles something under her breath . . . (like COLD day in hell ;D ;D) BTW it broke a 100 degrees here is it ain't no freggin' dry heat. Too damn hot to even drink a cold one! -Ed
|
|
3RRL
Administrator  Huge Kama
Posts: 2,027 
|
Post by 3RRL on Jun 9, 2008 18:42:12 GMT -5
Yea all those crazy Dutchmen look and act alike.
Yeah, well there is only one that has a Chinese tractor that I'm aware of.
Even Renze has some weirdo brand tractor over there.
|
|
GuglioLS
Administrator  Jinma354 LE
Posts: 1,276
|
Post by GuglioLS on Jun 12, 2008 10:18:39 GMT -5
|
|
GuglioLS
Administrator  Jinma354 LE
Posts: 1,276
|
Post by GuglioLS on Jun 12, 2008 10:34:00 GMT -5
|
|
GuglioLS
Administrator  Jinma354 LE
Posts: 1,276
|
Post by GuglioLS on Jun 12, 2008 10:51:22 GMT -5
Care was taken to get precise alignment under the anvil and over the die for accurate and reproducible bends. A stop was placed inside the die to obtain a 43* bend as determined off the AutoCAD drawing. Two arms are needed that are exact mirror images of each other. Here are two still images of before and after bending followed by a short video showing the bending process: 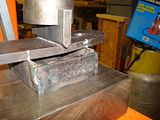 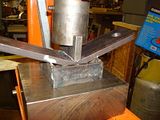 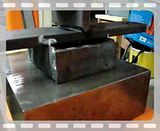 Larry |
|
GuglioLS
Administrator  Jinma354 LE
Posts: 1,276
|
Post by GuglioLS on Jun 12, 2008 11:04:56 GMT -5
|
|
quikduk
CTW Life Member
   Dog House
Posts: 552
|
Post by quikduk on Jun 12, 2008 15:28:31 GMT -5
WOW!!!  It sure is coming out nice. |
|
|
|
Post by stumpy on Jun 12, 2008 18:04:30 GMT -5
Larry, It's getting more interesting each time you post the progress  Can't wait to see the final product in action.... ;D ;D |
|
GuglioLS
Administrator  Jinma354 LE
Posts: 1,276
|
Post by GuglioLS on Jun 12, 2008 21:37:27 GMT -5
WOW!!!  It sure is coming out nice. Howdy Ken - thanks for the positive compliment. Larry, It's getting more interesting each time you post the progress  Can't wait to see the final product in action.... ;D ;D Stumpy, I have to admit my last set of posts on this were kind of dry and a little boring. I will try to spice it up a little to hold your interest. Sorry this is bending your patients  I cant wait to get this out of the shop and mounted on the tractor. Larry |
|
|
|
Post by tuffytractor on Jun 12, 2008 23:57:15 GMT -5
Larry, I don't see why you say it was dry, I've been finding all this quite interesting. I must have missed the part about the stops inside the anvil. How do you know when you achieved the correct degree bend? It sounds by the video that you are sneaking up on it, but I don't know how you know when to stop to achieve your proper angles. In any case, whatever you have been doing, the end result is stupendous! The amount of steel in this thing is MEGA, you have any idea how much this thing is gonna weigh? Just out of curiosity, why do you think you'll want to use the rake off to the side and at different angles. I was thinking perhaps of making rows out of cut grass, but I couldn't really see the application. How are you planning on using that feature? You have sponsored my interest, I'm going to attempt one of my own, although probably not quite so ambitious. I'm just going to add to my box scrapers hydraulic ripper bar. Take the rippers out, add a rake. But I'll start my own thread when the time comes. Thanks for the inspiration! 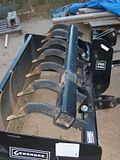 |
|
red
CTW Advanced Member
 
Posts: 306
|
Post by red on Jun 13, 2008 5:08:39 GMT -5
Larry-
I agreed with Tuffy can't remember anything that you've posted that was dry. Can remember a few times where I was confused but that seems like it's happening more and more on my part. Have you decided what color your going to paint it? And any idea on the weight? Thanks Ed
|
|
|
|
Post by stumpy on Jun 13, 2008 18:15:40 GMT -5
Larry, You must be a very humble guy. I can't remember anything that was dry. This thread was interesting and full of helpful information from the very beginning. Great post. thanks!
Tom
|
|
GuglioLS
Administrator  Jinma354 LE
Posts: 1,276
|
Post by GuglioLS on Jun 13, 2008 22:34:38 GMT -5
Hi guys, Thanks for all the great feedback. When Tom added the rolling eyes after saying "It's getting more interesting each time you post the progress  " " I took that as...... Boring, Oh well my bad. Tim - I'll try and answer some of your questions - I must have missed the part about the stops inside the anvil. How do you know when you achieved the correct degree bend? Actually the stop was inside the die (stationary part). The thickness of the stop was determined by taking a measurement off the autoCAD drawing. As the metal bent and was pushed into the die, it came in contact with the stop which stalled out the press. It sounds by the video that you are sneaking up on it, but I don't know how you know when to stop to achieve your proper angles. The press would start to stall out when the bent metal contacted the stop inside the die. As it made contact with the stop, as you cleverly noticed, the frequency of the jack hammer sound would diminish to the point it could no longer push the anvil into the die, at that point I cut off the air pressure to the press. The amount of steel in this thing is MEGA, you have any idea how much this thing is gonna weigh? Hum, good question, I'm guessing somewhere in the neighborhood of 400#'s? Since this is still in somewhat manageable pieces, I will try to get some weights off the bathroom scale. Just out of curiosity, why do you think you'll want to use the rake off to the side and at different angles.The offset feature will allow raking near a fence line, or the edge of a trail were one side is a hill and the other a drop off. In essence keeping the tractor tires at a save distance. With the angle feature, I am hoping rocks (1" or larger) will migrate to one side while dirt or other material 1" or smaller stays behind by sifting through the tines. Thats the theory anyway. Tim, your idea adding tines to your box blade sounds very interesting. When the time comes, I look forward to seeing and reading all about that. Larry |
|
3RRL
Administrator  Huge Kama
Posts: 2,027 
|
Post by 3RRL on Jun 15, 2008 22:51:12 GMT -5
All I can say is amazing Larry!
That video is too cool man. Looks like everything came out perfect. Does it only need to be welded now, or are their more parts to make yet? How much longer before you get it ready to try out, do you think?
|
|
GuglioLS
Administrator  Jinma354 LE
Posts: 1,276
|
Post by GuglioLS on Jun 16, 2008 23:25:11 GMT -5
All I can say is amazing Larry! That video is too cool man. Looks like everything came out perfect. Does it only need to be welded now, or are their more parts to make yet? How much longer before you get it ready to try out, do you think? Thanks Rob, Yea a few more parts need be made, very close to welding it up though. Maybe this weekend? that is if I don't have to paint the house or something. Saturday I got a little more done, by now you guys must be getting sick and tired seeing pics of drilling, and band saw cutting. Here are the last you will have to endure before this thing finally gets welded up and assembled. I still have a few more small parts to make, but am on the home stretch..... That plasma cut TPH index plate for the boom needed a few holes drilled for cylinder pins. I did that myself as opposed to plasma cutting because I wanted a little closer tolerance than the plasma cutter was capable of. 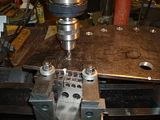 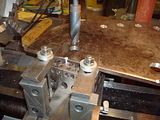 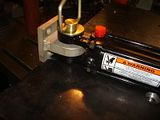 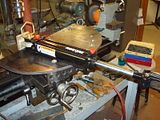 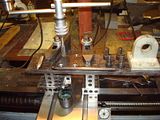 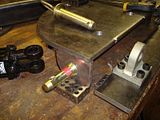 The cylinder on top will control the swing / offset the one on the bottom will control the rotational angle. A 1/4" spacer was made for one of the cylinder clevis mounts. The metal I had was 12.25" wide, 1/4" beyond the official capacity of the band saw, I squeezed it in there anyway to cut out a 3"x3"x.25" spacer. 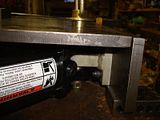 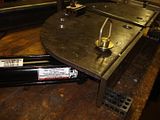 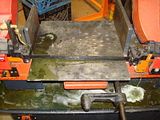 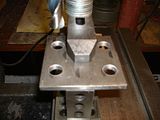 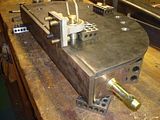 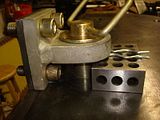 Larry |
|