|
|
Post by Rich Waugh on Jun 4, 2010 20:57:06 GMT -5
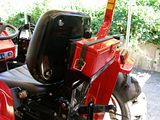
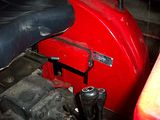
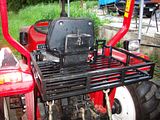
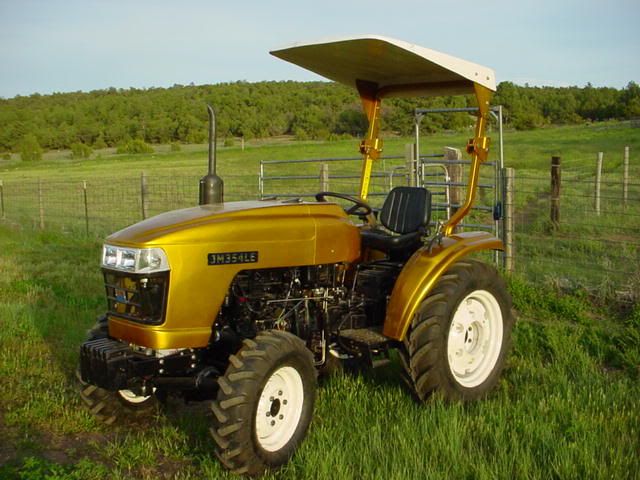
I'm rapidly coming up on time to go start clearing the new property and I didn't want to have to make two trips to take the tractor and the other tools necessary. So, it was time to make a carryall rack for the tractor so I'd have a place to haul the chainsaw, spare fuel, mattock, chains, etc. Someday I'll have to come up with a chain box like Rob has, but for now I'll just toss 'em in a bag in the rack. I built the rack from 3/4" square steel tube and 3/8" square bar for the bottom grate. I didn't want a solid floor as mowing chaff would just fill it up and grow all sorts of nasty shit over time. Better to have it drain. Actually, I wanted to use expanded metal mesh for the bottom but I didn't have a piece big enough. So the fallback plan was the 3/8" bar. Ya do what ya gotta do, right? :-) The first thing I had to do was to move the toolbox I had mounted on the rear of the seat, as it would be in the way of stuff in the proposed rack. I'd put it there because I didn't get the factory mount for the toolbox and I liked that location better than on the fender where the OEM puts them. Well, as you can see, it's now on the fender after all. Just took a bit of whittling and gluing...   With the toolbox safely out of the way I built the new carryall rack and installed it. Like the toolbox, it mounts on the same bolts that hold the fenders to the ROPS, so it should be sturdy enough. I can stand on the back rail of it and it doesn't deflect, so I think it will carry my chainsaw and other stuff okay. The goofy-looking "doorway" in it at the front of the right hand side is the pass-through for the chainbar on my 16" Stihl. Keeps it out of the way and, as long as I keep the plastic sheath on it, the chain will stay undamaged and so will my arm. I'll only have to forget the sheath one time to learn that lesson, I'll bet. :-)   All in all I'm pleased with the way it looks. Time will tell if I'm happy with the way it works. I still don't have a fancy cup holder or ashtray, though I did install an electric cigarette lighter. My "temporary" cup holder is a salvaged propane torch cylinder whacked off and screwed to the side of the cowling. Really butt ugly but it works. May do the same thing to mount my new fire extinguisher, since I have no faith whatsoever in the chickenshit little plastic strap hanger that came with it. Rich |
|
roy697
CTW Advanced Member
  Roy's Pond
Posts: 303
|
Post by roy697 on Jun 4, 2010 22:29:05 GMT -5
That thing looks pretty good. After you have it for a while let us know if it hinders you doing anything on the back of the tractor. I am thinking of something for the front over the weights.
|
|
|
|
Post by Rich Waugh on Jun 4, 2010 22:44:03 GMT -5
You want to be sure you don't do anything to restrict air flow through the radiator with stuff up front. Something to keep in mind.
I have a loader so I had no room for anything up front. That left only the back. I'll let you know if I have any issues with access back there, but my measurements say I shouldn't. We'll see...
Rich
|
|
|
|
Post by stumppuller on Jun 4, 2010 23:29:20 GMT -5
Looks good.....that giant fask in back of the seat must hold about a gallon of rum, no?
BTW....a simple but very functional cup holder can be made from a water bottle holder for bicycles.
Bruce
|
|
GuglioLS
Administrator  Jinma354 LE
Posts: 1,276
|
Post by GuglioLS on Jun 5, 2010 0:14:26 GMT -5
Wow that came out really nice.
Larry
|
|
red
CTW Advanced Member
 
Posts: 306
|
Post by red on Jun 5, 2010 7:10:39 GMT -5
Rich, when you said carryall I was thinking of the kind that attaches to the 3-point mounts. Sweet set-up! Was going to steal your idea on mounting the original toolbox to the back of the seat for better access, but remembered I have to be careful when I raising the BH height cause the BH Seat will push and bend the tractor seat (don't ask how many times I did that! :  -Ed |
|
|
|
Post by Rich Waugh on Jun 5, 2010 19:05:04 GMT -5
Well, dammit - Roy called it right. I need to raise the carryall rack up about 3 to 4 inches if I'm going to use the bush hog on the TPH much. Under normal use everything is fine, just like my measurements said they should be, BUT - the orchards I mow are a lot of up and down with gullies, dips and bumps all over the damn place. When the hog is flexed way up coming through a deep gully the toggle on the top link allows it to rock back and make contact with the rack. Fortunately I determined this in a non-destructive fashion thanks to Roy's caution. Easy to raise it up, just add a bit of 1/4 x 2 flat bar and drill a couple new holes. Just annoys me to be wrong - never had that happen before. I wish! :-)
Thanks for the heads up Roy.
Rich
|
|
roy697
CTW Advanced Member
  Roy's Pond
Posts: 303
|
Post by roy697 on Jun 5, 2010 20:44:24 GMT -5
It is great to find a problem BEFORE it does damage. That is one nice looking carry all.
|
|
|
|
Post by bracabric on Jun 7, 2010 11:40:32 GMT -5
Clever clogs !!
PS Want one,want one,want one !
Dick
|
|
|
|
Post by Rich Waugh on Jun 7, 2010 13:17:23 GMT -5
I fixed the problem yesterday. I raised the rack 3-1/2 inches and also modified the 3-point mounts on the bush hog. The hog is the only implement I use that has that much interference at the top so it seemed okay to fiddle with it a bit. I also added a stop on the lift lever to prevent it from going all the way to where it dead heads the pump and I can set that down just a hair more and keep the hog out of the rack just fine now. When I go up to the property to do clearing I won't have the bush hog back there, I'll have the box scraper which is much lower and doesn't need to be raised as high to travel, either. I think I'm good to go now. Just need to find the perfect ice chest to fit the rack and I'm done. :-)
If I can make one Dick, so can you. I know you have MIG welder and they make steel where you live so what's your excuse? Get busy! (GRIN) Speaking of being busy, isn't it about time you posted a couple of new jokes? I was getting so I counted on you there.
Rich
|
|
|
|
Post by bradblazer on Jun 7, 2010 22:38:58 GMT -5
The back of the seat does look like a giant wiskey flask. Your rack is pretty similar to mine! Mine is hinged so if the 3ph does hit it it can swing up.    |
|
|
|
Post by Rich Waugh on Jun 8, 2010 1:28:35 GMT -5
Hmmmm...I like yours better, Brad - wanna trade? :-)
I did look at doing a hinged one but gave up on the notion for two reasons. First was that my ROPS hinges are way higher up than yours and second was that I drive over such rough ground that I figured it would always be flipping up and either whacking me in the back of the head or pitching all my gear out of it. As it is, I think I 'm going to need to get one of those stretch cargo net things that motorcyclists use to hold crap on their tanks and racks. Otherwise I'll be shedding gear behind me and not even realizing it until I get to the property and the rack is empty. And that's traveling exactly one mile of "paved" road (read, reinforced sequential potholes). The ground in the mango orchards is smoother than Mahogany Road, I fear.
I'm still wavering on whether or not I close in the side walls of the rack or leave them as is. Closed in would contain smaller stuff better but open makes it easier to hook bungee cords to it. I'm going to leave it open for now and see how it works out. If I decide i need to, I can always add some metal mesh or perf metal or even solid panels in short order. I'm definitely going to add some expanded mesh to the bottom of it - just as soon as I remember to pick some up when I'm at a place that has it. The spacing on the 3/8" bars leaves a 1-1/2" gap between them at present and that's good for sledge hammers but not for spark plug wrenches. Yeah, yeah, I could put the small shit in a box...and will initially, I'm sure.
Was out mowing the orchards today for a couple hours and one of the hitch pins on the hog fell off. Had to unhook it and drive back to the shop and swipe one off my grader box to get the mower back home. Pain in the butt and now I'll need to get a replacement. The threads on it were so buggered they couldn't be cleaned up with a die. One of the local hardware stores carries Cat. 1 hitch pins if I recall correctly. I really should keep a spare on hand, too. When the one dropped, the other one got a slight bend in it. It'll go next, probably.
Your mention of the whiskey flask reminds me that I forgot to add a hook for my little ice chest - have to do that tomorrow. It's been hot down here, lately.
Rich
|
|
|
|
Post by bradblazer on Jun 8, 2010 9:42:46 GMT -5
I don't think mine looks better. Yours has the fresh paint and of course it's cool the way it wraps around your seat. Mine sits pretty high. Easy to access from the seat but from the back I step up on the implement or lift arms. I use a plastic soda crate for my chains because the holes on my expanded metal are just big enough for the chain to vibrate through and then it's like a blacksmith's puzzle getting it back out. I also keep a soft tool bag in mine since I don't have another tool box. I need to mount a separate toolbox though since the rack has to come off when the backhoe is on. When you install the hitch pins on your implements use a long handle wrench and tighten them very tight. If the threads wallow in the hole they are too loose. I actually just inquired at Speeco to see if they have a strength spec for their draw pins. Guessing they are about a grade 5 equivalent. Grade 5 .. 7/8-14 Torque = 470ft-lb dry and 350 ft-lb lubricated. The clamp force of about 16 tons - should be enough to prevent wallowing.  |
|
|
|
Post by Rich Waugh on Jun 8, 2010 13:12:23 GMT -5
Good point on the torque for the draw pins, Brad. I'll run over them with a 4' cheater bar. Don't have a torque wrench for the 3/4 drive sockets and my 1/2" torque wrench only goes to 250 #/ft. If I stand (150#) on a cheater pipe about three feet out form the arc center that should yield 450 #/ft. If'n I jump on it I should get it up to full yield - maybe beyond. :-) Or I could stick them in the forge, take them up to about 1000F first, then let them shrink fit to yield point. Maybe just weld them in place.  Nah, I'll just use the cheater pipe. I'm sure I didn't have them over 200 #/ft before. Obviously not nearly enough. So, ya got any slick ideas on how to mount my new fire extinguisher? There's no way that chickenshit little plastic strap will hold up to bouncing around. The extinguisher is a 5# marine dry-chemical job. I got the marine one because it was, (1.) - cheap; and (2.) - has a metal nozzle instead of plastic. But they couldn't bother to supply a stainless latching strap, just that plastic joke. Come to think of it, I don't recall having seen an extinguisher on your tractor...well, think about it anyway, okay? :-) Rich |
|
|
|
Post by bradblazer on Jun 8, 2010 15:13:10 GMT -5
|
|


 -Ed
-Ed


 Nah, I'll just use the cheater pipe. I'm sure I didn't have them over 200 #/ft before. Obviously not nearly enough.