GuglioLS
Administrator  Jinma354 LE
Posts: 1,276
|
Post by GuglioLS on May 16, 2008 12:15:59 GMT -5
Also, this weekend is when I am trying to get all this finished by so... Good luck getting it all done. From the looks of where your at now, it's gonna take a miracle to pull that off. All that plumbing re-work takes time, not to mention figuring out what fittings work best. For me, what took the longest was positioning and clamping the cylinder jaw brackets in just the right spot on top of the bucket. Second to that was getting the hoses routed properly near the cylinder so they would flex just right with the bucket dump/curl and grapple jaw action so they would not twist, pinch or otherwise bind. Now that I have some experience using mine - I think having some over bite is preferable to having the jaws under-bite the bucket cutting edge, at least for me anyway. There are two schools of thought on the subject of under-bite vs over-bite. With under-bite it is said you can clamp loose material tightly into the bucket. With overbite, it's easier to pick up larger objects or take a larger bite out of a of slash pile,. Being able to take a larger bite out of a pile of brush, you can still clamp the material tightly into the bucket. Ken, I think you have a tooth bar, right? they work hand in hand with a grapple. Oh and I seem to have better results picking up large stumps or piles of branches by dumping the bucket so the cutting edge is facing straight down, then clamp the jaws so as to let the grapple do most of the work. Depending on the size and shape or position of what I need to pickup, I will sometimes use the feature of being able to clamp the jaws and curl the bucket at the same time (True third function) With a little experience and experimentation, you'll be a pro at it in no time. Have fun on your grapple project this weekend! Larry |
|
quikduk
CTW Life Member
 Dog House
Posts: 552
|
Post by quikduk on May 20, 2008 14:14:09 GMT -5
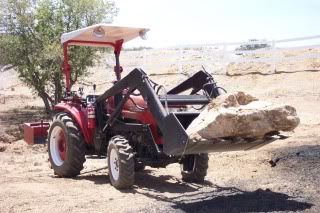
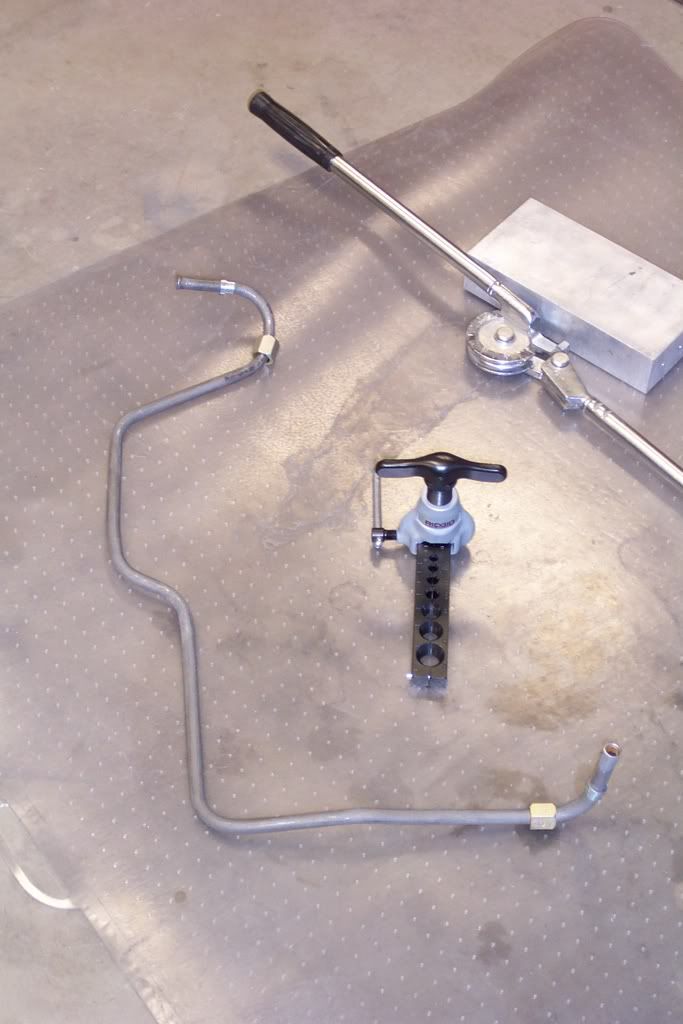
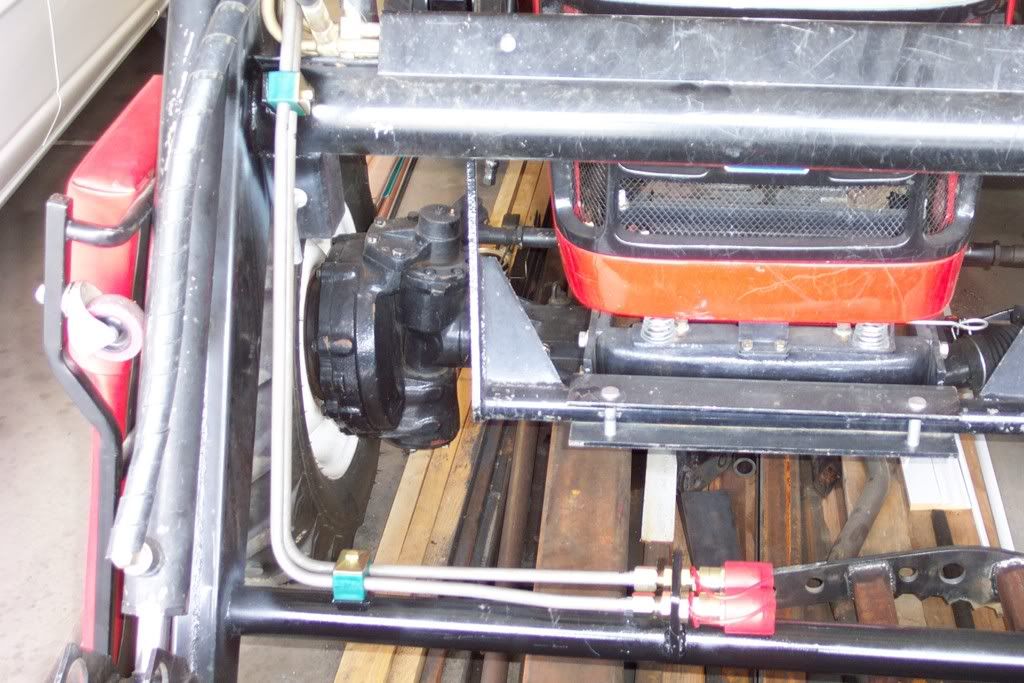
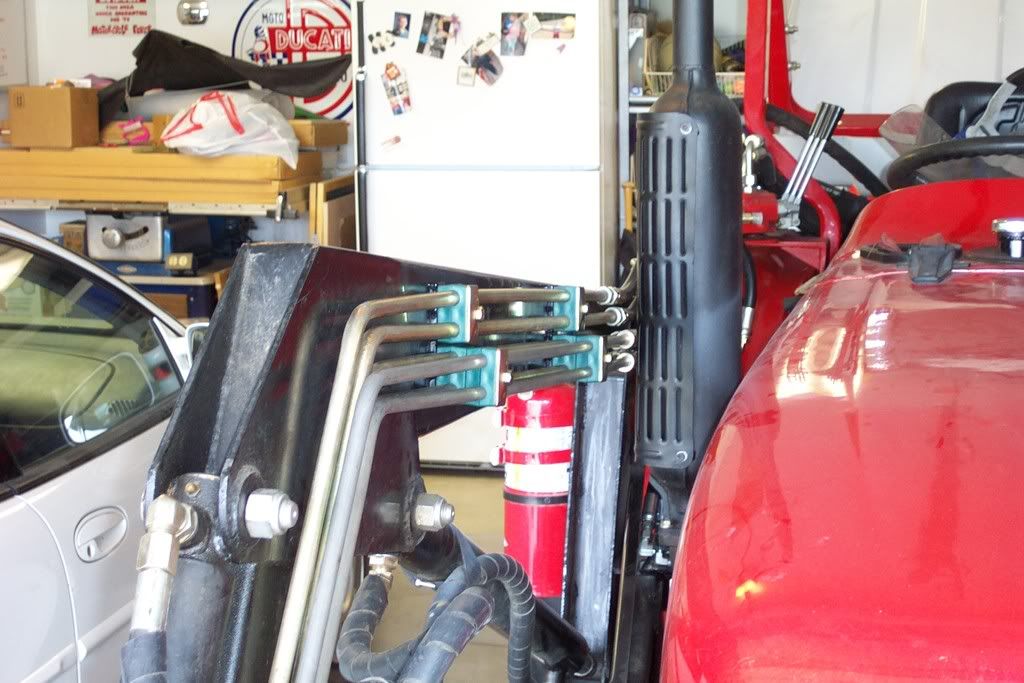
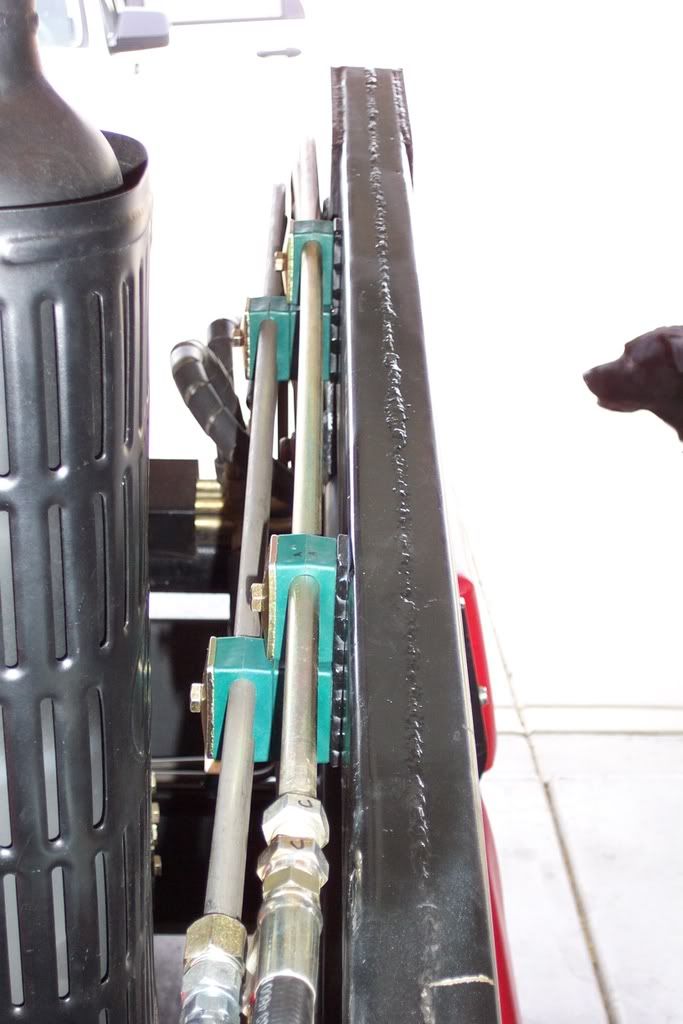
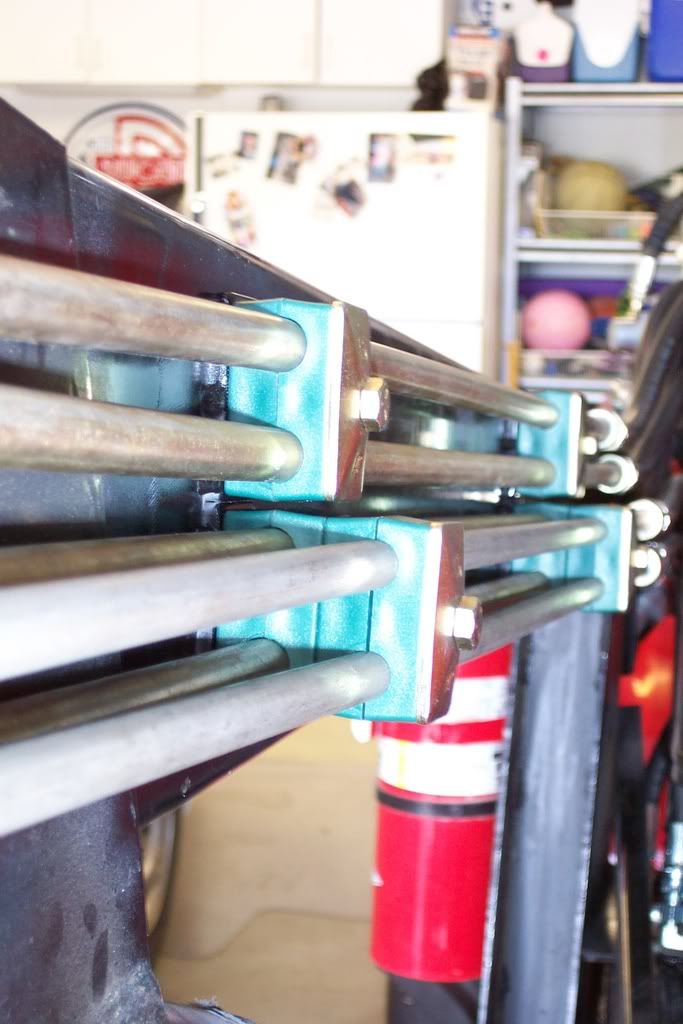
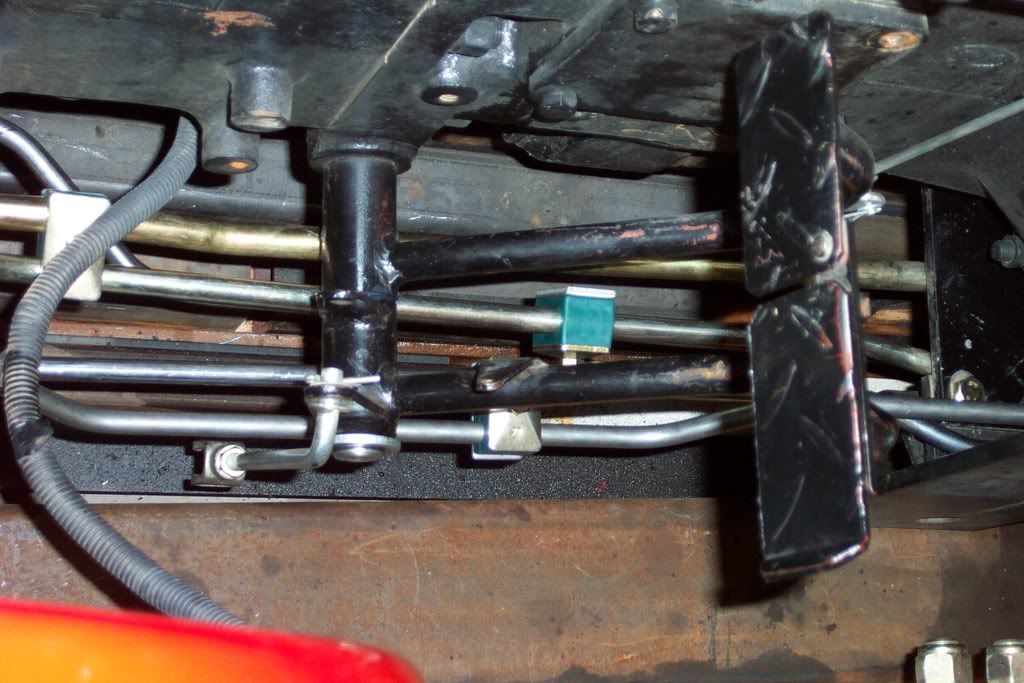
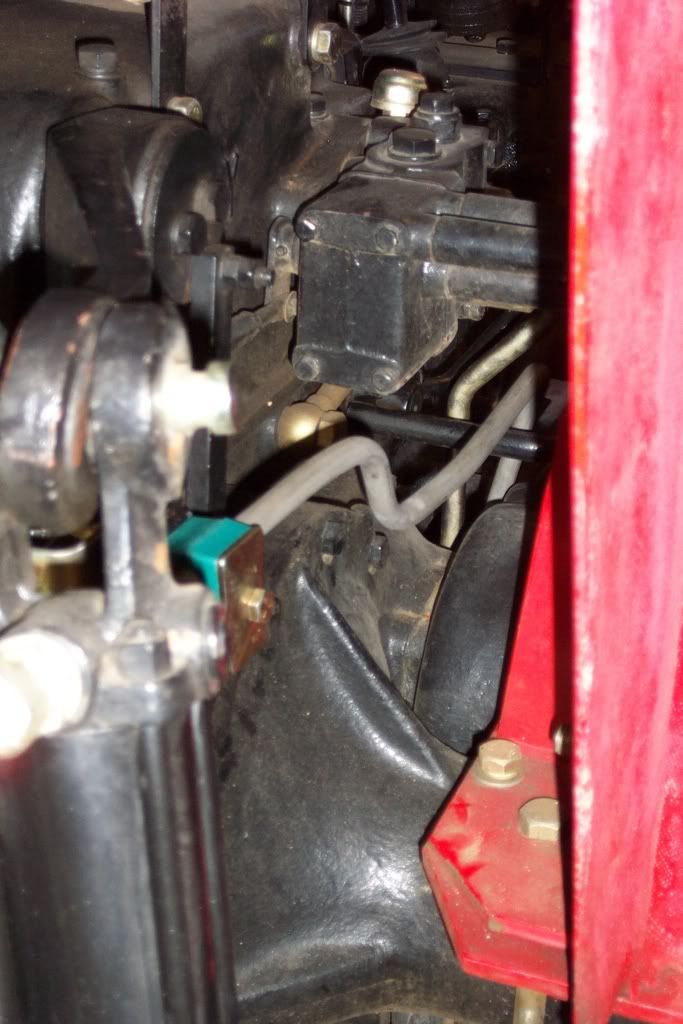
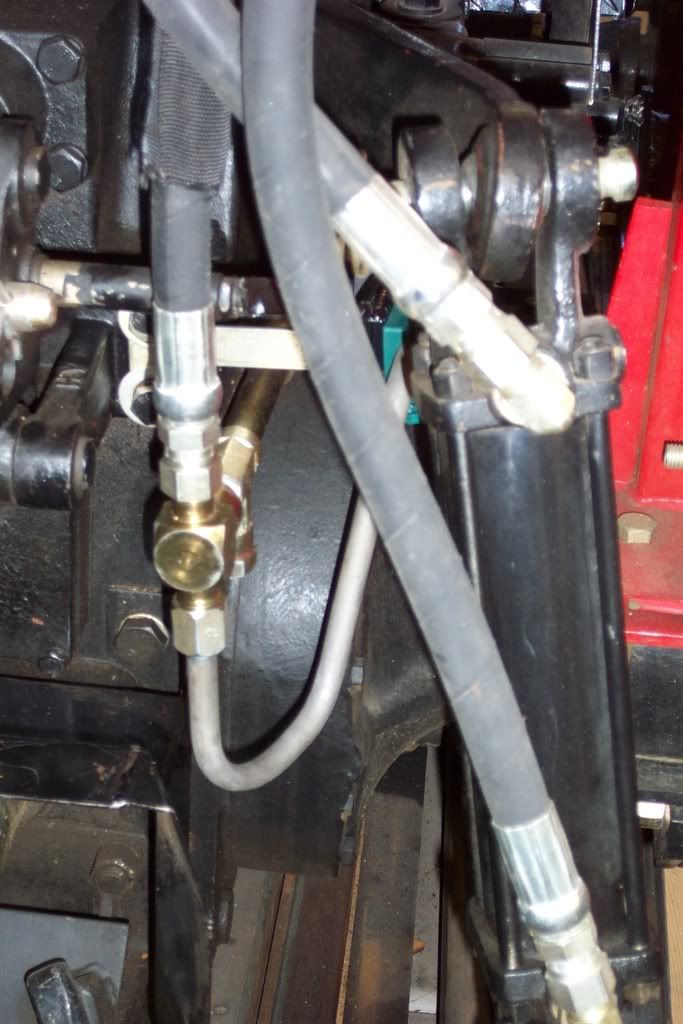
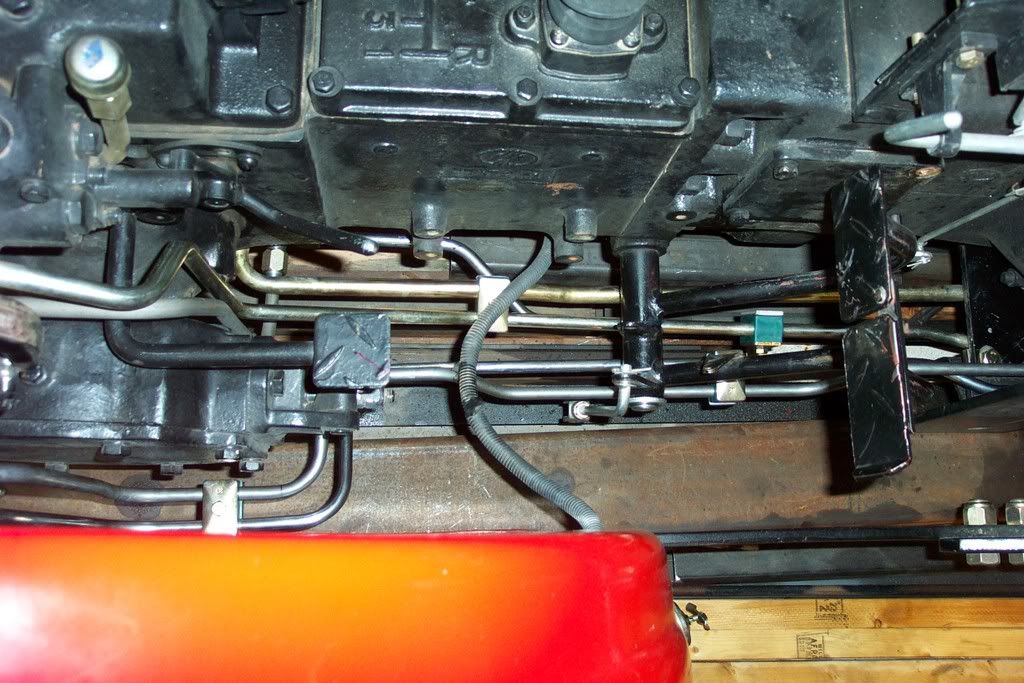
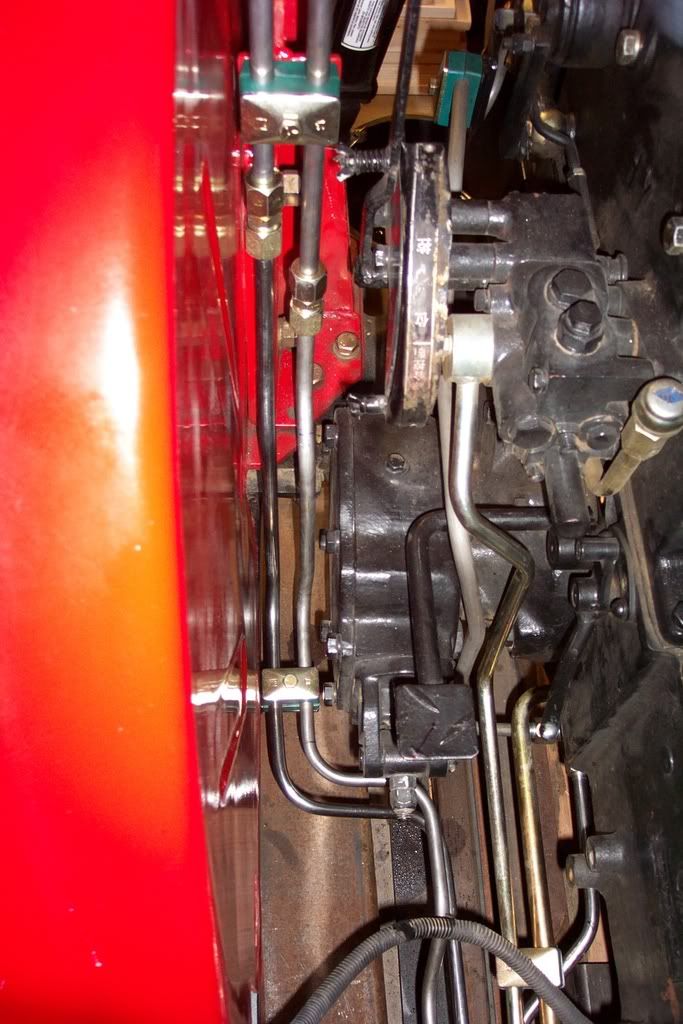
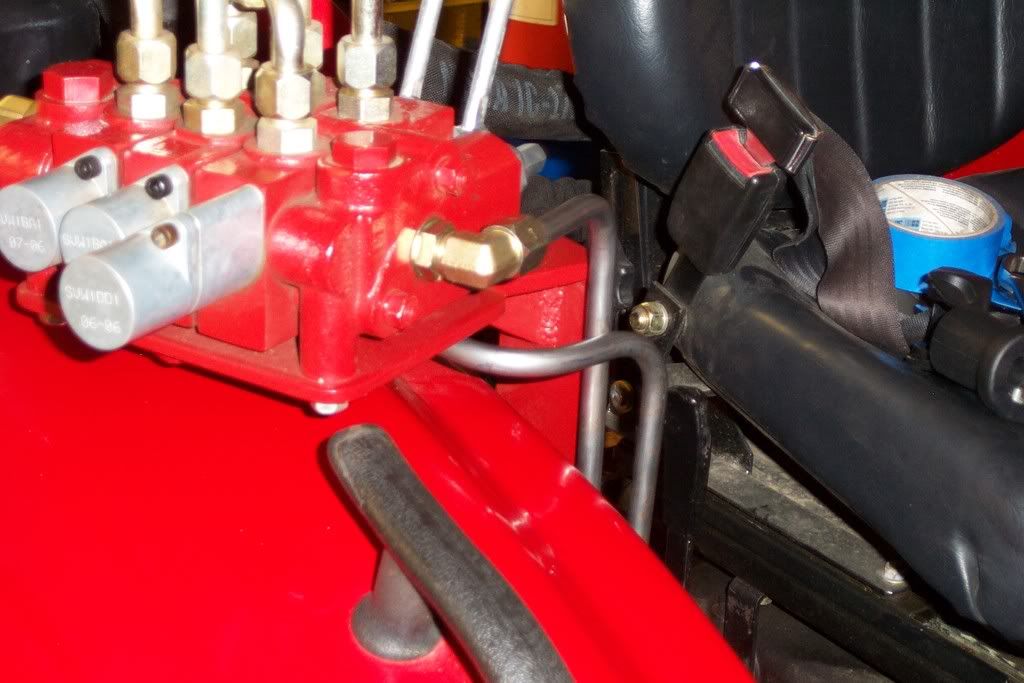
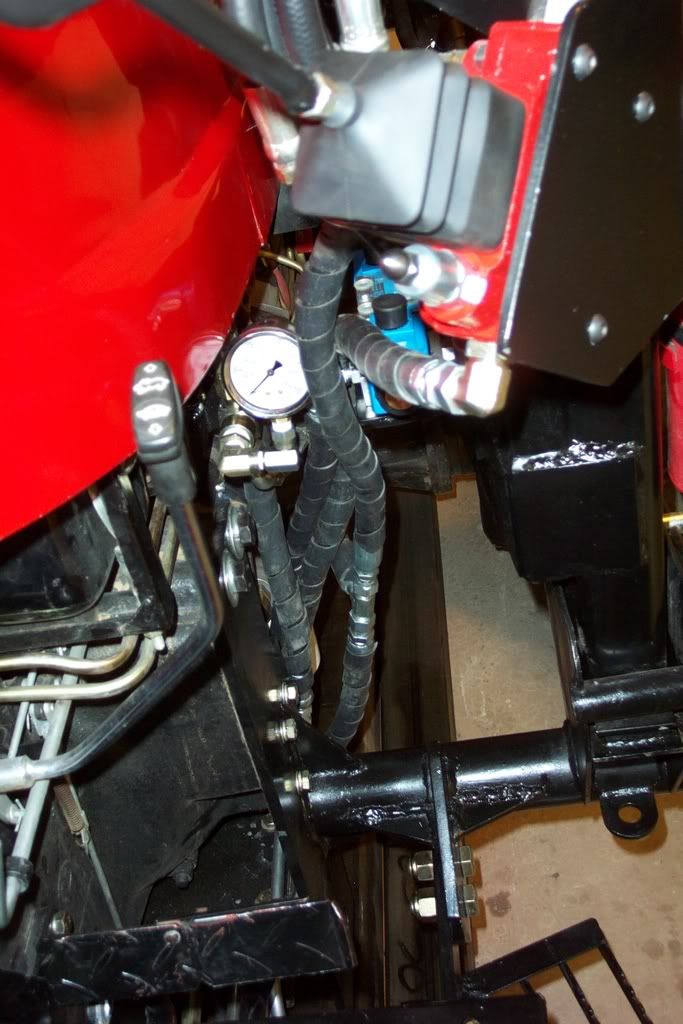
I have been working on this for a while now. I decided that while I was addressing some split and torn hyd. hoses and the replacement of the 314 pump with the higher flow 320, I would replace these problematic hoses with hard lines. I have a JIC tubing flaring tool and borrowed my FIL’s larger ½” tubing bender. All of the hard lines are ½” OD (1/16” wall, 3/8” ID) steel hydraulic rated seamless tubing. The flow characteristics and differences between this and 5/8” OD (1/2” ID) are minimal so I opted for the tubing that I had a bender for plus the 5/8” OD isn’t stocked as readily. Here are some shots of some of the bends I had to make. As Larry G. pointed out, tube bending is a bit of a black art. I have a lot of experience doing this but bending this particular type of tubing was a first for me as it requires a bit more muscle and patience to get it right plus it is very stiff tubing. 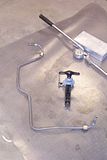   |
|
quikduk
CTW Life Member
Dog House
Posts: 552
|
Post by quikduk on May 20, 2008 14:14:48 GMT -5
|
|
quikduk
CTW Life Member
Dog House
Posts: 552
|
Post by quikduk on May 20, 2008 14:15:05 GMT -5
|
|
quikduk
CTW Life Member
Dog House
Posts: 552
|
Post by quikduk on May 20, 2008 14:21:38 GMT -5
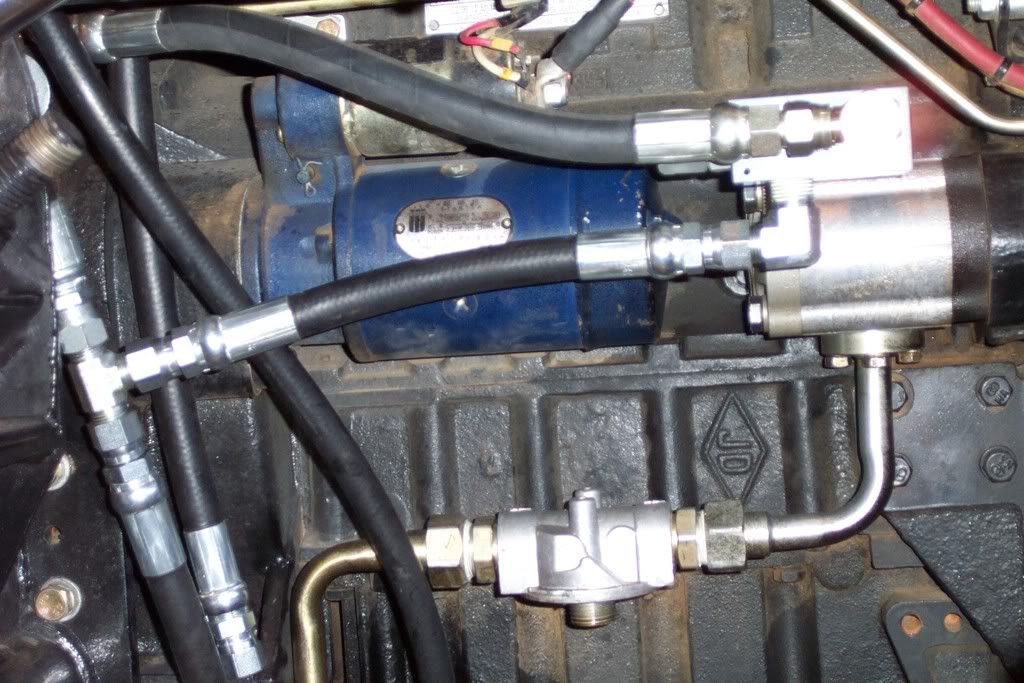
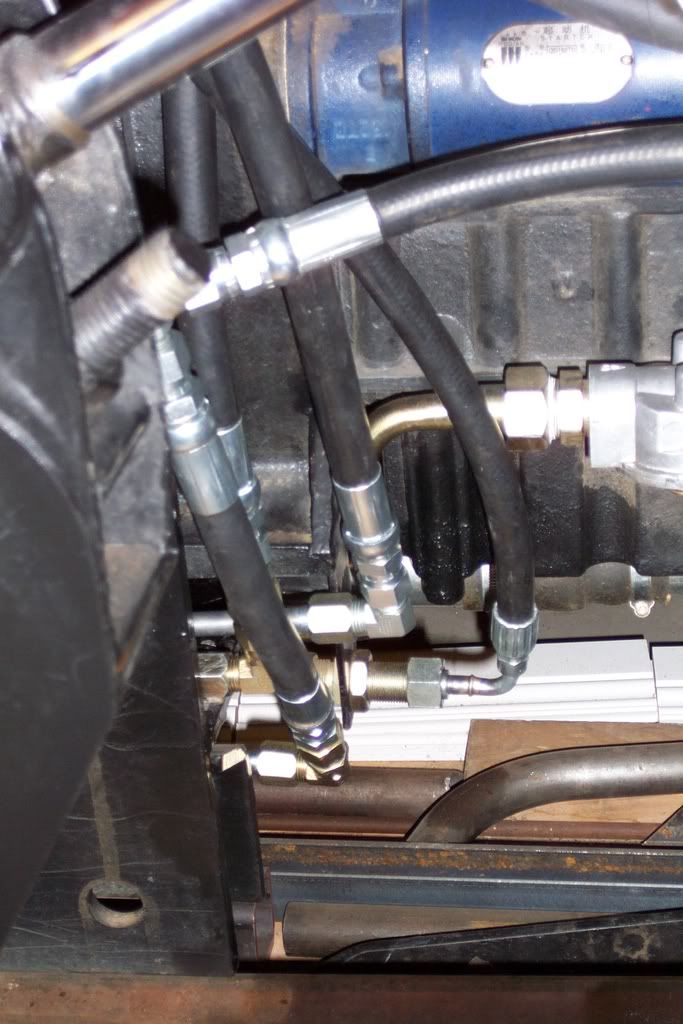
In two of the last shots, I had to remake the two upper lines that are attached to the T&T valve as the tubing nuts were the wrong type and were leaking. I picked up the correct parts and tubing yesterday and remade them last night. They should work now but I still need to give every connection another look before buttoning up the parts.
After this, I am on to "tacking" the grapple brackets in place and test fitting the assembly.
|
|
3RRL
Administrator
Huge Kama
Posts: 2,027 
|
Post by 3RRL on May 20, 2008 22:58:11 GMT -5
Wow, what a great job you are doing Ken. It looks extremely sano to me.
I know by now you've got some big bucks wrapped up into all that hard line, the fittings, all those super cool clamps and redoing some, but it sure looks really good. How did you manage skirting around Julie with all that? That in itself is an amazing feat.
When you mount your grapple, be sure to position it as far forward on your top bucket lip to have it stick out farther so it can interlock with your toothbar. I have written before how I used to like the grapple to go inside the bucket for added clamping of smaller objects, but it makes it harder than heck to pick up stuff when the toothbar is hitting a boulder (for example) and the grapple doesn't reach out over it. I have managed the last couple years by using the "clamshell" method but would still like to have them go out farther. I am going to modify the ones on the Kama by adding 6" to 8" in length to them and on Loretta's, I will scoot it forward about 3" more than I have them now. They are now about 1" ahead of the cutting edge, but moving them out will be of more value, I believe.
Hope that will be of value to you.
Rob-
|
|
GuglioLS
Administrator
Jinma354 LE
Posts: 1,276
|
Post by GuglioLS on May 20, 2008 23:27:56 GMT -5
Ken, No surprise, it's turning out professional grade. Man you sure do good work, you have an open invitation to clean up the hydraulic house routing on my Goldie anytime you want  Sweet! Larry |
|
|
|
Post by tuffytractor on May 21, 2008 0:12:54 GMT -5
Wow Ken,
All I can say is, "are you free to come re-vamp all my hoses"? Sure looks good. Very impressive.
|
|
quikduk
CTW Life Member
Dog House
Posts: 552
|
Post by quikduk on May 21, 2008 10:14:40 GMT -5
Thanks guys. I would love to help out. Send me a pattern and I can make them up otherwise I will have to ask the boss (work) for more vacation time...  Re: the costs, it really wasn't that much. I found a place that gave me a great deal on some left over hyd. tubing since the surface finish wasn't as "shiny" as it should be. I didn't care about that (or I would have had them all gold-irridite plated to match the factory stuff... ) and it didn't alter the quality or strength of the tubing so the cost savings was what sold me. I also traded back and forth re: most of my existing fittings which worked out to my advantage as well and when I ordered some stuff and it got backordered four times, they just gave it to me for the inconvenience. ;D ;D ;D Overall, the tubing cost a whopping $25, the tubing fittings were free, some misc. addit. hose and valve fittings were about $30, the Stauff clamps were around $2.50 each so maybe $35 for those, I had some extra hoses so most of those were re-worked to fit with a couple new ones purchased (the shop used end-runs from their large spools that they normally cant sell so BIG savings here (pennies on the dollar) and then the JIC/AN flaring tool. I have an offer to sell it to a air/hyd. hose shop but I might keep it since it is very nice quality. I got everything buttoned up last night (around 12:00 since I first had to replace the starter and battery cables on our MH's diesel generator) so now I can get back to the grapple and joystick wiring. Re: the "overbite", I am thinking the same thing. I will start looking at this tonight. When I position the grapple on my bucket, the tips can stop at the front of the "bar" on the toothbar but the teeth are on either side. I could extend the first or second teeth (tooths... ) on the grapple jaws to "wrap past/around the cutting edge (or what remains of it) on the bucket to get a kind of overbite. Is that what you are referring to? |
|
3RRL
Administrator
Huge Kama
Posts: 2,027
|
Post by 3RRL on May 21, 2008 10:20:40 GMT -5
I could extend the first or second teeth (tooths... ) on the grapple jaws to "wrap past/around the cutting edge (or what remains of it) on the bucket to get a kind of overbite. Is that what you are referring to?Yes, if what you are saying is what I think I meant.  Rob-
|
|
quikduk
CTW Life Member
Dog House
Posts: 552
|
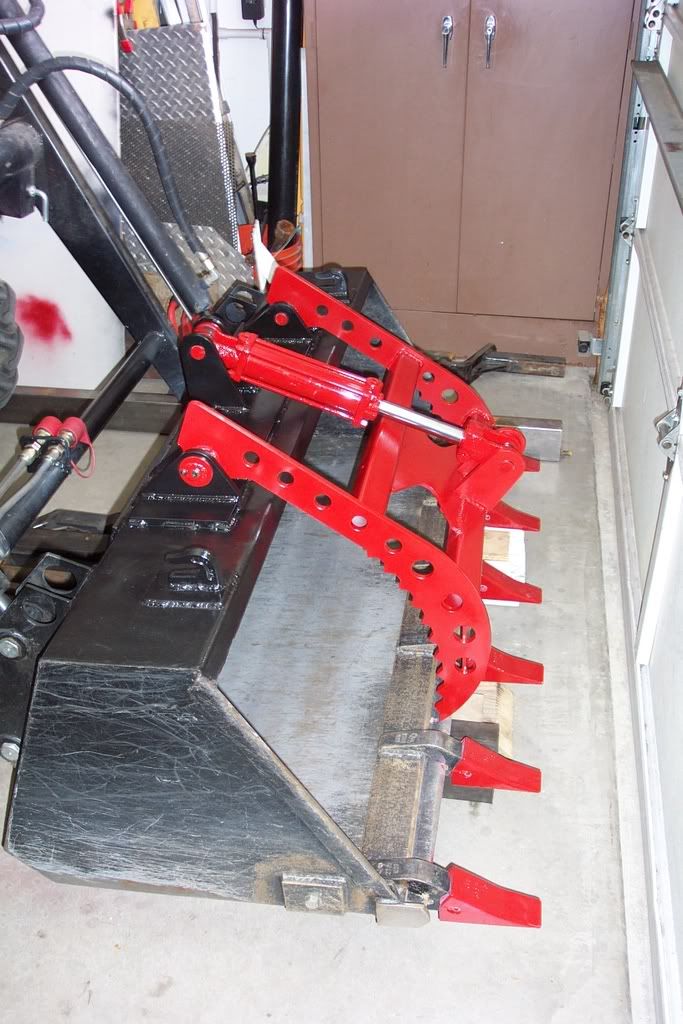
Post by quikduk on May 27, 2008 16:41:14 GMT -5
I took this past Friday off to make a 4-day Memorial Day weekend out of the holiday. Here is some more progress on the grapple project. I will spare you all the welding, tacking pics (since I didn’t bother to take any and since most of you know how to weld). I worked in the garage on Friday grinding and tack-welding all of the bits and pieces together on my FEL bucket since it rained cats and dogs all day. I also added both ½” x 6” x 34” reinforcing plates to the top and top/rear of the bucket. 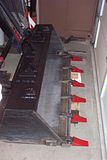 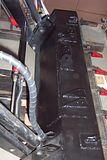 |
|
|
|
quikduk
CTW Life Member
Dog House
Posts: 552
|
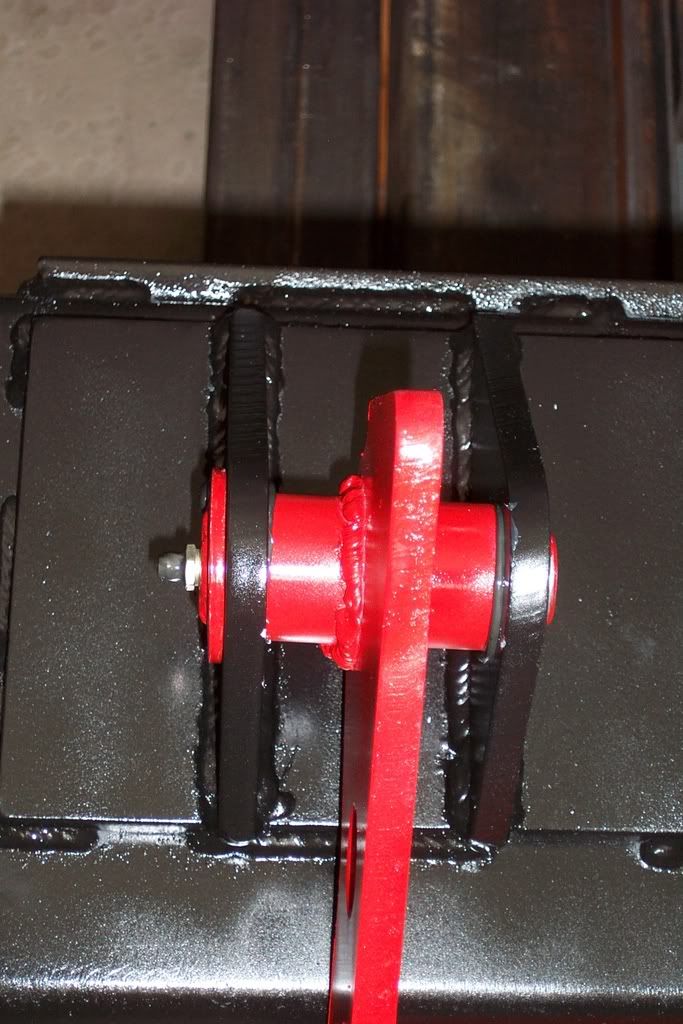
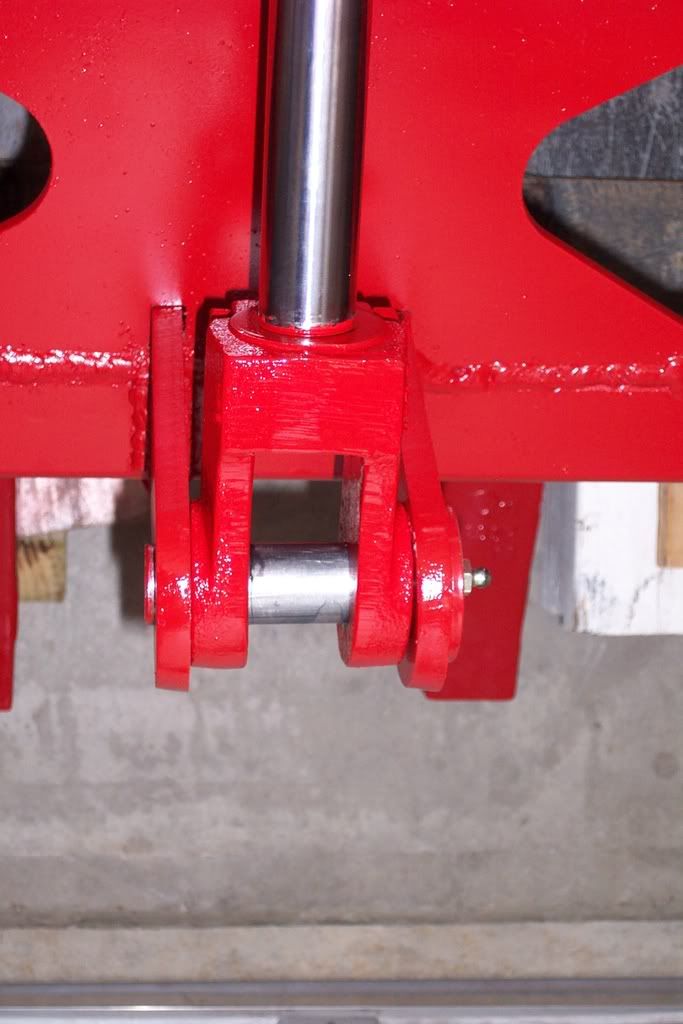
Post by quikduk on May 27, 2008 16:42:08 GMT -5
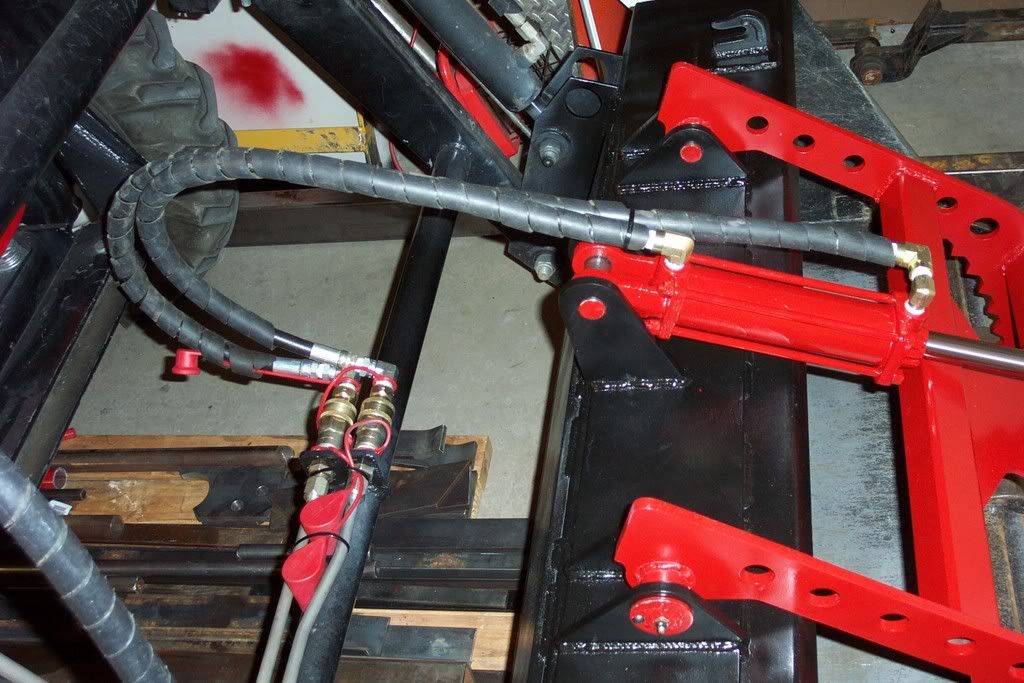
I then had to fabricate my pivot pins and cylinder pins. For this I used some additional 1” round CR rod, cut into four pieces. I welded HD 3/16” thick grade-8 flat washers to the tops, drilled a securing bolt hole in one edge/face and then drilled and tapped the corresponding hole in each respective bracket for a 6mm x 1.0mm button head bolt. I drilled blind holes through the center of the pins with a cross hole/holes where the pivot bushing or cylinder ear required grease. I also drilled and tapped out the ends for the 1/8” MNPT grease zerk fittings but did not recess them due to a lack of the required drill bit. I think I would need a 5/8” dia. bit and if they get damaged, I will “upgrade” them with recessed zerks. For now, they work perfectly.  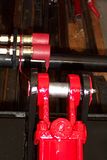 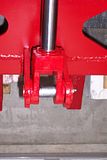 |
|
quikduk
CTW Life Member
Dog House
Posts: 552
|
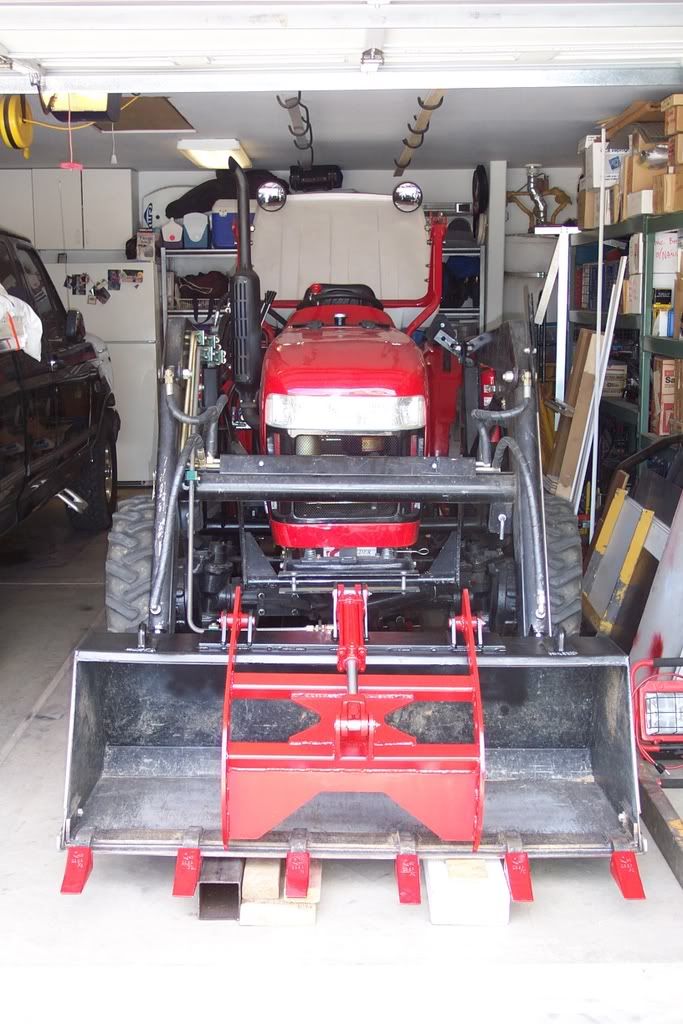
Post by quikduk on May 27, 2008 16:43:04 GMT -5
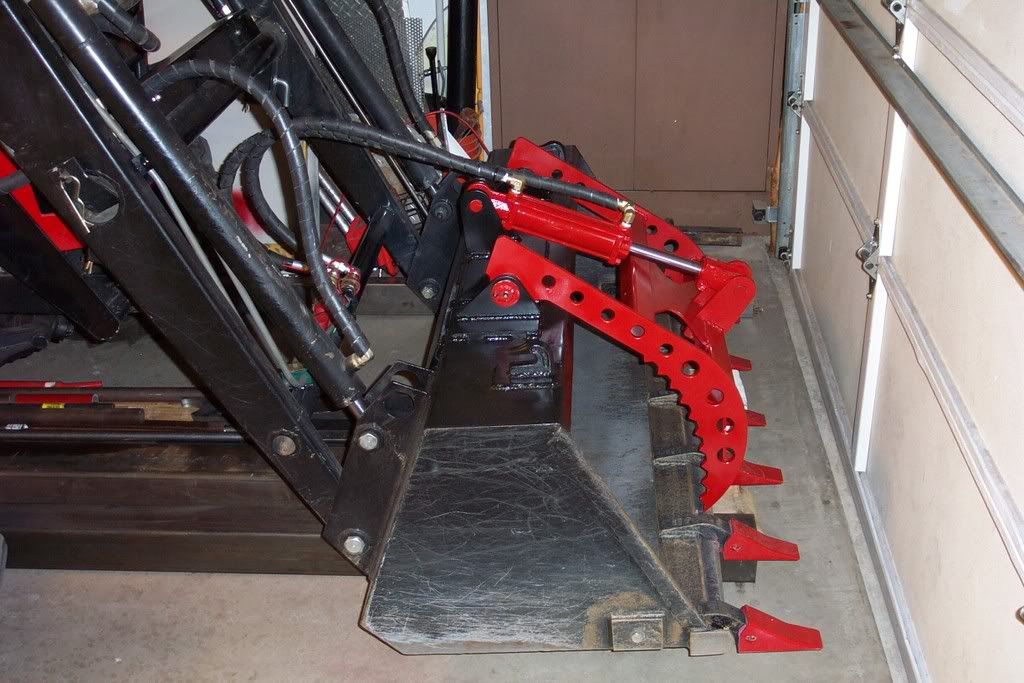
After I painted everything and bolted/pinned it all together, I oiled the QD’s so they pivot easier and I think once I get power to the system and can check out the movement, my lines should work well. If they bind, I will purchase the live swivels, shorten the hoses into two pairs and re-mount them. I finished off the grapple and hose installation by re-wrapping the hoses with my old Chinese spiral hose wrap that I saved.  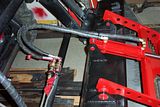 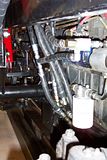  One last note re: this crop of posts. I decided to change out my fuel injection pump oil, engine oil/filter and hyd. strainer and fluid. The inj. pump had a high quality compressor oil in it and basically came out clean but I changed it just to be safe with the same grade and type of oil. The engine oil came out dirty but that was expected. The hyd. fluid was not nearly as clean as I would have liked. Possibly the system sucked in some dirt but everything appears to be running smoothly. I still need to change the PS pump fluid but that will have to wait till this weekend. Enjoy the pics and the next time I post on this thread, I will have the electrics hooked up and tested, maybe even with video. |
|
3RRL
Administrator
Huge Kama
Posts: 2,027
|
Post by 3RRL on May 27, 2008 19:34:24 GMT -5
Great progress Ken,
The grapple looks awesome all painted up like that.
Rob-
|
|