GuglioLS
Administrator  Jinma354 LE
Posts: 1,276
|
Post by GuglioLS on Jun 8, 2009 0:12:10 GMT -5
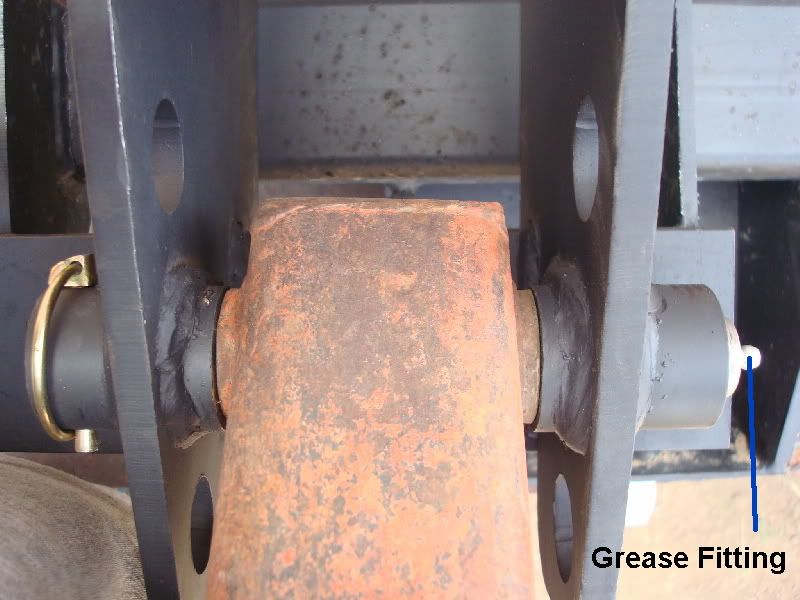
Larry, Very nice machining pics. You are cranking out lots of parts! Hope the welding went well. It's always challenging to get those bushings to line up for a nice fit welded. My dad used to have an International 300 with a Freeman loader with the s/a lift cylinders and a manual trip to dump. Fully hydraulic is so much better! That will be a nice(er) TLB when you are finished. Nice chop saw by the way. Any thoughts of adding a ROPS? A 4 poster anchored to the rear axle and loader towers with a nice big sunshade would be the heat. Brad Thanks comrade Brad! That Chinese chop saw came off eBay a few years back. The 14" metal blades from H/F are made in Russia, I have a 14" diamond blade for masonry that cuts through brick and stone like butter. The only way to start it is by using the compression release button. Thanks for the kudos on all the parts, not too big a deal when mass producing. I think the welding came out okay as everything lines up better than expected considering there were 12 bushings welded to accommodate only 4 pins. Yea a ROPS and canopy for the old buzzard would be nice and a seat belt too! I have really become used to all the safety and creature comforts afforded by the Jinma (and Kama too). Good idea for maybe next years project. Some day when I build a fully enclosed shop / barn like yours and Rob, I want to restore the old iron. I wonder if there is a power steering add-on kit for the old beast? With a FEL and now a big bucket, power steering is by Armstrong. Larry |
|
|
|
Post by bradblazer on Jun 8, 2009 8:36:04 GMT -5
|
|
GuglioLS
Administrator
Jinma354 LE
Posts: 1,276
|
Post by GuglioLS on Jun 8, 2009 16:13:45 GMT -5
Oh man, thats cool. Something like that would work for sure. I'm finally done welding bushings and plates. Of course I only post close up pictures of the best of my welds ;D 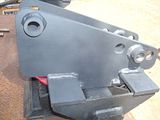 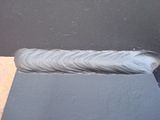 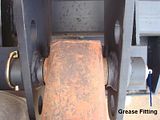 Here is a video clip showing the fitments of the pins after welding everything up. No doubt I would not have posted this if I had to sledge hammer the pins in. 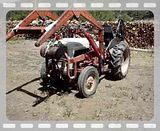 Now it's time to get my brackets plasma cut. I have not been to visit my plasma cutting buddy in a long time. Not sure if he even still works there, or if they have the 3/8" plate stock. I will head over there tomorrow and see what up. Larry |
|
red
CTW Advanced Member

Posts: 306
|
Post by red on Jun 8, 2009 16:24:37 GMT -5
MORE VIDEO! Very impressive Larry! before the ROPS you might want to check out those front tires - their doing a lot more than they were design for. -Ed
|
|
FlyHiFlyLo
Administrator
2007 Jinma 554LE
Posts: 425
|
Post by FlyHiFlyLo on Jun 8, 2009 17:31:53 GMT -5
Any suggestions on the bracket? should I punch some holes in it near the base end for additional welding points? Larry Larry this design may work a bit better over the long term.... There is a bit more material in the force vector and also allows for no welding in the shear points. Even ties all the loader arm joints and would lay flush. Plus you can plate the top/back to prevent twist in the two plates. 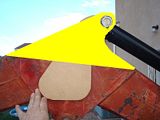 |
|
FlyHiFlyLo
Administrator
2007 Jinma 554LE
Posts: 425
|
Post by FlyHiFlyLo on Jun 8, 2009 17:41:23 GMT -5
Great vid Larry... Those things slid right in and you didn't even need KY.... sweet!
|
|
|
|
Post by bradblazer on Jun 9, 2009 21:52:46 GMT -5
I agree with Scott - his bracket re-design is excellent and you achieved a really good fit on those pins.
|
|
GuglioLS
Administrator
Jinma354 LE
Posts: 1,276
|
Post by GuglioLS on Jun 10, 2009 0:45:54 GMT -5
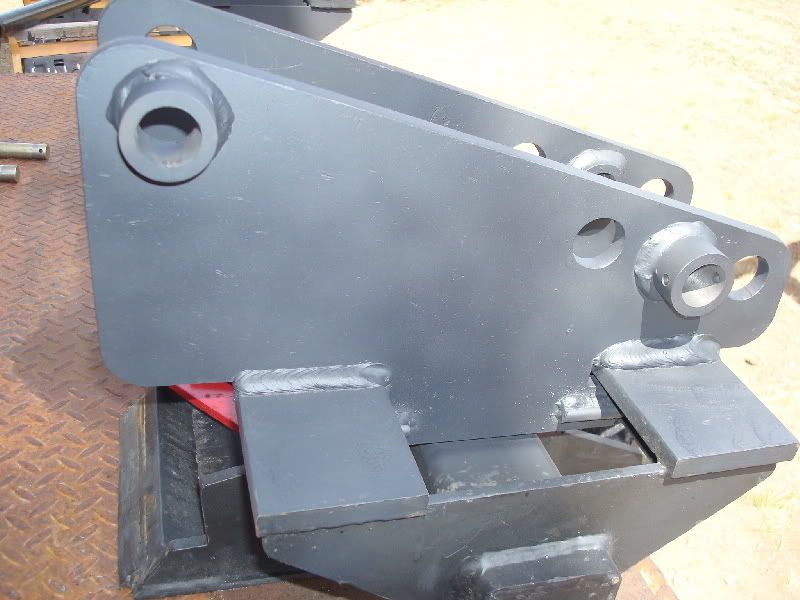
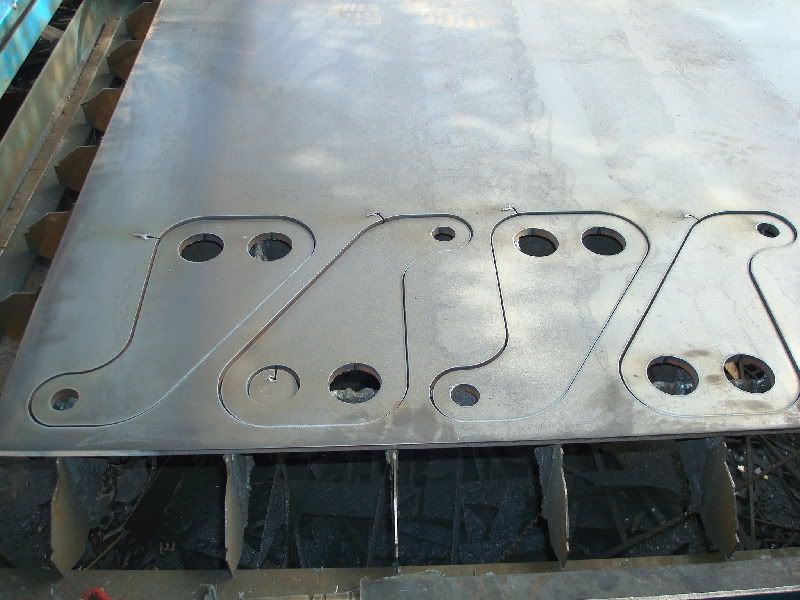
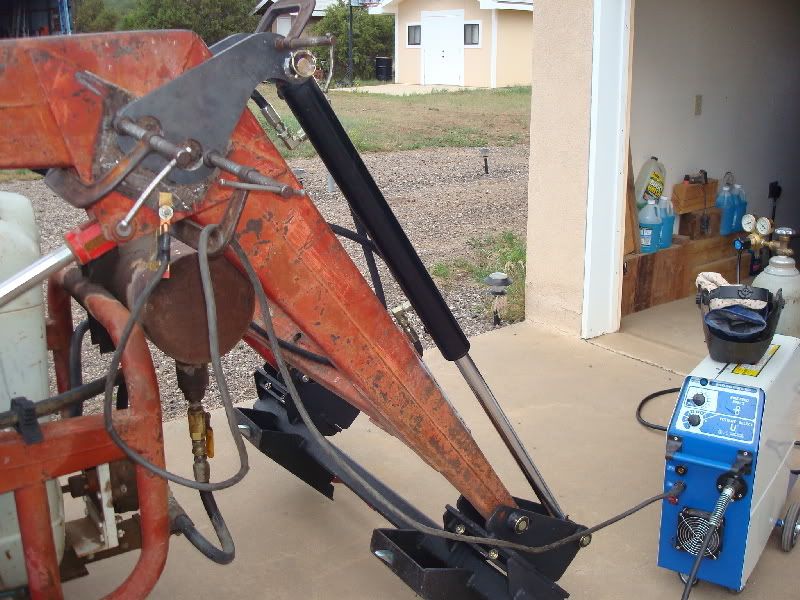
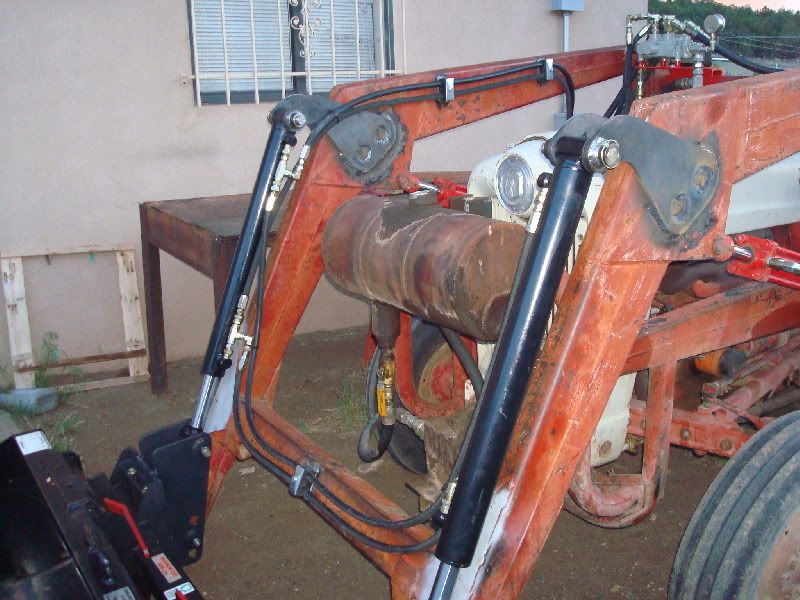
Ed, Fly, Brad, Thanks for the feedback on the way the bushings and pins fit the way they did, what a luck out that was. Ed - what tires do you suggest? The ones on there are (were) brand new 20 years ago! Fly - I appreciate the time and effort on the bracket re-design. I did not catch your post in time. Measuring the length where the base of the triangle would be is ~ 19". Agreed the force would be spread out over a larger area. A few reasons I went with that funky looking goose neck bracket was the ability to position it in place. In other words I can move it up / down or left / right an inch or two and still have it look like it was made to fit. It also needs to be welded on top of the existing flat plate that tie the arms together. Doing that gives the inside width needed between the two brackets to accommodate the width of the cylinder cross tubes. The FEL arms above the existing flat plate are quite curved so fitting flat and welding it over the arms at that point would be a patch job. I guess it's one of those things if you saw the surface I have to work with you might possibly agree what I did is the next best thing to what you have suggested. To get more shear strength, I punched two holes in the base for additional weld beads and made them out of 3/8" plate. Here is what I mean:  My plasma cutting buddy left the shop for greener pastures. No one left at the shop knows how to run the plasma cutter. Lucky me got permission from Dorthy the owner to figure it out. I got there at 9:30am and finally by 4:14 pm figured it out and got this by the end of the day: 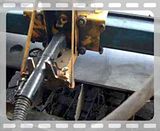 As usual I watched in awe as it effortlessly cut clean through 3/8" plate steel. There is allot to plasma cutting and getting decent results such as cut speed, punch through distance, torch gap to the top of the surface, order of what gets cut first and on and on. The plasma cam software is a frigging nightmare, In the end I was able to lick it good enough to get my brackets cut clean. Dorthy asked me to cut some parts for a customer waiting over a month. Luckily it was only 16 simple rectangles  6" X 18" X 1/8" thick. I spent another 3 hours figuring that out. Needless to say I got my brackets for "Free". And an invitation to come back and cut parts. If I ever loose my day job I have an open invitation to work @ minimum wage as a "Master Plasma cutter" LOL. Larry |
|
red
CTW Advanced Member
Posts: 306
|
Post by red on Jun 10, 2009 15:02:02 GMT -5
Larry- Have no idea on what type of tires to recommend just was concerned cause you are doubling up on the weight of the loader and it's capacity. But then again it is an "old" Ford so it may not be a problem.
Minimum wage seems to be the new American standard . Yesterday on the news they were all over Gulfstream and the quality of their pilots. Three months of training that cost the "students" 30k and then they get a job fly as a co-pilot for 8 Freaking dollars an hour! With an opportunity to move up to $20 an hour as captain. Absolutely shameful! The skill and responsibility involved. More video! Great Job! -Ed
|
|
jeep
CTW Member

Posts: 33
|
Post by jeep on Jun 13, 2009 13:39:26 GMT -5
another great job larry I need to do that to my old ford Jeep
|
|
FlyHiFlyLo
Administrator
2007 Jinma 554LE
Posts: 425
|
Post by FlyHiFlyLo on Jun 14, 2009 18:42:31 GMT -5
Yeah the ability to tack into place so the darn thing can actually be optimised is truly worth its wieght in gold... Good call... I doubt the design you have would tweak... Adjustibility is always a better call.
|
|
GuglioLS
Administrator
Jinma354 LE
Posts: 1,276
|
Post by GuglioLS on Jun 14, 2009 23:48:59 GMT -5
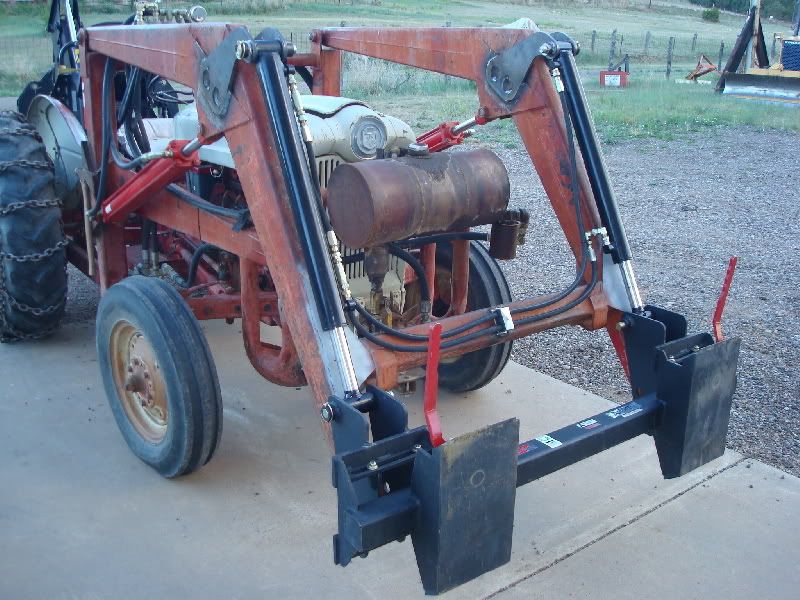
Hey Jeep, Glad to see you're still around. Thanks for your compliment and checking this project out. So you got an old ford? Which model? Fly, I don't think those brackets are going to shear off, especially with weld bead all around the inside of those 2" holes I punched. Here is the latest progress report..... More of the same welding bushings to brackets, cutting pins, getting the geometry just right, welding brackets and as Brad would say...."yada, yada, yada"  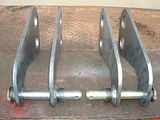 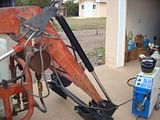  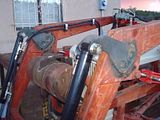  And by popular demand (or not) here's the action shot video: 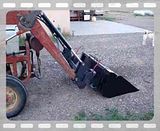 So much for "Quick" attach  HaHaHa Now lucky me gets to take it all apart and paint it  Larry |
|
FlyHiFlyLo
Administrator
2007 Jinma 554LE
Posts: 425
|
Post by FlyHiFlyLo on Jun 15, 2009 0:39:16 GMT -5
Awesome! great vid!
|
|
3RRL
Administrator
Huge Kama
Posts: 2,027 
|
Post by 3RRL on Jun 19, 2009 10:43:28 GMT -5
Great job Larry, can't wait to see it painted.
Are you considering painting the old Jubilee too? That sure has been a good tractor for you.
I was just thinking how far we've all come with all the modifications we do ourselves on our tractors over and above the recommended service and maintenance. You are a prime example of using your talents to do all the work yourself....very impressive. It wasn't too long ago we were all afraid to do anything to our tractors.
Now you are making your own loader and buckets and such.
Awesome Larry!!
Rob-
|
|
jeep
CTW Member
Posts: 33
|
Post by jeep on Jun 19, 2009 23:49:20 GMT -5
Larry I have a 74 4400 id FNH with a loader & grapple you And Rob gave me the idea on the grapple I had to have one it work's good for moveing the 2' & 3' oak log's saves the back Jeep
|
|


 6" X 18" X 1/8" thick. I spent another 3 hours figuring that out. Needless to say I got my brackets for "Free". And an invitation to come back and cut parts. If I ever loose my day job I have an open invitation to work @ minimum wage as a "Master Plasma cutter" LOL.


 HaHaHa
