|
|
Post by gerifalte on Apr 21, 2008 0:13:03 GMT -5
So, I did have some time today to work on this. Here are some pics of the work so far: After cleaning the piece with a spray-on engine cleaner, I used a 4-1/2 grinder and a small air die grinder to make a bevel on the crack 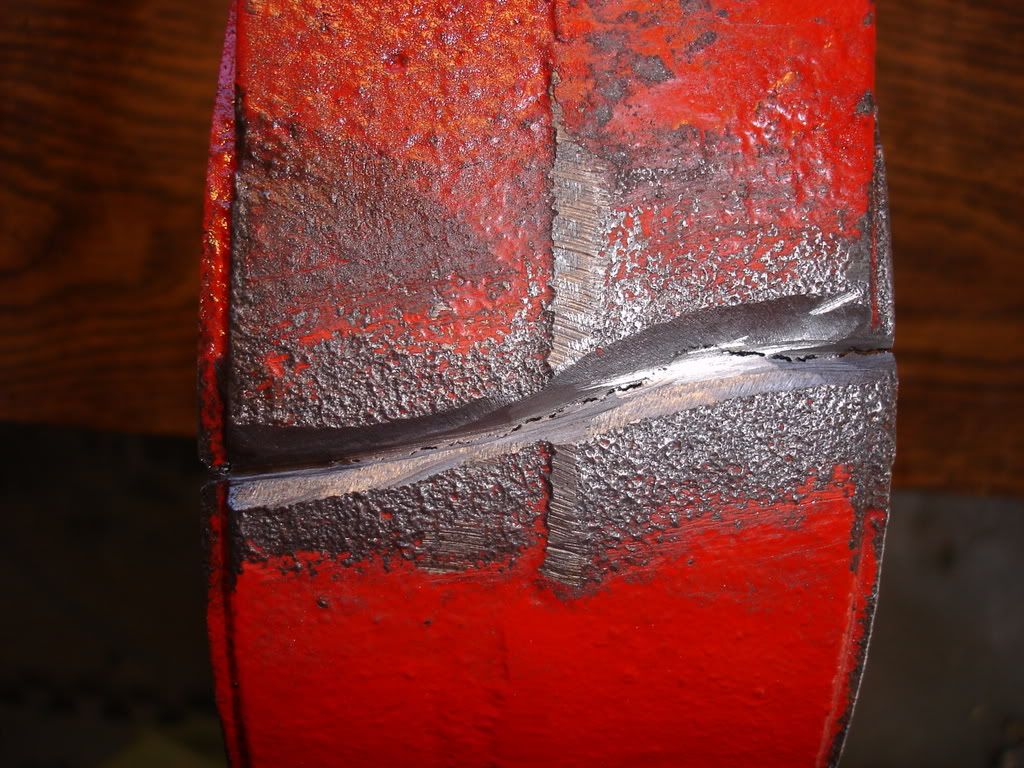 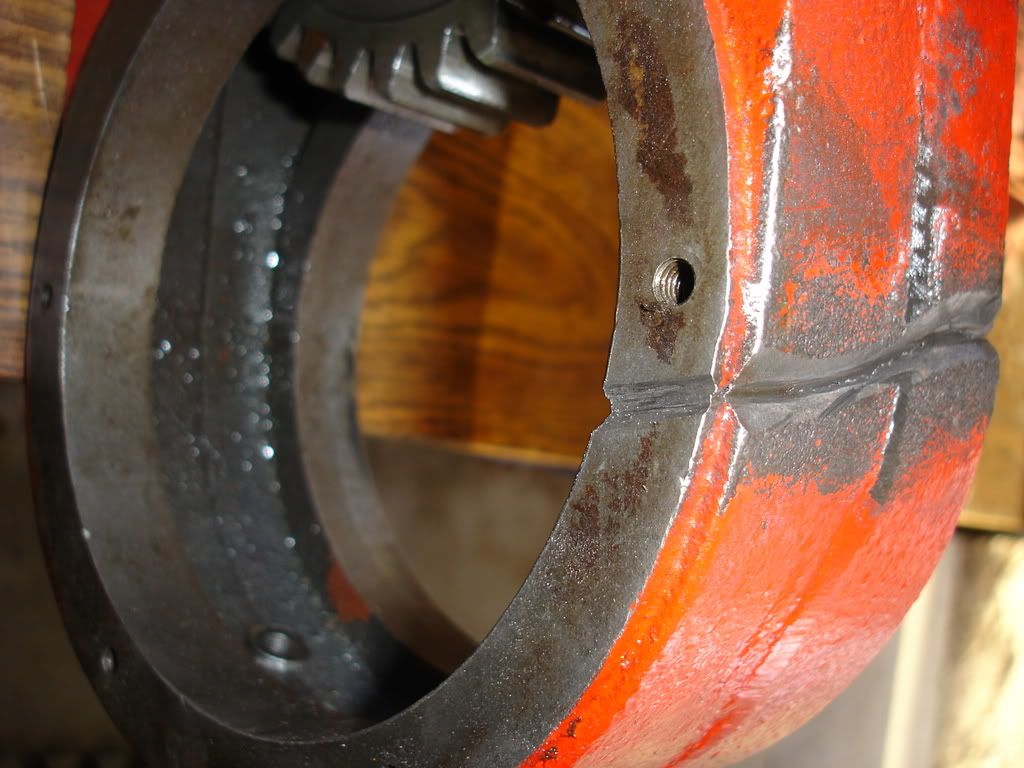 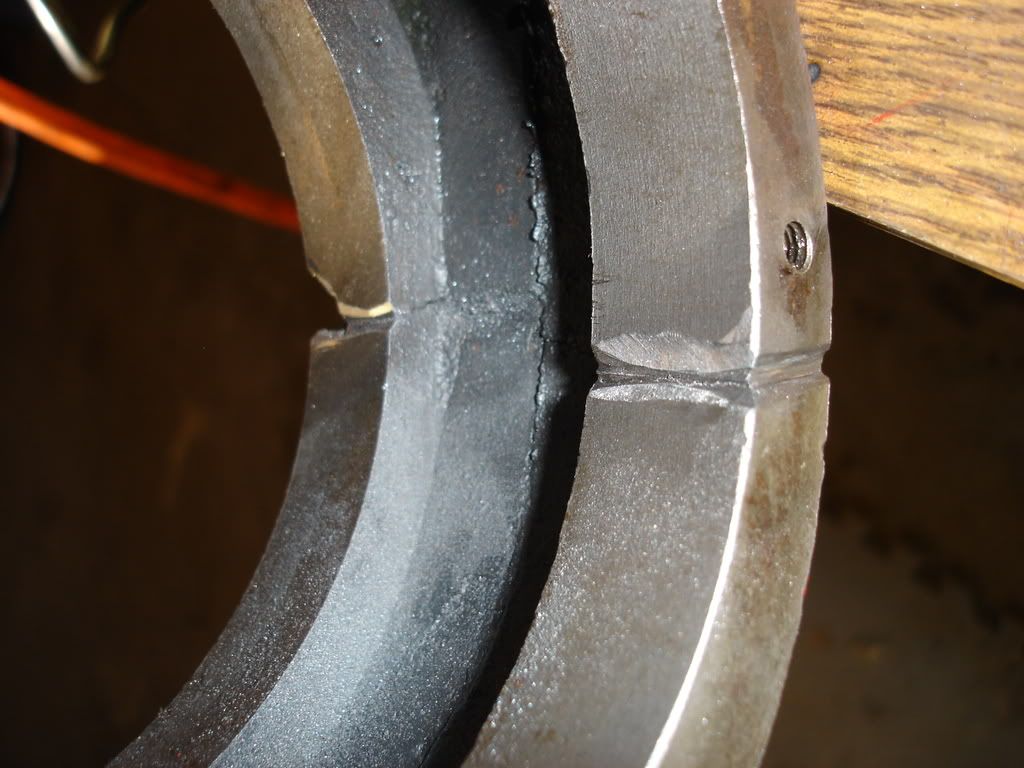 I didn't grind the crack in the inside wall (the dark area in the pic above), as that section wasn't very thick (plus, it is really hard to work in that tight space!) so I hopeI got enough penetration from the outside weld. We heated the piece until it was very hot, and used 1/8" 7018 rods on 90amp DC-. It took two passes to get a thick weld on the outside crack. 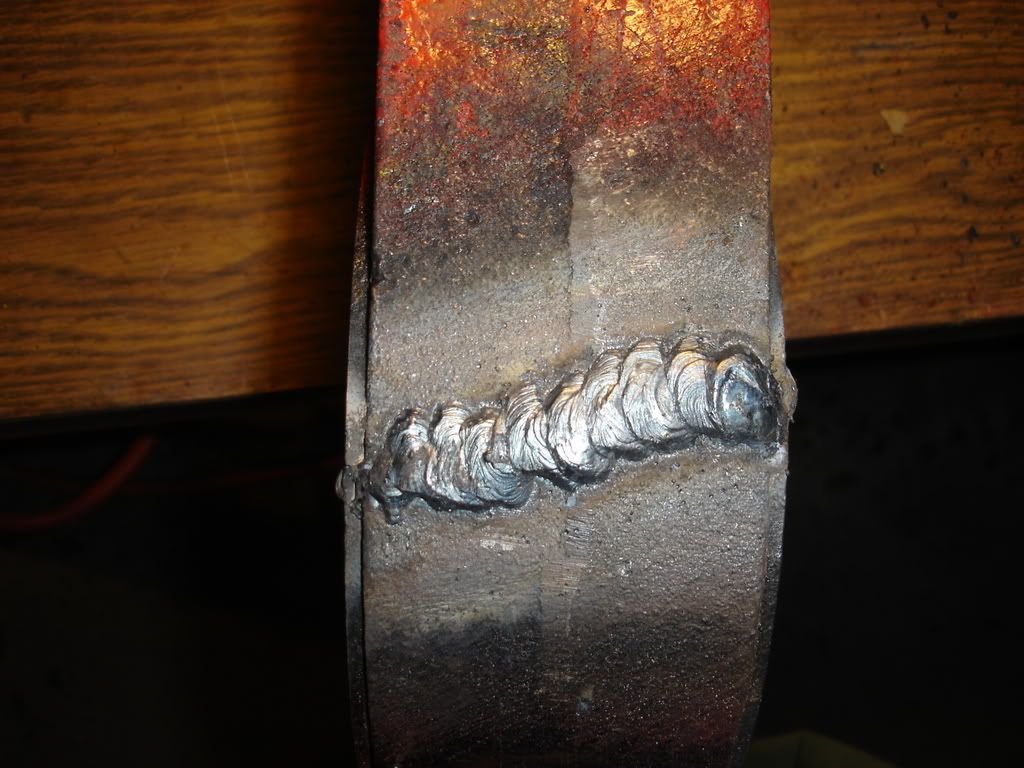 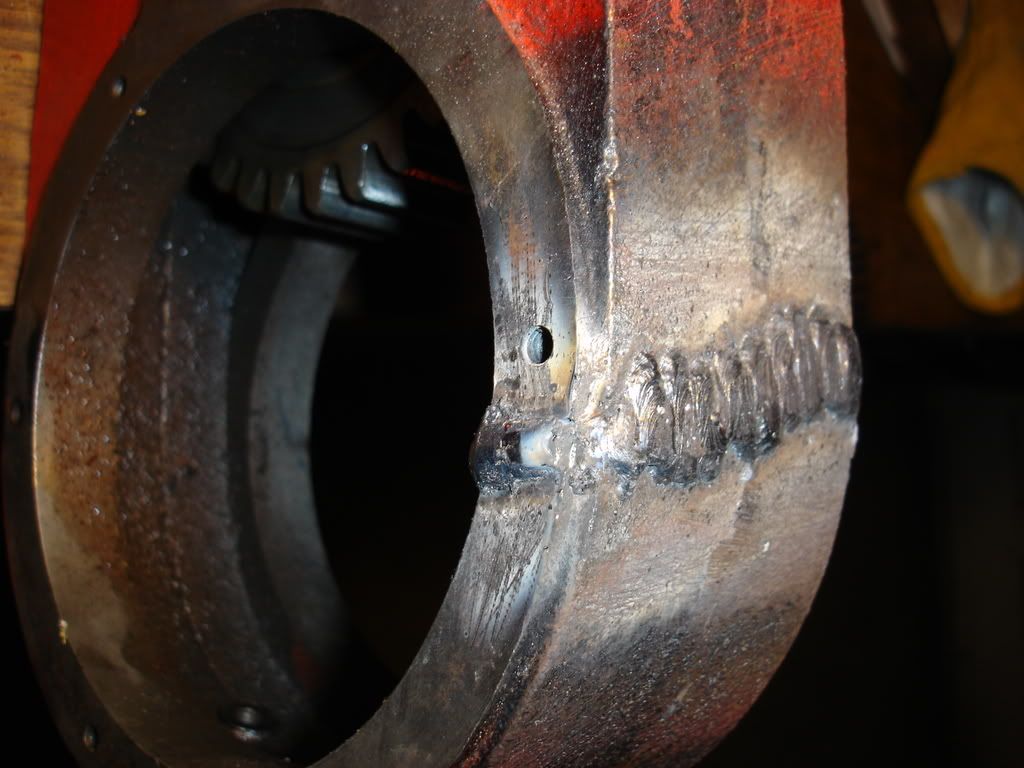 Since two threads were very messed up, we decided to plug them completely to then re-tap them. 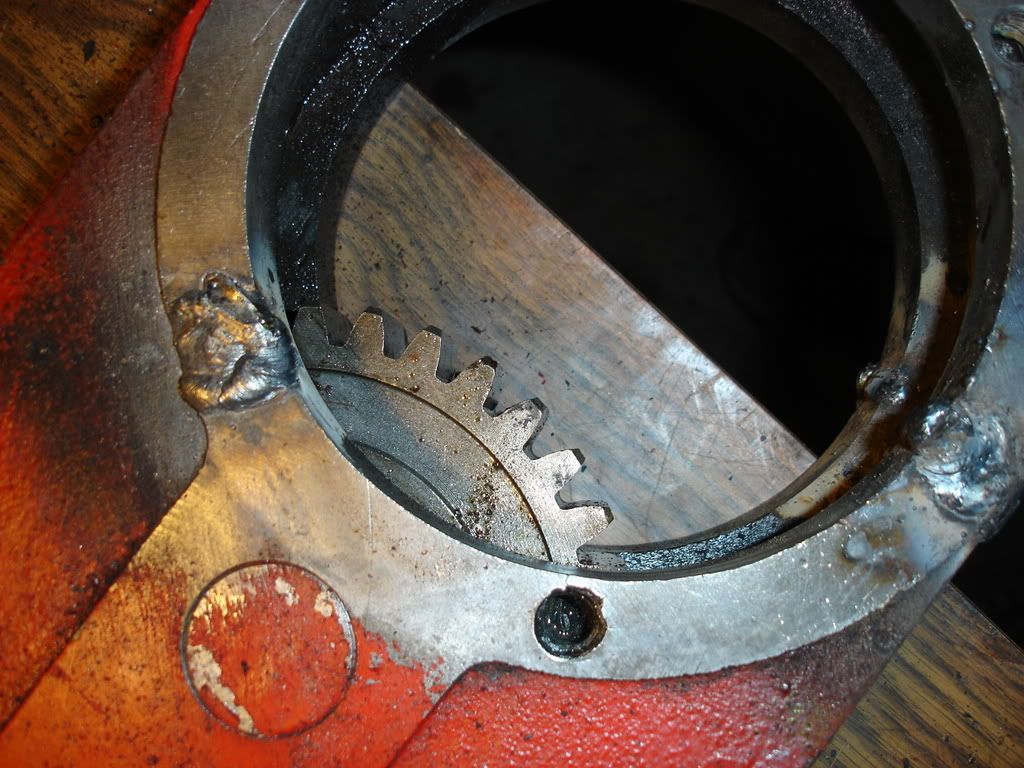 We had to cover the gears with a piece of thin so they wouldn't get splattered... |
|
|
|
Post by gerifalte on Apr 21, 2008 0:24:25 GMT -5
I again used the grinder to make all the inside welds flush with the rest of the walls, because that's where the gaskets fit and I don't want to have leaks. The 4-1/2 grinder fit just about perfectly in the hole, making my work way easier than using the die grinder  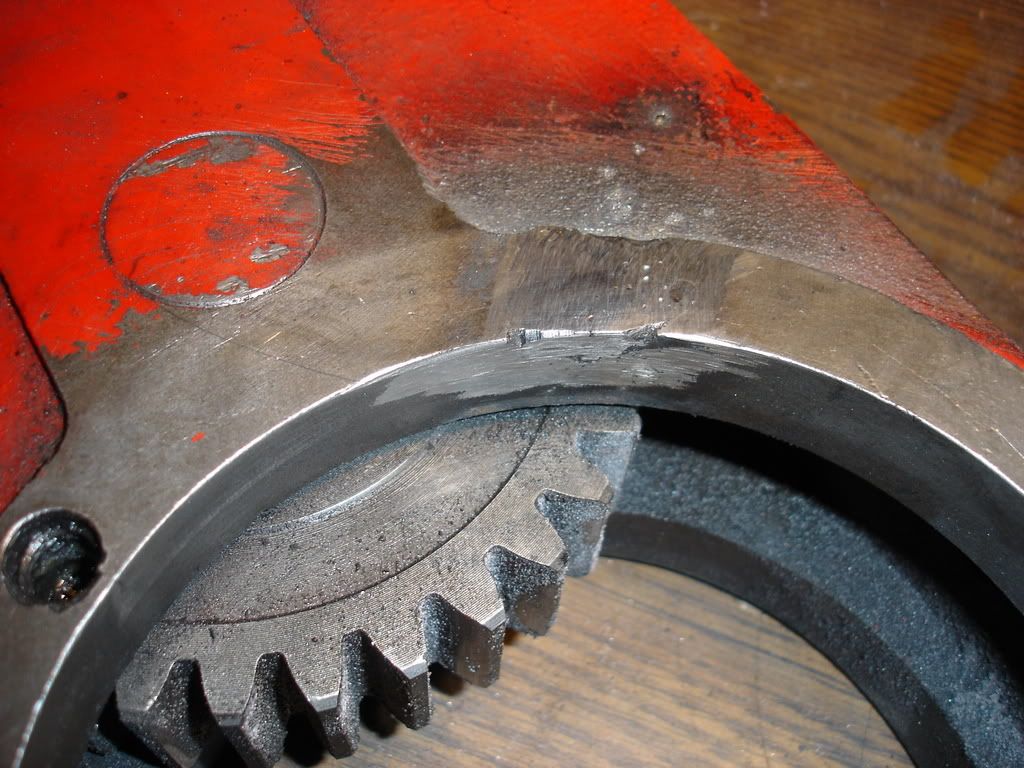 The grinder did an amazing job!  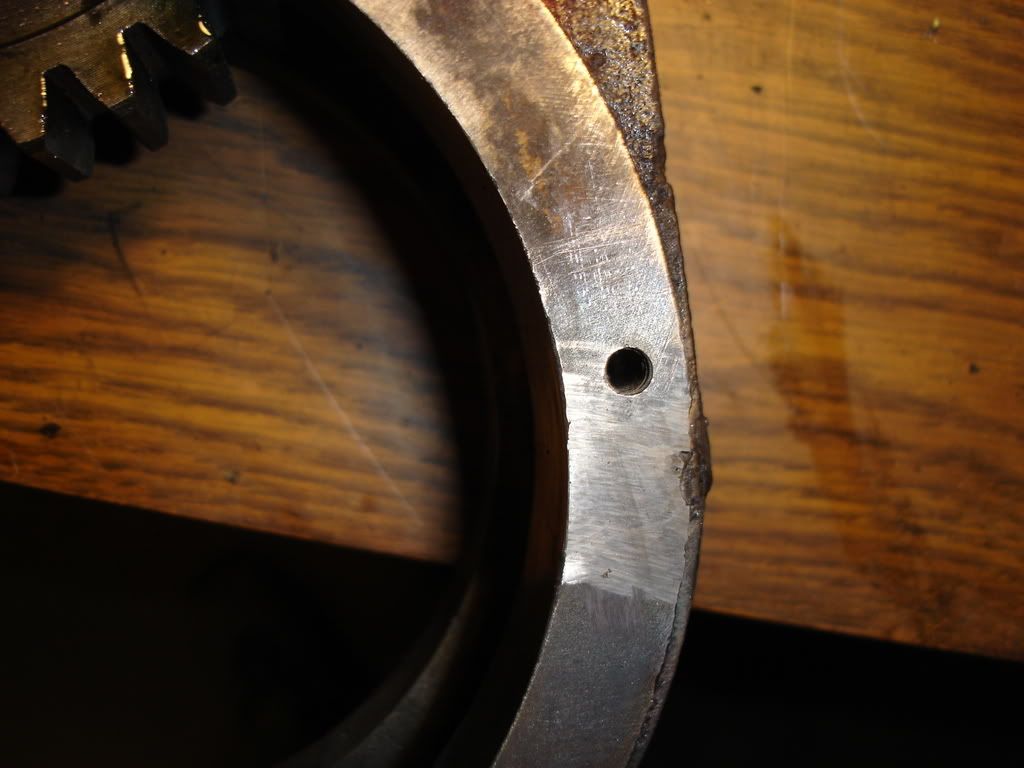 This picture shows the places where the threads used to be. 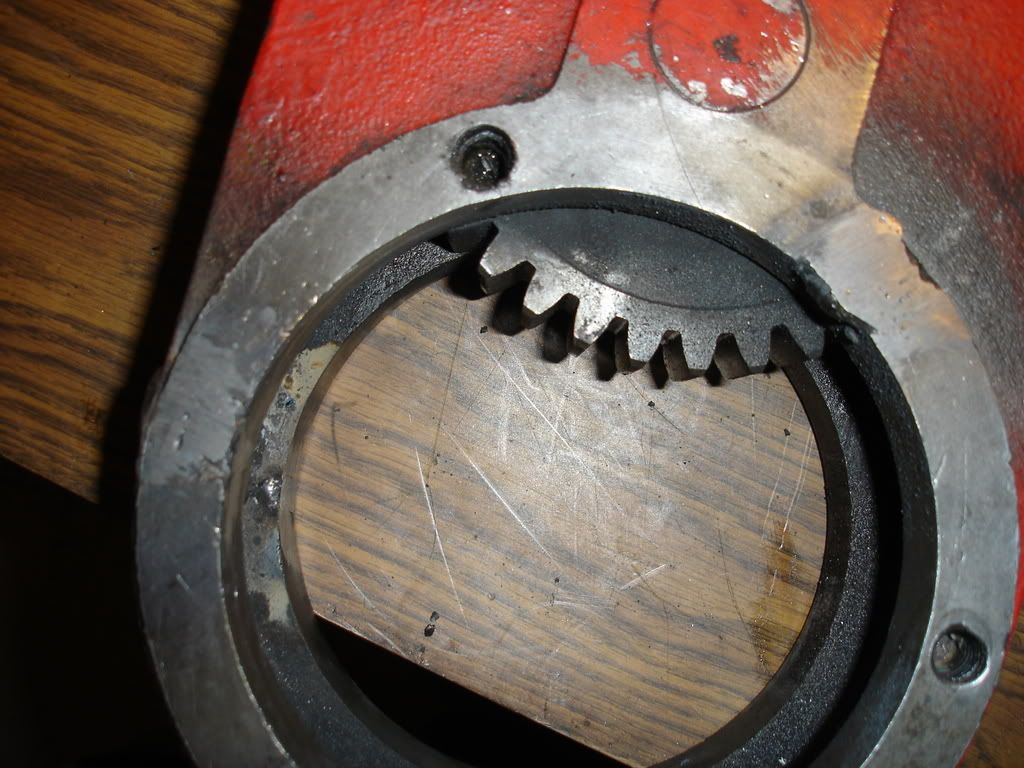 I ended up no burying the piece after we were done, as I was a bit worried about cleaning the sand off the gears. Instead, I closed all the windows and doors in the shop and put the piece next to a propane heater so it would cool down slowly. I don't know if this was the ideal setting but oh well, I would rather do that than cleaning the sand off those gears! I did follow Fly's advice and pinned all the welds. I still need to make the new threads and grind down the thick weld in the inside wall so it doesn't rub with the gears. After that, I will put it together and test it on the field! More to come... |
|
FlyHiFlyLo
Administrator  2007 Jinma 554LE
Posts: 425
|
Post by FlyHiFlyLo on Apr 21, 2008 0:45:17 GMT -5
You didn't peen it with a slag hammer.... Or heat the part up till glowing red...    Uh Oh Looks good, but I would add the gusset for sure. |
|
|
|
Post by gerifalte on Apr 21, 2008 0:50:51 GMT -5
You didn't peen it with a slag hammer.... Or heat the part up till glowing red...  ?   Uh Oh I would add the gusset for sure. Yes and yes! I did both as you advised boss  (see burned paint in pics following the pictures of the groove) I didn't take pics of that, as I was busy handling the torch, welder, hammer, etc After I took the piece apart I am pretty sure the cause of the crack was over tightening the bolts (i.e. me being stupid!). Do you still think the gusset is necessary? G |
|
FlyHiFlyLo
Administrator  2007 Jinma 554LE
Posts: 425
|
Post by FlyHiFlyLo on Apr 21, 2008 10:53:07 GMT -5
Do you still think the gusset is necessary? G while you are in there I would for sure. |
|
3RRL
Administrator  Huge Kama
Posts: 2,027 
|
Post by 3RRL on Apr 21, 2008 14:15:21 GMT -5
The grinder did an amazing job!  Looks to me the grinder OPERATOR did an amazing job. Very nice work and documentation! Welding that stuff is not as bad as some would believe. Yours look very good. Peening the weld helps reduce and redistribute the stresses in the weld. Looks like you're on your way to a successful repair. I was viewing your photos again to see why it cracked in the first place. I don't think tightening those bolts was the problem, unless the fit between the shaft housing across the top and the casting was not good. Like when tightening the bolts would pull the casting towards the shaft housing and cause stress in the bolted position. The other thing is the torque applied by the gears of the shaft to the ones in the housing. If that exceeded the strength of the housing or not? Maybe you hit something with the tiller that caused undue stress and made the gears want to separate instead of just turn? That's what it looks like to me...no fault of yours. In that case, the housing is not designed strong enough? Scott's suggestion of a reinforcing strap or gusset would help there. Rob-
|
|
|
|
Post by gerifalte on Apr 21, 2008 17:51:03 GMT -5
Looks to me the grinder OPERATOR did an amazing job. Very nice work and documentation! Thanks Rob! It was actually quite fun working on this thing. I am glad I followed your advice and took a crack at it! In that case, the housing is not designed strong enough? Scott's suggestion of a reinforcing strap or gusset would help there. I think you guys might be right about this. We do hit rocks once in a while when tilling, and with those gears being so beefy something has got to give...normal tillers are chain operated, and that's what usually breaks. I am wondering what's going to break next if I add the gusset! Maybe a gear? Thanks again guys for all your help! I will post the final pics when I get this done sometime this week. G |
|
3RRL
Administrator  Huge Kama
Posts: 2,027 
|
Post by 3RRL on Apr 21, 2008 19:50:14 GMT -5
Here's an idea G- You could make or buy a small slip clutch and fit it to that shaft to absorb shocks like that. It might not be 100% the answer, but if we are right about the housing and the rocks, it would surely help. For the time being, some reinforcement around that casting sounds like a really good idea. Again, nice job on it. Has to be pretty satisfying to do it yourself like that.  Rob- |
|
|
|
Post by gerifalte on Apr 22, 2008 15:59:25 GMT -5
You are very right about this Rob! One of the things I first noticed when I bought this tiller was that the shaft didn't have a shear bolt and I was going to replace it, but then I forgot all about it  Now that you suggest a slip clutch I realize I should definitively do something about this before I put it to work again. Good suggestion, thanks! G |
|
|
|
Post by gerifalte on Apr 29, 2008 14:38:15 GMT -5
Hello again, Just a follow-up on my original posting: Last weekend I finished this project. Sorry, but I didn't take pics this time as I was too excited trying to get this done! I will take pics of the final product and post them later this week. As suggested in the welding forum, I drilled new holes rather than working on the original holes. I also tried to drill and tap holes where the original holes were to have more grip, by I just couldn't drill through that tough 7018 material, even with a 12-speed heavy duty drill press and titanium nitride drill bits!!! I guess I need to get myself some of the heavy-duty toys Guglio or Rob have in their shops! ;D For extra reinforcement I also added a 1/2 inch steel plate rather than the original thiner side cover plate. I had fun making a little attachment out of a U-bolt to make a good circle cut with my torch! I hope this will help keeping the casting strong. I ended up not adding a gusset, as so many people told me I would end up weakening the casting even more...sorry Fly, if it breaks again you are welcome to tell me "I told you!"  Finally, I am installing a slip clutch as suggested by Rob. I tested the tiller on light soil and is working well. I don't want to expose it to real work until I get the slip clutch though (later this week according to UPS). Thanks so much for all your help! G |
|
GuglioLS
Administrator  Jinma354 LE
Posts: 1,276
|
Post by GuglioLS on Apr 29, 2008 18:17:20 GMT -5
G, Nice repair job, now if you could "repair" all those big ass photos of yours it would even be more impressive and we would appreciate it. You can do this by logging into your photobucket account, select the little box under the pictures then scroll down the photobucket website, go all the way down to the lower right, then push the button "generate HTML and IMG code", when the new window opens, click on the text in the box "IMG clickable thumbnails for message boards - recommended" the thumbnail code will automatically be copied to the clipboard, go to your previous posts, click on modify and replace all the big picture codes with the new and correct thumbnail code. Thanks!  Larry |
|
|
|
Post by gerifalte on Apr 29, 2008 19:07:18 GMT -5
G, Nice repair job, now if you could "repair" all those big ass photos of yours it would even be more impressive and we would appreciate it. Hello Larry, Thanks for your positive comment. I can reduce the photo sizes when I have some time. Since the images don't use server space on the site, I assume you want me to change it for people with slow connections, right? Anyway, are there still people with dial-up connections out there?!  I am curious. Maybe we should have a survey about internet speeds in the general discussion section... G |
|
GuglioLS
Administrator  Jinma354 LE
Posts: 1,276
|
Post by GuglioLS on Apr 29, 2008 23:12:25 GMT -5
.......Since the images don't use server space on the site, I assume you want me to change it for people with slow connections, right? Anyway, are there still people with dial-up connections out there?!  I am curious. .......G G - Yes there are some of us who still have dial-up. The rural area I live in has no cable, no DSL, mountains on the southern horizon so no satellite. My connection is through ISDN (128K) not the best but better than the 24K analog dial-up connection I used to have. If you want to create a survey / poll, go for it. In any-event your welds look great, surprising that TiN drill bits would not penetrate the weld. At least you know it's tough. Glad it's holding up for you. Larry |
|
3RRL
Administrator  Huge Kama
Posts: 2,027 
|
Post by 3RRL on Apr 29, 2008 23:55:53 GMT -5
In any-event your welds look great, surprising that TiN drill bits would not penetrate the weld. At least you know it's tough. Glad it's holding up for you. Larry I can tell you a little bit about the Titanium Nitride coated drills. IMO they are no better than high speed and often, the ones we get cheap are a little worse than good high speed drills. Tin coating came along in the 80's in our industry. It sounded good and looks cool, but the parent material needs to good too. The new Harbor Freight I got was pretty good, but I've drilled some stuff lately where the flute edges have scored as I passed through the material. I have some old high speed and cobalt bits that haven't scored in 20 years. They are about an inch long now. ;D Morse, Brubaker, Weldon and several others used to make good stuff. That's what the pros use. Now there are many new brand names offer good drill bits. Cobalt is still my favorite for all around versatility, but if you want to drill really hard steel you need solid carbide drills or carbide tipped drills and center drills to start the holes. Carbide Tipped DrillsSolid Carbide DrillsRob- |
|
|
|
Post by gerifalte on Apr 30, 2008 0:37:51 GMT -5
The rural area I live in has no cable, no DSL, mountains on the southern horizon so no satellite. My connection is through ISDN (128K) not the best but better than the 24K analog dial-up connection I used to have. If you want to create a survey / poll, go for it. Larry ah, that make sense. I thought satellite pretty much got everywhere. I am lucky enough to have high-speed cable internet right on the farm. Do you get cell-phone signal at your property? That could be another option. In any event, I am sorry about the large pictures! I will change them when I have a few minutes to go over my old postings. In any-event your welds look great, surprising that TiN drill bits would not penetrate the weld. At least you know it's tough. Glad it's holding up for you. Larry Thanks! We did some more light tilling today and it seems to be holding up. I will let you guys know how it goes after installing the slip clutch and doing some "real" tilling. The drill bits cut through mild steel and other material like butter so I was very surprised when they bailed out on the 7018! G |
|