3RRL
Administrator  Huge Kama
Posts: 2,027 
|
Post by 3RRL on Jan 6, 2010 16:39:49 GMT -5
Rob I don't know much about your motor but if it has a cam put new cam bearings in I know most of the time when you louse oil pressure it's the cam bearings, you do have one hell of job ahead of you but we all know you can do it with all your toys you have in your shop be careful the crank will be heavy. you have to split it so you can take the fly wheel off the crank .Jeep Thanks Jeep, I have an entire (complete) set of bearings coming from Chip. I have that Diesel engine booklet which I refer to as my "Manual". But there are no exploded parts views or a parts list like the other books I have. Chip has an engine parts list book with exploded views. He's going to get me one with his next order. Like he said, I probably won't need it by the time he gets it in, but I still want one for future reference. Rob- |
|
3RRL
Administrator  Huge Kama
Posts: 2,027 
|
Post by 3RRL on Jan 8, 2010 21:58:16 GMT -5
Got a little more done today. Loretta and I were able to split the tractor. It was easier than the first time since we weren't as scared and new what to expect. Went through the same thing as last time... Got two floor jacks and wood blocks ready, blocked up the front axle so the engine wouldn't tip over, then rolled the rear away from the front. 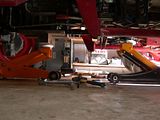 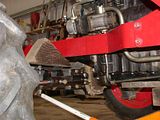 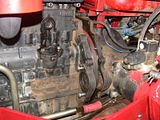  |
|
3RRL
Administrator  Huge Kama
Posts: 2,027 
|
Post by 3RRL on Jan 8, 2010 22:13:54 GMT -5
I had a chance to check out the sliding sleeve which holds the throw out bearing. If you remember, I made a modification to where I could lubricate the sliding sleeve with some of the grease migrating to the throw out bearing. It all looked like it was working nicely. The clutch was in good shape too, and the fingers were not worn down at all. After checking things out, I started to remove the flywheel housing and get the engine ready to put on the engine stand. 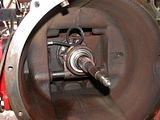 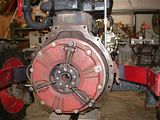 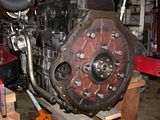 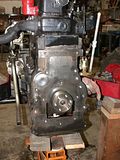 I will show photos of that tomorrow. Only because I had Loretta get the wrong bolts.:confused: I picked out 4 bolt holes I thought I could use, but no matter what I tried, I couldn't get those I chose to bolt to the stand without interfering. So I had to use other bolt holes which, of course, were 12mm instead of the 14mm ones she bought. I also got the new crankshaft and bearings from Chip. Unfortunately, the head gasket got ruined during shipping, so he is sending another one. Right now I have the new crankshaft in the lathe to check it's concentricity. I still have to mic all the journals, so I will show some of that tomorrow as well. The digital gram scale has not arrived yet. On the bright side, my chickens and my dog were keeping me company. Rob-  |
|
3RRL
Administrator  Huge Kama
Posts: 2,027 
|
Post by 3RRL on Jan 8, 2010 22:19:12 GMT -5
I do have a question for you guys...
Is there any reason I couldn't take out the pistons from the bottom of the engine after removing the crankshaft? That way, I won't have to remove the head or any of the fuel injectors, rocker arm assembly etc. If I can line up the connecting rods to their respective journals, I should be able to place the crankshaft in position and get to all the rod bearing caps to tighten everything back up form the bottom.
Am I missing something?
|
|
GuglioLS
Administrator  Jinma354 LE
Posts: 1,276
|
Post by GuglioLS on Jan 9, 2010 0:10:39 GMT -5
Amazing progress Rob you really get with the program. The inside of the bell housing where you added that grease-able bearing looks super clean. I see so reason why you cant pull the rods and pistons out the bottom once the crank is pulled. I suppose the only issue might be getting them back in. If there is enough clearance to get the piston ring compression tool in near the bottom of the sleeve it should work. I suppose you'll have to pull the crank first and see if it can be done. No sense in pulling the head and everything else if you don't have to.
LOL love that pic of the chickens and Coco hanging out. Surprising they aren't coyote or mountain lion meals by now. Cool parking sign too :-) Are you keeping the shop warm?
Larry
|
|
3RRL
Administrator  Huge Kama
Posts: 2,027 
|
Post by 3RRL on Jan 9, 2010 12:25:51 GMT -5
Thanks Larry, I try to keep after it when I have time. There are still chores both Loretta and I gotta do plus upkeep on the property ... road and gutters etc. and of course the constant gathering and cutting firewood for the future. The chickens accept Coco as their guard dog. Even the roosters let her get within 6 inches when she and the chickens are gathered around my feet. They follow me everywhere.  She's repeatedly zipped off the porch to chase (something) away. Sometimes I see it too, like a coyote. Sometimes I have no clue a predator is around, but she sure does. One of the guys at work gave me that cool metal tractor sign. Plus one to replace my worn out sign out by the drive entrance. No heat in the barn either. It hasn't been super cold (yet) like in previous years. I do have that one propane heater that puts out 80,000 BTU, but I haven't used it yet. I wear gloves and a light insulated shirt/coat. That seems to work for me. Loretta never gets cold? What's up with that? After some wrenching, the coat comes off. Makes sense that if I can get the pistons out from the bottom, I should be able to get them back in that way too. The guys on TBN say I should put them in from the top to reduce the possibility of ring damage. But it's tempting because I wouldn't need to strip down the top end at all. No removing valve cover (and new gasket), fuel lines and injectors, intake and exhaust manifolds (and new gaskets), rocker arm assembly or valve lash adjustment, head bolts (and new gasket). So there is a lot of work I could pass over if I could get them out and back in from the bottom. I'll have to think about it. I don't want to screw up now that I'm this far along. Rob- |
|
psj12
CTW Member
 KAMA 554
Posts: 93
|
Post by psj12 on Jan 9, 2010 14:28:56 GMT -5
The ability to put the pistons in from the bottom is not common in engines but I have seen some that can. Usually there are cast protrusions in the lower end that limit this.
|
|
rayh
CTW Member
 Devonn 554
Posts: 52
|
Post by rayh on Jan 9, 2010 14:38:38 GMT -5
Why were you wanting to pull ALL pistons out? I only seen 1 rod with damage to bearing area. If you pull the piston down just enough to remove the wrist pin, it might be possible to do from the bottom. DO NOT pull rings out the BTM!!! Most engines don't have enough room for this. Remove the head, but only pull out the 1 piston and rod. The less disturbance of the rings the better.
Good Luck
RayH
|
|
3RRL
Administrator  Huge Kama
Posts: 2,027 
|
Post by 3RRL on Jan 9, 2010 21:49:54 GMT -5
I was wanting to balance the pistons and rods. But the more I hear not to take the piston out from the bottom, the more I am leaning to not doing that. I really don't want to take the head off again. Everything else has to come off before I can get to the head bolts. It is all fine as is. If I can get them out the bottom, and be certain to re-install them that way, then I will. Otherwise, no. I spent most of the day checking out the new crank. The rest of the day was taking off the front timing cover and housing and marking all the gear line up, etc. The new crank checks out real good. I set it in the lathe with a live center in the tailstock. Then indicated each main journal. I got the headstock dead on but could not get the tailstock dead nuts. I ran out about .001". As I indicated each journal, the ones closer to the tailstock also ran out in accordance with the tailstock. My impression is that the new crank is right on. Also shown below are the new journal bearings and new oil pump. 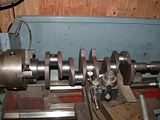 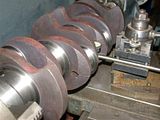 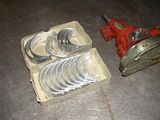 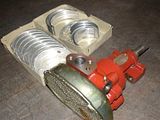 |
|
3RRL
Administrator  Huge Kama
Posts: 2,027 
|
Post by 3RRL on Jan 9, 2010 22:25:57 GMT -5
|
|
3RRL
Administrator  Huge Kama
Posts: 2,027 
|
Post by 3RRL on Jan 9, 2010 22:35:00 GMT -5
This engine has a timing gear cover plate and also a timing gear housing. They are separate, and you can only take the housing off after the cover and also after removing the gears inside. There are bolts that hold the housing on behind two of the gears. But before that, you have to take the pulley off. The pulley bolt is right handed thread. I had the engine marked on the pulley for TDC, and when the pulley came off, the key was on top. After taking the cover off, the first thing I did was mark all the gears that would be coming off. Maybe you can see the markings in the close ups? That way, I can line up the meshing teeth exactly the same as when they came off. Chip told me if I did that, I wouldn't need to worry about timing later. 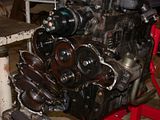    |
|
3RRL
Administrator  Huge Kama
Posts: 2,027 
|
Post by 3RRL on Jan 9, 2010 22:42:15 GMT -5
After taking the bolts off behind 2 gears, I had to disconnect the fuel injector pump oiler and fuel supply hose which goes to the fuel filter. I was planning to leave the injector pump bolted to the housing ... same thing with the rear hydraulic pump. I figured the less I have to disassemble, the better. So here is a photo of me holding the timing gear housing with injector and hydraulic pump still attached. Then I was able to flip the motor upside down so I could start splitting the bottom half of the engine to expose the crankshaft. I will get to that maybe tomorrow or when I get back from work on Wednesday. Rob-   |
|
|
|
Post by Rich Waugh on Jan 10, 2010 21:32:30 GMT -5
Rob,
I have no real experience with diesels, but I've done some old straight sixes and straight fours where it was easy enough to pull the pistons down from the bottom. I just pulled the pan, unbolted the mains and rod journals and lifted the crank out, then pulled the pistons out one at a time. Needless to say, I marked the caps and rods for mating and for orientation before yanking anything.
The only issue I ever had was on one engine the bottoms of the cylinder castings were so non-planar that it was a bit of fun getting the rings back in without chipping any, but I did manage. That was an old Rambler six, as I recall.
I'd think, without knowing jack shit about it, that a sleeved engine would have the sleeves turned square on the ends and be a snap to pop the pistons back in. But like I said, never done a diesel so I could be way out in left field on that one. I do know that if you pull the pistons out the top after the engine has some hours on it, you'll likely have to ream the top ridge before you pull them so you don't chip the rings on the ridge. Once you've done that you're pretty much committed to honing the cylinders, too.
My old buddy the diesel rebuilder told me once, as I recall, that any time you pull the pistons out of an engine you should really hone the cylinders and put in new rings. This is because the cylinders never wear cylindrically, but rather wear more on the thrust side and when you put the pistons back in the rings inevitably end up in a new orientation and create very uneven new wear patterns, usually resulting in pretty prompt loss of compression. Again, I have no personal experience and am just passing on what I was told to the best of my recollection. Your mileage, as they say, may vary considerably. :-)
Thanks for the terrific documentation and photos. If you keep that tractor long enough you'll have written a complete service manual.
Rich
|
|
|
|
Post by affordable on Jan 11, 2010 12:36:48 GMT -5
Rob, if you wring out your jeans before you wash them you should be able to tell how much oil was in the tractor   Just kidding, great job on posting your progress Tommy Affordable Tractor Sales "Your Jinma Parts Superstore" www.affordabletractorsalesco.com |
|
3RRL
Administrator  Huge Kama
Posts: 2,027 
|
Post by 3RRL on Jan 13, 2010 21:03:41 GMT -5
lol...thanks guys,
The sleeve liners are cylindrical and even have a nice lead-in chamfer on the bottom.
But the bad news is that the web castings are spaced too close together. The spacing is narrower than the piston diameter. I say "bad news" but I really don't mean it, since I really didn't want to take the head off again. Nor did I really want to pull the cylinders out of the liners again. I believe the head and ring job came out very well (for me), so I will not be balancing those rods and pistons after all. Gee, and I was really looking forward to doing that, at least just for the experience. ;D
I received that gram scale already and will store it for a rainy day.
When I was at the shop, I had to make an order from MacMaster Carr, so I ordered some of the rubber and paper gasket material I need. They come in large sheets so I can make my own for the front timing gear housing and cover, and also for the main oil sump. I got 1/64" thick high pressure general purpose for that, and 1/32" thick rubber for a new oil pan gasket. I also got several packages of "Stat-O-Seals" which are to replace all those steel washers with molded rubber inside them. I think I got enough of every size to change all the banjo bolt washers on the entire tractor.
What kind of gasket sealer should I use for between the main oil sump and engine, and the timing gear cover and housing?
The Shellac type or that sticky stuff?
Got home late today (instead of yesterday) because I stopped by to see an old friend who is in one of those convalescent homes. He is pretty bad off and we've been best friends for over 52 years! Tomorrow I will start taking off the caps to remove the crankshaft. I'll snap some more photos for my little documentary.
Rob-
|
|