3RRL
Administrator  Huge Kama
Posts: 2,027 
|
Post by 3RRL on Jul 15, 2009 11:42:54 GMT -5
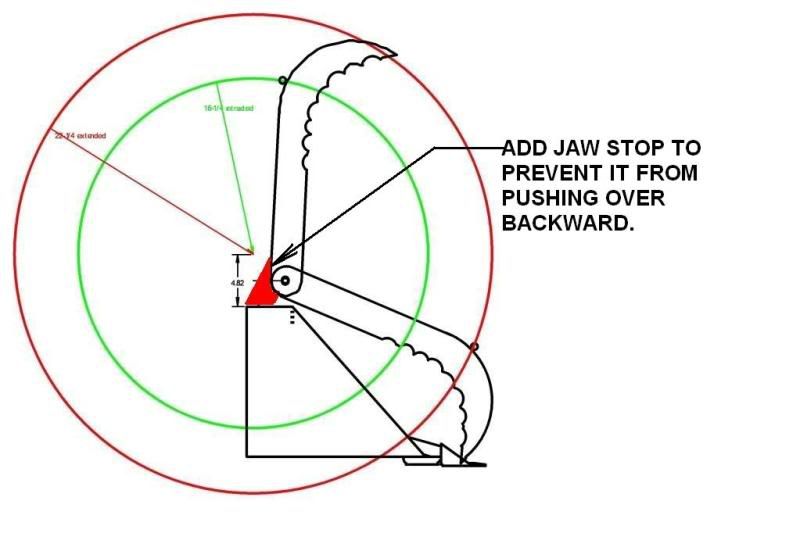
Ron, I borrowed your drawing which is very good. Looks like you figured out the open and close like you want it. I would recommend you weld on a "Jaw Stop" to keep the jaws from flipping backwards when you push into something with them wide open like that. I did it a couple times so I added that feature to Larry's grapple design. I hope it's worked for him? It did on Loretta's, she has never had hers flip back over. 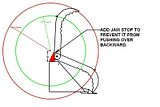 See your marked up drawing where I added a stop in RED color. Make it so it doesn't interfere with any other function. You can make it touch the top of the bucket or to the base if you have one. Rob- |
|
GuglioLS
Administrator
Jinma354 LE
Posts: 1,276
|
Post by GuglioLS on Jul 15, 2009 22:29:17 GMT -5
I hope it's worked for him?
Of course it works Rob, your jaw design with the stop is perfect. I have not tweaked it over yet. Another worthwhile add-on is the cylinder protector plate, not only does it protect the cylinder rod, it ties everything together for super strength.
Larry
|
|
GuglioLS
Administrator
Jinma354 LE
Posts: 1,276
|
Post by GuglioLS on Jul 23, 2009 0:10:50 GMT -5
|
|
3RRL
Administrator
Huge Kama
Posts: 2,027
|
Post by 3RRL on Jul 23, 2009 14:56:20 GMT -5
EXCELLENT STUFF Larry !!!
Ron should be thrilled.
Rob-
|
|
ronj
CTW Member

Posts: 72
|
Post by ronj on Jul 23, 2009 17:21:09 GMT -5
I am!! Larry did an absolutely fantastic job!
RonJ
|
|
red
CTW Advanced Member

Posts: 306
|
Post by red on Jul 23, 2009 17:43:55 GMT -5
Another SUPERB Job! Just amazing what a skilled and experienced operator can do with that Plasma cutter. Very generous of you Larry to help out Ron.
BTW Larry, I finally brought a HF Mig (151) welder. Finished the electrical today and of course it's raining! Maybe Saturday I see how much damage I can do! -Ed
|
|
GuglioLS
Administrator
Jinma354 LE
Posts: 1,276
|
Post by GuglioLS on Jul 24, 2009 20:05:50 GMT -5
Thanks guys,
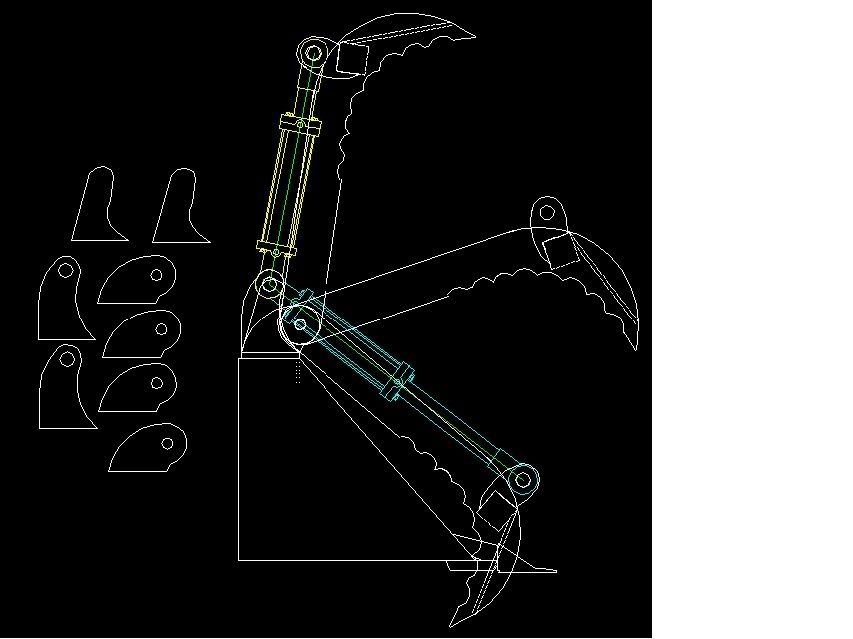
They did come out looking good. Ron did an excellent job drawing up the jaws and side profile of the bucket and tooth bar teeth. The real test will be if they fit properly and the geometry is as planned.
RonJ-
You'll need a base plate of 3/8" thick flat strap 4" wide about 21" long. The geometry is based on the brackets being aligned with the front edge and on top of that 3/8" plate, then place on top of the bucket aligned with the front edge. Take your time getting the brackets parallel to each other and at a 90* angle to the base plate. Only tack weld at first making sure the jaws open - close with the extremes of the cylinder retract - extend. Adjust the length of the cylinder clevis by screwing in out as needed. Also make sure the jaws hit the stops at the fully open position. Take your time making sure all is correct before laying a deep penetrating weld bead.
I look forward to successful results.
BTW the brackets shipped yesterday and on their way to you. Maybe you'll get them by Tuesday 7/28/09.
Larry
|
|
3RRL
Administrator
Huge Kama
Posts: 2,027
|
Post by 3RRL on Jul 26, 2009 13:07:27 GMT -5
One more thing Ron, If you're gonna put that plate on that Larry said, consider making it as wide as the bucket top and then add some steel over the sides of your bucket. That is to reinforce the top lip and sides of your bucket to keep it from bowing and tearing at the corners. I made a small plate like that for Loretta's 284 but the top of the bucket still "bowed" upwards. The plate didn't bend (much) but the bucket did where the plate was attached to to it. The corners of the bucket started to tear as well. There are lots of photos in the following thread. Go here to see how I repaired it: New Mods to Loretta's 284 JinmaThis was the Chinese bucket that came with the ZL-20 loader. If you have a thicker, stronger bucket, it might not be necessary? But it is only a few pounds of extra safety IMHO. Rob- |
|
ronj
CTW Member
Posts: 72
|
Post by ronj on Jul 26, 2009 23:52:06 GMT -5
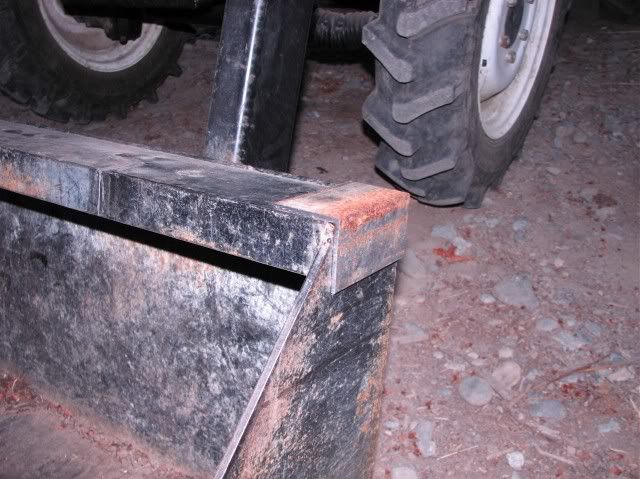
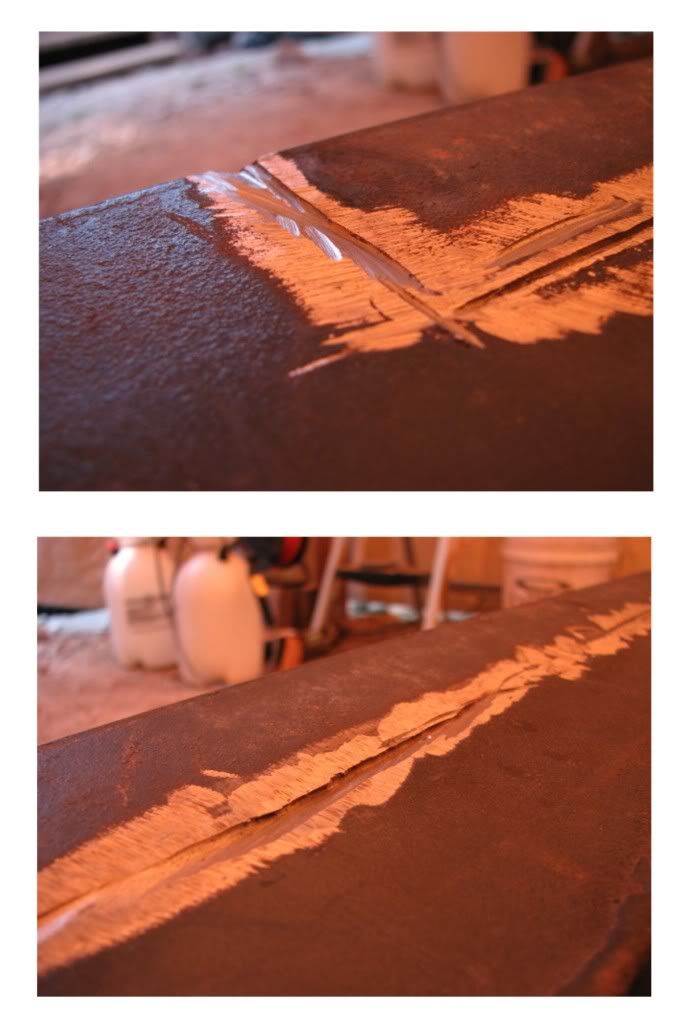
Rob, thank you for the suggestions. Here is a profile of the bucket. It is all 1/4 steel. As you can see the grapple plate will cover nearly all of the bucket top width. Larry and I decided to bevel the rear bottom of the plate so that the welds don't need to be ground. 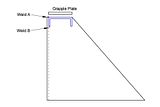 Is this what you meant about tying the sides and top together to prevent tearing?  When I removed the old grapple mount, I scored up the top of the bucket pretty badly. 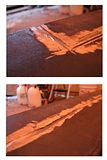 But I did get it off and it was a new experience for me. Tomorrow I will break out the oxy-acet and see if I can't fill in those canyons. RonJ |
|
3RRL
Administrator
Huge Kama
Posts: 2,027
|
Post by 3RRL on Jul 30, 2009 9:05:10 GMT -5
Rob, thank you for the suggestions. Here is a profile of the bucket. It is all 1/4 steel. As you can see the grapple plate will cover nearly all of the bucket top width. Larry and I decided to bevel the rear bottom of the plate so that the welds don't need to be ground. Is this what you meant about tying the sides and top together to prevent tearing? RonJ Hi Ron, I guess I should have said the "length and width" of you bucket top lip. That photo of the corners is a good way to strengthen the top lip and keep it from tearing. If your bucket is 1/4" thick, I believe it's thicker than Loretta's 284 bucket. Her bucket had rolled top and side edges and is (I believe) only about 1/8" wall thickness? What kind of bucket do you have on there? It looks like a Koyker or other brand (other than the ZL-20 bucket). In viewing the thickness of those walls, it looks very sturdy to me. You should have no problems with what you are going to do. It should turn out to be very strong. Rob- |
|
ronj
CTW Member
Posts: 72
|
Post by ronj on Jul 30, 2009 13:22:10 GMT -5
Hi Rob,
I have the Coldwater FEL and thanks for the response.
RonJ
|
|
ronj
CTW Member
Posts: 72
|
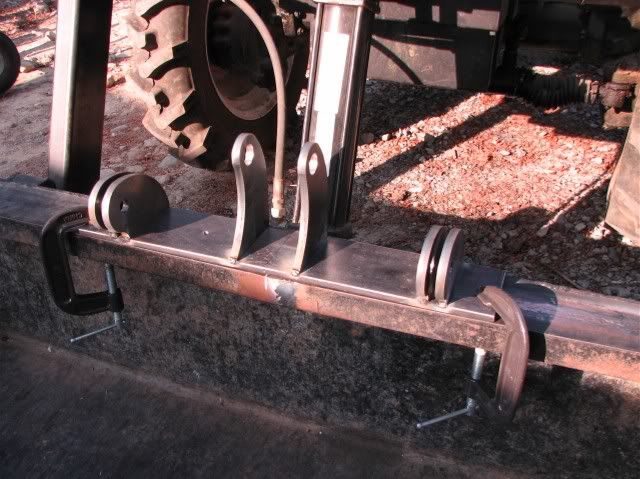
Post by ronj on Aug 5, 2009 20:27:50 GMT -5
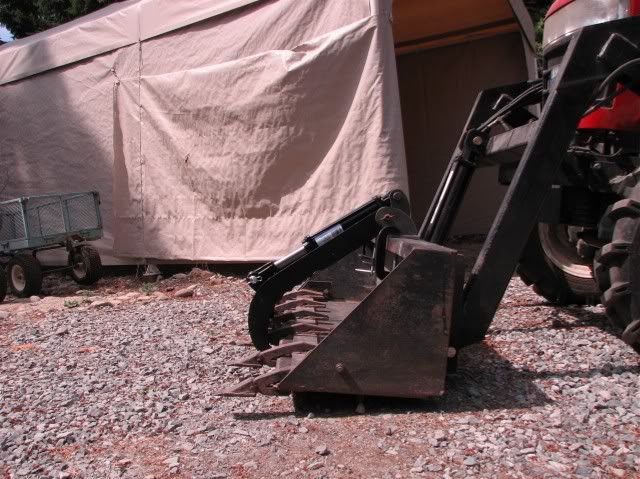
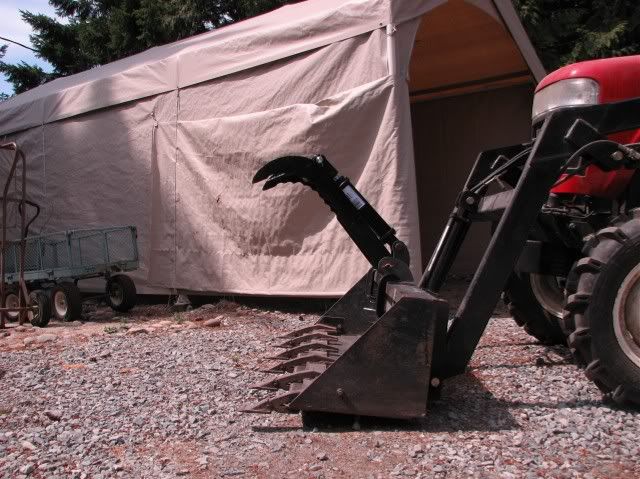
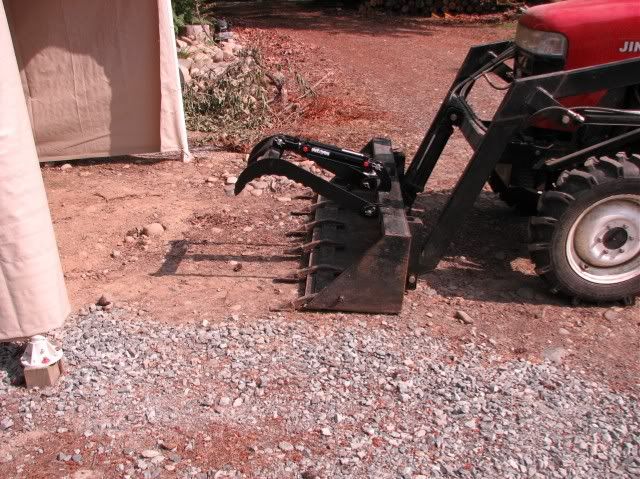
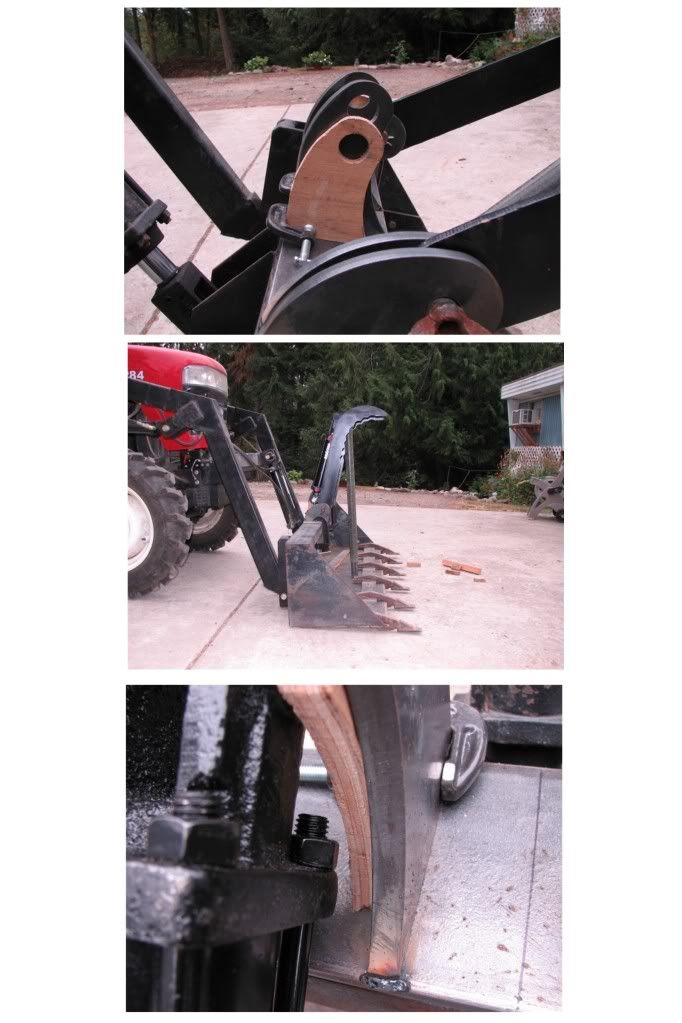
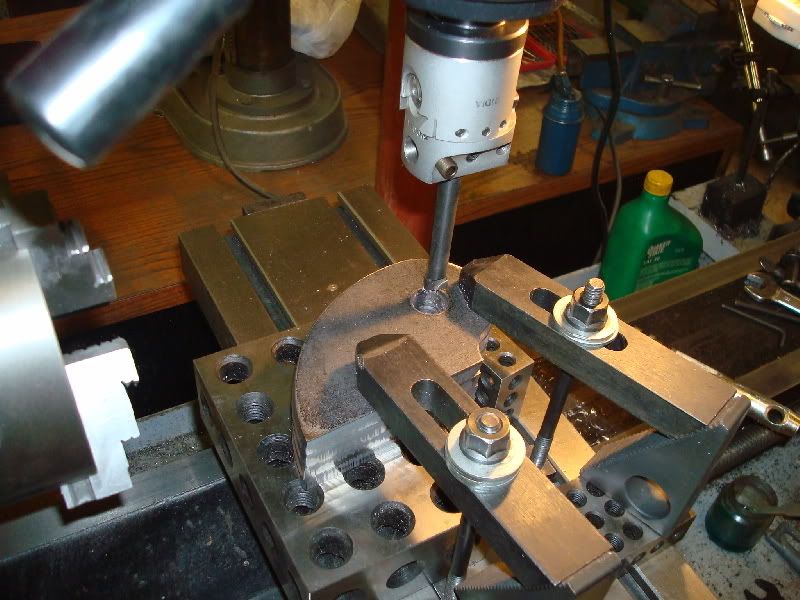
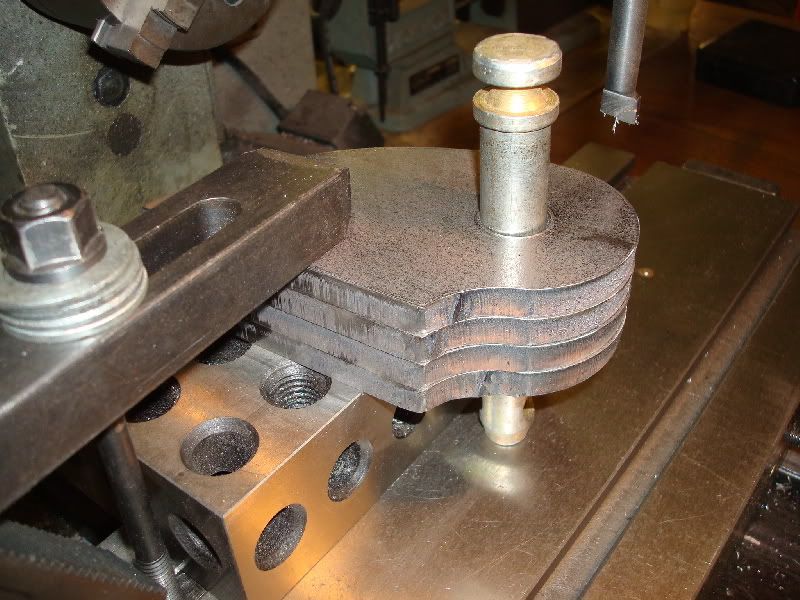
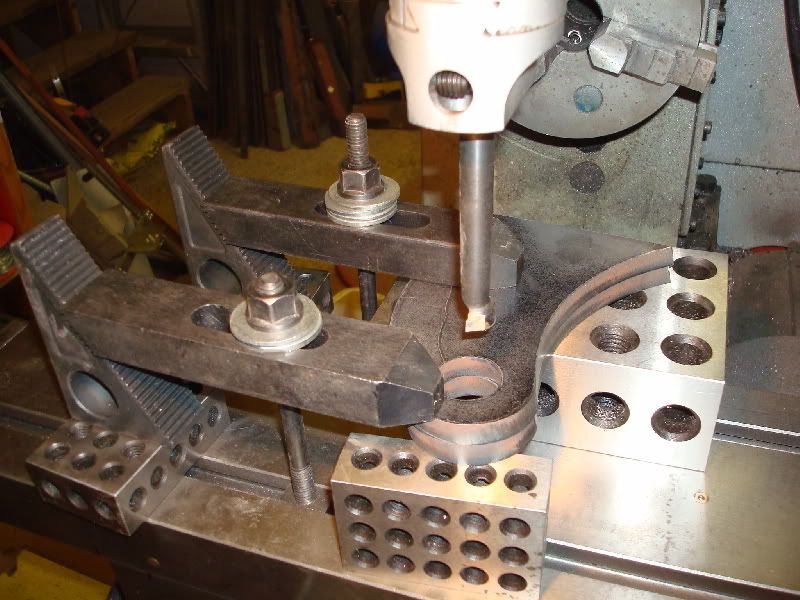
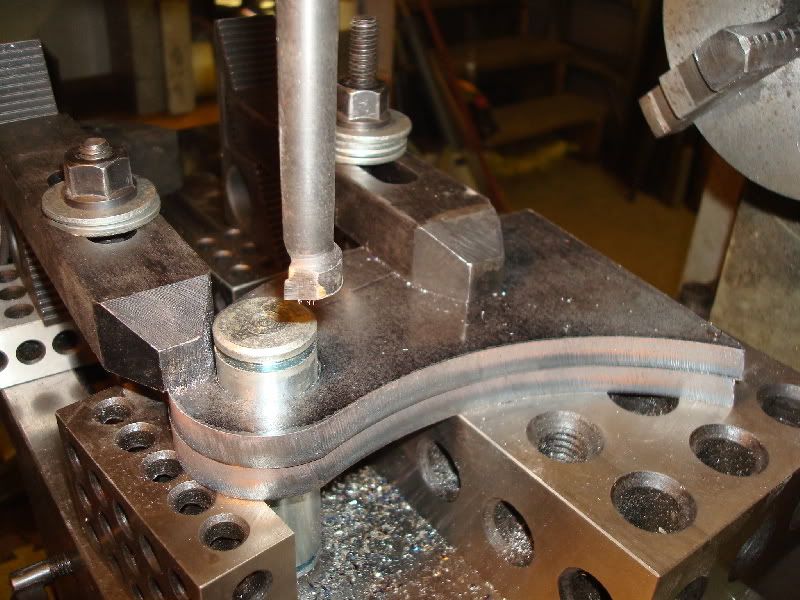
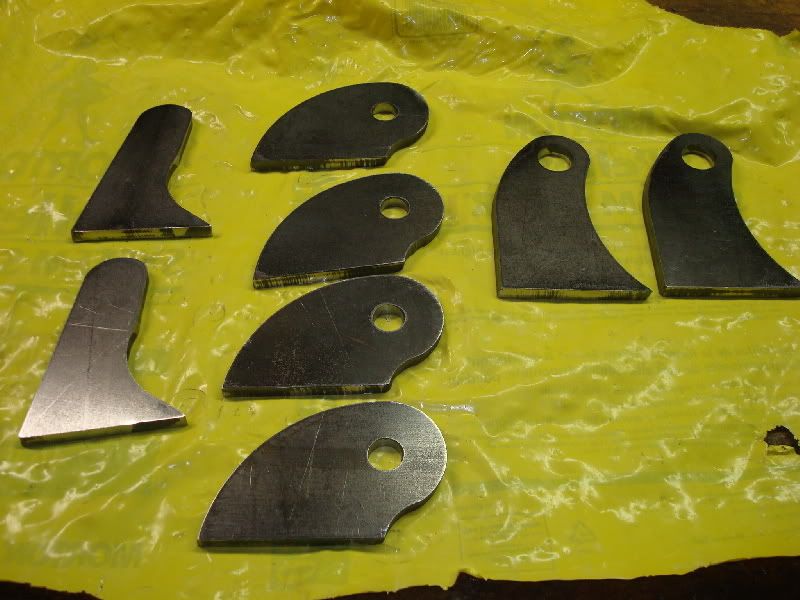
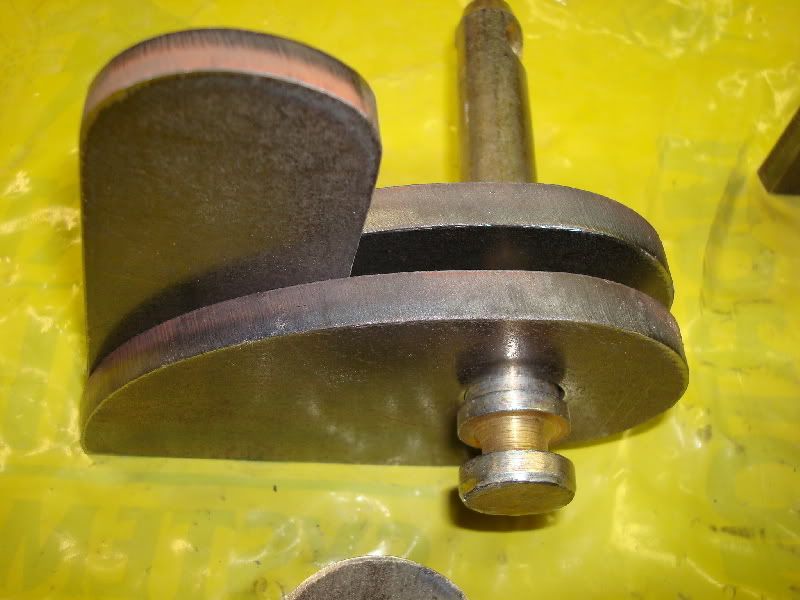
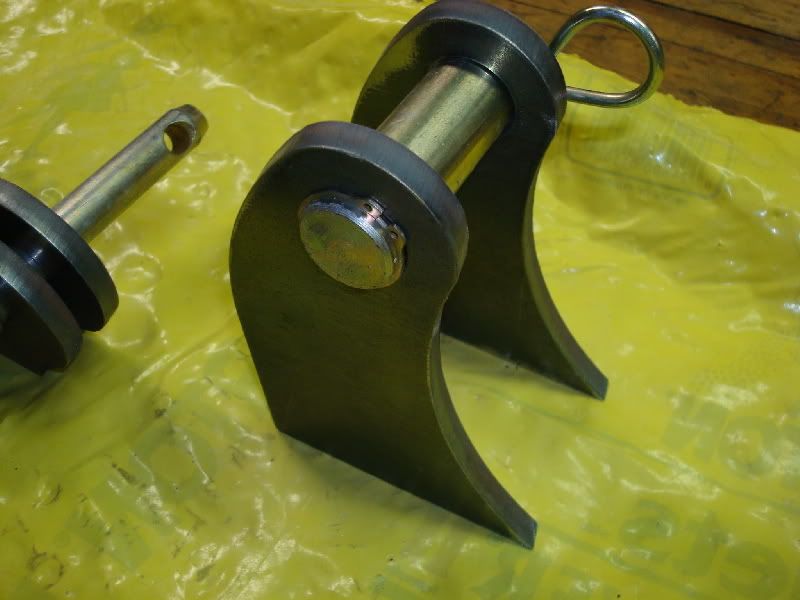
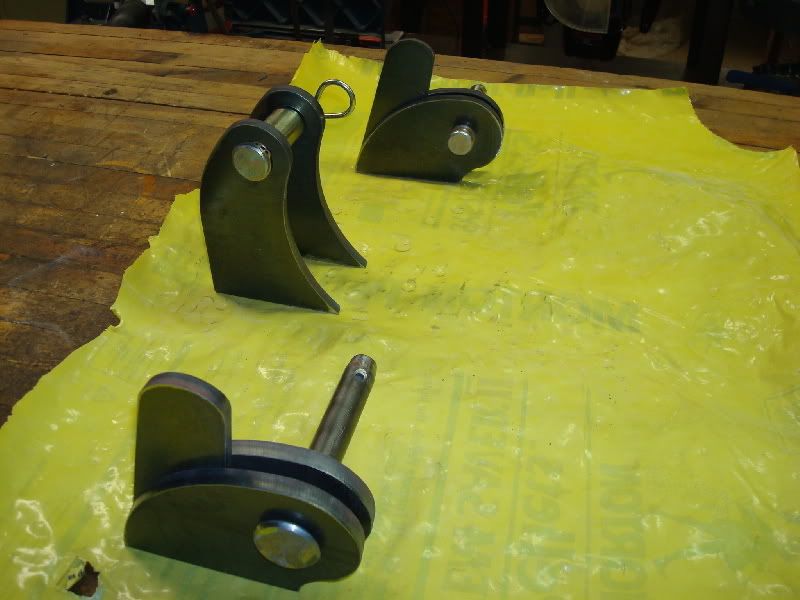
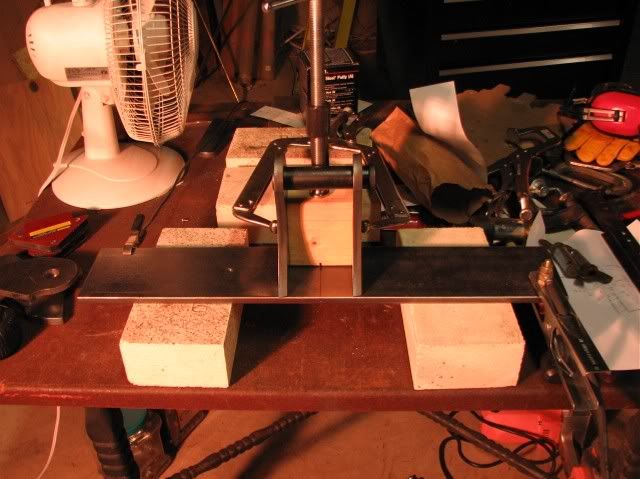
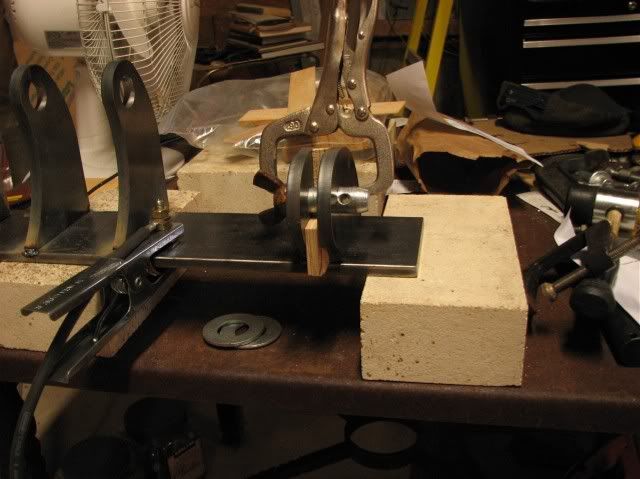
I wanted to give an update on my grapple situation. As shown in previous posts, I received the brackets from Larry. In case any are interested, these first 2 pictures show the setup that I used for tacking the brackets to the 3/8 plate. 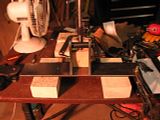 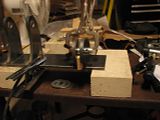 Here are pictures of the brackets tacked to the plate and the plate mounted on the bucket. You may notice on top of the bucket on the right that I did use oxy-acetylene and filler rod to fill the gouges that I made when removing the old mounting. 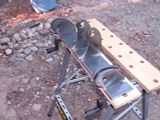  Finally, fitting the grapple jaws to the brackets and checking clearances. Everything just slipped into place like it should. Here are a couple of pictures showing the grapple in closed and open positions. I can now take a big bite  . Even though I haven’t used it yet, I like the concept of the overbite of the jaws. I should be able to kind of pull things into the bucket rather than having to put the effort into digging under them with the toothbar. 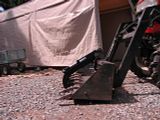 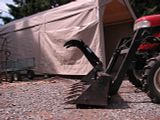 Now here is a picture of the maximum opening of the grapple before Larry did his terrific re-engineering job! 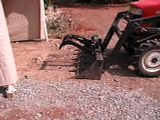 Now I am figuring out the hydraulic hoses and routings from the 3rd spool on the FEL valve to the grapple cylinder. If there is anyone out there who has put a grapple on a Coldwater FEL, I’d appreciate your thoughts. RonJ |
|
GuglioLS
Administrator
Jinma354 LE
Posts: 1,276
|
Post by GuglioLS on Aug 5, 2009 22:39:16 GMT -5
Looking real good there Ron, One thing that really stands out to me is the full open position looks to be off by about 15 degrees from plan. I was hoping they would open further than what they are now. I think the issue was not having the exact distance from the center of the jaw pivot to the exact center of the cylinder mount near the tips of the jaws. If you could get me that dimension within .0625 (1/16") I could make two more cylinder mounts and the jaws would open much further. OR you could cut off about 1/4" to 1/2" more or less off the bottom of the two cylinder mounts and that might do the trick as well. If it were me, I would take the pin out of the cylinder, open the jaws a little more then hold the cylinder under the center of the bracket to find out how much to cut off. You would be surprised how little would have to shaved off to get those jaws wide open. You have gone this far, I would take the extra time and make it the best it can be. Also I would install the jaw stops between the jaw pivot brackets (if they fit), then just run a weld bead along the outsides. Use this as a comparison: 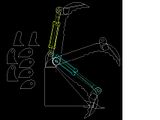 One thing for sure though, the geometry is much improved over what it was before. Larry. |
|
ronj
CTW Member
Posts: 72
|
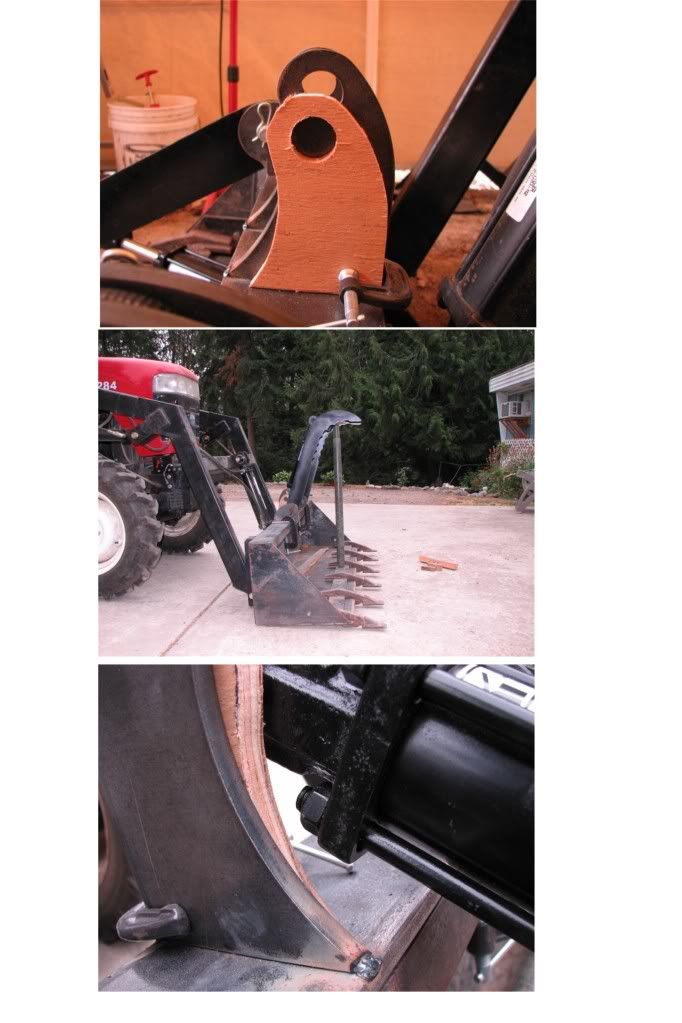
Post by ronj on Aug 10, 2009 2:19:29 GMT -5
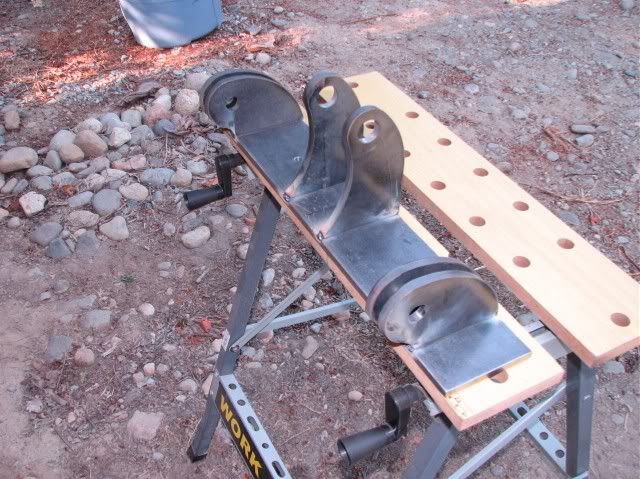
Here is an update on my grapple situation. Larry was right on that the grapple jaw drawing that I gave him was not correct on the hole to hole dimension. I decided to try cutting off the bottoms of the rear cylinder mount brackets as he suggested. I was concerned about the clearance of the cylinder body and didn’t want to mess up Larry’s fine work. I could have lived with the grapple opening as it existed. So I made up some wood templates to check. In this first set of pictures they simulate cutting 1 inch off the brackets. 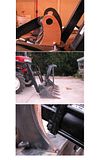 In these set of pictures the brackets are 1-1/4 inch shorter. 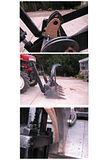 As you can see that last quarter of an inch doesn't seem to make a lot of difference. RonJ |
|
GuglioLS
Administrator
Jinma354 LE
Posts: 1,276
|
Post by GuglioLS on Aug 10, 2009 10:44:30 GMT -5
Hi Ron,
Thanks for posting those pictures. I see you made a template to check the bracket height before cutting them off. The jaw opening is much improved. I think you will be very happy with them in that position over the long haul. Just make sure you can still use the jaw stops or modify them to fit as needed. I'm glad your taking the time to fabricate this to achieve the best overall geometry.
Your getting close and it wont be long now till you get it working and we can oh and awe over how nice it turned out.
Larry
|
|


 . Even though I haven’t used it yet, I like the concept of the overbite of the jaws. I should be able to kind of pull things into the bucket rather than having to put the effort into digging under them with the toothbar.