|
|
Post by bradblazer on Dec 8, 2009 9:31:16 GMT -5
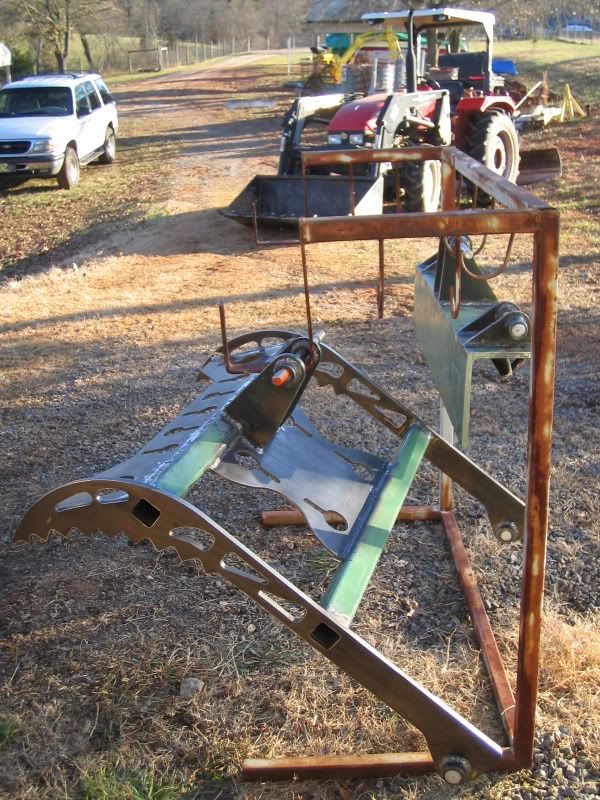
Hermetic Plenum for Thixotropic Lubrication aka Grease Collar. My bandsaw came with that nozzle. It's @#$%ty quality, tends to move due to the vibration of the saw. Notice I try to squirt the blade after the cut to help rinse the chips off. There is still a good bit of fluid carried around with the blade. Good ones are made by Loc-line. McMaster sells them. www.mcmaster.com/#loc-line-coolant-hose/=4ubx2x |
|
|
|
Post by bradblazer on Jan 10, 2010 21:28:06 GMT -5
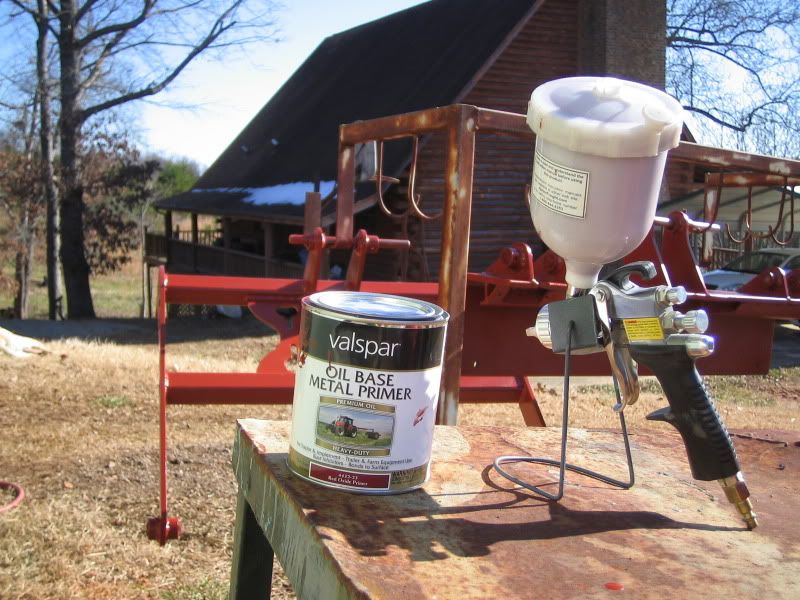
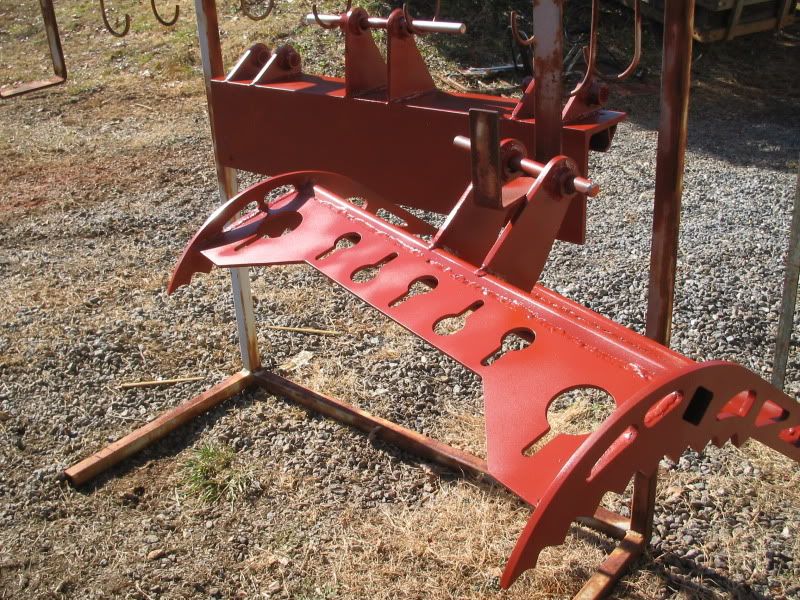
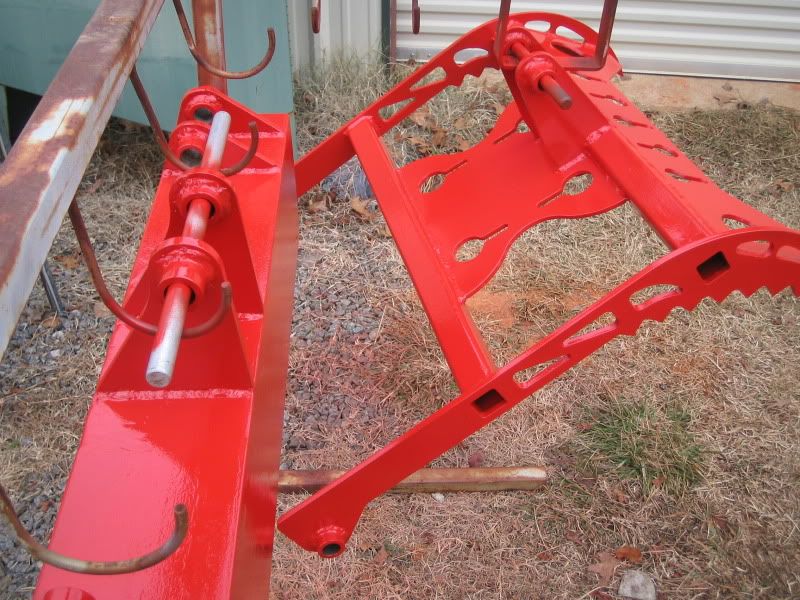
Another month has gone by and I've been delinquent in updating the grapple progress. I painted it over the holidays. The weather has really been too cold for the paint to harden properly - I'll definitely have to touch it up in the spring. Here's the primer going on.    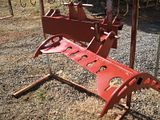 You might notice in that first picture I added some brackets to the back of the base angle. They hook onto the top lip of the bucket. That way there are just two bolts to attach it to the bucket. Here it is in International Harverser Red. It turned out to be a little more orangey than the tractor body but I think it looks okay.   |
|
|
|
Post by bradblazer on Jan 10, 2010 23:46:17 GMT -5
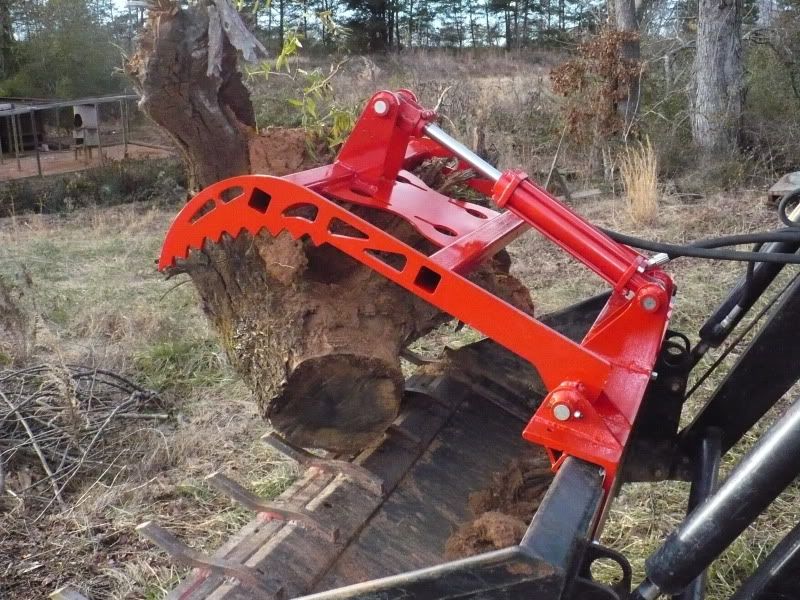
As seen in that last picture it's on the tractor! That was last weekend. I got all of the pins made and fixed their rotation with 1/4-20 bolts through holes in the bushings just like on my Koyker loader. I actually didn't have enough hose then for the full range of motion even though I managed to grab that stump. This weekend I added another 72" of hose and routed it. Total hose length from the grapples to the rear remote is now 24' and it seems just right. I only have 4 male quick-connects that fit the factory remotes so I have 4 each 6' hoses made up with those original male ends on one end and Pioneer style female ends on the other. For most applications like my log splitter and backhoe outriggers I can just plug them right into male QC fittings on the implement. I had bought some 144" hoses with the grapple cylinder at Agri Supply but they still came up a little short to route properly so I added another pair of 6' sections yesterday. I realize now I need some pictures of the routing. And yes I plan to add a solenoid valve in the future. Anyhow it works great! Just as planned! I made a slight adjustment to the cylinder length at the threaded end of the rod clevis and it powers all the way from the full open stops to the bucket lip. In that last picture with the stump gripped on one side of the jaw there was very little twist with full pressure applied to the cylinder. I didn't get a picture but today I picked up a 24" diameter x 8' oak log with no problem. Here is a video showing it in motion. Speed is plenty fast with the single 2" cylinder. This is with the engine at idle around 600RPM.  Here again is the video from the 3-D model for comparison:  |
|
GuglioLS
Administrator  Jinma354 LE
Posts: 1,276
|
Post by GuglioLS on Jan 11, 2010 0:42:09 GMT -5
Hi Brad
I was beginning to wonder if you had time between the snow, Christmas and new years to make any progress. That's one sweet grapple! Impressive paint job compared to the rattle cans that poor folks like Rob and I use. I see you used genuine oil based enamel, nice.
So you got a mile of hose to operate if off the rear remotes? LOL. The joystick switch and solenoid is the way to go (IMHO), I hope you consider that as an option in the future.
I'm glad all the parts seem to have fit and what a cool idea mounting it to the bucket like that. So I guess it's removable then? Now your a member of the "Grapple Club" with all bragging rights and honors that come along with. It won't be too long before you wonder how in the world you ever got along without it.
Very cool and nice job!
Larry
|
|