3RRL
Administrator  Huge Kama
Posts: 2,027 
|
Post by 3RRL on Mar 30, 2008 23:07:48 GMT -5
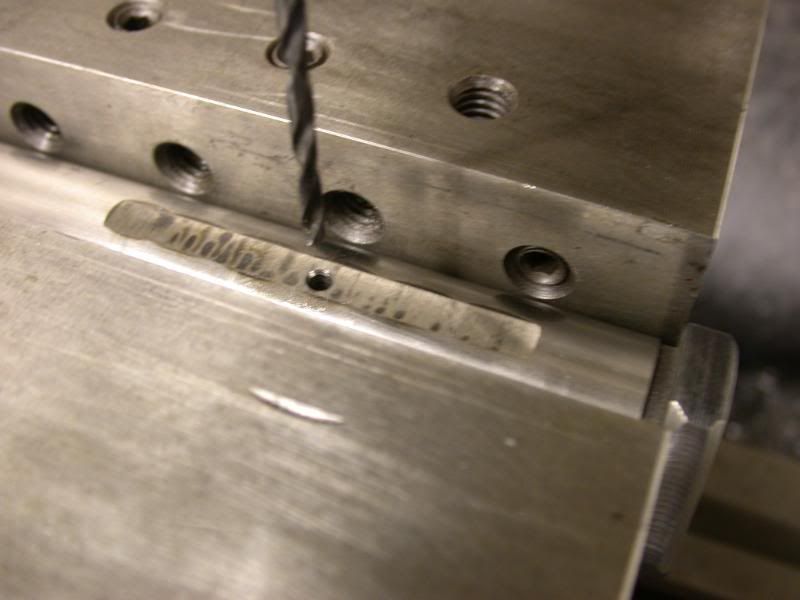
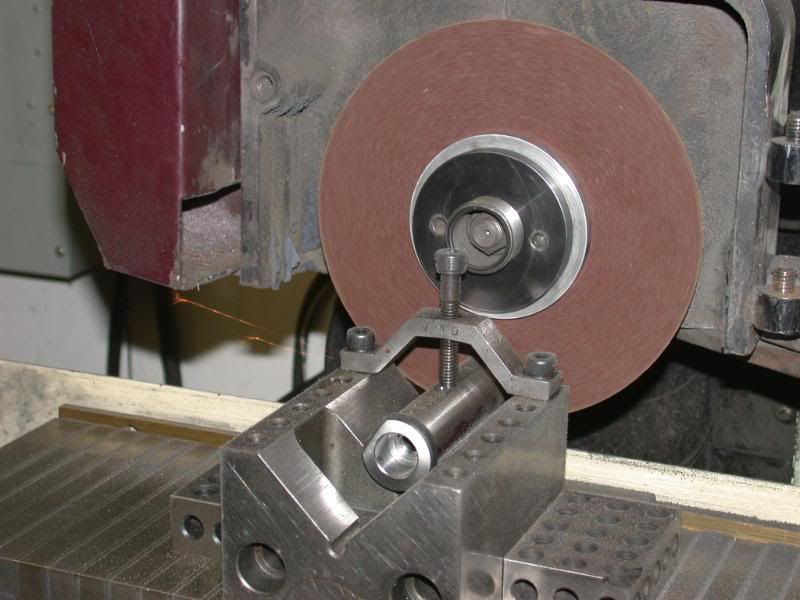
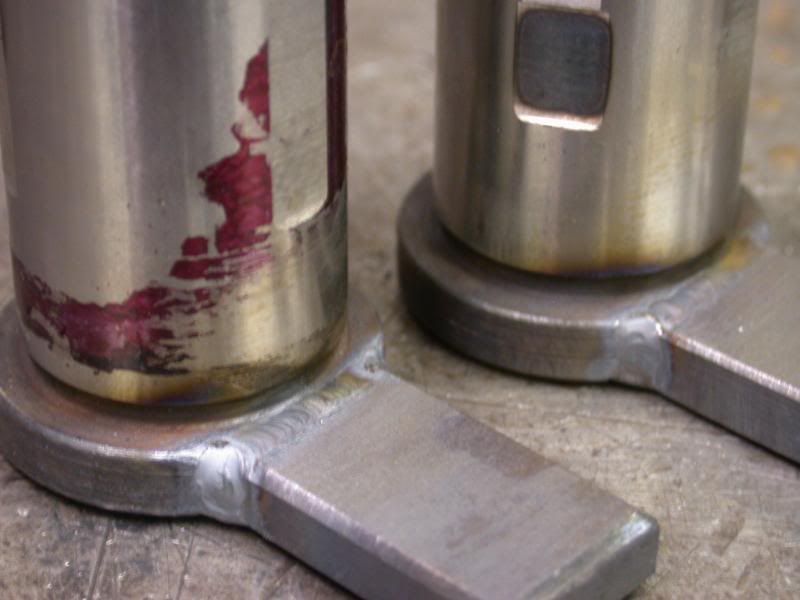
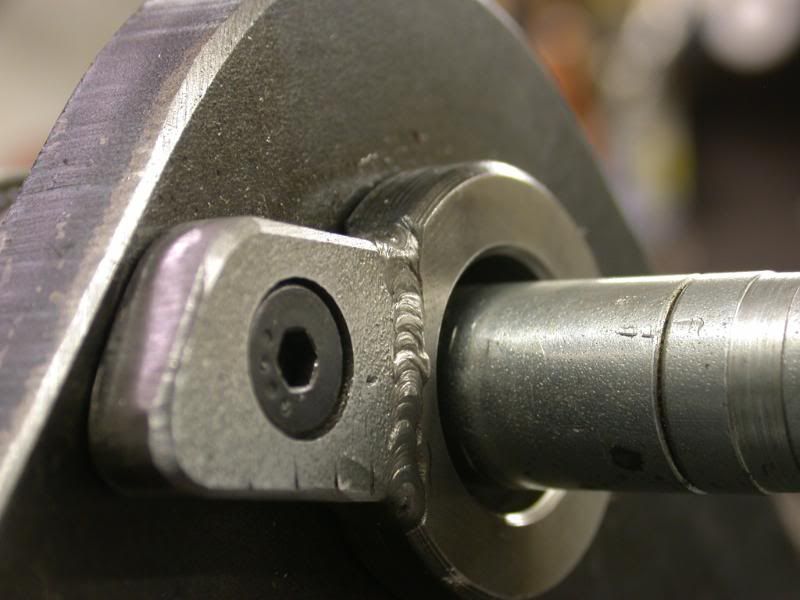
After getting the ends complete, I grind 3 flats lengthways on the diameter of the pin, equally spaced 120 degrees apart. They are the length ... about 1/4" shorter than the length of the bushing in Loretta's grapples. Then I drill holes connecting into the center hole. This will allow the grease to flow from the middle of the pin through the 3 holes and onto the flats ... thus lubricating the inside of the bushing perfectly.  After that, I cut the pins to length in the surface grinder using an abrasive cut-off wheel that is only 1/32" thick. It slices the 1" diameter pins like butter. 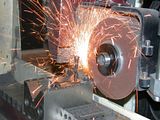 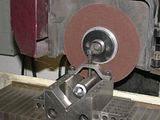 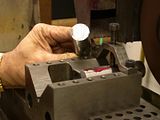 Rob- |
|
3RRL
Administrator
Huge Kama
Posts: 2,027
|
Post by 3RRL on Mar 30, 2008 23:23:43 GMT -5
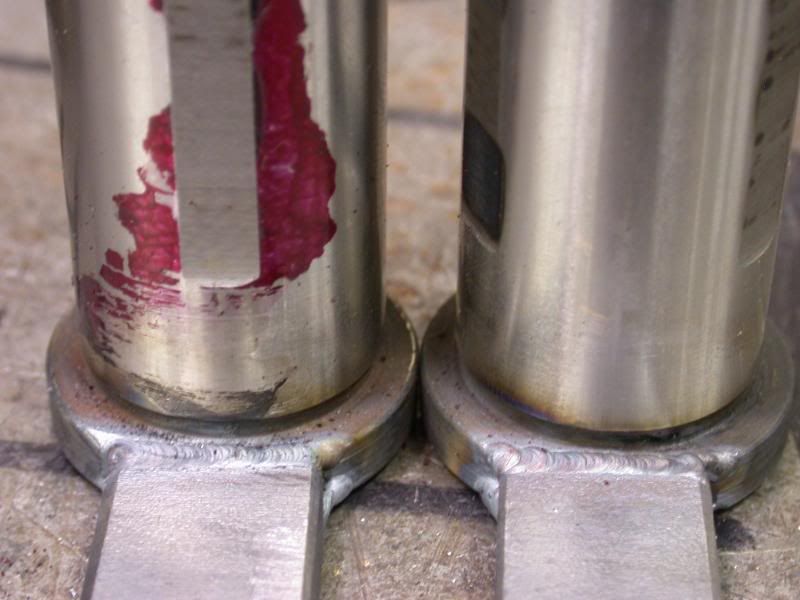
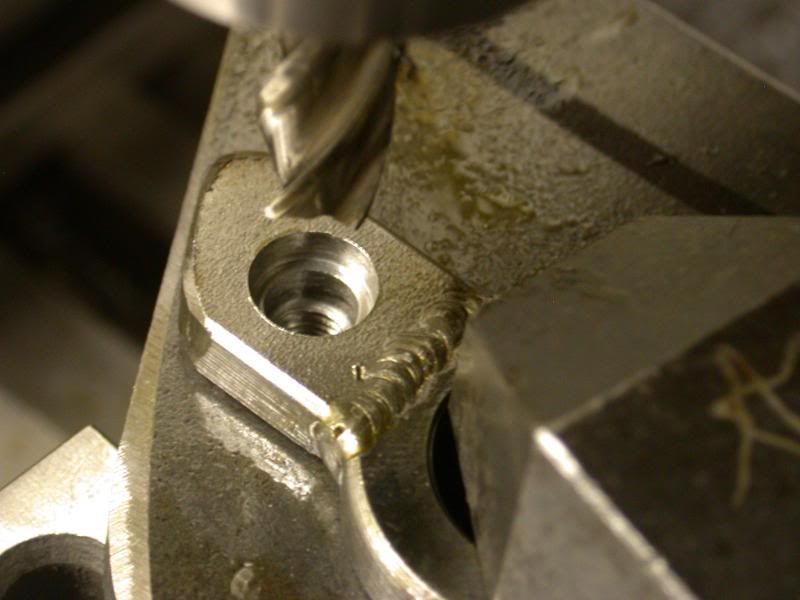
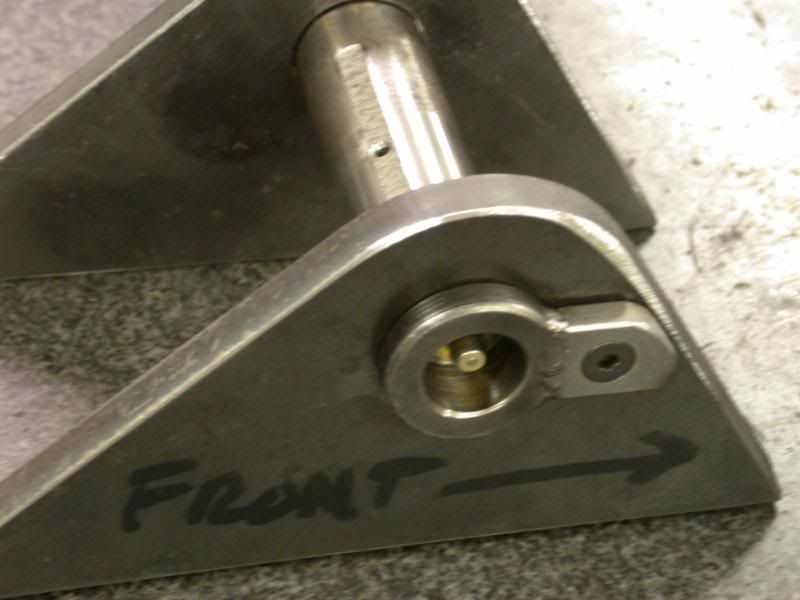
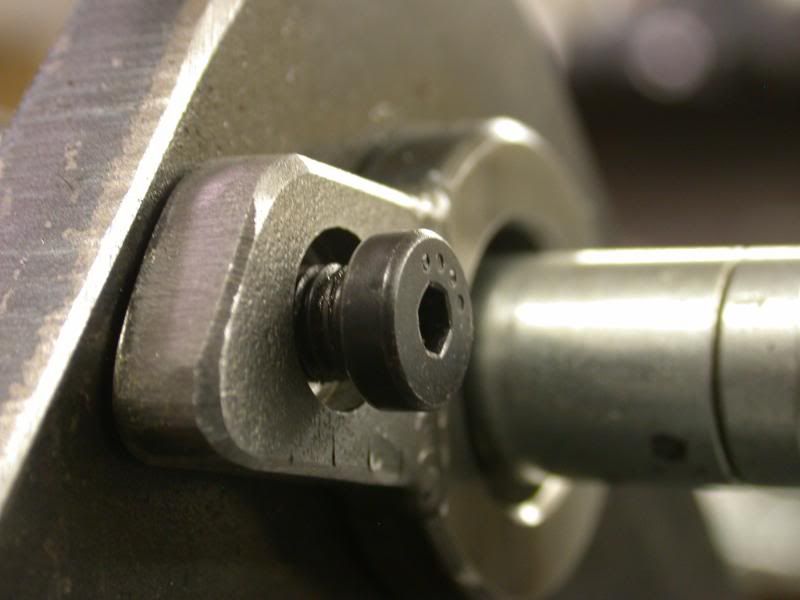
You saw the flat on the shoulder of pin. That is so I can weld a tab to it. The tab will be used to secure the pin to the pivot brackets, so the pins don't spin. This forces the bushing only to rotate or pivot over the pin. It's a common way to fasten pins. You can also see the grease flats on the pin. 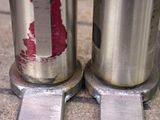 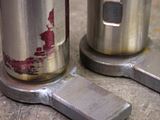 Then I set the pins into the mill again and drill, tap and counterbore for a low head socket screw. The screw will be protected also, sitting completely inside it's counterbore. Here is what the pin looks like fastened to the bracket. You can see the Zerk fitting installed and also protected. Then some close ups of the low head socket screw and the grease nozzle on the Zerk nipple. Everything fits pretty good. 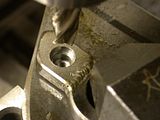   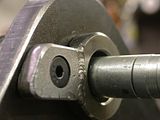 Rob- |
|
3RRL
Administrator
Huge Kama
Posts: 2,027
|
Post by 3RRL on Mar 30, 2008 23:35:37 GMT -5
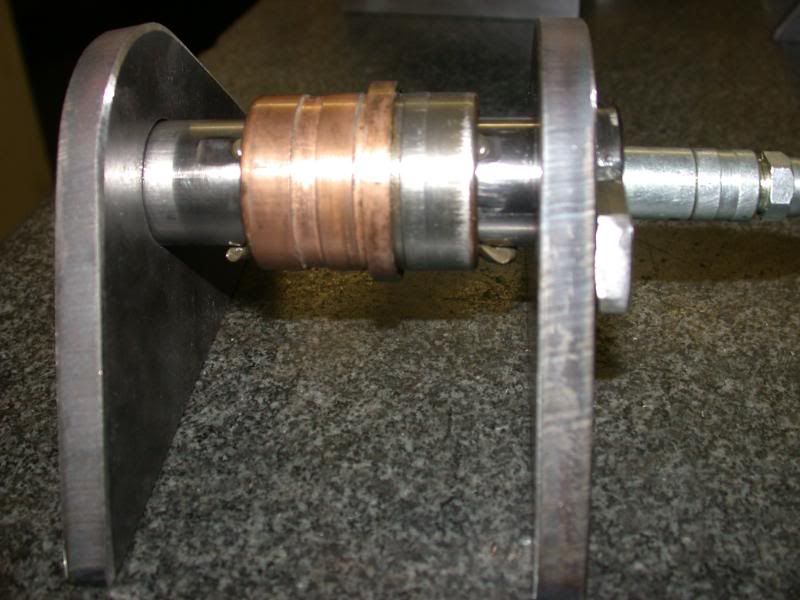
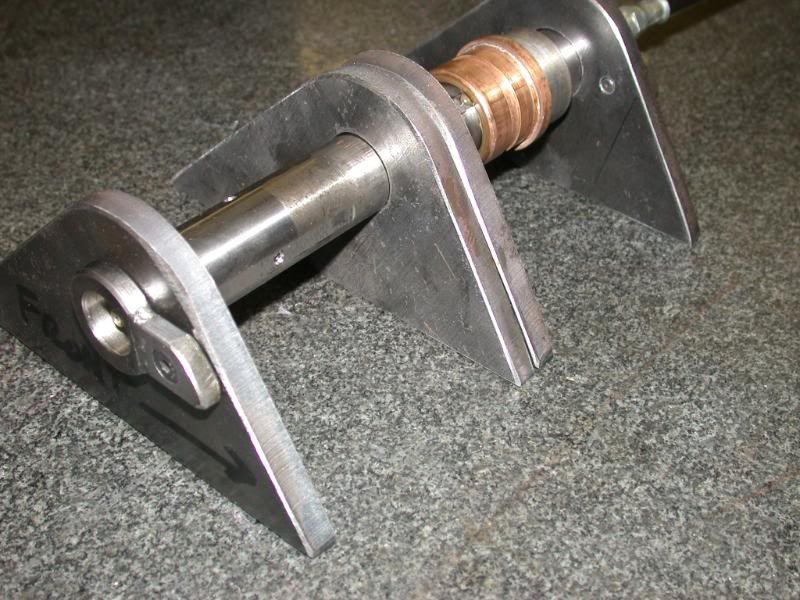
So if you are still awake, here's the final result. I put a test bushing over the pin and greased it. I chose a bushing shorter than the ones in Loretta's grapple so you could see the grease coming out of the 3 flats. Her bushings are longer and will overlap the ends of those flats by 1/8" per side. That way it kind of traps the grease inside the bushing with not too much squirting out the ends. It also forces the grease to work it's way all around the diameter. 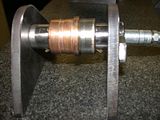 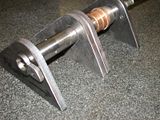 That last photo also shows the inside of the bracket. Notice that the screw does not go past the inside surface. I will take all that stuff to camp and weld those brackets to a plate, or sections of a 1/2" plate which will be the platform for her grapple pivots. The plate will then be attached to her top bucket lip. I'll take some photos up there of how to fit the grapple jaws to the bucket properly for final mounting. Rob- |
|
3RRL
Administrator
Huge Kama
Posts: 2,027
|
Post by 3RRL on Mar 31, 2008 16:18:31 GMT -5
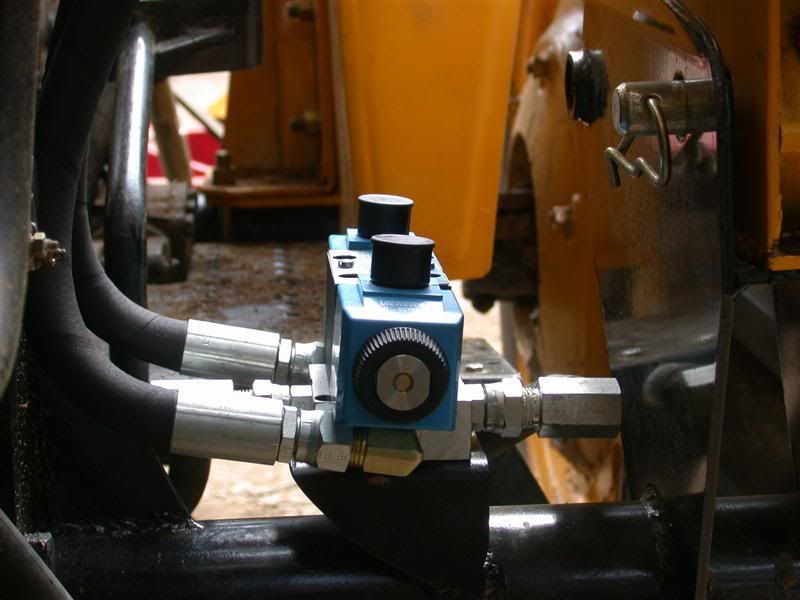
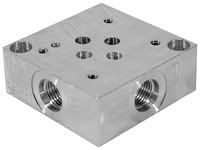
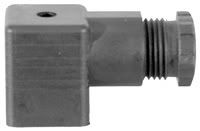
Last weekend we started fitting the electric solenoid valve mounting bracket to Loretta's Jinma. Loretta left the ordering or materials up to me since I've had experience doing all this before on my Kama 554. The valve is a true third function double action solenoid valve so the grapples can be operated simultaneously with the other FEL functions. That is, while curling/dumping and raising/lowering the bucket all at the same time. It is not a diverter valve where you lose (usually) the curl to operate the grapple. We purchased the components from Surplus Center. They are for an OPEN center system like most of our tractors. For those of you interested in a DIY valve installation like Loretta's, these are the components you need, or least the ones that I used. Of course there are several others to choose from, but these are pretty reasonable. Click on the link for details. The valve is an open center EATON-VICKERS DG4V-3 12 VDC 10 GPM OC DA SOLENOID VALVEThe subplate is DO3 1 STATION SUBPLATE which can be used for either open or closed center valves. The electrical connectors are HIRSCHMANN CONNECTOR FOR DG4V3 SOLENOID VALVE and you need 2 of these for installation of wires to solenoid coil and up to the switch on the joystick handle. Click the pictures to enlarge them.  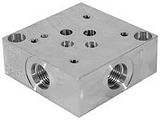  |
|
3RRL
Administrator
Huge Kama
Posts: 2,027
|
Post by 3RRL on Mar 31, 2008 16:32:35 GMT -5
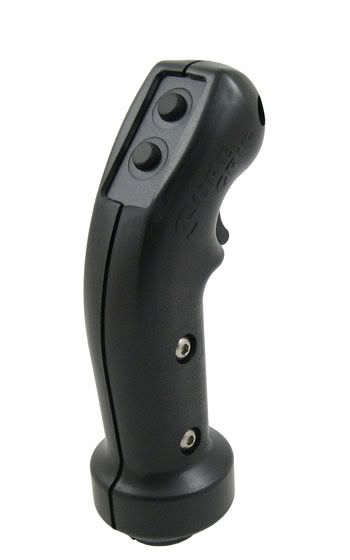
When I did my grapples, I didn't know enough to buy a switch separately, because I could have installed one into the pocket of my Koyker handle. So that is another option to mount the switch. Anyway, here are some pictures and links about th stuff I ended up getting for Loretta's FEL handle. I don't think I posted any photos or links before? Click on this link and look at the different grips, switches and components for the handle. Scorpion Technologies Joy Stick Handles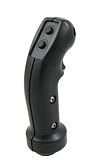  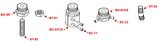 Earlier, Larry also suggested placing a diode between the solenoid terminals to prevent arcing across and also to lengthen the life of the switch or something like that. He told me to get them at Radio Shack and that these would work, 2.5 amp 1000 volt diode (NTE125), so I will do that too. He said " Just make sure to get the correct polarity on the diode - Cathode (white band on the diode goes to the positive lead)" |
|
quikduk
CTW Life Member
 Dog House
Posts: 552
|
Post by quikduk on Mar 31, 2008 17:34:02 GMT -5
WOW!  Those pins are cool!!! Is she going to paint the grapple a matching yellow? Maybe she could detail the inside of all those holes with black. Talk about a bee-utiful grapple! ;D |
|
3RRL
Administrator
Huge Kama
Posts: 2,027
|
Post by 3RRL on Mar 31, 2008 19:32:56 GMT -5
Thanks Ken.
She really went all the way.
I'm not sure but I think she is thinking yellow. That's a great idea about painting the inside of the holes black too. I used to do that with my home made parallels and 1-2-3 blocks. I'd paint them before final grind so the holes remained my color after finish grinding. I could tell them apart from all the others in the shop in a second.
|
|
quikduk
CTW Life Member
Dog House
Posts: 552
|
Post by quikduk on Apr 1, 2008 9:46:08 GMT -5
It would just add that little bit of 'BLING BLING'...(or is that 'CHING CHING'...or 'BRING BRING')... ;D ;D ;D ;D
|
|
GuglioLS
Administrator
Jinma354 LE
Posts: 1,276
|
Post by GuglioLS on Apr 1, 2008 23:16:03 GMT -5
Rob,
I always find it amazing that you do all that machining and never a chip. I guess they all somehow disappear out of the picture. Whats' your secret? (I know what a mess it makes, you make it look so sanitary).
I sure do like all your x-ray quality micro welding, is that TIG?
Great looking pins that should last forever.
Larry
|
|
3RRL
Administrator
Huge Kama
Posts: 2,027
|
Post by 3RRL on Apr 3, 2008 1:02:20 GMT -5
Thanks Larry,
Yeah, those little welds are TIG welded.
If I tried to arc that, the pin would probably end up as my electrode ... hahaha.
LOL ... the disappearing chip syndrome. Well, I blow off the work first so you guys can see what I've done. I'm still waiting for Loretta to offer sweeping up the floor, but that will never happen. I'll have to do it pretty soon anyway, since I'm considering taking the machinery down in a bout a month and moving it up to 3R.
Rob-
|
|
|
|
Post by Mrs3RRL on Apr 7, 2008 14:33:48 GMT -5
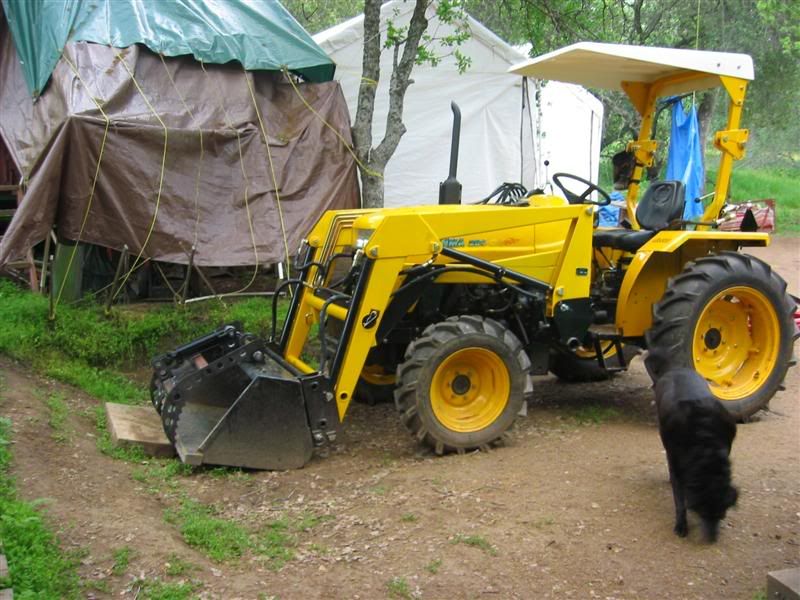
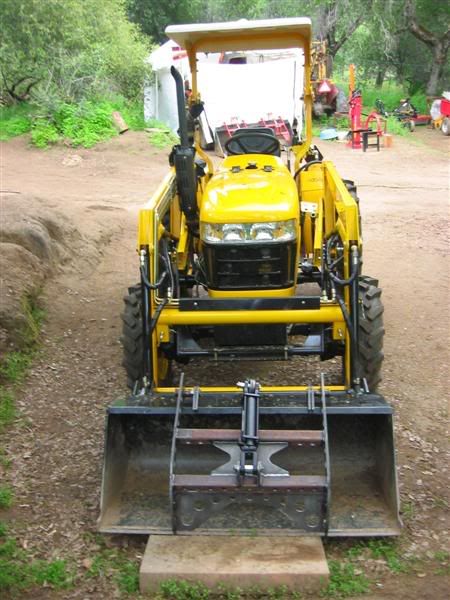
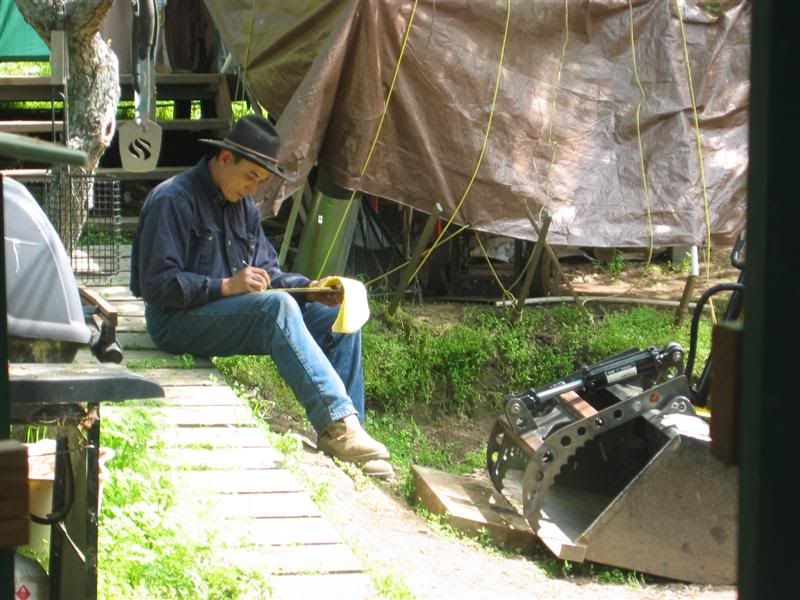
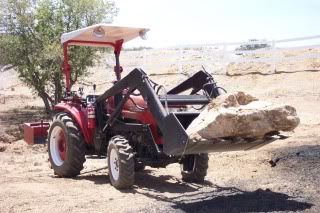
Sorry I have been so busy doing our taxes, I haven't had a chance to update my grapples. Last week Rob started fitting the grapples to the bucket, but he forgot the mounting plate. He wants to bolt them on now, in case we need to take them off the bucket later. Here are some pictures of what they should look like ... kinda. Of course they will be painted to match HoneyBee.    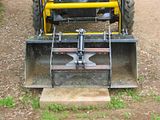 While Rob was figuring out the hose length and what connectors he needs, I caught these pictures of him. He didn't know I took them.  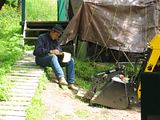 |
|
FlyHiFlyLo
Administrator
2007 Jinma 554LE
Posts: 425
|
Post by FlyHiFlyLo on Apr 7, 2008 21:41:22 GMT -5
Man! I want some!
|
|
|
|
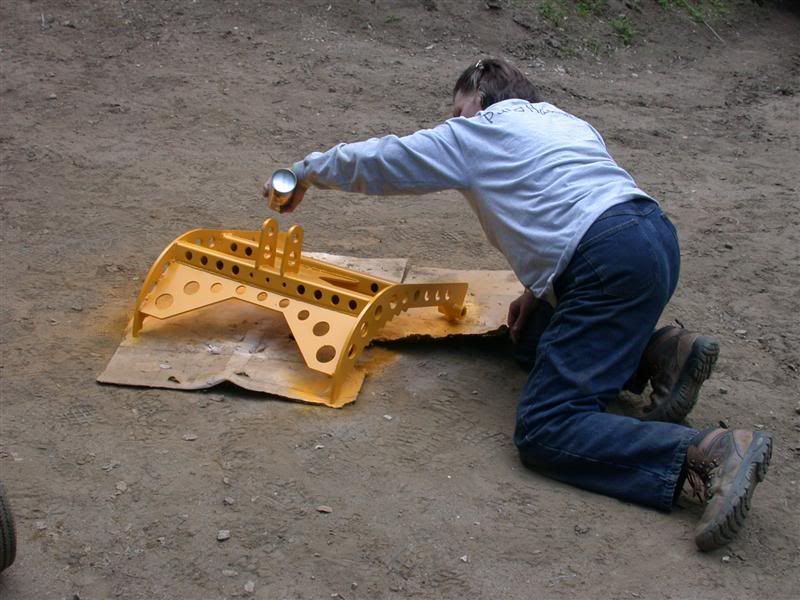
Post by Mrs3RRL on Apr 7, 2008 23:51:25 GMT -5
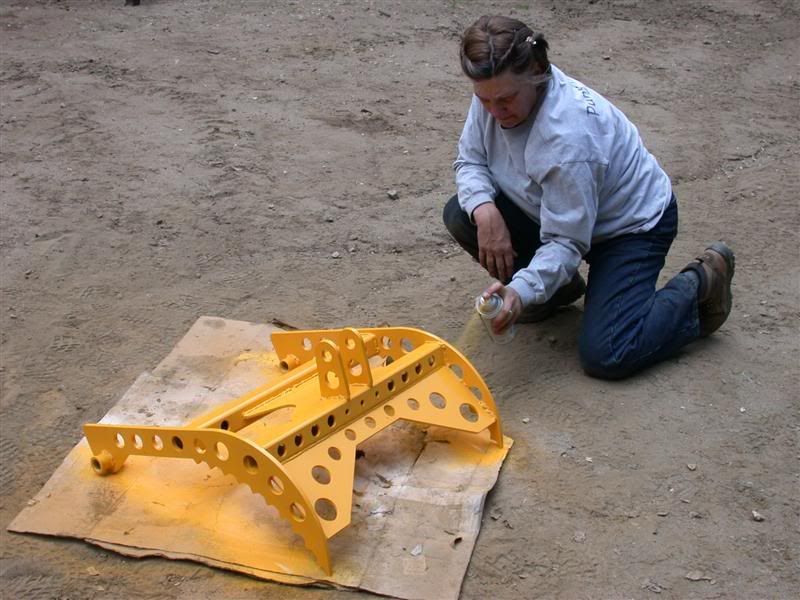
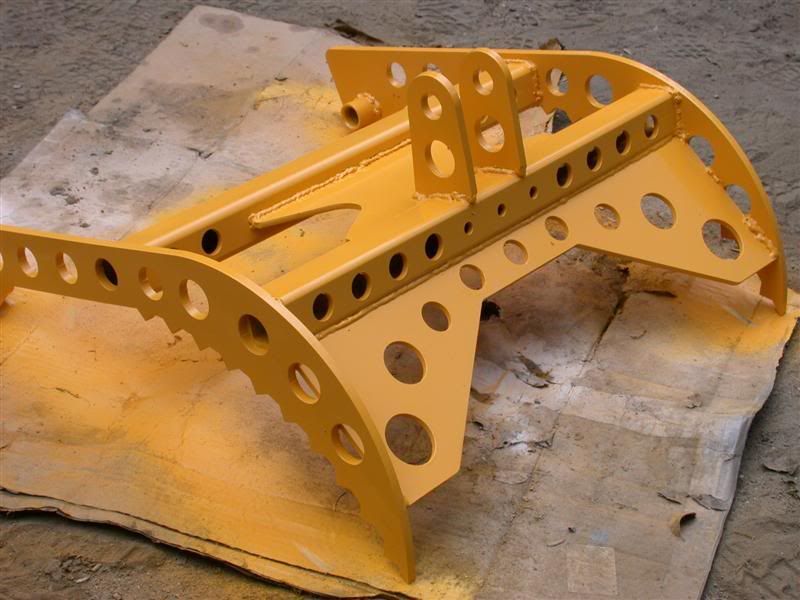
Later on Rob took some pictures while I was painting the grapples. I primed them in the morning and started painting one side HoneyBee yellow.  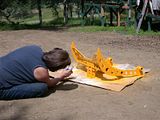 Then later in the afternoon I applied the final coat on the other side. Now they are all finished painted. Rob is supposed to have the mounting plate ready to bring up to camp this week. I hope he gets all those holes drilled for me. See, aren't they beautiful?    Loretta |
|
quikduk
CTW Life Member
Dog House
Posts: 552
|
Post by quikduk on Apr 8, 2008 10:17:41 GMT -5
1+1=3....JK Rob. Loretta, they look great! Don't forget to detail the hole edges with black for that extra BLING! ;D
|
|
3RRL
Administrator
Huge Kama
Posts: 2,027
|
Post by 3RRL on Apr 8, 2008 13:08:00 GMT -5
While Loretta was busy with painting, I had a chance to work on the true third function solenoid valve. I have it nearly all plumbed and wired now, just a few more connections before it's operational. Those pictures don't show the Hirshman wiring connectors yet. I still need to get hoses running to the front, but it is starting to look pretty cool. It sits on the left side of the tractor.  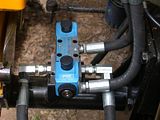  |
|


 Those pins are cool!!! Is she going to paint the grapple a matching yellow? Maybe she could detail the inside of all those holes with black.